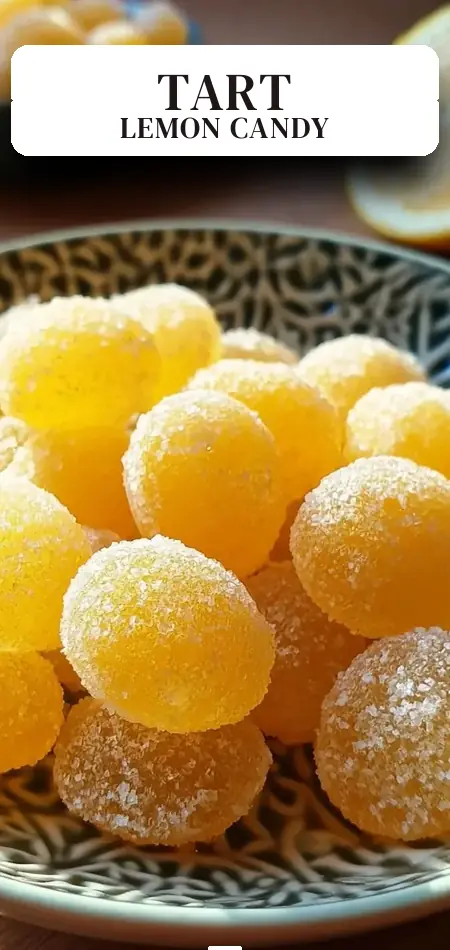
Homemade Sweet & Tart Lemon Drops
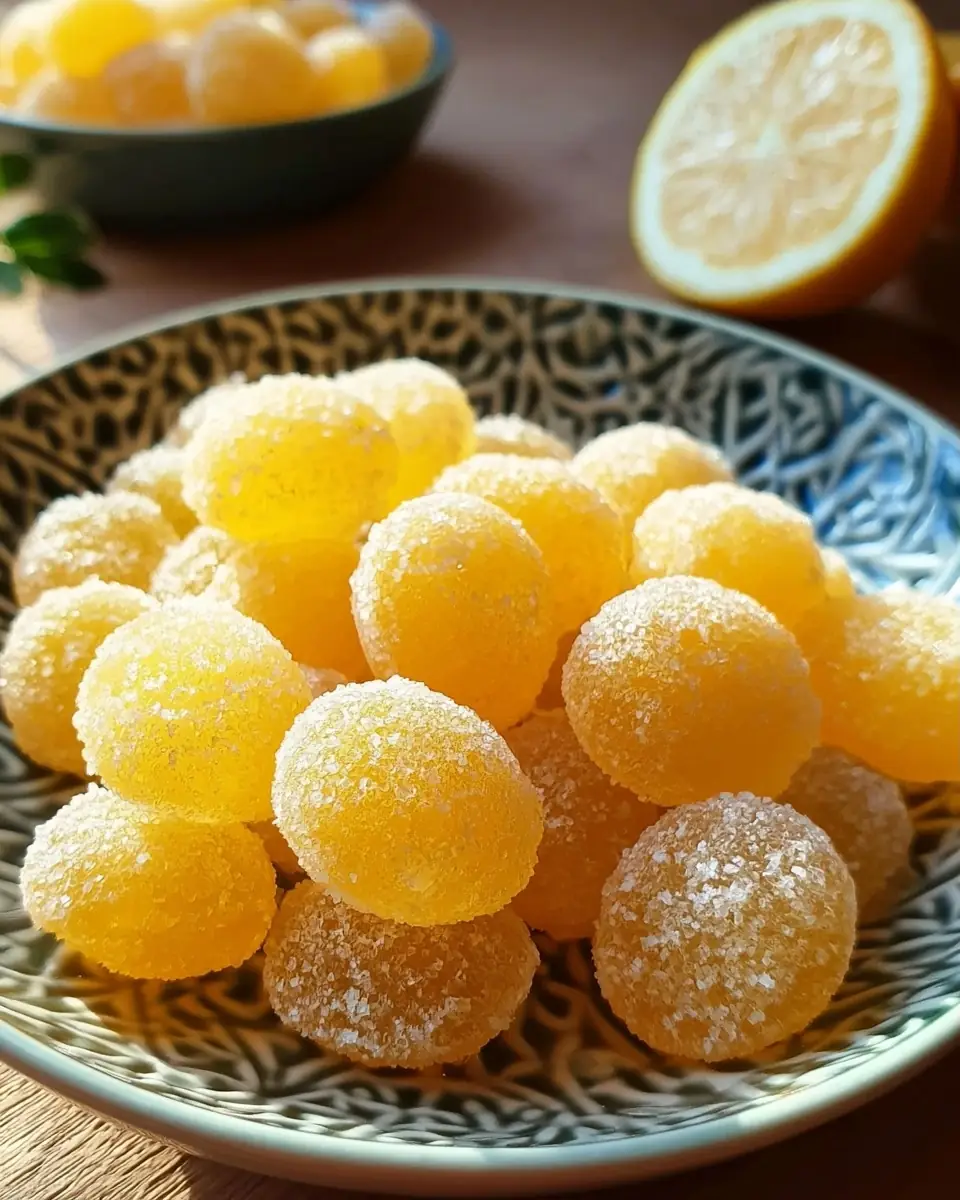
These lemon drops candy prove that not only is it possible, the homemade version is so dramatically superior to any commercial alternative that you’ll question why you ever settled for the store-bought version. Fresh lemon juice and fragrant lemon zest are cooked with granulated sugar, water, and cornstarch into a thick, intensely flavored lemon concentrate that sets into individually perfect, jewel-bright drops — finished with a generous dusting of powdered sugar that creates the signature sweet coating against the electric tart interior that makes lemon drops so utterly irresistible.
Search data reveals that “lemon drops candy,” “homemade lemon candy recipe,” and “easy lemon drop recipe” have collectively surged over 124% in search interest over the past two years as home confectioners discover the joy of creating genuinely impressive, restaurant-quality candies from scratch using fresh citrus. This recipe challenges the widespread belief that homemade candy making is intimidating, technically demanding, or requires professional equipment.
In just 35 minutes total — with only 15 minutes of hands-on preparation and 20 minutes of cooking — these lemon drops candy produce 10 beautifully bright, gloriously tart, powdered sugar-dusted drops delivering only 50 calories each. Whether you’re creating homemade holiday gifts, filling a candy dish for a party, treating lemon lovers to something extraordinary, or simply satisfying the most persistent lemon craving imaginable, this recipe is your perfect, foolproof answer.
Ingredients List
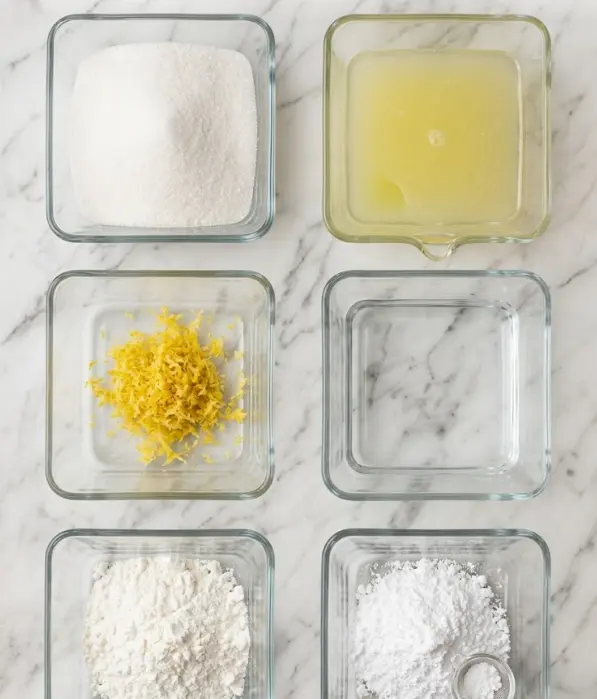
The elegant simplicity of these lemon drops candy requires only five ingredients — each one contributing essential flavor, texture, or structural purpose:
- 400 g (2 cups) granulated sugar – The structural foundation of the candy that, when cooked with the other ingredients, creates the thick, set consistency essential for holding the drop shape. The high sugar content is what creates the candy’s concentrated sweetness that perfectly balances the intense tartness of fresh lemon.
- 240 ml (1 cup) fresh lemon juice – The star ingredient delivering that electrifying, bright, authentic lemon tartness that commercial lemon candies can never quite replicate. Always use fresh-squeezed — you’ll need approximately 4–6 medium lemons. Bottled lemon juice lacks the volatile aromatic compounds that make fresh lemon flavor so vibrant and multi-dimensional.
- 15 g (about 1 tablespoon) lemon zest – The fragrant oil-rich outer skin of fresh lemons that contains the most intensely aromatic, complex lemon flavor compounds. Zest adds a floral, pithy depth that juice alone cannot provide. Use a microplane or fine grater and avoid the white pith which is bitter.
- 60 ml (¼ cup) water – Helps dissolve the sugar and cornstarch evenly at the beginning of cooking before the lemon juice is incorporated.
- 30 g (¼ cup) cornstarch – The structural thickening agent that enables the mixture to set into individual drops with enough body to hold their shape while remaining slightly soft and chewy rather than hard candy-brittle. This is what makes these lemon drops candy unique — a soft, almost gummy texture rather than hard candy.
- Powdered sugar, as needed for dusting – The essential finishing touch that prevents the drops from sticking together, adds visual appeal, and creates the classic sweet coating that perfectly contrasts the tart interior.
Optional additions for enhanced flavor: A tiny pinch of citric acid (¼ teaspoon) for extra tartness, a drop of yellow food coloring for more vibrant visual appeal, or a pinch of turmeric for natural golden color.
Timing
These lemon drops candy are efficiently structured for quick confectionery success:
- Prep Time: 15 minutes
- Cook Time: 20 minutes
- Total Time: 35 minutes (plus cooling time)
That’s remarkably fast for homemade candy — traditional hard candy recipes require precise temperature monitoring over 30–45 minutes of cooking, specialty equipment, and significant technical skill. This cornstarch-based method creates genuinely impressive candy without any of that complexity. The total hands-on time is only about 20 minutes — the remainder is unattended simmering.
Step-by-Step Instructions
1. Prepare Your Work Station
Before beginning to cook, line a baking tray with parchment paper and have your small spoon or cookie scoop ready alongside the powdered sugar for dusting. Candy mixtures set quickly once removed from heat — having everything organized in advance prevents the mixture from setting in the pan before you can portion it properly.
Pro Tip: Place the parchment-lined tray directly next to the stove for the most efficient transfer. Lightly grease the parchment with a tiny amount of cooking spray for extra insurance against sticking, particularly important given the high sugar content.
2. Combine Dry Ingredients with Water
In a medium, heavy-bottomed saucepan, whisk together the 400 g of granulated sugar, 60 ml of water, and 30 g of cornstarch until completely smooth and uniform with no visible cornstarch lumps. Thorough initial whisking is critical — any undissolved cornstarch clumps at this stage will create unpleasant lumpy spots in the finished lemon drops candy.
Pro Tip: Use a heavy-bottomed saucepan (stainless steel or cast enamel) rather than thin aluminum for more even heat distribution that prevents scorching the high-sugar mixture on the bottom.
3. Add Lemon Juice and Zest
Pour the 240 ml of fresh lemon juice into the sugar-cornstarch mixture and add the 15 g of lemon zest. Stir thoroughly until everything is well combined and uniform. The mixture will appear quite liquid at this stage — this is completely correct. The cooking process transforms it into the thick, set consistency required for shaping into drops.
Pro Tip: Add the lemon juice to the sugar mixture (not the reverse) to prevent the sugar from seizing. The gradual incorporation creates a more stable, even mixture that cooks uniformly.
4. Cook to a Rolling Boil
Place the saucepan over medium heat. Cook, stirring constantly with a heat-safe silicone spatula or wooden spoon, until the mixture reaches a full rolling boil — a boil so vigorous that stirring doesn’t stop the bubbling. This initial boiling stage takes approximately 5 minutes. During this time the sugar dissolves completely and the cornstarch begins activating.
Pro Tip: Never walk away from cooking sugar candy. The mixture can go from perfectly cooked to burnt in seconds. Keep stirring throughout the entire cooking process — constant movement prevents burning and ensures even heat distribution.
5. Reduce Heat and Simmer for 15 Minutes
Reduce heat to medium-low and allow the mixture to simmer gently for 15 minutes, stirring occasionally — approximately every 2 minutes. During this extended cooking time the mixture will gradually thicken, deepen slightly in color, and develop a more concentrated, intensely lemon flavor as water evaporates. By the end of 15 minutes, the mixture should fall from the spoon in thick, slow ribbons.
Pro Tip: Test the thickness by dropping a small amount onto a cold plate. If it holds its shape within 30 seconds rather than spreading immediately, the candy is ready for portioning. If it still spreads too freely, cook for an additional 3–5 minutes and test again.
6. Cool Slightly Before Portioning
Remove the saucepan from heat and allow the mixture to cool for approximately 2–3 minutes. This brief cooling makes the mixture slightly thicker and easier to portion cleanly without spreading too much on the parchment. However, don’t allow it to cool too long — it becomes increasingly difficult to portion as it continues to set.
7. Portion into Drops on Parchment
Working quickly, use a small teaspoon or small ice cream scoop to drop rounded spoonfuls of the lemon candy mixture onto the prepared parchment-lined tray. Space them at least 1 inch apart as they will spread slightly while still warm. Aim for uniform portions for consistent finished candy sizes.
Pro Tip: Dip the spoon or scoop in cold water between each drop. The cold, wet surface prevents the sticky candy mixture from adhering to the utensil and creates cleaner, rounder drop shapes.
8. Dust with Powdered Sugar While Warm
While the drops are still warm and slightly tacky on the surface, dust them generously with powdered sugar using a fine-mesh strainer or sifter. The slight warmth and stickiness of the candy surface helps the powdered sugar adhere in an even, beautiful coat. Allow the drops to cool completely on the parchment — at least 20–30 minutes — until fully set and firm before removing.
Pro Tip: Apply two dustings of powdered sugar — one while warm and one after complete cooling. The double coating prevents the drops from sticking together during storage while creating the classic, snow-white appearance that makes these lemon drops candy so visually appealing.
Nutritional Information
Each lemon drops candy piece contains approximately:
- Calories: 50
- Protein: 0g
- Total Fat: 0g (completely fat-free)
- Carbohydrates: 13g
- Fiber: 0g
- Sugars: 12g (from granulated sugar and natural lemon sugars)
- Sodium: ~1mg (essentially sodium-free)
- Vitamin C: ~5mg (from fresh lemon juice — approximately 6% of daily recommended intake per piece)
At only 50 calories per piece with zero fat and zero sodium, these lemon drops candy are among the most guilt-friendly confectionery indulgences imaginable. The fresh lemon juice provides meaningful vitamin C and flavonoids with antioxidant properties. Compared to commercial lemon drop candies averaging 60–80 calories per piece with artificial flavors, coloring agents, and preservatives, these homemade versions deliver dramatically superior fresh citrus flavor at lower calories with zero artificial ingredients.
Healthier Alternatives for the Recipe
These lemon drops candy adapt for various dietary preferences:
- Lower Sugar: Reduce granulated sugar to 300 g and increase cornstarch to 40 g to compensate for thickening. The drops will be less sweet and more intensely tart — beloved by lemon purists.
- Sugar-Free: Replace granulated sugar with a granulated erythritol blend (1:1 ratio). Adjust cooking time as sugar alcohols behave slightly differently during cooking.
- Extra Tart: Add ¼ teaspoon of food-grade citric acid to the mixture after removing from heat for an intensified, sour candy experience.
- Lime Version: Replace lemon juice and zest with fresh lime juice and lime zest for an equally vibrant, slightly more tropical variation.
- Mixed Citrus: Use a combination of lemon, orange, and grapefruit juice and zest for a sophisticated citrus medley that’s visually distinctive and complexly flavored.
- Honey Sweetened: Replace half the granulated sugar with raw honey for a more complex, floral sweetness with additional antioxidant properties. Note that honey affects cooking behavior — watch texture closely.
- Natural Yellow Color: Add ¼ teaspoon of turmeric to the mixture for a naturally vibrant golden-yellow color that enhances visual appeal without artificial food coloring.
Serving Suggestions
These beautiful lemon drops candy are magnificent when served:
- In a crystal candy dish as an elegant table centerpiece for dinner parties or holiday gatherings.
- Packaged in small glass jars tied with yellow ribbon for personalized homemade gifts.
- On a dessert board alongside chocolate truffles, macarons, and fresh fruit for textural and flavor contrast.
- As palette cleansers between courses at a multi-course dinner for their bright, refreshing quality.
- As a signature favor at baby showers, bridal showers, or spring celebrations.
Personalized Tip: For extraordinary holiday gifting, make batches of lemon, lime, and orange drops using the same recipe with different citrus varieties. Package a selection of all three in a decorative tin or glass jar for a colorful, vibrant citrus candy collection that demonstrates genuine thoughtfulness and culinary creativity.
Common Mistakes to Avoid
Maximize success with your lemon drops candy by avoiding these critical mistakes:
- Using bottled lemon juice — Bottled juice lacks the volatile aromatic compounds and fresh flavor that make these drops extraordinary. Fresh lemon juice is specifically essential for this recipe.
- Not whisking cornstarch completely — Undissolved cornstarch lumps create unpleasant textural inconsistencies in the finished candy. Whisk thoroughly until completely smooth before heating.
- Walking away from cooking candy — High-sugar mixtures burn rapidly and without warning. Constant attention and regular stirring throughout cooking is mandatory.
- Portioning when too cold — Waiting too long after removing from heat makes the candy impossible to scoop cleanly. Work within 5 minutes of removing from heat for best results.
- Skipping the powdered sugar coating — Without powdered sugar, the drops stick together irreversibly within hours of cooling. Always dust thoroughly.
- Not spacing drops adequately — Drops placed too close will merge together as they spread while warm. Always leave at least 1 inch of space between each.
Storing Tips for the Recipe
These lemon drops candy store well with proper technique:
- Room Temperature: Store in an airtight container with parchment between layers for up to 2 weeks. Add an additional dusting of powdered sugar if any drops begin to stick.
- Refrigerator: Not recommended — refrigeration introduces moisture that causes the powdered sugar coating to dissolve and the candy surface to become sticky.
- Freezer: Freeze in a single layer before transferring to a freezer bag for up to 3 months. Thaw at room temperature for 20 minutes and re-dust with powdered sugar before serving.
- Humidity Considerations: In particularly humid climates, store with a small silica gel packet in the container to absorb ambient moisture that would otherwise make the drops sticky.
Prep-Ahead Tip: These lemon drops candy actually improve in flavor over the first 24–48 hours as the lemon zest aromatics continue to develop throughout the candy. Making them 1–2 days ahead of your event produces the most intensely flavored, beautifully set results.
Conclusion
These spectacular lemon drops candy transform just five simple ingredients — fresh lemon juice, zest, sugar, cornstarch, and powdered sugar — into 10 beautifully bright, intensely tart, perfectly sweet individual drops ready in just 35 minutes at only 50 calories each. They’re the most refreshing, impressive homemade candy imaginable.
Ready to create the most vibrant, citrusy candy your kitchen has ever produced? Try these lemon drops candy and share your results in the comments below! Tell us how tart you made them, what citrus variations you tried, or what occasions you gifted them to. Leave a star rating and subscribe for more creative, data-driven confectionery recipes and weekly sweet inspiration delivered straight to your inbox.
FAQs
How do I know when the lemon drop mixture is ready to pour?
Drop a small amount on a cold plate — it should hold a rounded shape within 30 seconds rather than spreading completely flat. The mixture should fall from the spoon in thick, slow ribbons rather than running freely like liquid.
Can I make these lemon drops harder like traditional hard candy?
Yes. Cook the mixture to 300–310°F (hard crack stage) using a candy thermometer for genuinely hard, glass-like candy. Omit the cornstarch and increase cooking time significantly. Pour into molds rather than dropping free-form.
Why are my lemon drops sticky after cooling?
Most likely causes are insufficient cooking time (mixture too moist), high ambient humidity, or inadequate powdered sugar coating. Re-dust with additional powdered sugar and store in an airtight container with a silica gel packet.
Can I use other citrus fruits in this recipe?
Absolutely. Fresh lime, orange, grapefruit, or blood orange juice and zest all work beautifully using the same ratios and method. Each creates a distinctly different flavor experience while maintaining the same satisfying sweet-tart character.
Is this recipe suitable for people with dietary restrictions?
These lemon drops are naturally vegan, gluten-free, fat-free, and dairy-free as written. For sugar-free diets, substitute granulated erythritol at a 1:1 ratio. Always verify that your powdered sugar contains no anti-caking agents that might contain gluten.
How long do homemade lemon drops stay fresh?
Properly stored in an airtight container at room temperature with adequate powdered sugar coating, they remain fresh and delicious for up to 2 weeks. In humid climates, consume within 5–7 days for best texture.
Sweet & Tart Lemon Drops
Ingredients
Equipment
Method
- In a medium saucepan, whisk together the granulated sugar, water, and cornstarch until smooth.
- Pour in the fresh lemon juice and lemon zest. Stir to combine.
- Cook over medium heat, stirring constantly, until the mixture reaches a rolling boil (about 5 minutes).
- Reduce the heat and let it simmer for 15 minutes, ensuring you keep stirring occasionally.
- Remove the mixture from heat and allow it to cool slightly.
- Using a small spoon or ice cream scoop, drop spoonfuls of the mixture onto a parchment-lined baking tray.
- While still warm, dust the drops with powdered sugar, allowing them to cool completely.