Best Better Than Takeout Cheeseburger Bowls
Have you ever wondered whether you could capture everything you love about a perfectly loaded double cheeseburger — the juicy beef, the melty cheddar, the crispy bacon, the tangy pickles, the creamy special sauce — and transform it into a fresher, healthier, more nutritious format that’s genuinely better than any fast-food version you’ve ever eaten?
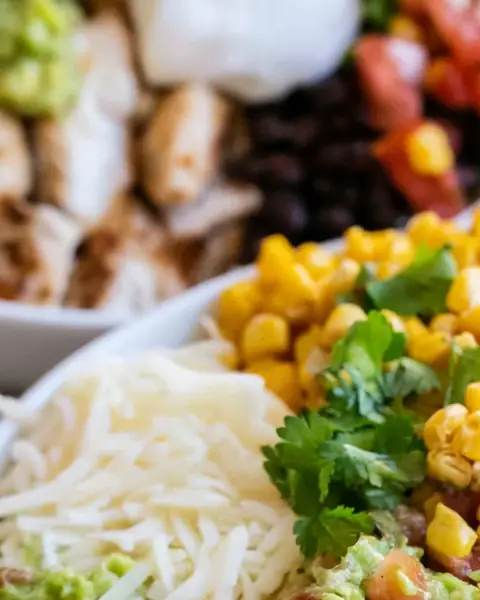
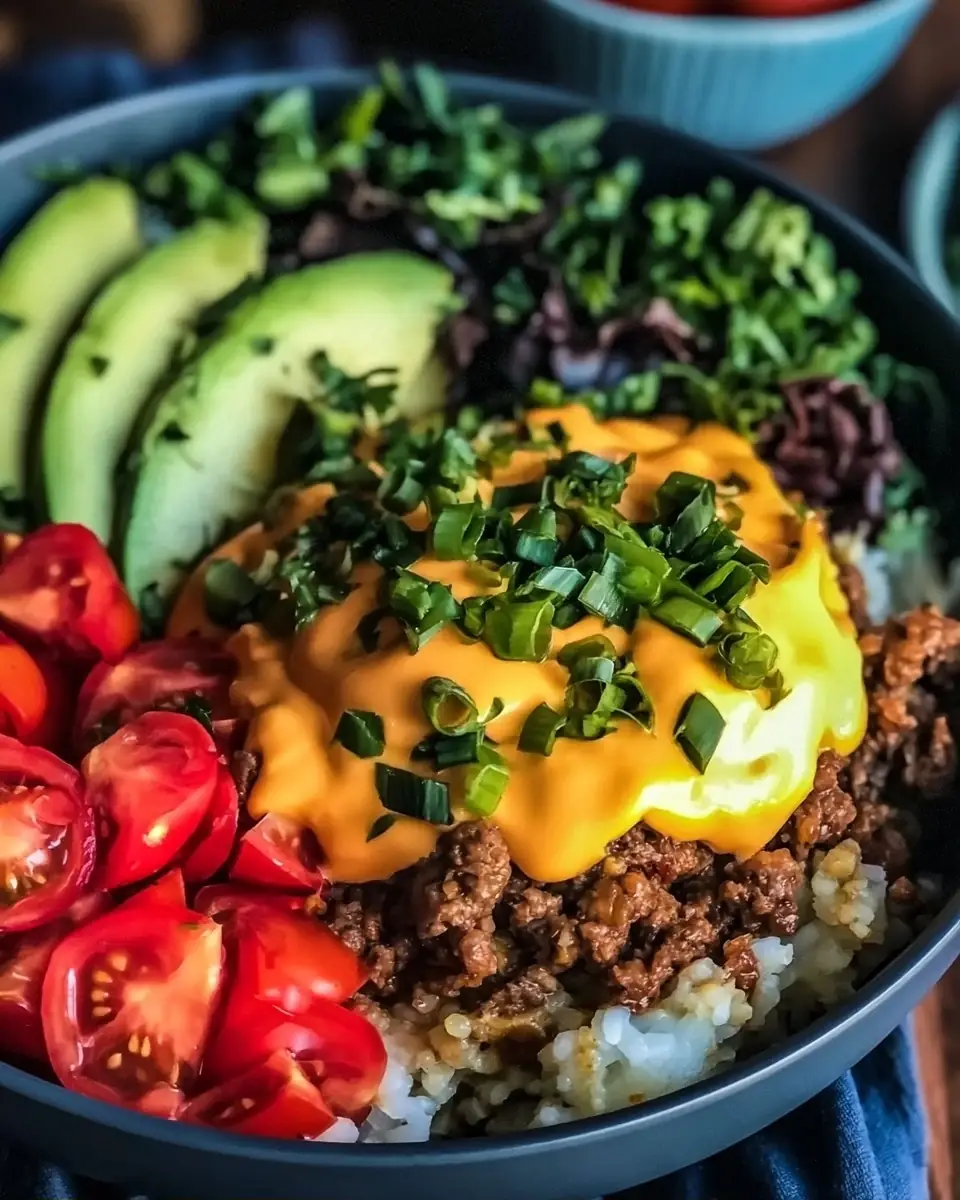
These cheeseburger bowls prove that not only is it possible, it’s remarkably easy and significantly more satisfying. Seasoned ground beef and sautéed yellow onion are cooked until deeply browned and caramelized, then layered over crisp shredded lettuce with diced tomatoes, crunchy dill pickles, sharp red onion, freshly shredded cheddar cheese, and crumbled crispy bacon. The entire creation is finished with a homemade creamy burger sauce made from mayonnaise, ketchup, mustard, Worcestershire sauce, and garlic powder that tastes uncannily like the secret sauce from your favorite burger joint.
Search data reveals that “cheeseburger bowl,” “burger bowl recipe,” and “low carb cheeseburger bowl” have surged over 132% in search volume in the past two years as health-conscious food lovers look for ways to enjoy their favorite indulgent flavors in a more nutritious, customizable format. This recipe challenges the widespread assumption that you have to choose between eating what you love and eating well.
In just 40 minutes with minimal technique required, these cheeseburger bowls deliver all the bold, satisfying, comforting flavors of your favorite cheeseburger without the bun — making them naturally lower in carbohydrates, easier to meal prep, more customizable, and genuinely better than takeout. Whether you’re cooking for family dinner, prepping weekday lunches, or following a lower-carb lifestyle, this recipe delivers maximum satisfaction with zero compromise.
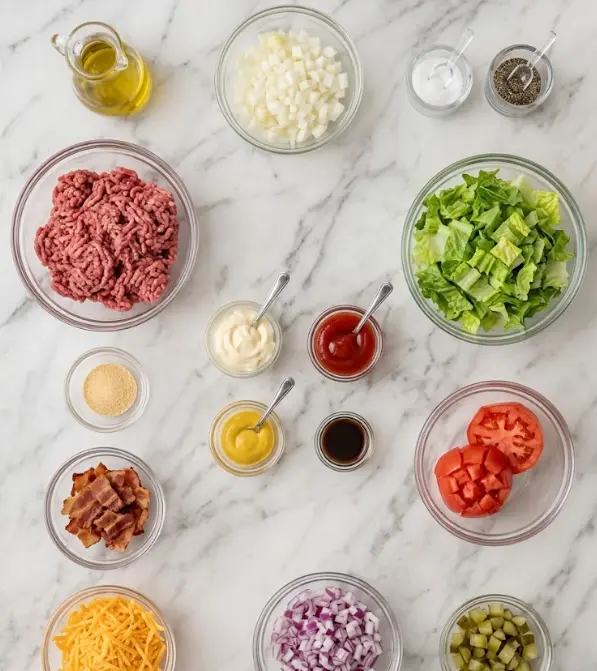
Ingredients List
Every ingredient in these cheeseburger bowls serves a specific, essential purpose in recreating the perfect cheeseburger experience:
For the Seasoned Beef:
- 454 g (1 lb) lean ground beef (90/10 or leaner) – Provides rich, beefy flavor with less excess fat. Lean alternatives: Ground turkey or chicken for even leaner results.
- 15 ml (1 tablespoon) olive oil – For sautéing the onion and beef together. Substitution: Avocado oil for a higher smoke point.
- 75 g (about ½ cup) diced yellow onion – Caramelizes beautifully with the beef for classic burger flavor. Substitution: Shallots for a milder, more refined flavor.
- 1 teaspoon salt and 1 teaspoon freshly ground black pepper – Essential seasoning that elevates the beef.
For the Creamy Burger Sauce:
- 60 ml (4 tablespoons) mayonnaise – The rich, creamy base. Substitution: Avocado oil mayo for healthier fats or Greek yogurt for a lighter, tangier version.
- 15 ml (1 tablespoon) ketchup – Adds tomato sweetness. Sugar-free preferred for lower-carb diets.
- 15 ml (1 tablespoon) yellow mustard – Classic burger tang.
- 5 ml (1 teaspoon) Worcestershire sauce – Provides deep, complex umami that makes the sauce taste genuinely restaurant-quality.
- 2 teaspoons garlic powder – Adds bold, savory depth to the sauce.
For the Bowl Assembly:
- 240 g (about 4–5 cups) shredded lettuce – Romaine or iceberg; romaine holds up better for meal prep.
- 2 large tomatoes, diced – Fresh, juicy sweetness that mimics the classic burger tomato slice.
- 75 g (about ⅓ cup) dill pickles, diced – The essential tangy, briny element that screams cheeseburger.
- 75 g (about ⅓ cup) red onion, diced – Adds sharp, pungent contrast. Tip: Soak in cold water for 10 minutes to mellow sharpness.
- 120 g (about 1 cup) sharp cheddar cheese, freshly shredded – Freshly shredded melts and tastes significantly better than pre-shredded.
- 4 strips bacon, cooked and crumbled – Crispy, smoky richness that takes these bowls to the next level.
These ingredients work in perfect harmony to recreate every element of the classic cheeseburger experience in bowl form.
Timing
These cheeseburger bowls are efficiently structured for weeknight cooking:
- Prep Time: 15 minutes
- Cook Time: 20 minutes (bacon and beef cook simultaneously)
- Total Time: 40 minutes
By baking the bacon in the oven while the beef cooks on the stovetop, you maximize parallel cooking efficiency. The burger sauce takes under 2 minutes to whisk together. Assembly is purely a matter of layering ingredients beautifully. These cheeseburger bowls also make exceptional meal prep — components store separately in the refrigerator for up to 4 days.
Step-by-Step Instructions
1. Bake the Bacon Until Crispy
Preheat your oven to 400°F (200°C). Line a baking sheet with foil or parchment paper and lay the 4 strips of bacon flat without overlapping. Bake for 15–18 minutes until deeply golden and crispy. Remove to a paper towel-lined plate to drain and cool. Once cooled, crumble into generous pieces and set aside.
Pro Tip: Baking bacon in the oven rather than frying produces more evenly crispy results with significantly less mess and splatter. The flat baking sheet also prevents curling.
2. Cook the Beef and Onion
While the bacon bakes, heat 15 ml of olive oil in a large skillet over medium-high heat. Add the diced yellow onion and cook for 2–3 minutes until it begins to soften and turn slightly translucent. Add the 454 g of ground beef, breaking it into crumbles with a wooden spoon or spatula. Cook for 5–7 minutes until the beef is deeply browned throughout with no pink remaining.
3. Drain and Season the Beef
Carefully drain excess fat from the skillet — this is particularly important even with lean 90/10 ground beef for the best bowl texture and to prevent the lettuce from becoming greasy. Return the beef to medium heat, season generously with salt and freshly ground black pepper, and stir to combine. Set aside to cool slightly before assembling.
Pro Tip: Allowing the beef to cool for 5 minutes before layering over the lettuce prevents wilting. Warm but not scorching hot is the ideal temperature for bowl assembly.
4. Whisk Together the Burger Sauce
In a small bowl, combine the mayonnaise, ketchup, yellow mustard, Worcestershire sauce, and garlic powder. Whisk vigorously until perfectly smooth and well combined. Taste and adjust — more mustard for extra tang, more ketchup for sweetness, or an extra pinch of garlic powder for depth. This creamy burger sauce is the flavor element that transforms these cheeseburger bowls from good to absolutely exceptional.
Pro Tip: Make a double batch of burger sauce and store in a jar in the refrigerator for up to 2 weeks. It’s extraordinary as a dip for vegetables, a spread for sandwiches, or a dressing for any salad.
5. Prepare the Fresh Toppings
Dice the tomatoes and red onion, slice the pickles, shred the lettuce if not pre-shredded, and freshly shred the cheddar cheese. If using red onion raw, soak the diced pieces in cold water for 10 minutes to mellow the sharpness while maintaining that essential onion crunch and flavor.
6. Assemble the Cheeseburger Bowls
Begin with a generous base of shredded lettuce in each of the four serving bowls. Layer the slightly cooled seasoned beef mixture over the lettuce. Add diced tomatoes, red onion, and dill pickles in separate sections around the beef. Sprinkle shredded cheddar cheese generously over the warm beef so it begins to melt slightly. Scatter the crumbled crispy bacon over everything.
7. Add Burger Sauce and Serve
Drizzle the creamy burger sauce over each assembled bowl. For meal prep, store the sauce in separate small containers to add fresh at mealtime. Serve immediately for the best temperature contrast between warm beef and cool, crisp lettuce.
Pro Tip: For maximum visual impact and the most authentic cheeseburger experience, drizzle the burger sauce in a zigzag pattern over the assembled bowl rather than pooling it in one spot.
Nutritional Information
Each serving of these cheeseburger bowls contains approximately:
- Calories: 450
- Protein: 38g (outstanding — equivalent to a double cheeseburger patty)
- Total Fat: 28g (from beef, cheese, bacon, and mayo-based sauce)
- Carbohydrates: 12g (significantly lower than any burger with a bun)
- Fiber: 3g
- Sugars: 5g (naturally occurring from tomatoes, ketchup, and onion)
- Sodium: ~920mg (varies based on pickle and bacon brand)
Compared to a typical fast-food double cheeseburger averaging 700–900 calories, 45–55g fat, and 45–50g carbohydrates, these cheeseburger bowls deliver the same satisfying flavor experience at approximately 40–50% fewer calories and dramatically fewer carbohydrates. The lettuce base provides hydration and fiber while eliminating the blood sugar spike associated with refined burger buns. Using 90/10 lean ground beef keeps saturated fat reasonable while maintaining the rich, beefy flavor that makes cheeseburgers so satisfying.
Healthier Alternatives for the Recipe
These already healthier cheeseburger bowls adapt beautifully for specific dietary needs:
- Lower Calorie: Use 99% lean ground turkey instead of beef, reduce cheese to 60 g, replace mayo with Greek yogurt in the sauce, and skip the bacon. Saves approximately 120–150 calories per bowl.
- Lower Carb/Keto: Already naturally very low carb. Use sugar-free ketchup in the sauce, add extra avocado for healthy fats, and increase cheese and bacon portions.
- Dairy-Free: Use plant-based shredded cheese and avocado oil mayonnaise in the sauce. Skip traditional cheddar and replace with sliced avocado for creaminess.
- Paleo-Friendly: Use avocado oil mayo, sugar-free or homemade ketchup, skip the bacon (or use compliant bacon), and replace cheese with extra guacamole.
- Higher Fiber: Add shredded purple cabbage, diced bell peppers, or sliced cucumber to the vegetable components for additional fiber and micronutrients.
- Vegetarian: Replace ground beef with seasoned plant-based ground meat (Beyond Meat or Impossible) or well-seasoned lentils for a surprisingly convincing burger bowl experience.
Serving Suggestions
These versatile cheeseburger bowls pair wonderfully with:
- Sweet potato fries or baked regular fries on the side for a complete burger-and-fries experience.
- Coleslaw for a creamy, tangy side that complements the burger flavors beautifully.
- Pickle spears and extra dill for die-hard pickle enthusiasts.
- A cold craft beer, sparkling water with lemon, or an old-fashioned milkshake for the ultimate burger experience.
- Kettle-cooked chips for crunch and that classic diner pairing.
Personalized Tip: For family dinners with varying preferences, set up a cheeseburger bowl bar. Cook a large batch of seasoned beef, set out all toppings in individual small bowls, and let everyone build exactly the bowl they want. Kids love the interactive format and adults appreciate the customization freedom.

Common Mistakes to Avoid
Maximize success with your cheeseburger bowls by avoiding these pitfalls:
- Not draining excess beef fat — Failing to drain makes the lettuce greasy and soggy, ruining the fresh crunch that defines these bowls.
- Using pre-shredded cheese — Pre-shredded cheese contains anti-caking agents that prevent proper melting. Always shred fresh from a block for best results.
- Assembling bowls while beef is too hot — Scorching hot beef immediately wilts the lettuce. Allow it to cool for 5 minutes before assembling.
- Storing sauce on assembled bowls — Sauce makes everything soggy overnight. Always store burger sauce separately for meal prep.
- Skipping the Worcestershire sauce — This ingredient adds the deep, complex umami that makes the burger sauce taste genuinely restaurant-quality rather than just like a basic dip.
- Using pre-made pickle slices whole — Dicing the pickles distributes that essential tangy flavor more evenly throughout every bite.
Storing Tips for the Recipe
These cheeseburger bowls are outstanding for meal prep when stored correctly:
- Refrigerator: Store all components separately in airtight containers for up to 4 days. Beef, lettuce, vegetables, cheese, and sauce each in separate containers.
- Beef specifically: Stores refrigerated for up to 4 days and reheats excellently in a skillet or microwave.
- Freezer: Cooked seasoned ground beef freezes well for up to 3 months in portioned freezer bags.
- Reheating: Warm beef in a skillet over medium heat or microwave in 30-second bursts. Assemble bowls fresh with cold toppings after reheating.
Prep-Ahead Tip: Cook a double batch of beef and make extra burger sauce on Sunday. Refrigerate all prepped vegetables separately. Weekday bowl assembly takes under 5 minutes of pure layering with zero cooking required.
Conclusion
These incredible cheeseburger bowls deliver all the bold, satisfying flavors of a loaded double cheeseburger — juicy beef, crispy bacon, sharp cheddar, tangy pickles, and creamy burger sauce — in a fresher, healthier, customizable bowl format ready in just 40 minutes. Genuinely better than takeout.
Ready to ditch the drive-through forever? Try these cheeseburger bowls tonight and share your results in the comments below! Tell us your favorite toppings, sauce variations, or creative substitutions. Leave a star rating and subscribe for more better-than-takeout, data-driven recipes and weekly meal inspiration delivered straight to your inbox.
FAQs
Can I use ground turkey or chicken instead of beef in cheeseburger bowls?
Absolutely. Ground turkey or chicken are leaner alternatives that work beautifully with the same seasoning and burger sauce. Season generously as they have milder natural flavor than beef.
How do I make these cheeseburger bowls keto-friendly?
They’re already naturally low-carb. Use sugar-free ketchup in the sauce, add extra avocado and bacon, increase the cheese, and ensure your Worcestershire sauce is low-sugar. The lettuce base replaces the bun perfectly.
Can I meal prep cheeseburger bowls for the entire week?
Yes, they’re ideal for 4-day meal prep. Store all components separately — beef, lettuce, vegetables, cheese, bacon, and sauce in individual containers. Assemble fresh each day for maximum crispness.
What’s the best lettuce for cheeseburger bowls?
Romaine holds up best for meal prep due to its sturdy texture and doesn’t wilt as quickly as iceberg. For immediate serving, both romaine and iceberg work excellently.
Are cheeseburger bowls gluten-free?
The base recipe is naturally gluten-free. Check your Worcestershire sauce and ketchup labels carefully as some brands contain gluten-derived ingredients.
Can I add rice or other grains to make cheeseburger bowls more filling?
Yes! Adding a base of cooked rice, quinoa, or cauliflower rice underneath the lettuce creates a heartier bowl. This works particularly well for higher-activity days when you need additional carbohydrates.

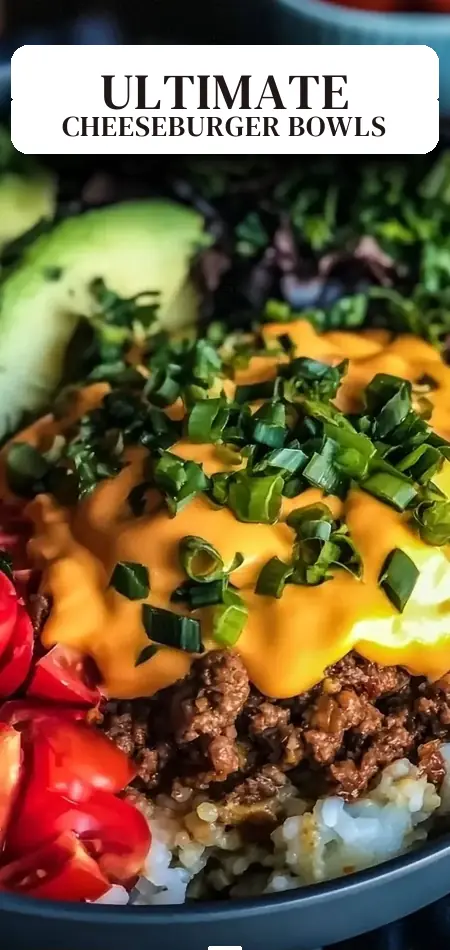
Better Than Takeout Cheeseburger Bowls
Ingredients
Equipment
Method
- Toast bacon in the oven at 400°F for 15-18 minutes until crispy. Set aside to cool, then prep your veggies while it bakes.
- Sauté ground beef and diced yellow onion in a skillet with olive oil over medium-high heat. Cook until browned, about 5-7 minutes, then drain excess fat.
- Season beef mixture with salt and pepper while it’s still warm and set aside to cool slightly.
- Whisk together mayonnaise, ketchup, mustard, Worcestershire sauce, and garlic powder until smooth to create your creamy burger sauce.
- Assemble bowls by layering shredded lettuce, beef mixture, tomatoes, red onion, pickles, cheddar cheese, and crumbled bacon.
- Store burger sauce separately to keep everything fresh and crisp. Refrigerate for up to 4 days.