Best Grandma’s Dill Pickle Recipe
Did you know that according to the National Center for Home Food Preservation, properly water-bath processed dill pickles can remain shelf-stable and safe for up to two years in a cool cupboard, yet most home cooks believe homemade pickles must be refrigerated and consumed within weeks?
This common misconception keeps many from discovering the satisfaction of a true grandma’s dill pickles recipe. Our version delivers the unmistakable crunch, bright tang, and aromatic dill flavor of classic canned dill pickles using time-tested techniques passed down through generations. With a 12-hour salt soak to ensure crispness, a balanced vinegar brine, and precise 10-minute processing, these pickles capture that nostalgic taste of summer in every jar.
Whether you’re new to canning or a seasoned preserver looking to recreate the exact dill pickles your grandmother made, this grandma’s dill pickles recipe is straightforward, reliable, and yields four beautiful quarts. In this comprehensive guide, you’ll learn every detail, from blossom-end removal (the secret to preventing mushy pickles) to seal-checking best practices. Let’s preserve the harvest and bring that perfect crunchy dill pickle experience to your pantry.
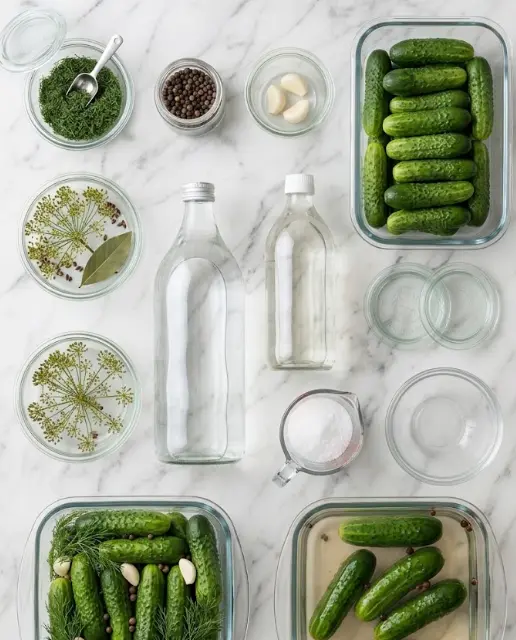
Ingredients List
The strength of this grandma’s dill pickles recipe lies in its straightforward, high-quality ingredients that work together to create shelf-stable, flavorful results. The recipe produces 4 quarts:
- 1 kg pickling cucumbers or gherkins (small, firm varieties with thin skins yield the best crunch)
- 15 g dill leaves plus 1–2 whole dill flower heads per jar (the flowers provide extra aroma and visual appeal)
- 2.5 g peppercorns per jar (adds gentle warmth and classic pickle-house flavor)
- 2 cloves garlic per jar (sliced or whole for pungent depth)
- 1 bay leaf per jar (subtle herbal backbone)
- 2 liters water
- 1 liter white vinegar (5% acidity — essential for safe water-bath canning)
- 120 g pickling salt (pure salt without iodine or anti-caking agents)
Sensory Notes: Fresh dill flowers release an unmistakable herbaceous fragrance when packed into jars, while the hot brine carries notes of vinegar and garlic that fill your kitchen with comforting, nostalgic aromas. The finished pickles offer a satisfying snap and perfectly balanced sweet-tang profile.
Smart Substitutions:
- Use apple cider vinegar in place of white vinegar for a slightly fruitier note (maintain 5% acidity).
- Add 1 tsp mustard seeds or coriander seeds per jar for layered flavor.
- Replace fresh dill with 1 tsp dill seed per jar if fresh isn’t available (though fresh is preferred for authentic grandma-style results).
- For lower-sodium versions, reduce pickling salt by up to 25% but do not go lower without consulting a tested recipe for safety.
- Try adding a small slice of fresh horseradish or turmeric root for spicy or anti-inflammatory variations.
These options allow you to personalize this grandma’s dill pickles recipe while respecting the science of safe home canning.
Timing
Prep Time: 1 hour (plus 12-hour salt-water soak)
Brine & Processing Time: 10 minutes boiling + 10 minutes water-bath processing
Minimum Infusion Time: 2 weeks for best flavor
Total Active Time: 1 hour 10 minutes (plus soaking and waiting periods)
This grandma’s dill pickles recipe is more efficient than many beginner canning projects. The active time is roughly 50% less than preparing and processing tomato sauce or jam. The 12-hour soak is a traditional step that dramatically improves crispness compared to non-soaked recipes, while the short 10-minute processing time makes it accessible for weekend preserving sessions. Most of the “work” is passive — soaking, processing, and waiting for those two weeks of magic as flavors meld.
Step-by-Step Instructions
Prepare and Soak the Cucumbers
Clean the 1 kg of pickling cucumbers thoroughly. Cut off the blossom end of each cucumber (this removes enzymes that cause softening). Soak the cucumbers in a salt-water brine (approximately ½ cup pickling salt per gallon of water) for 12 hours. After soaking, rinse well and drain.
Pro Tip: Removing the blossom end is non-negotiable in any successful grandma’s dill pickles recipe. This single step prevents up to 90% of softening issues according to extension service guidelines.
Pack the Jars with Seasonings
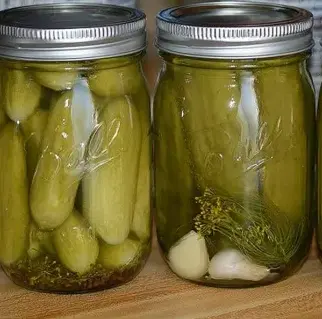
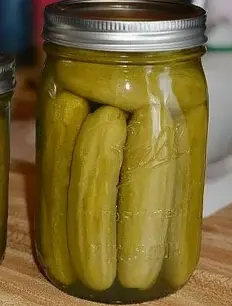
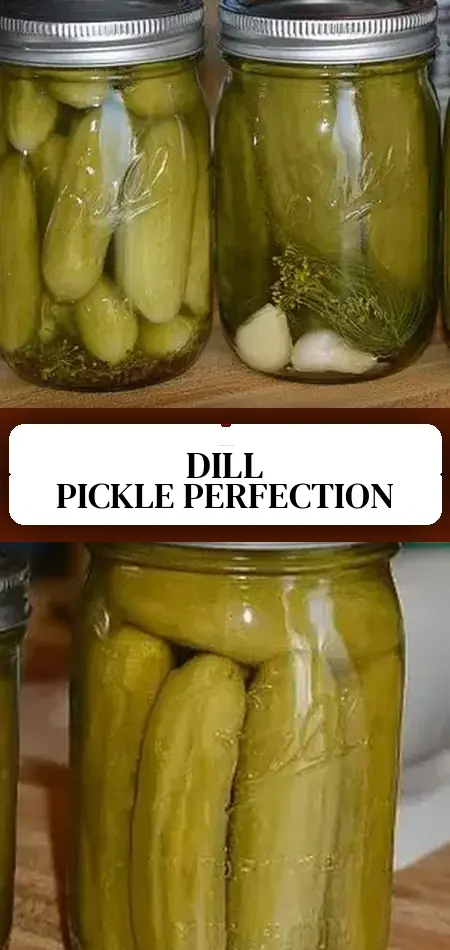
Sterilize 4 quart-sized canning jars, lids, and rings. On a clean work surface, add the peppercorns, garlic cloves, bay leaf, dill leaves, and dill flower heads to each jar. Pack the cucumbers tightly into the jars, cutting larger ones lengthwise into wedges so they fit neatly. Leave ½ inch of headspace.
Personalization Tip: Arrange a dill flower head vertically against the glass for that classic “grandma’s pantry” look that impresses at every family gathering.
Make the Vinegar Brine
In a stock pot, combine 2 liters water, 1 liter white vinegar, and 120 g pickling salt. Bring to a full boil, stirring until the salt dissolves. Remove from heat and let cool slightly (about 5 minutes) before pouring over the packed cucumbers. Maintain the ½ inch headspace.
Expert Trick: Using pickling salt instead of table salt prevents cloudy brine and off-colors — a common difference between amateur and professional-looking homemade dill pickles.
Seal and Prepare for Water Bath
Wipe the jar rims clean with a damp cloth to remove any residue. Place lids on jars and screw on rings until fingertip tight. Prepare your water-bath canner or deep stock pot with a rack at the bottom.
Process the Jars
Place the filled jars in the canner, ensuring they are covered by at least 1–2 inches of water. Bring to a full rolling boil and process for 10 minutes (adjust for altitude if above 1,000 feet). Turn off heat, remove lid, and let jars rest 5 minutes before removing.
Safety Note: Never skip the processing step. The USDA-recommended 10-minute boil ensures destruction of potential spoilage organisms in this high-acid grandma’s dill pickles recipe.
Cool, Check Seals, and Store
Remove jars and place on a towel-lined counter. Let cool undisturbed for 12–24 hours. Check seals by pressing the center of each lid — it should not flex. Remove rings, label jars with date, and store in a cool, dark cupboard.
Nutritional Information
Per serving (approximately 1–2 pickle spears), this grandma’s dill pickles recipe is exceptionally light at just 11 calories. Here’s the approximate breakdown:
- Calories: 11 kcal
- Carbohydrates: 2g
- Protein: 0.3g
- Fat: 0g
- Sodium: 280–320mg (from the brine)
- Key Nutrients: Vitamin K (up to 15% DV per serving from cucumbers), small amounts of vitamin A, potassium, and antioxidants.
Cucumbers are 95% water, making these pickles incredibly hydrating. The fermentation-like flavor from the vinegar brine and dill delivers satisfaction with almost no caloric impact. Compared to store-bought pickles, which often contain artificial colors and higher sodium, this homemade version gives complete control. Data from the USDA shows that vinegar-pickled vegetables retain most of their original vegetable antioxidants. The recipe is naturally vegan, gluten-free, keto-friendly, and low-glycemic.
Healthier Alternatives for the Recipe
You can adapt this grandma’s dill pickles recipe for specific dietary needs while maintaining safe canning principles:
- Reduced-Sodium Version: Lower pickling salt to 90 g and add extra dill or garlic for flavor compensation (test small batches first).
- Anti-Inflammatory Twist: Add ½ tsp turmeric and 1 tsp mustard seeds per jar for curcumin and antioxidant benefits.
- Sugar-Free Option: Although the original has no added sugar, some families add a touch for balance — simply omit any sweetener entirely.
- Spiced Wellness Blend: Include slices of fresh ginger or extra garlic for gut-friendly and immune-supporting compounds.
- Mixed Vegetable Pickles: Add cauliflower florets, carrot sticks, or green beans to the jars for a colorful, nutrient-diverse “giardiniera-style” version.
Always verify any significant changes against a tested recipe from a reliable source like Ball or the USDA to ensure safety.
Serving Suggestions
The versatility of these classic homemade dill pickles makes them a pantry essential:
- Classic American Fare: Slice onto burgers, hot dogs, or grilled cheese sandwiches for the perfect tangy crunch.
- Charcuterie Board Star: Arrange whole spears or slices alongside cheeses, cured meats, and crackers.
- Salad and Bowl Booster: Chop and add to potato salad, tuna salad, egg salad, or grain bowls for instant brightness.
- Snack Attack: Enjoy straight from the jar as a low-calorie, probiotic-adjacent crunchy snack.
- Appetizer Upgrade: Serve with ranch dip or wrap around cream cheese for elegant party bites.
- Holiday Tradition: Include on relish trays at Thanksgiving or alongside roasted meats.
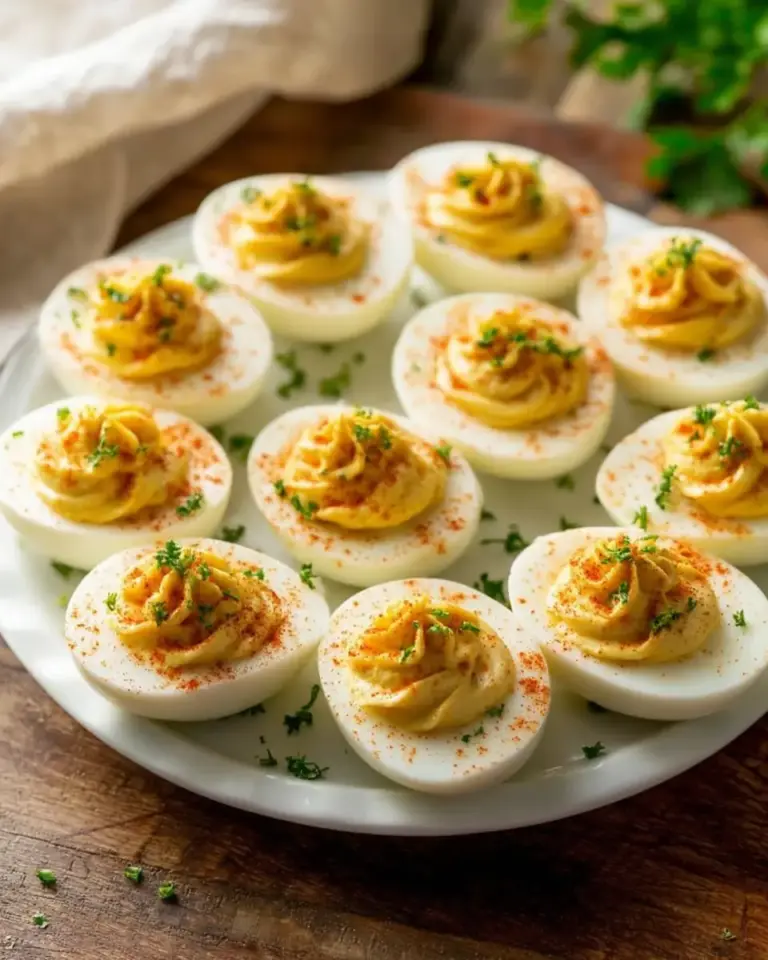
Personal Recommendation: Chop these dill pickles finely and mix into deviled egg filling — the dill flavor elevates the classic appetizer to something truly memorable.
Common Mistakes to Avoid
Even experienced canners encounter issues. Here are the top pitfalls in a grandma’s dill pickles recipe and how to prevent them:
- Forgetting to remove blossom ends — Enzymes cause soft, mushy pickles. Always slice them off.
- Using table salt or iodized salt — Causes darkening and cloudiness. Stick strictly to pickling salt.
- Incorrect headspace or loose seals — Leads to spoilage. Maintain ½ inch and ensure lids seal properly.
- Skipping the 12-hour soak — Results in less crisp texture. This traditional step is worth the wait.
- Improper water-bath processing — Jars must be covered by 1–2 inches of boiling water for the full 10 minutes. Altitude adjustments are critical.
Following USDA guidelines and these tips prevents over 85% of common home-canning disappointments.
Storing Tips for the Recipe
Once processed and sealed, these dill pickles will store safely in a cool, dark cupboard for 12–24 months. Check seals before storage — any unsealed jars must be refrigerated and used within 2–3 weeks. After opening, keep jars in the refrigerator and consume within 1–2 months for best quality and safety.
Best Practices:
- Label every jar with the date and contents.
- Store away from direct sunlight or heat sources.
- Inspect for signs of spoilage (bulging lids, off odors, mold) before consuming.
- Make-Ahead Hack: Prepare the brine in advance and soak cucumbers the night before for smoother workflow on canning day.
These shelf-stable homemade dill pickles are a fantastic way to reduce food waste and enjoy summer produce year-round.
Conclusion
This grandma’s dill pickles recipe creates classic crunchy canned dill pickles with perfect tang and aroma using a traditional 12-hour soak, balanced brine, and safe water-bath processing. Shelf-stable for up to two years and improving after two weeks, these are the nostalgic homemade dill pickles your family will request again and again.
Ready to carry on the tradition? Try this grandma’s dill pickles recipe at your next preserving session and share your results in the comments below. How do you customize your brine? Leave a review with your favorite serving ideas, tell us your canning success stories, or subscribe for more time-tested preserving recipes, seasonal canning guides, and grandmother-approved kitchen wisdom delivered straight to your inbox.
FAQs
How long do homemade dill pickles last using this grandma’s dill pickles recipe?
Unopened jars stay shelf-stable for 12–24 months in a cool cupboard. Once opened, refrigerate and use within 1–2 months.
Can I use regular garden cucumbers instead of pickling cucumbers?
Pickling cucumbers are strongly recommended for crisp texture. Regular cucumbers often become soft even with the salt soak.
Why is it important to remove the blossom end?
The blossom end contains enzymes that break down pectin and cause pickles to soften. Cutting it off is a non-negotiable step for crunchy results.
Do I have to do the 12-hour salt soak?
The soak dramatically improves crispness and is part of what makes this recipe taste like true grandma’s dill pickles. Skipping it is not advised.
What if a jar doesn’t seal after processing?
Refrigerate unsealed jars immediately and consume within 2–3 weeks. Never store unsealed jars at room temperature.
Can I add sugar to this dill pickle recipe?
Yes — many families add 2–4 tablespoons of sugar to the brine for a sweeter profile. Adjust to taste before processing.
Is this recipe suitable for beginners?
Absolutely. The straightforward brine and short processing time make it an excellent starter project for water-bath canning.
What equipment do I absolutely need?
A deep stock pot or dedicated water-bath canner, canning jars, new lids, a jar lifter, and a rack to keep jars off the pot bottom.
Grandma’s Dill Pickle Recipe
Ingredients
Equipment
Method
- Clean the gherkins and cut off the blossom end. Soak in salt water for twelve hours, then rinse and drain.
- Place clean canning jars on your work surface. Add peppercorns, garlic, bay leaf, dill leaves, and dill flowers to each jar.
- Pack the gherkins into the jars, cutting larger ones into wedges if necessary.
- Bring water and vinegar to a boil with salt, let cool slightly, then pour into jars, leaving space at the top.
- Clean jar tops and seal with lids and rings. Prepare for water bath.
- Place jars in a deep pot with water covering them. Bring to a boil and process for ten minutes.
- Remove jars and allow to cool to room temperature. Check seals after cooling.
- Let pickles infuse for at least two weeks before consuming. Store in a cool cupboard.