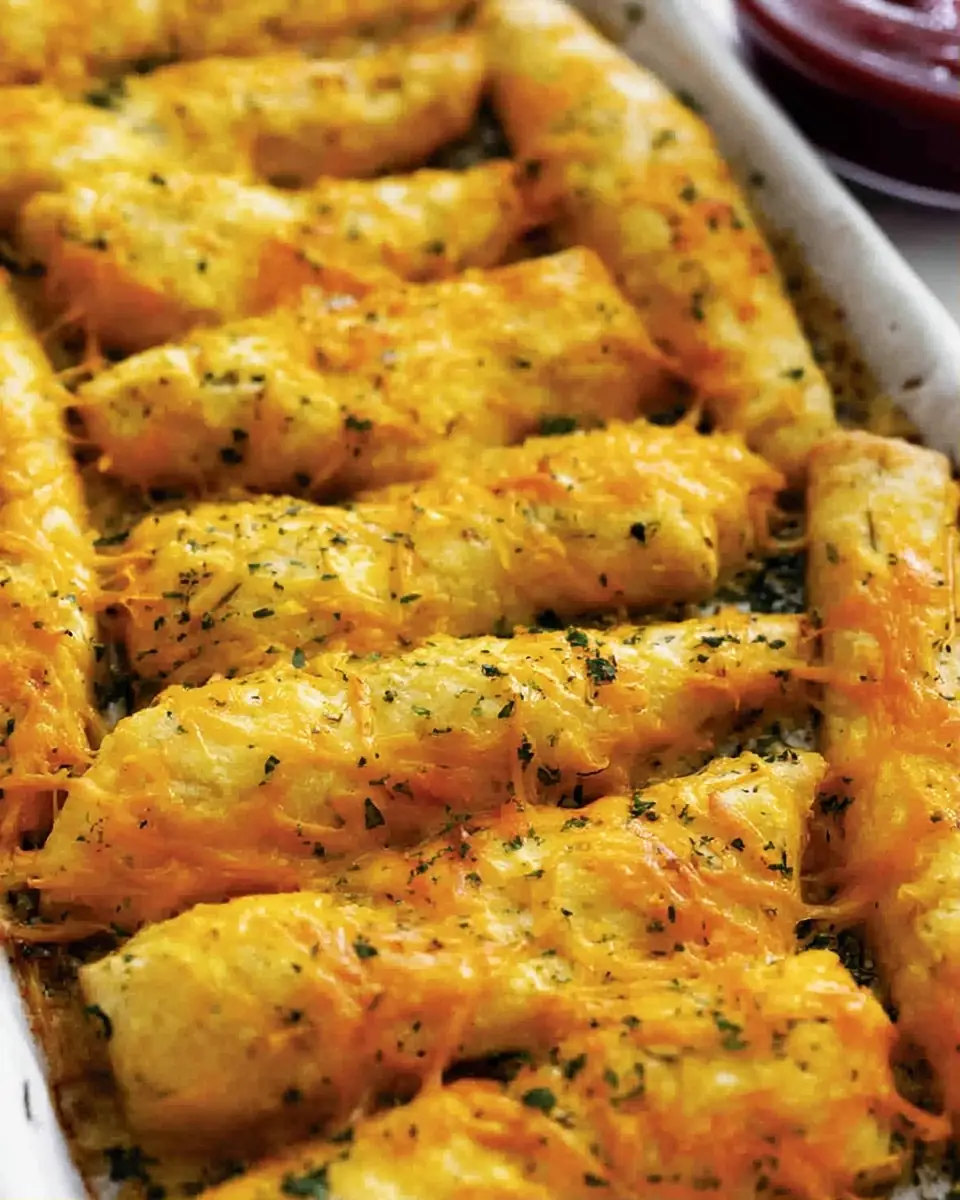
Best Cheesy Cheddar Garlic Breadsticks
What if you could pull hot, gooey, restaurant-style breadsticks from your oven in less than 45 minutes—complete with melty cheddar, bold garlic butter, and fragrant herbs—while most homemade breadstick recipes demand 2+ hours of rising time and complicated starters?
This cheesy cheddar garlic breadsticks recipe shatters that myth. Using a quick-rise yeast dough, generous toppings, and smart shortcuts, you’ll create 8 irresistibly cheesy, garlicky breadsticks at approximately 405 calories each. They deliver the perfect balance of soft, chewy interior and golden, bubbly cheese crust that makes them ideal for dipping, sharing, or devouring straight from the pan.
Whether you’re hosting game night, pairing them with pasta, or craving a savory snack, this cheesy cheddar garlic breadsticks recipe has become a go-to favorite. It requires minimal active effort yet produces bakery-level results that outperform frozen or delivery options in both flavor and freshness.
In this comprehensive guide, you’ll find the full ingredients list with smart substitutions, precise timing details, step-by-step instructions packed with pro tips, complete nutritional insights, healthier adaptations, creative serving suggestions, common mistakes to avoid, and storage secrets that preserve that fresh-from-the-oven taste.
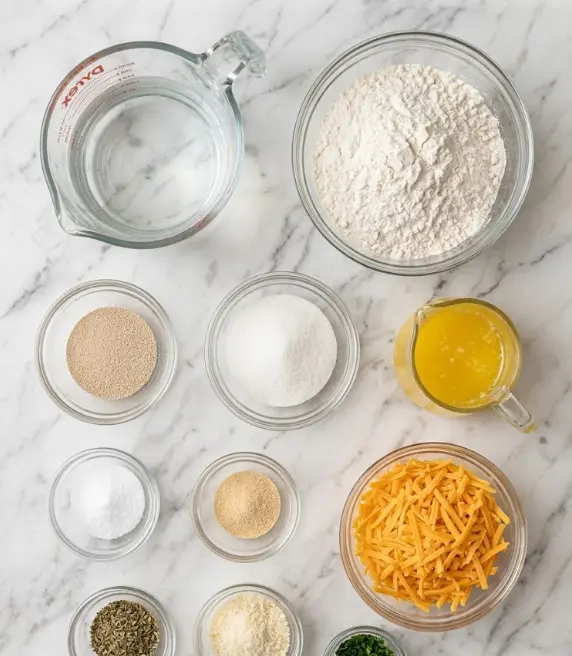
Ingredients List
This cheesy cheddar garlic breadsticks recipe keeps the ingredient list straightforward while maximizing flavor through quality staples. Here’s everything needed for 8 large breadsticks:
For the dough:
- 360 ml (1½ cups) warm water (around 100–110°F / 38–43°C)
- 30 g (2 tablespoons) granulated sugar
- 10 g (about 1 tablespoon) active dry yeast
- 420 g (3½ cups) all-purpose flour
- 5 teaspoons salt (approximately 30 g—see note below)
For the topping:
- 85 g (6 tablespoons) salted butter, melted
- 5 g (2 teaspoons) garlic powder
- 5 g (2 teaspoons) Italian seasoning
- 240 g (2 cups) shredded cheddar cheese
- 5 g (about 2 tablespoons) grated parmesan cheese
- Chopped fresh parsley, for garnish (about 10–15 g)
Smart Substitutions:
- Salt note: 5 teaspoons is on the higher side for bold flavor; start with 2–3 teaspoons if you prefer less salty breadsticks and adjust to taste.
- Cheese variations: Swap cheddar for mozzarella for extra stretch, pepper jack for mild heat, or a Italian cheese blend. Use dairy-free cheese and butter for a vegan version.
- Flour options: Replace up to 120 g of all-purpose flour with bread flour for chewier texture or white whole wheat for added fiber.
- Herb boost: Fresh minced garlic (2–3 cloves) can replace garlic powder. Add red pepper flakes for subtle heat.
- Lower-fat twist: Use light butter or olive oil and reduced-fat cheddar to trim calories while keeping the cheesy pull.
The warm water activates the yeast quickly, sugar feeds it for fast rising, and the generous cheese topping is what transforms simple dough into addictive cheesy cheddar garlic breadsticks.
Timing
Prep Time: 30 minutes (including two short rises)
Cook Time: 15–17 minutes
Total Time: 45 minutes
This cheesy cheddar garlic breadsticks recipe is impressively fast—roughly 60–70% quicker than traditional yeasted breadsticks that require 1–2 hours of bulk fermentation plus additional shaping and proofing. The quick 10-minute rise plus 10-minute rest keeps active time low while still developing enough structure for soft, chewy results. It’s perfect for weeknights when you want homemade appetizers without the wait.
Step-by-Step Instructions
Step 1: Activate the Yeast
Preheat your oven to 400°F (200°C). In a small bowl, combine the warm water, sugar, and active dry yeast. Stir gently and let it sit for 5 minutes until foamy. This confirms your yeast is active and ready to produce a reliable rise in this cheesy cheddar garlic breadsticks recipe.
Pro Tip: Water that’s too hot will kill the yeast; aim for wrist-warm temperature. If it doesn’t foam, your yeast may be expired—start over with fresh.
Step 2: Mix the Dough
Add the flour and salt to the bowl of a stand mixer fitted with a dough hook. Pour in the foamy yeast mixture. Mix on low speed until a smooth dough forms, about 3–5 minutes. The dough should pull away from the sides but still feel slightly tacky.
Personalized Tip: No stand mixer? Knead by hand on a lightly floured surface for 5–6 minutes. This quick dough doesn’t need extensive kneading thanks to the rapid rise method.
Step 3: First Rise
Cover the bowl and let the dough rise in a warm spot for 10 minutes. It won’t double fully but will become noticeably puffier. This short rest develops flavor without turning the process into an all-day project.
Step 4: Shape the Dough
Turn the dough onto a large parchment-lined cookie sheet or 10-inch pizza pan. Roll it into a large rectangle or circle about ¼-inch thick. Let it rest for another 10 minutes. The thin rollout ensures crispy edges and even cheese distribution.
Actionable Trick: Use a rolling pin lightly dusted with flour or simply press with your hands. Parchment prevents sticking and makes transferring to the oven effortless.
Step 5: Prepare and Apply the Garlic Butter
Melt the salted butter and stir in the garlic powder and Italian seasoning. Brush this fragrant mixture generously over the entire surface of the rested dough. The butter not only adds rich garlic flavor but also helps the cheese adhere and promotes beautiful browning.
Step 6: Add Cheese and Garnish
Evenly sprinkle the shredded cheddar cheese across the dough, followed by the grated parmesan. Scatter chopped fresh parsley on top for color and fresh herbal notes that brighten the richness.
Expert Advice: Don’t skimp on the cheese—the 240 g creates those irresistible bubbly, golden patches that define great cheesy cheddar garlic breadsticks.
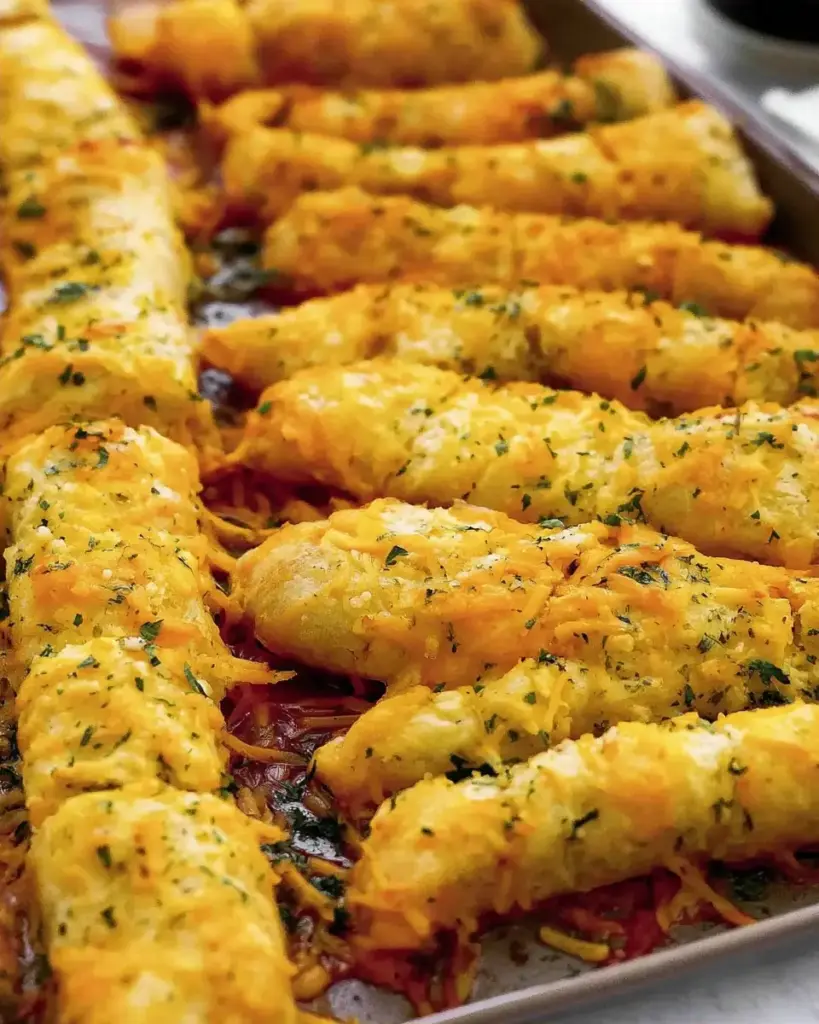
Step 7: Bake to Golden Perfection
Bake for 15–17 minutes until the edges are deep golden, the cheese is bubbly and slightly browned, and the bottom is crisp. Rotate the pan halfway if your oven has hot spots.
Step 8: Cool Slightly and Cut
Remove from the oven and let cool on the pan for 2–3 minutes. Use a pizza cutter or sharp knife to slice into 8 long strips. Serve immediately while the cheese is at its gooiest.
The combination of quick dough, garlic butter, and melty cheddar creates breadsticks with bakery-quality pull and flavor in record time.
Nutritional Information
Each breadstick (1/8 of recipe) contains approximately 405 calories. Here’s the detailed breakdown per serving:
- Calories: 405
- Carbohydrates: 48 g
- Protein: 13 g
- Fat: 18 g
- Fiber: 2 g
- Sugar: 4 g
- Sodium: 850–950 mg (depending on exact salt usage)
The high calorie count comes primarily from the generous cheddar and butter, delivering satisfying protein and fats that make these breadsticks filling. Compared to many restaurant breadsticks (often 300–500 calories with lower real-cheese content), this homemade cheesy cheddar garlic breadsticks recipe offers real ingredients and bold flavor. The parsley adds a touch of antioxidants, while the quick-rise method keeps the carbs focused on energy rather than long fermentation byproducts.
Healthier Alternatives for the Recipe
This cheesy cheddar garlic breadsticks recipe adapts easily for different dietary needs:
- Lower-Calorie Version: Use low-fat cheddar, reduce butter to 60 g, and cut salt in half. You can drop calories to ~320 per stick while retaining cheesy appeal.
- Higher-Protein Boost: Mix 30 g unflavored protein powder into the flour or top with part-skim mozzarella alongside cheddar.
- Whole-Grain Option: Substitute half the all-purpose flour with white whole wheat flour. Add 1–2 tablespoons extra water if the dough feels dry.
- Lower-Fat Twist: Replace half the butter with olive oil and use reduced-fat cheeses. Add extra Italian herbs to compensate for flavor.
- Gluten-Free Adaptation: Use a 1:1 gluten-free flour blend plus 1 teaspoon xanthan gum. Expect a slightly denser texture but equally delicious garlic-cheese topping.
- Vegan Version: Opt for plant-based butter, dairy-free cheddar-style shreds, and nutritional yeast instead of parmesan.
These modifications maintain the fun, shareable character while supporting various health goals.
Serving Suggestions
These cheesy cheddar garlic breadsticks are incredibly versatile:
- Serve warm with marinara sauce, ranch dressing, or garlic aioli for classic dipping.
- Pair alongside pasta dishes, minestrone soup, or Caesar salad for a complete meal.
- Cut into smaller pieces for party appetizers with a cheese board or charcuterie.
- Use as a base for quick cheesy bread pizza by adding extra toppings before baking.
- Enjoy as an afternoon snack or game-day treat—kids and adults alike devour them.
Personal Tip: For an elevated twist, serve with a side of warm pizza sauce spiked with crushed red pepper. The contrast of cool parsley and hot, melty cheese creates an addictive experience.
Common Mistakes to Avoid
Even quick recipes have pitfalls. Here’s what to watch for in this cheesy cheddar garlic breadsticks recipe:
- Inactive Yeast: Skipping the 5-minute foam test can lead to flat breadsticks. Always verify activity.
- Over-Salting: With 5 teaspoons listed, taste your dough. Many prefer 2–3 teaspoons total to avoid overly salty results.
- Rolling Too Thick: Dough thicker than ¼ inch won’t crisp properly and may stay doughy in the center.
- Burning the Cheese: Keep an eye after 12 minutes—cheese can go from bubbly to bitter quickly. Tent with foil if needed.
- Skipping the Rest: The two 10-minute rests are essential for texture. Rushing them yields tough breadsticks.
Avoiding these ensures consistently golden, cheesy, pull-apart results.
Storing Tips for the Recipe
These breadsticks taste best fresh, but proper storage extends enjoyment:
- Room Temperature: Store in an airtight container up to 1 day. Reheat in a 350°F oven for 5 minutes to restore crispness.
- Refrigerator: Keep up to 3 days in an airtight bag. Warm gently to revive the melty cheese texture.
- Freezer: Cool completely, wrap individually in plastic then foil, and freeze up to 2 months. Reheat from frozen at 375°F for 10–12 minutes. Add fresh parsley after reheating.
- Make-Ahead Tip: Prepare dough through the first rise and refrigerate up to 24 hours. Bring to room temperature before rolling.
Best practices keep the garlic aroma and cheesy pull intact.
Conclusion
This easy cheesy cheddar garlic breadsticks recipe delivers soft, chewy, garlicky breadsticks loaded with bubbly cheddar and parmesan in just 45 minutes. From the quick yeast dough to the flavorful butter brush and generous cheese topping, every element creates shareable, restaurant-quality results at home. Perfect as an appetizer, side, or snack.
Ready to bake? Try this cheesy cheddar garlic breadsticks recipe tonight and share your photos or tweaks in the comments below. Tell us what you dipped them in! Subscribe for more quick bread recipes, cheesy appetizers, and easy homemade snacks delivered to your inbox.
FAQs
Can I use instant yeast instead of active dry in this cheesy cheddar garlic breadsticks recipe?
Yes. Instant yeast can be mixed directly with dry ingredients, but the 5-minute activation step still helps ensure success. Reduce rise time slightly if needed.
Why is there so much salt in the dough?
The 5 teaspoons provide bold flavor that stands up to the rich cheese. Start with less (2–3 tsp) if you’re sensitive to salt and adjust in future batches.
Can I make these gluten-free?
Absolutely. A quality 1:1 gluten-free flour blend works well. The cheese and garlic butter keep them tasting indulgent regardless of the flour.
How do I prevent the cheese from burning?
Watch closely after 12 minutes. If browning too fast, loosely cover with foil for the last few minutes while the dough finishes cooking.
Can these cheesy cheddar garlic breadsticks be made ahead?
Yes. Assemble up to the baking step and refrigerate covered for a few hours. Add 2–3 extra minutes to bake time when baking straight from the fridge.
What’s the best way to reheat leftovers?
Reheat in a 350°F oven for 5–8 minutes. Avoid the microwave, which can make them soggy instead of crisp.
Can I add extra toppings?
Definitely. Try cooked crumbled bacon, sliced pepperoni, or jalapeños before baking for loaded cheesy garlic breadsticks that feel like a full meal.
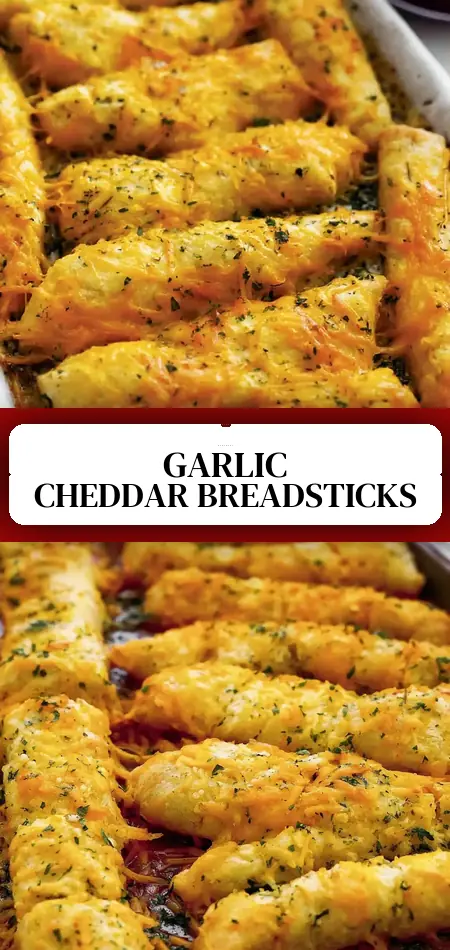
Cheesy Cheddar Garlic Breadsticks
Ingredients
Equipment
Method
- Preheat the oven to 400 degrees Fahrenheit.
- In a small bowl, add warm water, sugar, and yeast. Stir together and let sit for 5 minutes.
- Add flour and salt to a stand mixer. Add the yeast mixture and mix until smooth. Allow the dough to rise for 10 minutes.
- Roll the dough into a large rectangle on a large cookie sheet, or roll it out onto a 10-inch pizza pan about ¼ inch thick. Let the dough rest for another 10 minutes.
- Melt the butter, garlic powder, and Italian seasoning. Brush on top of the pizza dough.
- Sprinkle with shredded cheddar cheese and parmesan cheese. Top with chopped parsley for garnish.
- Bake for 15-17 minutes until golden brown and the cheese is bubbly. Remove from oven and cut into strips.