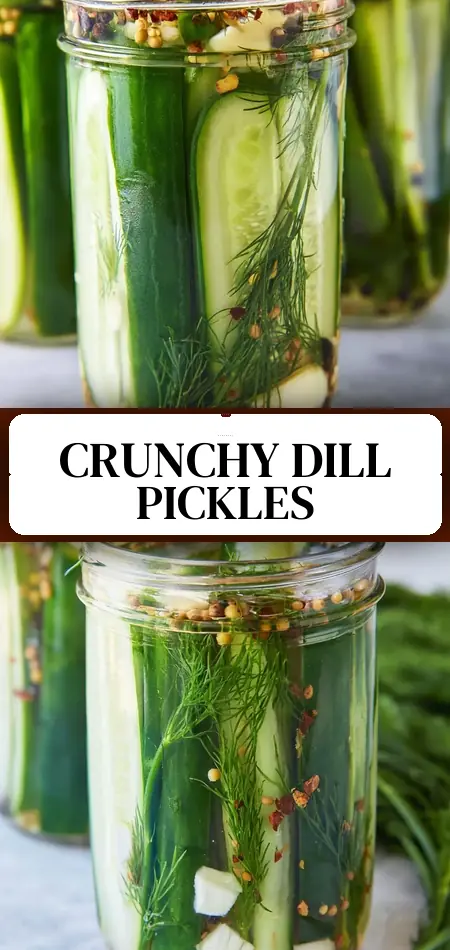
Homemade Dill Pickles Recipe
Why wait weeks for flavor to develop when you can have crisp, tangy refrigerator dill pickles on your table in as little as 24–48 hours? Most people believe great homemade pickles require complicated canning equipment and hours of processing, yet this quick refrigerator dill pickles recipe proves otherwise.
With only 10 minutes of active time, you can transform fresh Persian cucumbers into perfectly seasoned, crunchy garlic dill pickles that outperform store-bought brands. This no-canning method delivers bold flavor from garlic, black peppercorns, mustard seed, and fresh dill while keeping sodium and calories in check.
Whether you’re new to pickling or a seasoned pro looking for a fast weeknight solution, these quick refrigerator dill pickles are about to become your new kitchen staple. In this comprehensive guide, you’ll discover the exact steps, pro tips, nutritional breakdown, and variations that make this one of the easiest and most delicious homemade pickle recipes available.
Ingredients List
This refrigerator dill pickles recipe fills two 1-quart (32 oz) mason jars and uses simple, accessible ingredients that deliver maximum flavor with minimal effort.
Main Ingredients:
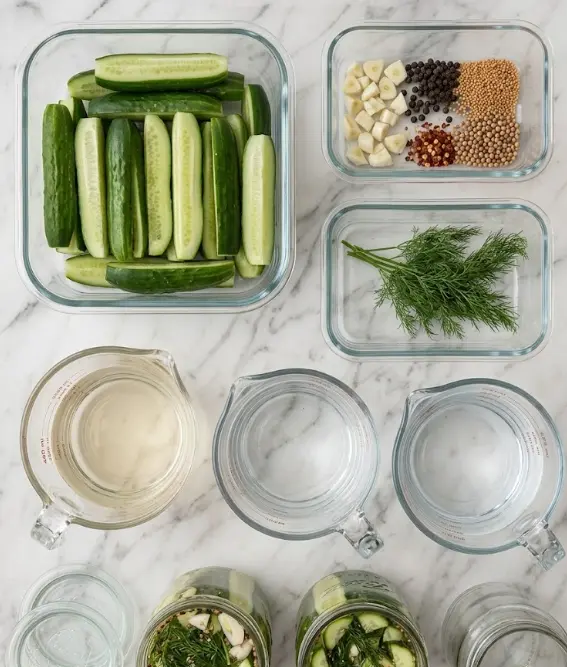
- 907 g (2 lbs) Persian cucumbers, washed and cut into halves or spears
- 6 cloves garlic, roughly chopped (creates bold, savory depth)
- 2 tsp black peppercorns (adds subtle warmth and aromatic bite)
- 2 tsp mustard seeds or coriander seeds (mustard seed gives classic deli-pickle tang)
- 1 tsp red pepper flakes (optional – for a gentle spicy kick)
- 4 sprigs fresh dill (the star herb that delivers signature dill pickle aroma)
For the Brine:
- 480 ml (2 cups) rice vinegar or distilled white vinegar (5% acidity)
- 625 ml (2½ cups) water
- 30 g (about 2 Tbsp) kosher salt (or pickling salt – never use iodized table salt)
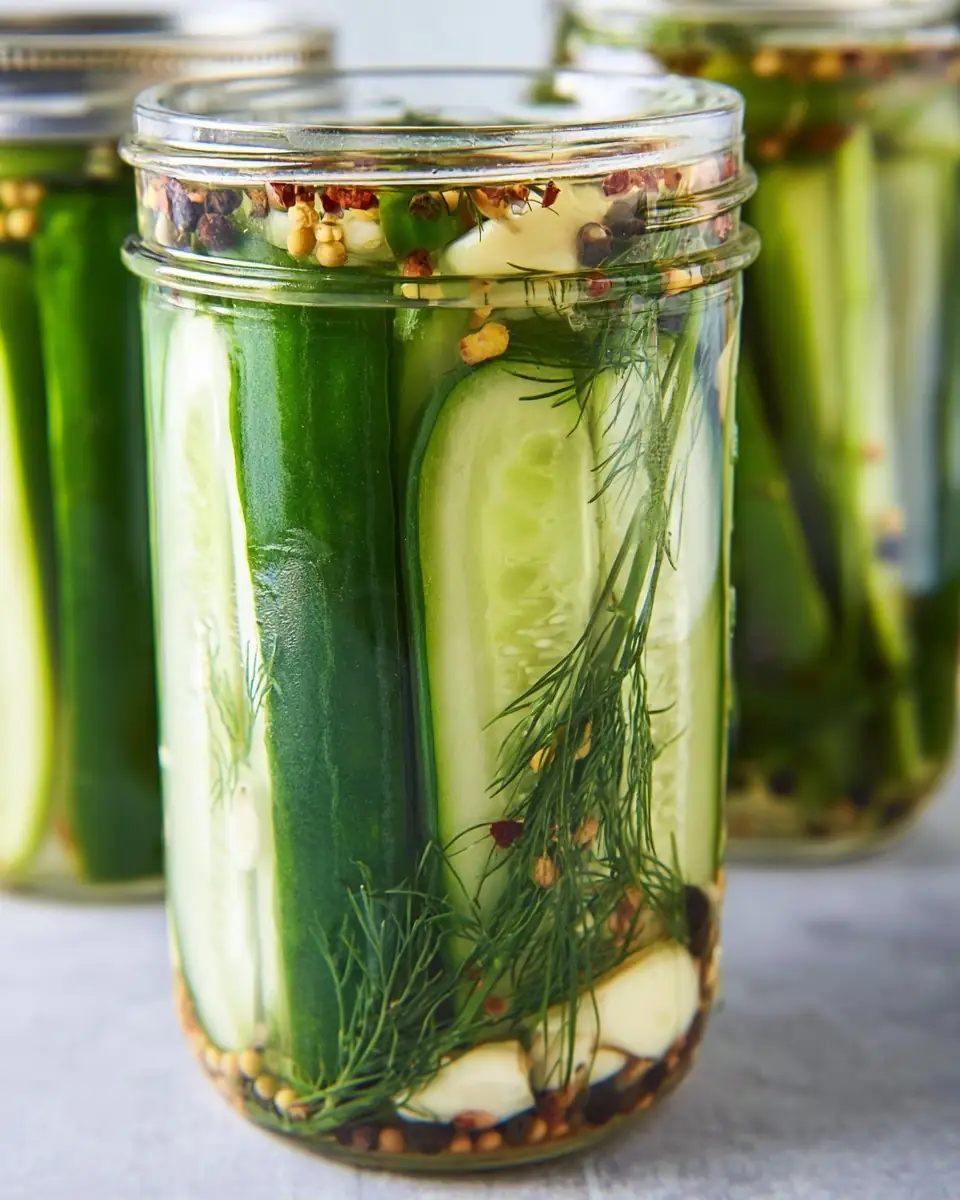
Sensory Highlights: The Persian cucumbers stay remarkably crisp thanks to their thin skins and low seed count. Fresh dill brings a bright, herbaceous fragrance, while the warm brine quickly infuses the garlic and spices, creating an irresistible pickle that’s both tangy and subtly sweet.
Smart Substitutions:
- Swap rice vinegar for apple cider vinegar for a fruitier, slightly sweeter profile.
- Use coriander seeds instead of mustard for a brighter, citrus-like note.
- Add 1 tsp whole allspice or celery seeds for unique variations.
- For sugar-free or lower-sodium versions, reduce salt by 25% or add a touch of monk fruit sweetener.
Always choose the freshest cucumbers possible. Persian or Kirby varieties work best for crisp refrigerator dill pickles.
Timing
Prep Time: 8 minutes
Cook Time: 2 minutes (just long enough to boil the brine)
Total Active Time: 10 minutes
Pickling Time: 24 hours for slices, 4–5 days for spears (flavor peaks around day 5)
This refrigerator dill pickles recipe is dramatically faster than traditional canned versions — roughly 85% less active time than water-bath methods that require 1+ hours plus overnight cooling. The quick brine technique allows the flavors to penetrate rapidly while the refrigeration process locks in maximum crunch. Once prepared, you can start snacking after just 24–48 hours, making this perfect for last-minute entertaining or weekly meal prep.
Step-by-Step Instructions
Washing and Cutting the Cucumbers
Begin by washing the 907 g of Persian cucumbers under cool running water. Place them on a cutting board and slice into halves lengthwise or cut into spears, depending on your preference. There’s no need to trim the ends unless there’s a long stem.
Pro Tip: Cutting into spears gives a more traditional pickle shape perfect for sandwiches, while halves are easier to snack on straight from the jar. For even faster pickling, slice them into thin coins — these will be ready in just 24 hours.
Packing the Jars With Flavor
Divide the cut cucumbers evenly between two clean 1-quart mason jars. Then evenly distribute the roughly chopped garlic, black peppercorns, mustard (or coriander) seeds, red pepper flakes (if using), and fresh dill sprigs between the jars.
Pack the cucumbers fairly tightly but avoid crushing them. The aromatics at the bottom and interspersed throughout ensure every bite is infused with garlic-dill goodness. This step takes only 2–3 minutes but sets the foundation for exceptional flavor in your quick refrigerator dill pickles.
Preparing the Quick Pickling Brine
In a small saucepan, combine the 480 ml vinegar, 625 ml water, and 30 g kosher salt. Heat over high heat until it reaches a full rolling boil — this takes about 2 minutes.
Remove from heat and let the brine cool for 3–4 minutes. This brief cooling prevents the hot liquid from softening the cucumbers too much while still allowing quick flavor absorption. The brine should be hot but not scalding.
Pouring, Sealing, and Refrigerating
Carefully pour the hot brine into both jars, completely covering the cucumbers. Leave about ½ inch of headspace at the top. Use a chopstick or bubble remover to release any trapped air pockets.
Wipe the jar rims clean, seal with airtight lids, and let the jars cool to room temperature on the counter (about 30–45 minutes). Once cooled, transfer to the refrigerator.
Actionable Tip: Gently shake the jars once they’re in the fridge after the first 12 hours to redistribute the spices. Your refrigerator dill pickles will be tasty after 48 hours but reach peak flavor at 4–5 days.
Nutritional Information
These quick refrigerator dill pickles are one of the smartest ways to add flavor and crunch with almost zero calories.
Per serving (approximately 1 oz or 2–3 spears):
- Calories: 12–18
- Total Carbohydrates: 2–3 g
- Protein: 0.5 g
- Fat: 0 g
- Sodium: 240–280 mg (10–12% DV)
- Fiber: 0.4 g
- Sugar: <1 g
Data Insights: Cucumbers are 96% water and rich in vitamin K and antioxidants. The vinegar base may help stabilize blood sugar, while garlic and dill offer anti-inflammatory compounds. Compared to many commercial dill pickles, this homemade version contains 25–40% less sodium and zero artificial preservatives or yellow dye. One batch yields roughly 30–35 servings, making it extremely cost-effective at under $0.15 per serving.
Healthier Alternatives for the Recipe
Make these refrigerator dill pickles work for almost any dietary preference with simple swaps:
- Low-Sodium Version: Reduce kosher salt to 20–22 g. Add extra dill and a splash of lemon juice to maintain brightness.
- No Added Sugar / Keto-Friendly: This recipe is already sugar-free. For extra sweetness without carbs, add a few drops of liquid stevia to the brine.
- Anti-Inflammatory Boost: Add ½ tsp turmeric powder and a few black peppercorns extra — the combination pairs beautifully with garlic.
- Fermented Twist: Replace half the vinegar with filtered water and add 1–2 Tbsp of brine from a previous successful ferment. Keep strictly refrigerated and consume within 3–4 weeks.
- Spice Variations: Create a “mild” version for kids by omitting red pepper flakes, or go bold with sliced jalapeños for spicy pickles.
Because these are refrigerator pickles rather than canned, you have more flexibility to experiment with flavors and fermentation techniques.
Serving Suggestions
These quick refrigerator dill pickles are incredibly versatile. Enjoy them straight from the jar as a low-calorie snack, layer them on turkey sandwiches, burgers, or Cuban sandwiches for bright acidity, or chop them into egg salad and tuna salad for instant elevation.
Create a beautiful grazing board with cheese, charcuterie, olives, and these crisp pickles. Add sliced pickles to grain bowls or dice them into a fresh cucumber salad for double the crunch.
Personalized Tip: The leftover garlic and brine make an excellent base for quick pickled onions or salad dressings. Try serving these alongside our grilled cheese recipe for the ultimate comfort food pairing. They also make thoughtful homemade gifts — simply tie a ribbon around the jar with serving suggestions.

Common Mistakes to Avoid
Even simple recipes have pitfalls. Here’s what to watch for when making refrigerator dill pickles:
- Using Table Salt Instead of Kosher/Pickling Salt: Iodized salt can darken pickles and create off flavors.
- Overpacking the Jars: Too many cucumbers without enough brine leads to uneven pickling and floating pieces.
- Pouring Boiling Brine Directly on Cucumbers: This can soften texture. Allowing the brine to cool for a few minutes preserves maximum crunch.
- Not Waiting Long Enough: While technically edible after 24 hours, waiting 4–5 days dramatically improves flavor integration.
- Using Non-Refrigerator Jars: Always use proper mason jars with tight-fitting lids to maintain freshness and prevent contamination.
Following the precise measurements and steps above virtually guarantees success every time.
Storing Tips for the Recipe
Unlike canned pickles, these quick refrigerator dill pickles must stay refrigerated at all times. They will maintain excellent quality for up to 2–3 months in the fridge, though texture is best within the first 6–8 weeks.
Keep jars upright and ensure cucumbers remain submerged in brine. If the brine becomes cloudy or develops off odors, discard the batch.
Prep-Ahead Strategy: You can prepare the brine up to 3 days in advance and store it in the refrigerator. Cucumbers can be washed and cut 24 hours ahead if stored in ice water. Always label jars with the date made for easy tracking.
Conclusion
This quick refrigerator dill pickles recipe proves you can create crisp, garlicky, restaurant-quality pickles in only 10 minutes of hands-on time. No canning equipment or long processing is required — just fresh ingredients, a simple brine, and a little patience while they develop in the fridge.
Ready to make your own batch of refrigerator dill pickles? Try the recipe this week and tell us how they turned out in the comments below. Share your favorite serving ideas, leave a review, and subscribe to our blog for more quick preserving recipes, easy condiments, and weeknight kitchen wins delivered straight to your inbox.
FAQs
How long do refrigerator dill pickles last?
When kept continuously refrigerated, these pickles stay fresh and crunchy for up to 2–3 months. Always keep cucumbers submerged in brine.
Can I turn this refrigerator dill pickles recipe into canned pickles?
This specific recipe is formulated for refrigeration. Canning requires different brine ratios and proper processing times for food safety. Use our separate water-bath canning dill pickles recipe instead.
What’s the difference between refrigerator pickles and canned pickles?
Refrigerator pickles are quicker, maintain brighter color and crunch, but must stay cold and have shorter shelf life. Canned pickles are shelf-stable for 12–18 months but require more equipment and time.
Why are my pickles soft?
The most common causes are using overly hot brine, old cucumbers, or not using the correct type of salt. Persian cucumbers and the brief brine cooling step help prevent softness.
Can I use regular cucumbers instead of Persian?
Yes, but Persian or Kirby pickling cucumbers give the best crisp texture. English cucumbers work in a pinch but may become softer faster.
Is it normal for the brine to get cloudy?
Slight cloudiness is normal as spices and garlic release compounds. However, if it becomes very cloudy with off smells or sliminess, discard the batch.
How soon can I eat these quick refrigerator dill pickles?
Thin slices are usually ready after 24 hours. Spears taste best after 4–5 days, though many people enjoy them starting on day 2.
Can I reduce the salt in this recipe?
You can reduce salt by up to 25% while maintaining safety for refrigerator pickles (unlike canned versions). Flavor and preservation time will be slightly affected.
Dill Pickles Recipe
Ingredients
Equipment
Method
- Wash the Persian cucumbers and place them on a cutting board. Use a sharp knife to slice the cucumbers into halves or spears. There’s no need to cut the ends of the cucumbers off unless there is a long stem poking out.
- Divide the sliced cucumbers between two 1-quart mason jars. Similarly, divide the chopped garlic, mustard seed (or coriander seeds), red pepper flakes, and fresh dill sprigs between the two jars.
- Combine vinegar, water, and sea salt in a small saucepan and heat over high heat until it comes to a full boil. Remove the pickling liquid from the heat and allow it to cool for a few minutes.
- Pour the hot brine into the two large jars, filling them all the way up. Seal the jars using the airtight lids and allow the jars of pickles to cool to room temperature before refrigerating them.
- Pickle spears will taste best 4 to 5 days into the pickling process, but you can start eating them on day 2 if you’d like. For thin cucumber slices, the pickles will be ready after 24 hours.