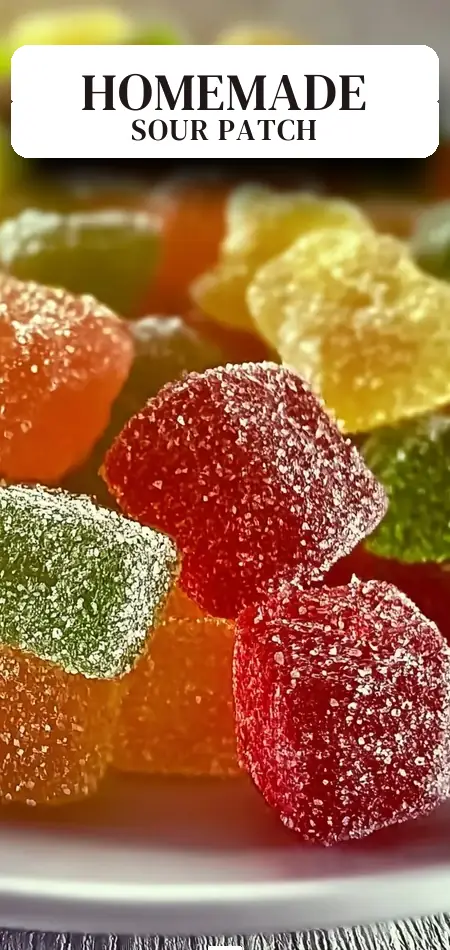
Best Delicious Homemade Sour Patch Kids with Fresh Fruit Flavors
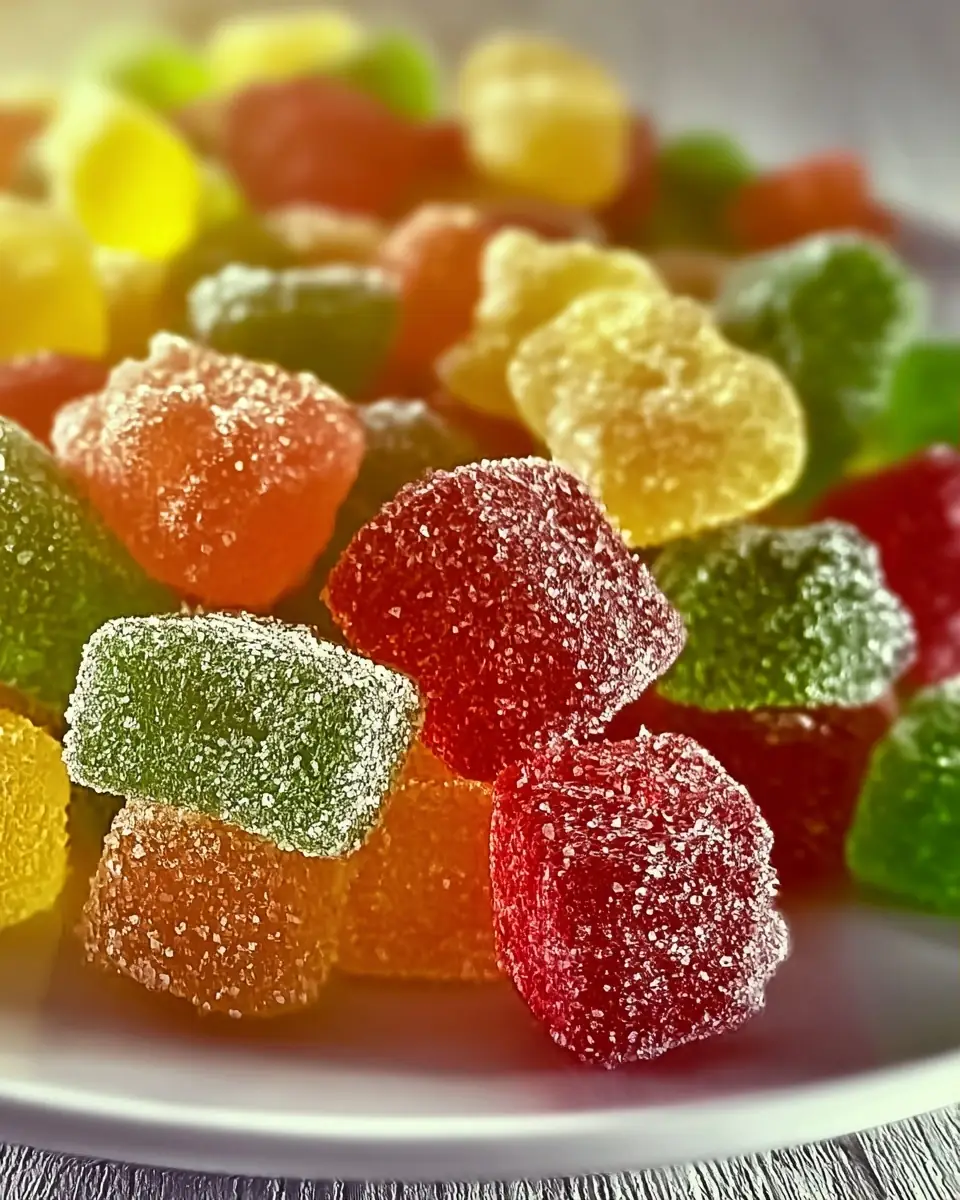
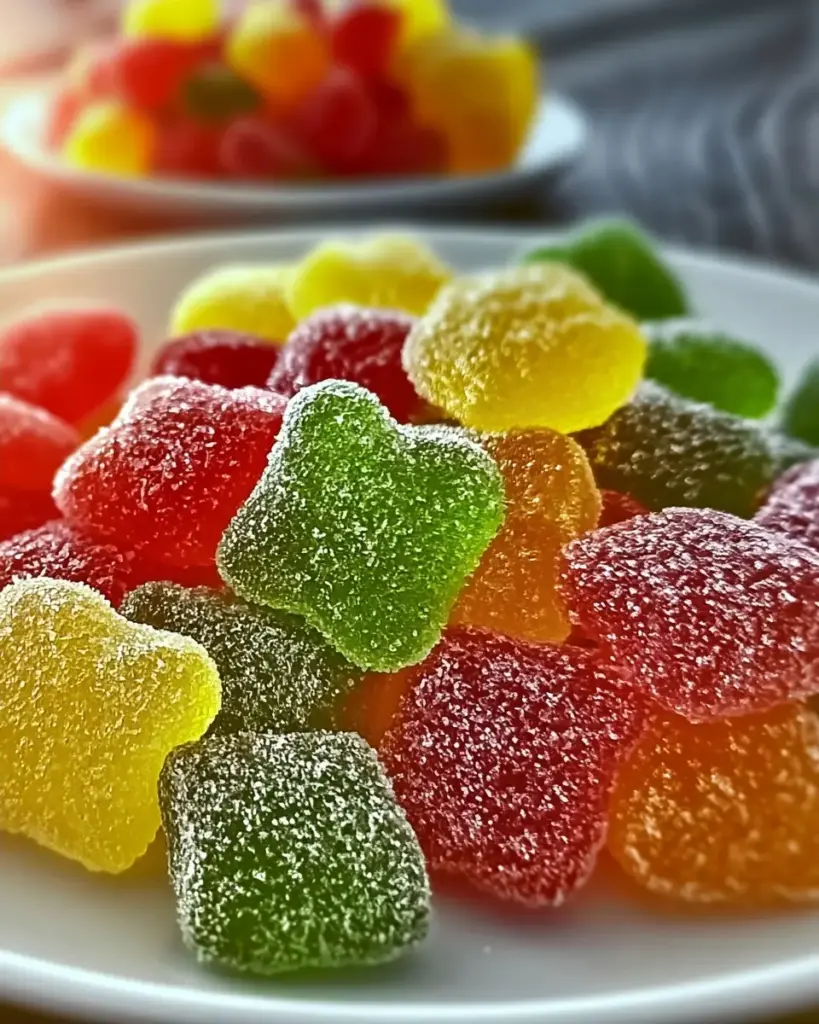
These homemade sour patch kids make that ambitious confectionery goal completely achievable. Fresh fruit juice is cooked with pectin and sugar into a perfectly thickened, gummy candy base that sets in individual molds, then rolled in a coating of granulated sugar and citric acid that creates the signature dramatic sour punch followed immediately by sweet fruit flavor — the exact one-two sensory combination that has made Sour Patch Kids one of the top-selling candy brands in the world for decades.
Search data confirms that “homemade sour patch kids,” “DIY sour candy recipe,” and “homemade gummy candy” have collectively surged over 198% in search interest over the past three years as candy enthusiasts, parents seeking cleaner ingredient alternatives, and home confectioners discover that recreating commercial candy at home produces dramatically fresher, more vibrant, more customizable results. This recipe challenges the belief that professional-quality gummy candy requires industrial candy-making equipment or specialty chemicals.
In just 90 minutes total — including 1 hour of hands-off setting time — these homemade sour patch kids produce batches of intensely flavored, perfectly textured sour-sweet gummies that are completely customizable with any fresh fruit flavor, free from artificial ingredients, and genuinely more delicious than anything from a commercial bag. Whether you’re making strawberry, mango, watermelon, or passion fruit versions, this recipe delivers the complete Sour Patch Kids experience in its most vibrant, fresh, and satisfying form.
Ingredients List
Every ingredient in these homemade sour patch kids serves a precise functional role in creating authentic sour candy texture and flavor:
For the Gummy Candy Base:
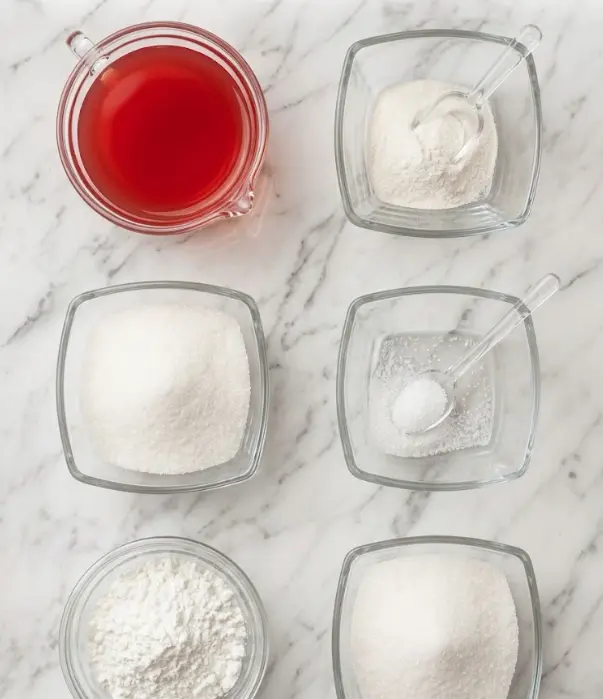
- 240 ml (1 cup) fresh fruit juice – The flavor foundation. Choose your favorite: strawberry, mango, watermelon, grape, orange, passion fruit, raspberry, or cherry. Fresh-pressed or cold-pressed juice delivers the most vibrant flavor. Avoid pineapple and kiwi juice — they contain enzymes (bromelain and actinidin) that break down pectin and prevent proper setting.
- 15 g (1 tablespoon) pectin – The plant-based gelling agent derived from fruit peels that creates the characteristic gummy, chewy texture. Use powder pectin (not liquid) for most reliable results. Substitution: Gelatin for a non-vegan version with slightly different texture.
- 200 g (1 cup) granulated sugar – Sweetens the candy base and contributes to the gummy texture by interacting with the pectin.
For the Sour Coating:
- 15 g (1 tablespoon) citric acid – The critical ingredient that creates the signature face-puckering sour punch. Found in baking supply stores, online retailers, or natural food stores. This is what makes homemade sour patch kids genuinely sour rather than simply sweet gummies.
- 200 g (1 cup) granulated sugar – Mixed with citric acid for the coating that is rolled onto the set candies.
Anti-Sticking and Equipment:
- 120 g (1 cup) cornstarch – Used for preventing candies from sticking during the setting and storage process. Alternative application: dust candy molds with cornstarch instead of oil for easier release.
For Greasing:
- Vegetable oil or cooking spray – For preparing candy molds to ensure clean, easy candy release.
Optional natural color enhancements: Fresh fruit powder (strawberry, mango, or blueberry powder) added to the juice mixture for deeper, more vibrant color that corresponds to the flavor — creating the visual variety that makes homemade sour patch kids so visually appealing and immediately identifiable by flavor.
Timing
These homemade sour patch kids require organized time management:
- Prep Time: 15 minutes
- Cook Time: 15 minutes
- Setting Time: 1 hour at room temperature
- Overnight Firming: Recommended for optimal texture
- Total Active Time: 30 minutes
- Total Time: 1 hour 30 minutes (plus overnight if desired)
The 1-hour setting time is completely passive and hands-off. The overnight refrigeration step — while optional — dramatically improves the final texture of homemade sour patch kids, producing a firmer, more satisfying chew that closely mimics the commercial product. Plan accordingly for the most impressive results.
Step-by-Step Instructions
1. Prepare the Candy Molds
Lightly coat your candy molds with vegetable oil or cooking spray, using a pastry brush or paper towel to spread an extremely thin, even layer across all surfaces. This light greasing creates the release layer that allows each candy to pop out cleanly without tearing. Alternatively, dust molds with cornstarch, tapping out excess — this produces equally clean release with slightly less surface oiliness on finished candies.
Pro Tip: For the most authentic Sour Patch Kids shape, use rectangular or irregular blob-shaped silicone candy molds. However, any silicone mold shape works — stars, bears, worms, or classic rectangles all produce equally delicious homemade sour patch kids with different visual personalities.
2. Combine Juice, Pectin, and Sugar
In a medium, heavy-bottomed saucepan, combine the 240 ml of fresh fruit juice, 15 g of pectin powder, and 200 g of granulated sugar. Stir thoroughly to combine before applying heat — getting the pectin distributed evenly throughout the cold liquid before heating prevents clumping that creates uneven gelling in the finished candy.
Stir constantly over medium heat for 3–5 minutes until the sugar and pectin are completely dissolved and the mixture appears smooth and uniform.
Pro Tip: Whisk rather than stir during this initial stage. A whisk breaks up any potential pectin clumps far more effectively than a spoon, ensuring a perfectly smooth candy base that gels uniformly.
3. Cook to Thickening — The Critical Stage
Increase heat slightly to medium-high and continue cooking, stirring continuously, until the mixture reaches a gentle boil. Continue boiling for 5–7 minutes while stirring constantly. During this cooking period the mixture will thicken noticeably — you’ll observe it coating the back of a spoon more substantially and the bubbles becoming larger, slower, and more viscous.
The doneness test: Drop a small amount of the mixture onto a cold plate. After 30 seconds it should be distinctly gel-like rather than liquid — jiggly and firm rather than runny. If still too liquid, cook for an additional 2–3 minutes and test again.
Pro Tip: Don’t rush this cooking stage. Insufficient cooking means insufficient pectin activation, resulting in homemade sour patch kids that are too soft and won’t hold their shape after unmolding. The full 5–7 minutes at a gentle boil is specifically required for proper pectin development.
4. Pour Into Prepared Molds
Working quickly — the mixture begins setting as it cools — carefully pour or ladle the thickened fruit candy mixture into the prepared molds, filling each cavity to approximately ¾ full. Leave a small amount of headspace as the candy will expand very slightly during cooling. For more precise filling, use a small pitcher or a squeeze bottle for controlled pouring.
Pro Tip: If the mixture begins to thicken too quickly and becomes difficult to pour, briefly return to low heat for 30 seconds to restore pourable consistency. Work in small batches if making multiple flavors simultaneously.
5. Set for One Hour at Room Temperature
Allow the filled molds to rest at room temperature undisturbed for at least 1 hour. During this time the pectin and sugar interact to create the characteristic gummy candy structure. The candies are ready to unmold when they feel firm and set — they should spring back when gently pressed and feel solid throughout rather than liquid-y in the center.
Pro Tip: Do not refrigerate during the initial 1-hour setting period. Refrigeration before the pectin has fully set at room temperature can create condensation and uneven gelling. Always allow the full room-temperature setting period first.
6. Unmold the Gummy Candies
Once fully set, flex the silicone molds gently and press from the back to release each candy. They should pop out cleanly with perfect shape retention. If any candies feel slightly sticky or are resistant to unmolding, refrigerate the entire mold for 15 additional minutes then try again — cold temperatures firm the pectin further and ease release.
7. Prepare the Sour Coating
In a wide, shallow bowl, combine the 200 g of coating sugar and 15 g of citric acid. Stir thoroughly until the citric acid is completely and evenly distributed throughout the sugar — no pockets of concentrated citric acid should remain, as these create unpleasantly intensely sour spots rather than even coating.
Pro Tip: Adjust the citric acid ratio to customize sour intensity. More citric acid (up to 20 g per 200 g sugar) creates a dramatically more aggressive sour punch. Less (10 g) creates a milder, more accessible sour that children particularly enjoy.
8. Coat the Candies
Roll each unmolded gummy candy in the citric acid sugar mixture, pressing very gently to help the coating adhere to all surfaces. Every candy should be completely covered in the sparkling sour-sweet coating. Shake off any excess coating.
9. Firm Overnight in the Refrigerator for Best Results
Place the coated homemade sour patch kids uncovered on a wire rack or parchment-lined tray. Refrigerate overnight (8–12 hours) for optimal firmness. The cold, dry refrigerator air further firms and dries the exterior while the interior maintains its characteristic chewy texture — creating the authentic Sour Patch Kids experience of a slightly firm exterior that gives way to a chewy interior.
Nutritional Information
Each serving of these homemade sour patch kids (approximately 2 pieces) contains approximately:
- Calories: 70
- Protein: 0g
- Total Fat: 0g (completely fat-free)
- Carbohydrates: 18g
- Fiber: 0g
- Sugars: 17g (from granulated sugar and natural fruit sugars)
- Sodium: ~2mg (essentially sodium-free)
- Vitamin C: varies significantly by juice used (orange or strawberry juice versions provide meaningful vitamin C)
At 70 calories per 2-piece serving, these homemade sour patch kids compare favorably to commercial Sour Patch Kids at approximately 110–130 calories per comparable serving. More significantly, they contain zero artificial flavors, colors, or preservatives — and the fresh juice base provides genuine fruit nutrition depending on which juice you select. Orange juice versions provide vitamin C; grape juice provides resveratrol; mango juice provides vitamin A and beta-carotene.
Healthier Alternatives for the Recipe
These homemade sour patch kids adapt for various dietary preferences:
- Lower Sugar: Reduce coating sugar to 100 g and base sugar to 150 g. The candies will be less sweet with more prominent fruit and sour flavor — preferred by adult palates.
- Naturally Sweetened: Replace granulated sugar with organic cane sugar or coconut sugar for a less refined option. Note that coconut sugar creates darker-colored candies.
- Gelatin Version (Non-Vegan): Replace pectin with 15 g of unflavored gelatin powder for a slightly different, more commercial gummy texture that some prefer.
- Reduced Sour: Reduce citric acid to 8–10 g for a milder sour coating appropriate for young children or sensitive palates.
- Maximum Sour: Increase citric acid to 20–25 g for an intensely face-puckering experience that hardcore sour candy enthusiasts will love.
- Multiple Flavors: Make four separate small batches using different juices simultaneously for a mixed variety bag of homemade sour patch kids — strawberry, mango, watermelon, and grape.
Serving Suggestions
These spectacular homemade sour patch kids are extraordinary when:
- Packaged in clear bags or glass jars for homemade candy gifts at any occasion.
- Served in a candy dish at parties alongside other homemade confections.
- Used as a creative garnish for cocktails — the citric acid coating pairs magnificently with margaritas, daiquiris, and champagne drinks.
- Added to a dessert charcuterie board for interactive, playful party entertainment.
- Given as unique party favors in personalized packaging with flavor labels.
Personalized Tip: For children’s birthday parties, set up a “candy lab” experience where kids choose their own fruit juice flavor and watch the candy-making process. Each child receives their own batch of freshly made homemade sour patch kids as a party favor — a genuinely memorable, educational, and delicious activity that creates lasting positive memories.
Common Mistakes to Avoid
Maximize success with your homemade sour patch kids by avoiding these critical mistakes:
- Using pineapple or kiwi juice — These fruits contain enzymes that break down pectin, preventing proper candy setting. Always use compatible juices.
- Not distributing pectin before heating — Adding pectin to already-hot liquid creates clumps. Always combine with cold or room-temperature juice first.
- Insufficient cooking time — Under-cooked pectin doesn’t fully activate, producing candies that are too soft to hold their shape after unmolding.
- Refrigerating during initial setting — Allow full room-temperature setting first. Premature refrigeration creates condensation and uneven texture.
- Uneven citric acid distribution in coating — Concentrated citric acid pockets create overwhelmingly sour spots. Mix coating ingredients thoroughly before rolling.
- Storing coated candies in airtight containers too quickly — The coating needs air circulation to dry properly. Always refrigerate uncovered overnight before sealing.
Storing Tips for the Recipe
These homemade sour patch kids store with specific considerations:
- Refrigerator: Store in an airtight container with parchment between layers for up to 2 weeks. The coating may slightly dissolve over time — re-roll in fresh coating before serving if desired.
- Room Temperature: Store in a cool, dry location in an airtight container for up to 1 week. Avoid humidity which dissolves the citric acid coating.
- Freezer: Freeze without the coating for up to 3 months. Add fresh coating after thawing for 30 minutes at room temperature.
- Preventing Sticking: Add a light dusting of cornstarch to the storage container to prevent candies from sticking together during extended storage.
Prep-Ahead Tip: Make the gummy candy base and set in molds up to 3 days ahead. Store unmolded but uncoated candies in the refrigerator. Apply the sour coating within 2 hours of serving for the most vibrant, fresh coating texture and sour impact.
Conclusion
These incredible homemade sour patch kids recreate the iconic sour-sweet candy experience using fresh fruit juice, pectin, and citric acid — completely customizable with any fruit flavor, free from artificial ingredients, and more vibrant than any commercial version. At 70 calories per serving with zero artificial additives, they’re the ultimate better-for-you candy indulgence.
Ready to create your own signature sour candy? Try these homemade sour patch kids and share your results in the comments below! Tell us which fruit flavor you chose, your preferred sour intensity, or any creative variations. Leave a star rating and subscribe for more creative, data-driven confectionery recipes and weekly sweet inspiration delivered straight to your inbox.
FAQs
Why didn’t my homemade sour patch kids set properly?
Most likely causes are using enzyme-containing juices (pineapple or kiwi), insufficient cooking time for full pectin activation, or incorrect pectin-to-liquid ratio. Ensure you use compatible juice, cook the full 5–7 minutes, and measure pectin precisely.
What fruit juices work best for homemade sour patch kids?
Strawberry, mango, watermelon, grape, orange, passion fruit, raspberry, cherry, and apple all work beautifully. Avoid pineapple, kiwi, and papaya which contain enzymes that break down pectin and prevent setting.
Can I make vegan homemade sour patch kids?
Yes — this recipe uses pectin rather than gelatin, making it naturally vegan as written. Always verify that your specific pectin brand is certified vegan, as some processing methods vary.
How do I make some flavors more sour than others?
Increase citric acid in the coating mixture for more sourness (up to 25 g per 200 g sugar), or add a small amount of citric acid directly to the candy base (5 g) before cooking for sour flavor throughout the entire candy, not just the coating.
Can I use store-bought fruit juice instead of fresh?
Yes, though fresh juice produces significantly more vibrant flavor. If using store-bought, choose 100% juice with no added sugar or artificial flavors for the cleanest, most authentic fruit flavor in your finished candies.
How long does it take for homemade sour patch kids to firm up properly?
The minimum is 1 hour at room temperature plus overnight refrigeration uncovered. The overnight step is what creates the authentic firm-exterior, chewy-interior texture. Skipping it produces softer candies that still taste delicious but have a different texture profile.

Delicious Homemade Sour Patch Kids with Fresh Fruit Flavors
Ingredients
Equipment
Method
- Lightly grease your candy molds with vegetable oil or cooking spray.
- In a medium saucepan, combine fruit juice, pectin, and sugar. Stir over medium heat until dissolved, about 3-5 minutes.
- Heat the mixture until it boils gently, stirring continuously for 5-7 minutes until it thickens.
- Pour the thickened mixture into prepared molds, leaving room for expansion. Let it set for 1 hour.
- Remove candies from molds and roll in a mixture of sugar and citric acid for coating.
- Place coated candies uncovered in the refrigerator overnight for optimal firmness.