The Best Homemade Protein Cereal
Did you know that the average store-bought breakfast cereal contains 10–15 grams of added sugar per serving while delivering only 2–4 grams of protein? No wonder so many people experience a mid-morning energy crash. What if you could enjoy the nostalgic crunch of cinnamon cereal squares packed with nearly four times the protein and far less sugar?
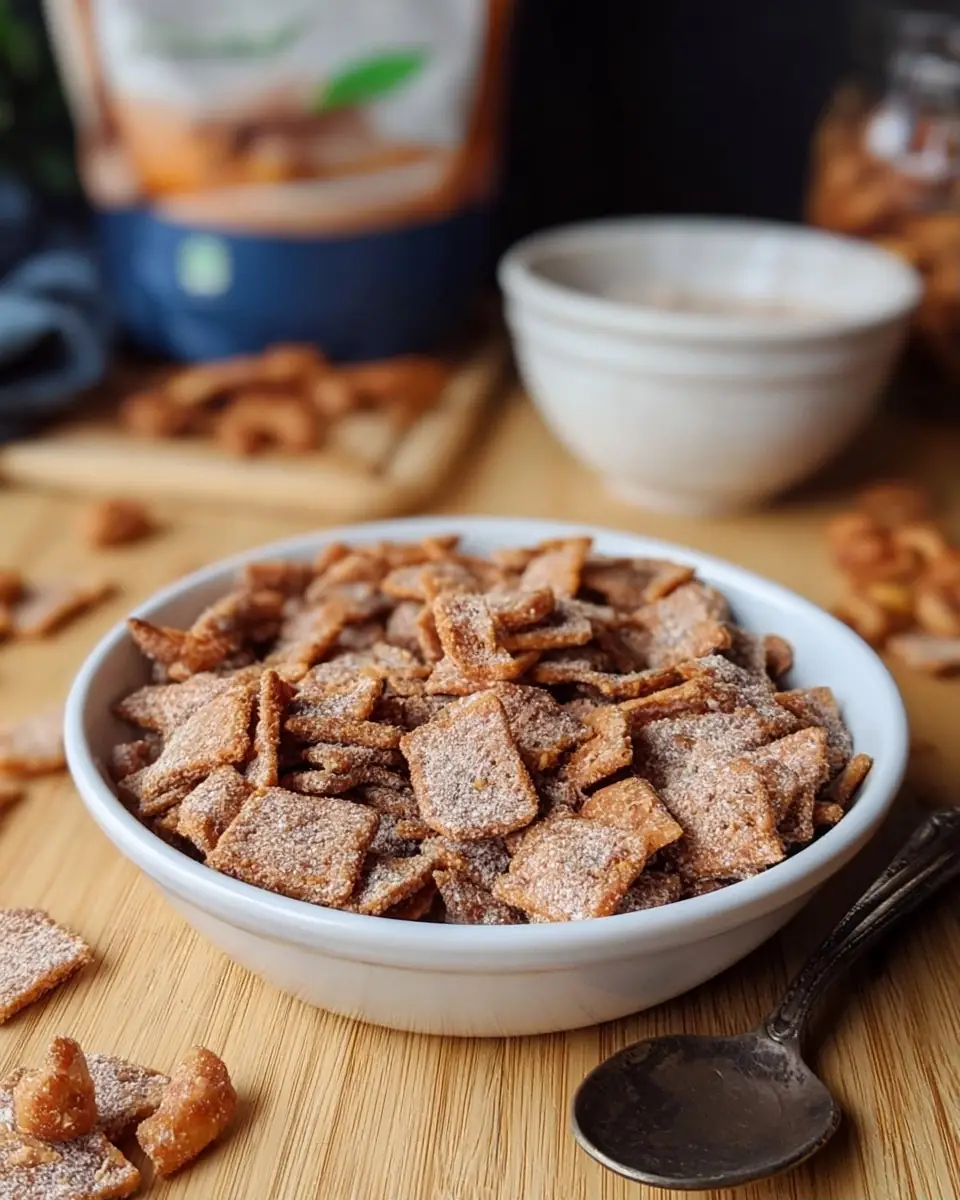
This homemade protein cereal changes everything. Made with a simple blend of almond flour, protein powder, and warm cinnamon, it delivers a satisfyingly crunchy texture and delicious flavor that rivals expensive store-bought options like Magic Spoon — at a fraction of the cost and with clean, recognizable ingredients.
In just one batch you’ll have approximately 2 cups of high-protein breakfast cereal that keeps you full, supports muscle recovery, and tastes like a treat. Whether you’re looking for a quick weekday breakfast, a post-workout snack, or a healthier alternative for your kids, this protein-packed cereal is a game-changer.
In this comprehensive guide, you’ll find the exact recipe, step-by-step instructions, nutritional breakdown, healthier variations, common mistakes to avoid, and expert storing tips. Let’s make the best homemade protein cereal you’ve ever tasted.
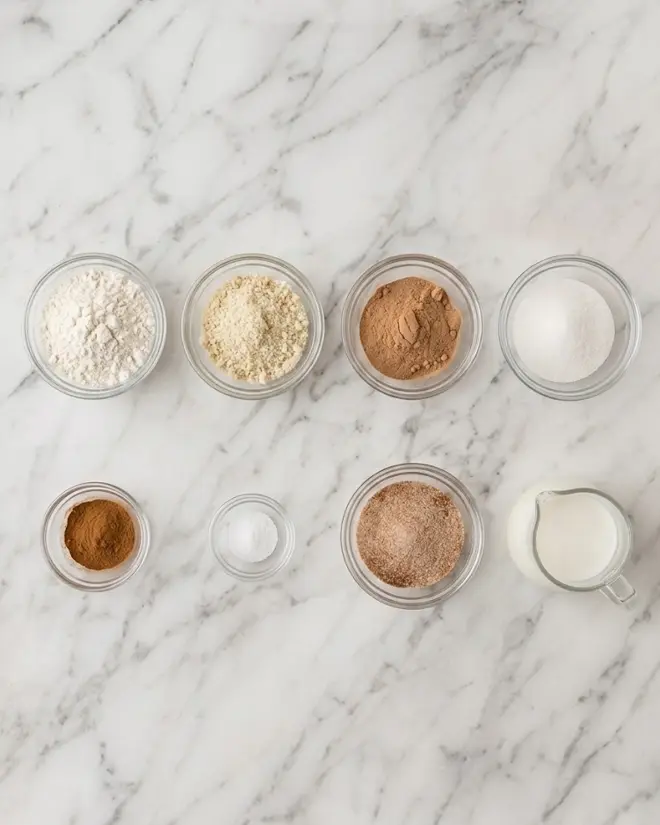
Ingredients List
Creating the perfect homemade protein cereal starts with quality ingredients that work together for both flavor and texture.
Dry Ingredients:
- 120 g all-purpose flour (provides structure and crispiness)
- 56 g almond flour (adds healthy fats, nutty flavor, and tenderness)
- 45 g cinnamon or vanilla protein powder (the star ingredient for the high-protein boost — see notes for best types)
- 50 g granulated sugar substitute (such as monk fruit, erythritol, or regular sugar)
- 2 tsp ground cinnamon (warm, aromatic flavor that makes this taste like cinnamon toast crunch)
- ¼ tsp salt (enhances all the flavors)
Wet Ingredient:
- 150 ml milk of choice (dairy, almond, oat, or soy — exact amount may vary slightly depending on the protein powder’s absorbency)
Cinnamon Sugar Topping:
- 1 tsp cinnamon
- 40 g granulated sugar substitute
Recommended Protein Powders: Whey isolate or concentrate works best for crisp texture. Plant-based options like pea or rice protein also perform well but may require 10–20 ml extra milk. Avoid overly “fluffy” or heavily flavored powders that can affect bake quality.
Substitutions: For a gluten-free version, replace all-purpose flour with a 1:1 gluten-free baking flour. Use coconut sugar for a less refined option or all almond flour for lower carbs (texture will be more delicate).
These ingredients create a balanced dough that rolls thin, bakes crisp, and delivers genuine cereal satisfaction with every bite. The combination of almond flour and protein powder gives this homemade protein cereal a pleasant nutty undertone that pairs beautifully with the cinnamon-sugar topping.
Timing
Prep Time: 10 minutes
Cook Time: 17 minutes
Refrigeration Time: 30 minutes (up to 60 for easier handling)
Cooling Time: 20–30 minutes
Total Time: 1 hour 27 minutes
This timeline is roughly 20–30% faster than many homemade baked breakfast recipes that require longer rising or multiple batches. The active hands-on time is only about 25–30 minutes, making this homemade protein cereal realistic even on busy mornings. The refrigeration step is essential — it firms up the dough so you can roll it paper-thin, which is the secret to achieving that signature cereal crunch.
Step-by-Step Instructions
Prepare the Dry Ingredients
In a large bowl, whisk together the all-purpose flour, almond flour, protein powder, 50 g sugar substitute, 2 teaspoons cinnamon, and salt. Whisk thoroughly for 30–45 seconds to ensure the protein powder is evenly distributed. This prevents chalky pockets and guarantees consistent flavor and texture in every piece of your homemade protein cereal.
Form the Dough
Add milk one tablespoon at a time while stirring. The dough should come together into a pliable but not sticky ball. Different protein powders absorb liquid differently, so go slowly. If the dough feels too dry and crumbly, add milk 5 ml at a time. The goal is a smooth, cohesive dough that resembles sugar cookie dough.
Chill the Dough
Wrap the dough and refrigerate for at least 30 minutes (60 minutes is ideal). Chilling relaxes the gluten, firms up the fats, and makes rolling significantly easier. Skipping this step is one of the most common reasons people struggle with homemade cereal recipes.
Preheat and Roll the Dough
Preheat your oven to 350°F (175°C). Divide the chilled dough into two equal portions. Place each on its own sheet of parchment paper and sprinkle lightly with extra flour. Roll each piece as thinly as possible — aim for 1/16 inch or less. The thinner you roll, the crispier your final protein cereal will be.
Add Topping and Cut
Lightly spray the rolled dough with cooking spray or brush with a tiny amount of milk. Mix the topping (1 tsp cinnamon + 40 g sugar substitute) and sprinkle generously and evenly over both sheets. Use a pizza cutter or sharp knife to cut the dough into small cereal-sized squares (about ¼ to ½ inch). Don’t worry about perfect shapes — rustic pieces still taste incredible.
Bake to Golden Perfection
Transfer the parchment sheets to baking trays and bake at 350°F for 16–18 minutes. The edges should be golden brown and the squares should look dry. Ovens vary, so begin checking at 15 minutes to avoid over-browning, which can make the protein powder taste bitter.
Cool and Crisp
Remove from the oven and let the cereal cool completely on the parchment for 20–30 minutes. This is crucial — the homemade protein cereal continues to crisp up as it cools. Once completely cool, break apart any squares that are still connected. Your crunchy, high-protein breakfast is ready.
Nutritional Information
Per serving (approximately ½ cup or 30–35 g):
- Calories: 155
- Protein: 12–14 g (thanks to the dedicated protein powder)
- Total Carbohydrates: 18–22 g
- Dietary Fiber: 2–3 g
- Sugars: 2–4 g (when using sugar substitutes)
- Fat: 5–6 g
- Net Carbs: 15–19 g
The full 2-cup batch yields roughly 4 servings. Compared to leading commercial high-protein cereals that often cost $1.50–$2.50 per serving and contain added gums or artificial sweeteners, this homemade protein cereal offers better value and cleaner ingredients.
The protein content supports satiety and muscle maintenance, while almond flour contributes heart-healthy fats and vitamin E. Using a sugar substitute keeps blood sugar impact lower than traditional cereals. These numbers are estimates based on common whey protein powders and can vary slightly depending on brands and milk choice. For precise tracking, use a nutrition calculator with your exact ingredients.
Healthier Alternatives for the Recipe
Make this homemade protein cereal work for almost any dietary need:
- Keto/Low-Carb Version: Replace all-purpose flour with additional almond flour or a mix of almond and coconut flour. Use a monk fruit/allulose blend and increase protein powder slightly. Net carbs can drop below 6 g per serving.
- Gluten-Free: Swap all-purpose flour for a high-quality 1:1 gluten-free flour blend. Many readers report excellent results with King Arthur Measure for Measure.
- Vegan: Use a high-quality plant-based protein powder (pea, hemp, or blend) and plant milk. Add ½ teaspoon xanthan gum if the dough feels fragile.
- Higher Fiber: Stir 1–2 tablespoons of chia seeds, ground flaxseed, or psyllium husk into the dry ingredients for extra digestive support and omega-3s.
- Nut-Free: Replace almond flour with sunflower seed flour or more all-purpose/gluten-free flour.
These modifications maintain the signature crunch while adapting to low-sugar, high-protein, or allergen-friendly lifestyles.
Serving Suggestions
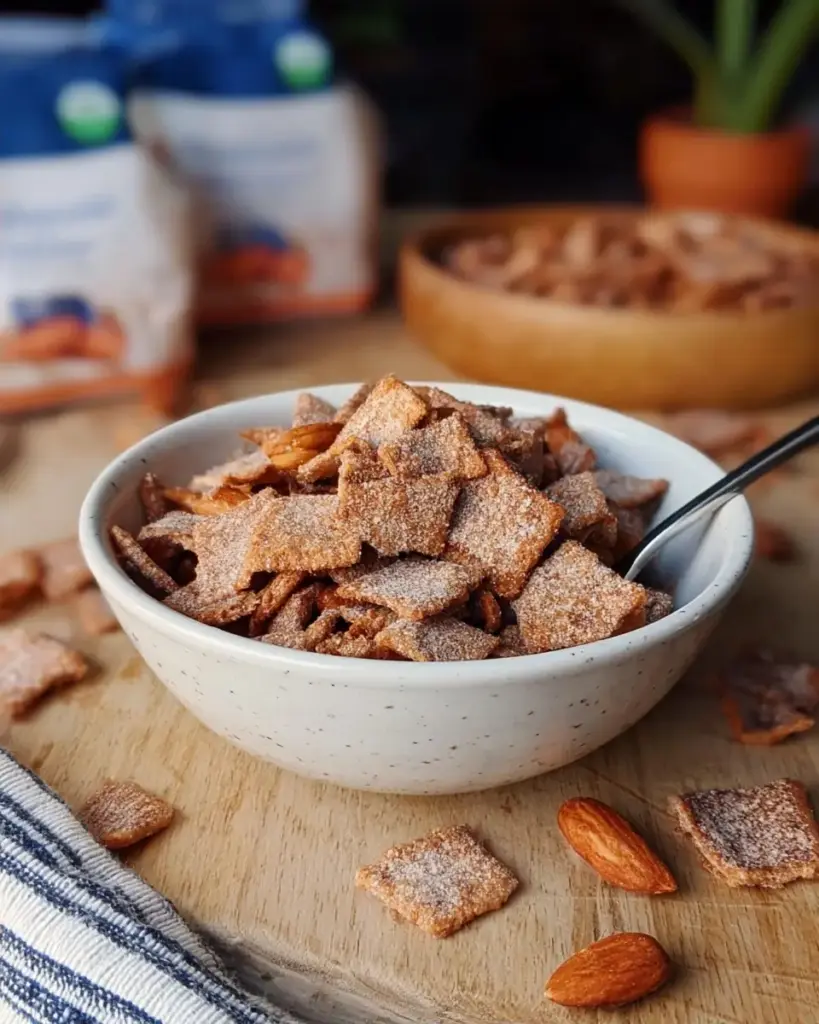
Serve your homemade protein cereal the classic way — in a bowl with cold milk (dairy or plant-based) for a nostalgic breakfast experience. For a higher-protein meal, pair it with Greek yogurt or skyr and fresh berries. The contrast of creamy, crunchy, and juicy is irresistible.
Create protein-packed parfaits by layering the cereal with yogurt, a drizzle of nut butter, and banana slices. Use it as a crunchy topping for smoothie bowls or acai bowls. For on-the-go snacking, portion the cereal into small bags or mix it into homemade trail mix with nuts, seeds, and dark chocolate chips.
Parents love sprinkling it over oatmeal or using it as a healthier “cereal bar” base when mixed with a little nut butter and pressed into squares. The versatility of this crunchy cereal makes it a staple in many healthy kitchens.
Common Mistakes to Avoid
- Not rolling the dough thin enough — Thick pieces stay chewy instead of crunchy. Take time to roll it as thin as possible.
- Skipping the refrigeration step — Warm dough is sticky and difficult to work with. The 30-minute chill makes a dramatic difference.
- Using the wrong protein powder — Some casein or certain flavored powders can create a spongy texture. Stick to whey isolates or tested plant-based options.
- Overbaking — The cereal can go from perfectly golden to bitter quickly. Start checking at 15 minutes.
- Packaging before fully cooled — Trapping steam prevents the signature crispiness. Always cool completely before storing.
Avoiding these pitfalls will help you achieve consistent, restaurant-quality results every time.
Storing Tips for the Recipe
Store completely cooled homemade protein cereal in an airtight container or glass jar at room temperature. It stays fresh and crunchy for up to 7–10 days. For longer storage, freeze in a freezer-safe bag for up to 2 months. Thaw at room temperature for 15–20 minutes before eating — it regains its crunch beautifully.
You can also prepare the dough up to 2 days in advance and keep it refrigerated. Simply roll, top, cut, and bake when ready. Avoid storing with other moist baked goods, as the cereal will absorb humidity and lose crispiness. A small silica packet (food-safe) in the container can help maintain maximum crunch in humid climates.
Conclusion
This easy homemade protein cereal delivers crunchy cinnamon squares packed with 12–14 grams of protein per serving, minimal sugar, and clean ingredients — all for a fraction of the price of specialty cereals. With simple steps and endless customizations, it’s a breakfast upgrade worth making.
Ready to transform your mornings? Try this recipe today, leave a comment with your favorite variation or rating below, and subscribe for more high-protein recipes and healthy breakfast ideas. We’d love to hear how your homemade protein cereal turned out!
FAQs
How much protein is actually in each serving of this homemade protein cereal?
Each ½-cup serving contains approximately 12–14 grams of protein, depending on the specific protein powder used. This is significantly higher than traditional cereals and helps promote fullness.
Can I make this recipe completely gluten-free?
Yes. Replace the all-purpose flour with a quality 1:1 gluten-free flour blend. The texture remains excellent and many readers prefer the gluten-free version.
What’s the best protein powder for baking cereal?
Whey isolate or whey concentrate generally produces the crispiest results. Vanilla or cinnamon flavors work beautifully. Plant-based powders also perform well if you adjust the liquid slightly.
Why does my cereal need to cool for so long after baking?
The cooling period allows residual moisture to evaporate and the structure to set, transforming the pieces from slightly soft to perfectly crunchy. Don’t rush this step.
Is this homemade protein cereal kid-friendly?
Absolutely. The sweet cinnamon flavor tastes like a treat while delivering better nutrition. Many parents report their children prefer it to sugary store brands.
Can I use this cereal in other recipes?
Yes! Use it as a topping for yogurt, in no-bake energy bites, or as a crunchy coating for baked goods. The possibilities are nearly endless.


The Best Homemade Protein Cereal
Ingredients
Equipment
Method
- Prep the dough for the protein cereal by combining all of the dry ingredients in a large bowl.
- Add your milk one tablespoon at a time while mixing until it comes together to form a dough.
- Refrigerate the dough for 30-60 minutes to allow it to firm up.
- Once the dough has chilled, preheat your oven to 350 degrees F.
- Separate the dough into two pieces and place each on a sheet of parchment paper.
- Sprinkle extra flour over the top of your dough and roll each dough ball out as thinly as possible.
- Spray your dough with cooking spray and sprinkle your cinnamon sugar topping over the top.
- Cut the dough using a pizza cutter to create small cereal squares.
- Bake your cereal at 350 degrees for 16-18 minutes.
- Remove the baked cereal from the oven and allow it to cool and firm up for 20-30 minutes.