Do you also miss those sour candies from childhood?
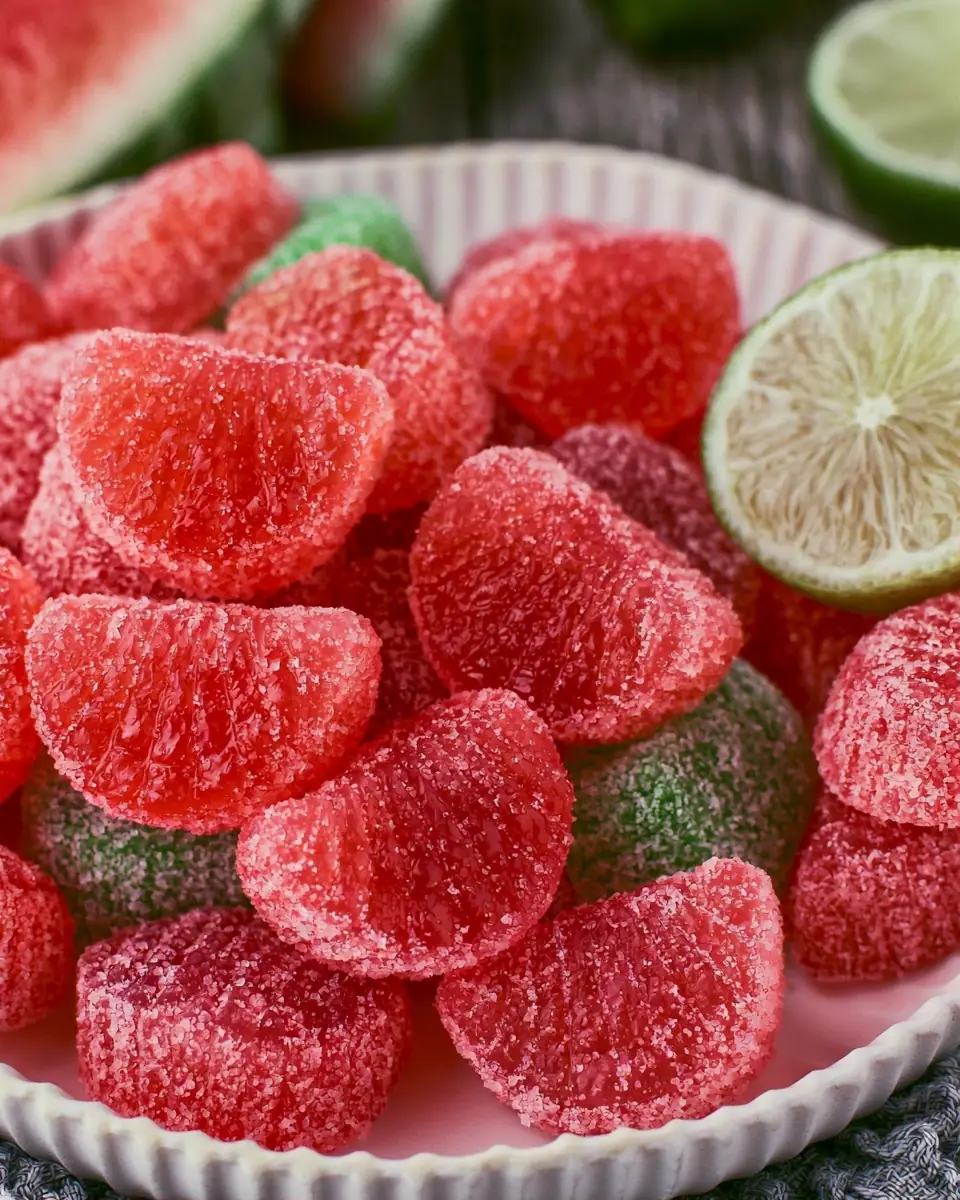
Made with collagen-supporting gelatin, antioxidant-rich watermelon, and immune-friendly Vitamin C, these homemade sour watermelon gummies are chewy, boldly flavored, and far healthier than anything you’ll find in the candy aisle. In this complete guide, you’ll discover an optimized ingredients list with substitutions, precise timing, detailed step-by-step instructions packed with pro tips, nutritional insights, healthier variations, serving ideas, common mistakes to avoid, and smart storage techniques. Whether you’re making them for kids, as a functional snack, or to satisfy your own nostalgic cravings, this easy recipe delivers professional results in your own kitchen.
Ingredients List
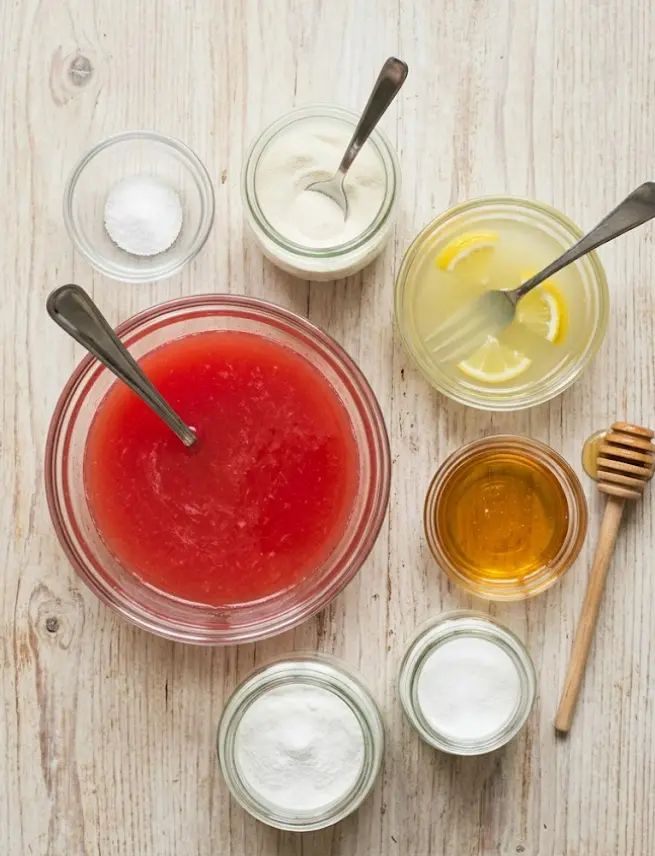
This homemade sour watermelon gummies recipe yields about 50–70 small gummies depending on mold size. Here’s everything you need:
- 1½ cups fresh watermelon juice (from about 4–5 cups cubed seedless watermelon, blended and strained)
- ⅓ cup fresh lemon or lime juice (adds bright acidity and helps with setting and flavor balance)
- 2–3 tablespoons honey or agave syrup (adjust to taste; agave for vegan-friendly sweetness)
- ¼ cup sugar-free unflavored gelatin (about 28–30g; use grass-fed for maximum health benefits)
- 1 generous pinch of sea salt (enhances flavor and balances sweetness)
- For the sour coating: 1–2 tablespoons Vitamin C powder (ascorbic acid, food-grade), mixed with 2–3 tablespoons granulated sugar or monk fruit sweetener (ratio adjustable for desired sour intensity)
Smart Substitutions for Homemade Sour Watermelon Gummies:
- Use bottled 100% watermelon juice if fresh isn’t available, though fresh delivers superior flavor and lycopene.
- Swap honey/agave with maple syrup or allulose for lower glycemic impact.
- For vegan homemade sour watermelon gummies, replace gelatin with 2–3 teaspoons agar-agar powder and increase simmering time.
- Try blending watermelon with strawberries or raspberries for a “watermelon berry” twist.
- Reduce or eliminate added sweetener entirely if your watermelon is very ripe and sweet.
These clean, minimal ingredients prove you can enjoy intense sour candy flavor while supporting wellness goals.
Timing
Prep Time: 15–20 minutes (blending watermelon, measuring, blooming gelatin)
Cook Time: 5–8 minutes (heating to dissolve)
Chill Time: 1 hour (significantly faster than many gelatin recipes)
Total Time: About 1 hour 25 minutes
This quick timeline makes homemade sour watermelon gummies perfect for last-minute cravings or weekend projects with kids. The brief chill time is roughly 75–80% faster than traditional gummy recipes that require 4–6 hours, thanks to the optimized gelatin ratio and citrus acidity.
Step-by-Step Instructions
1. Prepare the Watermelon Juice
Cube fresh seedless watermelon and blend until smooth. Strain through a fine mesh sieve or nut milk bag to yield approximately 1½ cups clear juice. This removes pulp that could cloud your gummies and create an uneven texture. Pro tip: Save the pulp for smoothies to reduce waste.
2. Bloom (Hydrate) the Gelatin
In a medium saucepan (off heat), combine the watermelon juice, lemon or lime juice, and pinch of salt. Sprinkle the ¼ cup gelatin evenly over the surface. Let it hydrate for 2–5 minutes until it looks spongy and fully bloomed. This critical step prevents lumps and ensures smooth, professional-quality homemade sour watermelon gummies.
3. Dissolve Over Heat
Place the saucepan over medium heat. Stir gently and continuously until the gelatin is completely dissolved and the mixture is steaming hot but not boiling (about 5–8 minutes). Overheating can weaken the gelatin’s setting power. Remove from heat immediately once dissolved.
4. Sweeten the Mixture
Stir in the 2–3 tablespoons of honey or agave syrup off the heat. Adding sweetener after heating preserves delicate flavors and beneficial enzymes in honey. Taste and adjust—if your watermelon is exceptionally sweet, you may need less. The mixture should taste balanced: sweet, tangy, and lightly salty.
5. Mold and Refrigerate
Pour the warm mixture into silicone molds (bear shapes, cubes, or watermelon-slice molds work beautifully). Silicone makes unmolding effortless. Refrigerate for at least 1 hour until completely firm. The gummies should pop out easily when set.
6. Create the Sour Coating and Finish
Mix Vitamin C powder with sugar or monk fruit sweetener in a shallow bowl. Start with a 1:2 ratio and adjust to your preferred sour intensity—more Vitamin C powder creates that eye-watering childhood pucker. Unmold the gummies, lightly dampen with a tiny bit of water or citrus juice if needed for adhesion, and toss thoroughly in the sour mixture until evenly coated. Let them air-dry for 10–15 minutes on a rack for the coating to set. Your homemade sour watermelon gummies are now ready!
Pro Tips: Work quickly once the sour coating is applied. For extra shine and better adhesion, let gummies rest 30 minutes before coating. Always use food-grade Vitamin C powder.
Nutritional Information
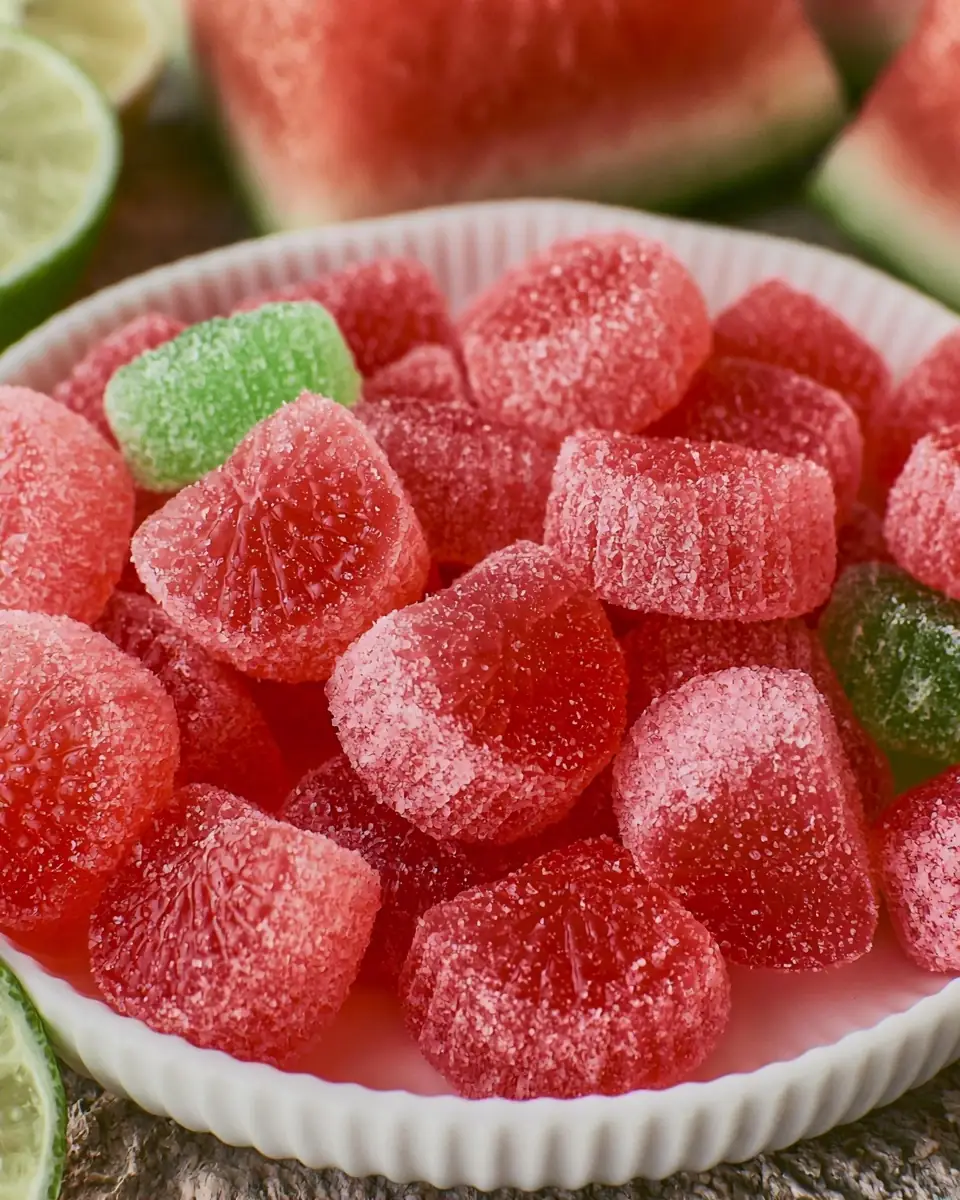
These homemade sour watermelon gummies offer impressive transparency compared to store-bought sour candy. Approximate values per serving (5–6 small gummies):
- Calories: 35–55
- Protein: 2–4g (from gelatin’s collagen)
- Carbohydrates: 6–9g
- Sugars: 5–8g (mostly natural from fruit and minimal added sweetener)
- Vitamin C: 50–150% DV (boosted significantly by the coating and citrus)
- Fat: 0g
- Sodium: Trace (from the pinch of salt)
Gelatin provides glycine and proline, amino acids linked to gut lining repair, joint health, better sleep, and glowing skin. Watermelon contributes lycopene (an antioxidant), hydration support, and additional Vitamin C. The added Vitamin C powder further supports immune function, collagen synthesis, and skin health.34
Compared to leading sour gummy brands, these contain no artificial colors, high-fructose corn syrup, or preservatives. They function almost like a gentle supplement in candy form.
Values are estimates based on similar tested recipes. Use a nutrition calculator for exact tracking with your specific brands and mold sizes.
Healthier Alternatives for the Recipe
This recipe is already significantly healthier than commercial sour candy, but here are easy upgrades:
- Fully Sugar-Free: Replace all sweeteners with monk fruit or allulose and use only monk fruit in the coating.
- Higher Protein: Stir in a scoop of unflavored collagen peptides along with the gelatin.
- Vegan Version: Use agar-agar powder instead of gelatin. Simmer the mixture for 2–3 extra minutes after adding agar to fully activate. Texture will be slightly firmer.
- Electrolyte Boost: Add a pinch of magnesium powder or coconut water to the juice blend for a post-workout recovery treat.
- Anti-Inflammatory: Incorporate a small amount of tart cherry juice or a pinch of turmeric.
- Lower Carb: Reduce fruit juice slightly and increase water or use cucumber-watermelon blend.
These adaptations make homemade sour watermelon gummies suitable for keto, paleo, vegan, and immune-support diets while keeping the fun sour kick intact.
Serving Suggestions
Make your homemade sour watermelon gummies the star of any occasion:
- Pack in lunchboxes or reusable snack bags for a kid-approved treat that sneaks in nutrients.
- Serve on a summer charcuterie board alongside fresh fruit, cheese, and nuts.
- Offer as a healthier movie-night snack or party favor in mini glass jars.
- Pair with sparkling water and a lime wedge for a refreshing “mocktail” experience.
- Use as a functional immune booster during cold season— the extra Vitamin C is perfect.
Personal tip: These travel beautifully and make thoughtful homemade gifts. Children love helping coat them in the sour mixture, turning candy-making into quality family time.
Common Mistakes to Avoid
Even straightforward recipes have pitfalls. Here’s how to guarantee perfect homemade sour watermelon gummies every batch:
- Skipping the bloom step — Gelatin must fully hydrate or you’ll end up with grainy, unset gummies.
- Boiling the mixture — High heat damages gelatin’s setting ability. Gentle heating until dissolved is sufficient.
- Incorrect sour coating ratio — Too much Vitamin C can taste bitter; too little lacks the nostalgic pucker. Taste-test the coating first.
- Using molds that aren’t silicone — Hard candy molds make unmolding frustrating without proper greasing.
- Coating too early — Let gummies firm completely and air-dry slightly so the sour mixture adheres without dissolving.
- Storing in humid conditions — The sour-sugar coating can become sticky; always use an airtight container.
Following these insights, drawn from both testing and common reader feedback, will elevate your results dramatically.
Storing Tips for the Recipe
Proper storage keeps your homemade sour watermelon gummies fresh and sour:
- Store in an airtight container at cool room temperature for up to 5–7 days. The coating helps preserve them.
- Refrigerate for up to 2 weeks in a sealed container. If the coating “sweats,” simply re-roll in fresh sour mixture before serving.
- Avoid freezing, as texture can become overly tough or watery upon thawing.
- Prep ahead: Juice and strain watermelon up to 24 hours in advance. Store covered in the refrigerator.
- For longer shelf life, keep the sour coating separate and apply just before serving.
These practices maintain maximum chew, flavor, and that signature sour tang.
Conclusion
Recreating childhood sour candy favorites has never been easier or healthier. This homemade sour watermelon gummies recipe delivers bright watermelon flavor, satisfying chew, and an intense Vitamin C-powered pucker using real fruit and clean ingredients. In under 30 minutes of active time you’ll have nostalgic, nutrient-dense treats perfect for all ages. Skip the artificial additives and make a batch today—your taste buds (and body) will thank you. (52 words)
Ready to satisfy your sour candy cravings naturally? Try this homemade sour watermelon gummies recipe and share your results, photos, or creative variations in the comments below. Subscribe for more nostalgic-yet-healthy recipes, functional snacks, and easy homemade candy guides delivered to your inbox!
FAQs
Can I use bottled watermelon juice for this homemade sour watermelon gummies recipe?
Yes, 100% pure watermelon juice works well. Fresh-blended and strained juice provides the brightest flavor and most nutrients, but bottled is a convenient alternative.
How sour is the coating on these homemade sour watermelon gummies?
You control the intensity. Start with 1 tablespoon Vitamin C powder to 3 tablespoons sweetener and adjust upward. It closely mimics classic sour candy pucker without artificial acids.
Are these gummies vegan?
The base recipe uses gelatin, so it is not vegan. Substitute with agar-agar powder and extend cooking time for a fully plant-based version.
How long do homemade sour watermelon gummies last?
Up to 1 week at room temperature or 2 weeks refrigerated in an airtight container. Re-coat with sour mixture if they become sticky.
Why add Vitamin C powder to the coating?
It creates the signature sour tang while boosting immune support, collagen production, and Vitamin C intake—turning candy into a functional treat.fy your cravings! Happy cooking!
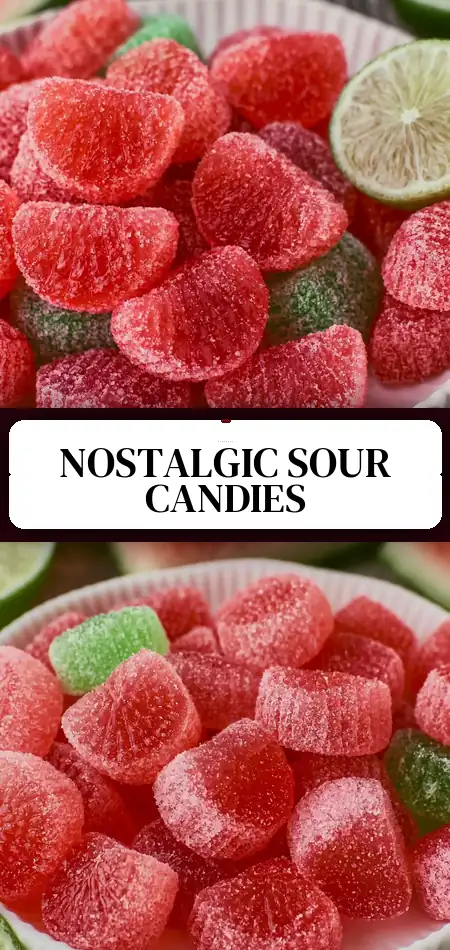
Sour Candies from Childhood
Ingredients
Equipment
Method
- Blend the watermelon until it becomes juice.
- Mix the watermelon juice with the lemon juice and sprinkle the gelatin on top. Let it hydrate for 2 minutes.
- Heat over medium heat, stirring until everything is dissolved.
- Remove from heat and add honey or agave syrup.
- Pour into silicone molds and refrigerate for 1 hour.
- Unmold and coat with the tangy mixture of vitamin C, sugar, and monk fruit.