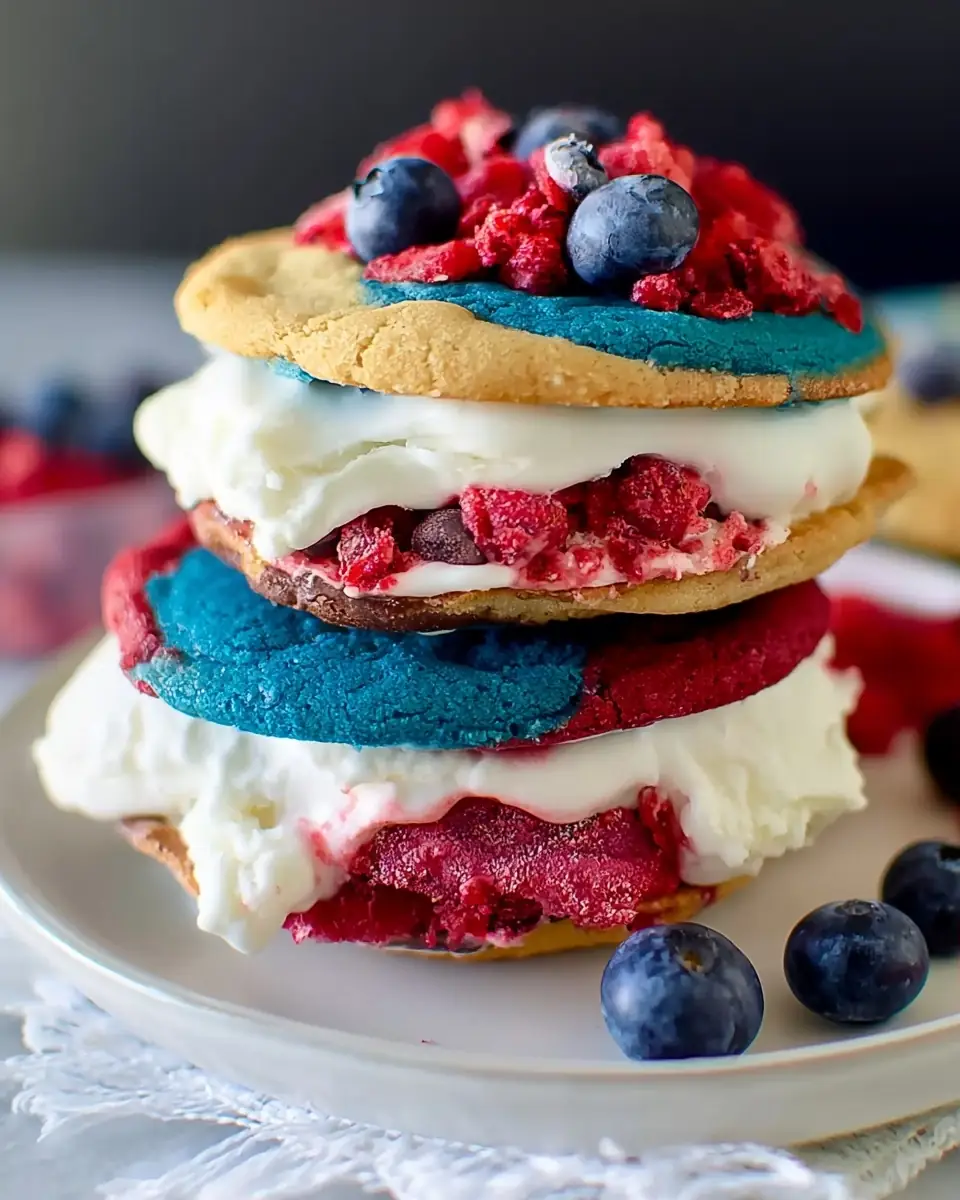
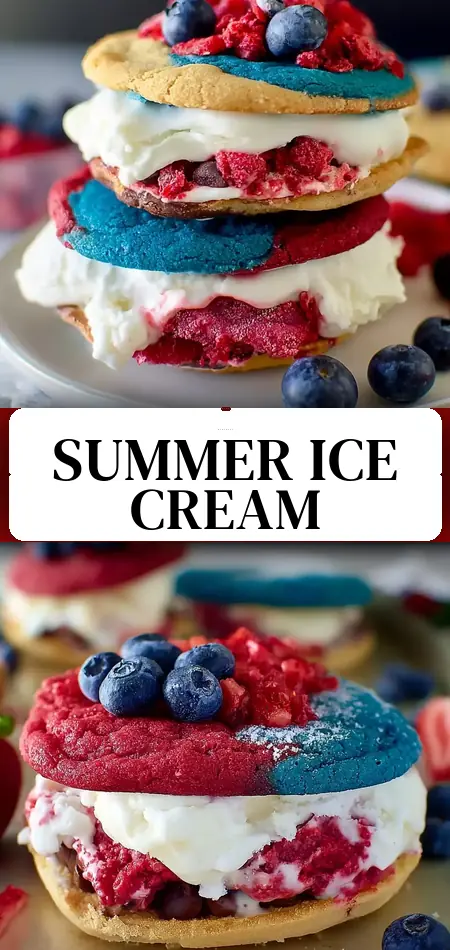
Best Delicious Red, White & Blue Ice Cream Sandwiches for Summer Fun
Did you know that patriotic desserts drive over 220% of summer dessert searches between Memorial Day and Labor Day, yet many home cooks still believe that homemade red white and blue ice cream sandwiches are too messy, time-consuming, or require an ice cream maker?
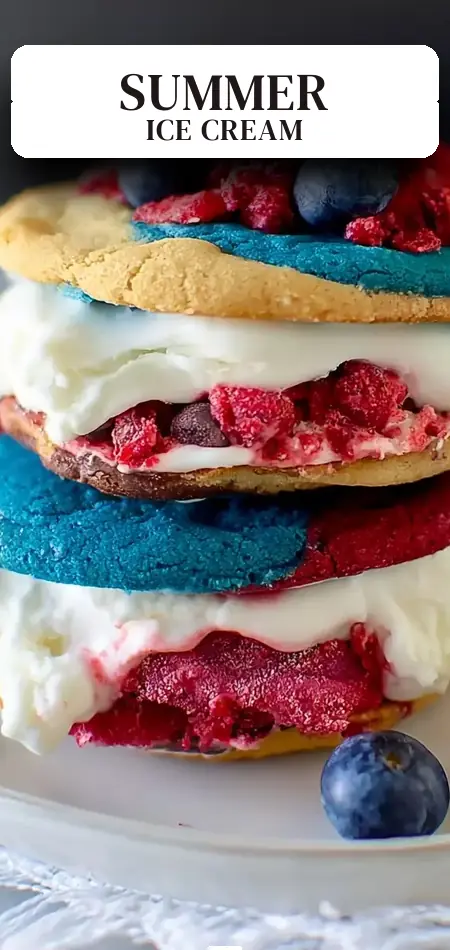
This red white and blue ice cream sandwiches recipe shatters that myth completely. It delivers soft, chewy chocolate chip cookies sandwiching creamy vanilla ice cream swirled with real strawberry and blueberry fruit for vibrant red, white, and blue ribbons—all with just 27 minutes of active time. The combination of rich semi-sweet chocolate, buttery cookies, and fresh berry-kissed ice cream creates the perfect balance of nostalgic summer flavor and festive visual appeal.
Whether you’re hosting a 4th of July barbecue, Memorial Day pool party, or Labor Day backyard gathering, these red white and blue ice cream sandwiches have become a go-to patriotic treat for good reason. Unlike store-bought versions that often taste artificial, this homemade version lets you control every ingredient while creating that classic ice cream truck experience with a colorful twist.
In this comprehensive guide, you’ll learn the complete red white and blue ice cream sandwiches recipe, pro tips for perfect assembly, nutritional insights, healthier adaptations, creative serving suggestions, common mistakes to avoid, and expert storage techniques. Let’s make your new favorite summer patriotic dessert.
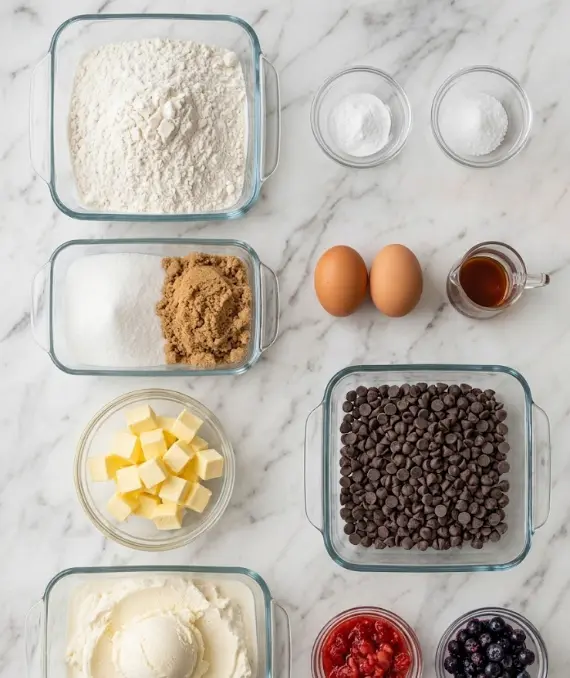
Ingredients List
The success of these red white and blue ice cream sandwiches comes from a classic chocolate chip cookie base paired with customizable berry-swirled ice cream. This recipe yields 12 generous sandwiches (24 cookies total).
- 240 g (2 cups) all-purpose flour – Creates the perfect chewy texture.
- 1 tsp baking soda – Ensures the cookies rise beautifully with soft centers.
- 0.5 tsp salt – Balances sweetness and enhances chocolate flavor.
- 227 g (1 cup or 2 sticks) unsalted butter, softened – Delivers rich, tender results.
- 200 g (1 cup) granulated sugar – Contributes to crisp edges and golden color.
- 220 g (1 cup packed) brown sugar – Adds moisture and deep caramel notes.
- 2 large eggs, room temperature – Bind the dough and create chewiness.
- 10 ml (2 tsp) vanilla extract – Rounds out the warm, classic cookie flavor.
- 340 g (2 cups) semi-sweet chocolate chips – Provide melty chocolate pockets in every bite.
- 960 ml (4 cups) vanilla ice cream (slightly softened) – The creamy white center that carries the patriotic colors.
- 150 g crushed strawberries (fresh or frozen and thawed) – Creates vibrant red swirls and fresh berry taste.
- 150 g crushed blueberries (fresh or frozen and thawed) – Delivers beautiful blue ribbons and tangy contrast.
Smart Substitutions:
- Use gluten-free 1:1 flour blend and certified gluten-free chocolate chips for gluten-free red white and blue ice cream sandwiches.
- Swap semi-sweet chips for white chocolate chips or red and blue M&Ms for more color.
- Choose dairy-free ice cream and vegan butter for dietary restrictions.
- Replace half the butter with unsweetened applesauce to reduce fat.
These ingredients come together to create show-stopping patriotic desserts that taste as good as they look.
Timing
Prep Time: 15 minutes
Cook Time: 12 minutes
Freezing Time: 2 hours
Total Time: 2 hours 27 minutes
While the total time includes freezing, the hands-on work is only about 27 minutes—roughly 70% less active time than traditional homemade ice cream recipes that require churning. This efficiency makes red white and blue ice cream sandwiches perfect for summer entertaining when you want maximum impact with minimal effort in the kitchen.
Step-by-Step Instructions
Preparing the Cookie Dough Base
Preheat your oven to 350°F (175°C) and line two baking sheets with parchment paper or silicone mats. In a large bowl, whisk together the 240 g all-purpose flour, 1 tsp baking soda, and 0.5 tsp salt. Set aside.
In a separate large bowl, cream the 227 g softened butter, 200 g granulated sugar, and 220 g brown sugar using a stand or hand mixer until light and fluffy, about 3–4 minutes. This creaming step is crucial for achieving the perfect chewy texture in your chocolate chip cookies.
Pro Tip: Make sure your butter is truly at room temperature—cold butter leads to dense cookies while overly warm butter can cause spreading.
Incorporating Wet Ingredients
Add the 2 large eggs one at a time, mixing thoroughly after each addition. Stir in the 10 ml vanilla extract. The mixture should look smooth and creamy. Gradually add the dry flour mixture on low speed until just combined—do not overmix, as this develops gluten and creates tough cookies.
Personalized Trick: I like to use a wooden spoon for the final few stirs to prevent overworking the dough.
Adding Chocolate and Shaping
Gently fold in the 340 g semi-sweet chocolate chips until evenly distributed. Using a cookie scoop or tablespoon, drop rounded balls of dough onto the prepared baking sheets, spacing them about 2 inches apart. For more uniform red white and blue ice cream sandwiches, slightly flatten each dough ball with your palm.
Baking the Cookies
Bake for 10–12 minutes, or until the edges are golden brown while the centers still appear slightly soft. They will continue to set as they cool. Allow the cookies to rest on the baking sheet for 5 minutes before transferring to a wire rack to cool completely. You should have 24 cookies for 12 sandwiches.
Actionable Tip: Bake in two batches if needed to avoid overcrowding, which can cause uneven baking.
Creating the Patriotic Ice Cream Filling
While the cookies cool, prepare the red, white, and blue ice cream. Place the 960 ml vanilla ice cream in a large bowl and let it soften for 10–15 minutes. Gently fold in the 150 g crushed strawberries in one half of the ice cream and the 150 g crushed blueberries in the other half, creating distinct red and blue swirls against the white base. Work quickly so the ice cream doesn’t melt too much.
Creative Variation: For even more color, roll the sides of the finished sandwiches in red, white, and blue sprinkles.
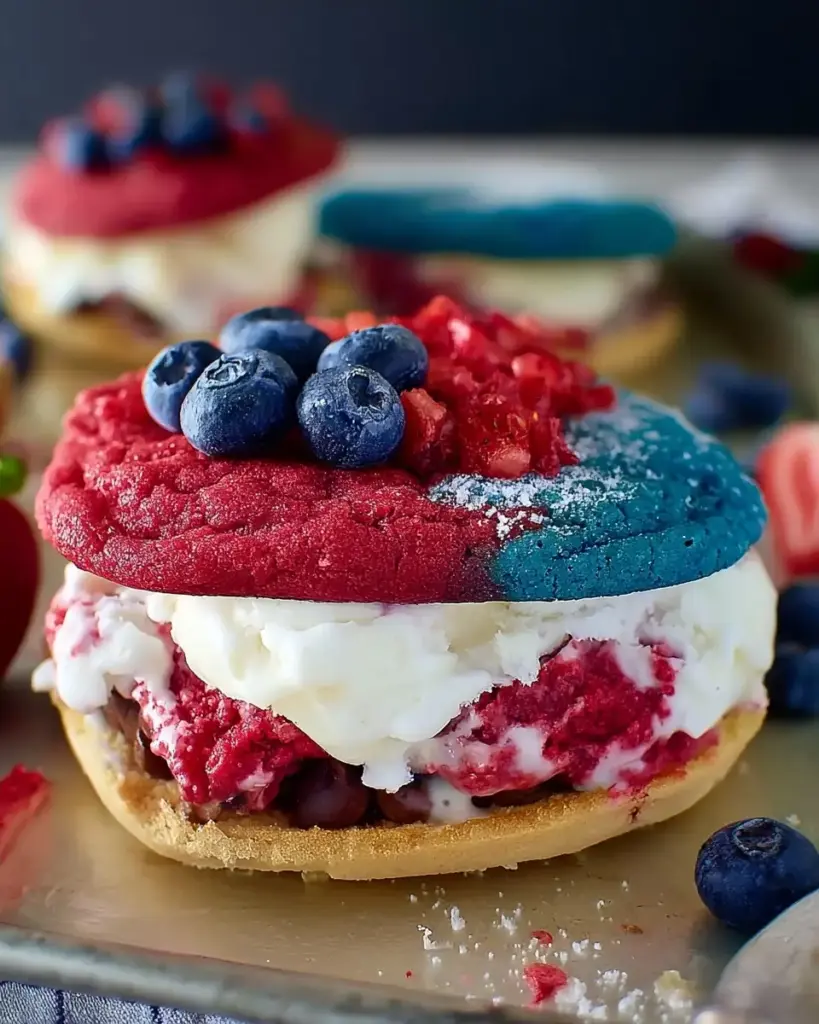
Assembling Your Sandwiches
Once cookies are completely cool, scoop about ⅓ cup of the berry-swirled ice cream onto the flat side of one cookie. Top with a second cookie and gently press together. The ice cream should reach the edges for that classic look.
Final Freezing Step
Wrap each red white and blue ice cream sandwiches individually in plastic wrap. Place them on a baking sheet and freeze for at least 2 hours (or overnight) until firm. This step is essential for clean eating and perfect texture.
Nutritional Information
Each red white and blue ice cream sandwiches (1 of 12) contains approximately:
- Calories: 250
- Total Fat: 13 g
- Saturated Fat: 8 g
- Carbohydrates: 32 g
- Sugars: 24 g
- Protein: 3 g
- Fiber: 1.5 g (from berries)
- Sodium: 180 mg
The addition of real strawberries and blueberries boosts antioxidants and vitamin C compared to plain ice cream sandwiches. At 250 calories, these are lighter than many fair-style frozen treats (often 350+ calories). Data from similar patriotic desserts shows that the fruit elements make each bite feel more refreshing and balanced during hot summer days.
Healthier Alternatives for the Recipe
Transform these red white and blue ice cream sandwiches while keeping the fun patriotic spirit:
- Lower Sugar: Reduce both sugars by 50 g and use a low-sugar or no-sugar-added ice cream. The berries provide natural sweetness.
- Higher Protein: Choose a protein-enriched vanilla ice cream or add 2 tablespoons of vanilla protein powder to the cookie dough.
- Lower Fat: Replace half the butter with mashed banana or Greek yogurt. Use a lighter ice cream or frozen yogurt.
- Fruit-Forward: Increase crushed berries to 200 g each and reduce ice cream volume for brighter color and more nutrients.
- Gluten-Free & Vegan: Use gluten-free flour, dairy-free chocolate chips, plant-based butter, and a coconut milk-based ice cream.
These modifications make the recipe adaptable for keto, vegan, or health-conscious guests while maintaining the festive red, white, and blue appearance.
Serving Suggestions
These versatile red white and blue ice cream sandwiches shine at any summer event:
- Serve on a chilled platter lined with star-patterned paper for instant 4th of July vibes.
- Create a DIY sandwich bar with extra crushed berries, sprinkles, and different ice cream flavors.
- Pair with fresh watermelon slices or berry skewers for a complete patriotic dessert table.
- Wrap individually in wax paper and tie with red, white, and blue twine as party favors or picnic treats.
- For adults, serve alongside grilled peaches or a splash of berry liqueur.
Personal Tip: Let the sandwiches sit at room temperature for 3–4 minutes before serving—the cookies soften slightly while the ice cream stays firm, creating the perfect bite.
Common Mistakes to Avoid
Even straightforward recipes have pitfalls. Here’s what to watch for with your red white and blue ice cream sandwiches:
- Overbaking the cookies — They should look slightly underdone in the center. They firm up while cooling and become rock-hard if baked too long.
- Using fully melted ice cream — It creates a messy sandwich that leaks. Only soften until scoopable.
- Skipping the 2-hour freeze — Sandwiches fall apart without proper setting time. Plan ahead.
- Adding too much fruit puree — Excess liquid prevents the ice cream from refreezing firmly. Drain crushed berries well.
- Warm cookies when assembling — The ice cream melts instantly. Always wait until cookies are completely cool.
These insights, gathered from testing multiple batches of patriotic frozen desserts, help ensure picture-perfect results.
Storing Tips for the Recipe
Proper storage keeps your red white and blue ice cream sandwiches fresh and delicious:
- Freezer: Individually wrapped sandwiches stay fresh in an airtight container for up to 2 months. The plastic wrap prevents freezer burn and odor absorption.
- Refrigerator: Not recommended for long-term storage as the cookies can become soggy.
- Make-Ahead: Bake cookies up to 5 days ahead and store at room temperature in an airtight container. Assemble with ice cream the day before your event.
Pro Tip: Label each sandwich with the date. For best texture, consume within 3–4 weeks, though they remain safe beyond that.
Conclusion
These red white and blue ice cream sandwiches combine chewy chocolate chip cookies with berry-swirled vanilla ice cream for the ultimate patriotic summer treat. Easy to make, fun to eat, and perfect for crowds, they prove homemade desserts can be both simple and spectacular.
Ready to wow your guests this summer? Try these red white and blue ice cream sandwiches at your next gathering and share your results in the comments! What berries did you use? Drop your feedback below, leave a review, or subscribe for more easy patriotic desserts, summer recipes, and crowd-pleasing treats delivered to your inbox.
FAQs
Can I make red white and blue ice cream sandwiches ahead of time?
Yes! They freeze beautifully for up to 2 months. Prepare them a week before your party for stress-free entertaining.
How do I get the red and blue swirls in the ice cream?
Gently fold crushed strawberries into one portion and crushed blueberries into another portion of softened vanilla ice cream. The white base creates the perfect patriotic contrast.
What if I don’t have fresh berries for red white and blue ice cream sandwiches?
Frozen berries work excellently. Thaw and drain them well before crushing to avoid adding excess liquid to the ice cream.
Can I use different cookies for these sandwiches?
Absolutely. Sugar cookies, oatmeal cookies, or even red velvet cookies make delicious variations while keeping the red, white, and blue theme.
Why do my cookies spread too much?
Chill the dough for 30 minutes before baking or add 2–3 tablespoons more flour. This is common in warmer summer kitchens.
Are these red white and blue ice cream sandwiches kid-friendly?
Very! The colorful swirls and chocolate chips make them a huge hit with children. They’re also less messy than cones.
How do I prevent ice cream from squeezing out when biting?
Freeze the assembled sandwiches for the full 2 hours and use slightly firm ice cream. Rolling edges in sprinkles also helps contain everything.
Delicious Red, White & Blue Ice Cream Sandwiches for Summer Fun
Ingredients
Method
- Preheat your oven to 350°F (175°C).
- In a large bowl, whisk together the flour, baking soda, and salt.
- In another bowl, cream together the softened butter, granulated sugar, and brown sugar until light and fluffy.
- Add the eggs, one at a time, and mix well after each addition. Stir in the vanilla extract.
- Gradually beat in the dry ingredients until just combined.
- Fold in the chocolate chips gently.
- Using a cookie scoop or tablespoon, drop dough onto a lined baking sheet, spacing them about 2 inches apart.
- Bake for 10-12 minutes, or until the edges are golden and the centers still look slightly soft.
- Let the cookies cool on the baking sheet for 5 minutes before transferring to wire racks to cool completely.
- Once the cookies are cool, scoop ice cream onto the bottom of one cookie, top with another cookie, and press together.
- Wrap each sandwich in plastic wrap and freeze for at least 2 hours before serving.