Homemade Blackberry Juice Recipe
What if you could crack open a jar in the middle of February and pour yourself a glass of vibrant, naturally sweet blackberry juice that tastes like it was picked at the peak of summer—without any artificial colors, preservatives, or high-fructose corn syrup?
That dream becomes reality with canning blackberry juice. This simple water-bath canning recipe lets you preserve the bright, antioxidant-rich essence of fresh blackberries so you can enjoy homemade blackberry juice all year long. Whether you forage wild berries, harvest from your garden, or buy in bulk during peak season, this method captures their pure flavor and nutrition in shelf-stable jars.
Using about 4–5 pounds of berries, this recipe yields approximately 8 cups (2 quarts) of finished juice. The process takes roughly 1 hour and 18 minutes from start to finish, including passive straining time—significantly less hands-on work than many people expect from home preserving projects. Ready to turn summer’s bounty into refreshing, homemade blackberry juice you can enjoy anytime? Let’s walk through every detail.
Ingredients List
This single batch recipe produces about 8 cups of canned blackberry juice. Quantities are straightforward and easy to scale up or down.
Ingredients:
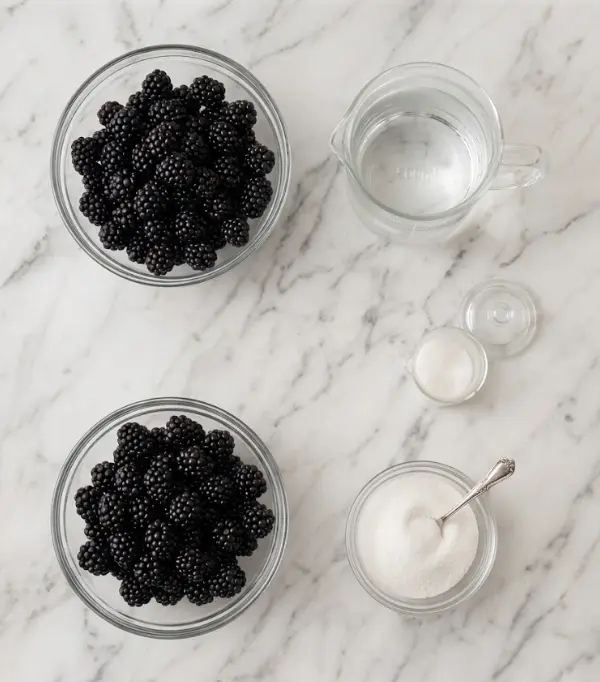
- 2,000 g (about 4–5 pounds) fresh blackberries
- 500 ml (about 2 cups) water, for boiling and extracting juice
- 100 g sugar (about ½ cup), optional and adjustable to taste
Substitutions & Tips:
- Berries: You can replace up to 25% of the blackberries with raspberries, blueberries, or marionberries for a delicious mixed-berry juice blend. Wild blackberries often have more intense flavor than cultivated varieties.
- Sweetener: Sugar is completely optional. Many people prefer the pure tart-sweet taste of unsweetened blackberry juice. If using sweetener, you can substitute honey, maple syrup, or a sugar substitute safe for canning.
- Water: Use filtered or spring water for the cleanest flavor. You can also use unsweetened apple juice in place of water for a milder, naturally sweeter result.
- Optional Flavor Boosts: A slice of fresh ginger, a few mint leaves, or a cinnamon stick added during simmering (and removed before straining) can create delightful variations.
Using high-quality, ripe berries is key to achieving that deep, jewel-toned color and rich taste in your finished canned blackberry juice.
Timing
- Prep Time: 1 hour (includes washing, simmering, and the extended passive straining period through a jelly bag)
- Cook Time: 10 minutes (5–10 minutes simmering plus brief reheating)
- Processing Time: 10 minutes in a boiling water bath canner (15 minutes if you live above 6,000 feet in elevation)
- Total Time: 1 hour 18 minutes plus 12–24 hours of undisturbed cooling
This efficient process is faster than many homemade juice recipes because the passive dripping phase requires almost no attention. Compared to traditional jelly-making, which can take hours of active boiling and testing, canning blackberry juice is remarkably beginner-friendly.
Step-by-Step Instructions
Prepare Your Canning Equipment
Begin by setting up your boiling water canner with enough water to cover your jars by 1–2 inches once they’re added. Wash jars, lids, and bands in hot soapy water and keep them hot until ready to fill. Sterilize your jelly bag or line a colander with several layers of dampened cheesecloth set over a deep non-reactive bowl. Having everything organized makes the entire process smoother and safer.
Cook the Blackberries
Place the 4–5 pounds of fresh blackberries and 500 ml of water into a large stainless-steel saucepan. Bring the mixture to a gentle boil over medium-high heat, stirring frequently to prevent scorching. Once boiling, reduce heat to low, cover loosely, and simmer for 5–10 minutes. Stir and crush the berries occasionally with a potato masher or wooden spoon. You’re looking for softened berries that have released their juice—avoid overcooking, which can dull both color and flavor.
Pro Tip: If you have children helping in the kitchen, let them participate in the berry-crushing step. It’s a fun, hands-on way to get kids excited about preserving food.
Strain for Clear Juice
Carefully transfer the hot berry mixture to your dampened jelly bag or cheesecloth-lined strainer. Allow the juice to drip naturally without squeezing or pressing the bag. This undisturbed straining can take 30–60 minutes and produces clearer juice. For even clearer results, refrigerate the strained juice overnight so sediment settles, then carefully pour off the top layer of clear juice.
Personalized Tip: If you prefer a thicker, more pulpy homemade blackberry juice with extra fiber, gently squeeze the bag or use a food mill instead of passive dripping.
Sweeten and Reheat (If Desired)
Pour the extracted juice back into a clean saucepan. Taste and add sugar (or preferred sweetener) if desired—start with half the amount and adjust. Bring the juice to a gentle simmer, stirring until the sugar fully dissolves. Do not boil vigorously, as this can degrade delicate flavors and nutrients.
Fill and Seal the Jars
Ladle the hot juice into hot jars, leaving ¼-inch headspace. This smaller headspace is standard for thin liquids like juice. Wipe the rims thoroughly with a clean, damp cloth, apply lids, and tighten bands to fingertip tight. Avoid over-tightening, which can prevent proper sealing.
Process in a Boiling Water Bath Canner
Place the filled jars in your prepared canner. Bring the water to a full rolling boil and process for 10 minutes (adjust to 15 minutes if you live above 6,000 feet). After processing, turn off the heat, remove the canner lid, and let the jars rest in the hot water for 5 minutes. This gradual cooling helps prevent liquid loss from the jars.
Cool and Check Seals
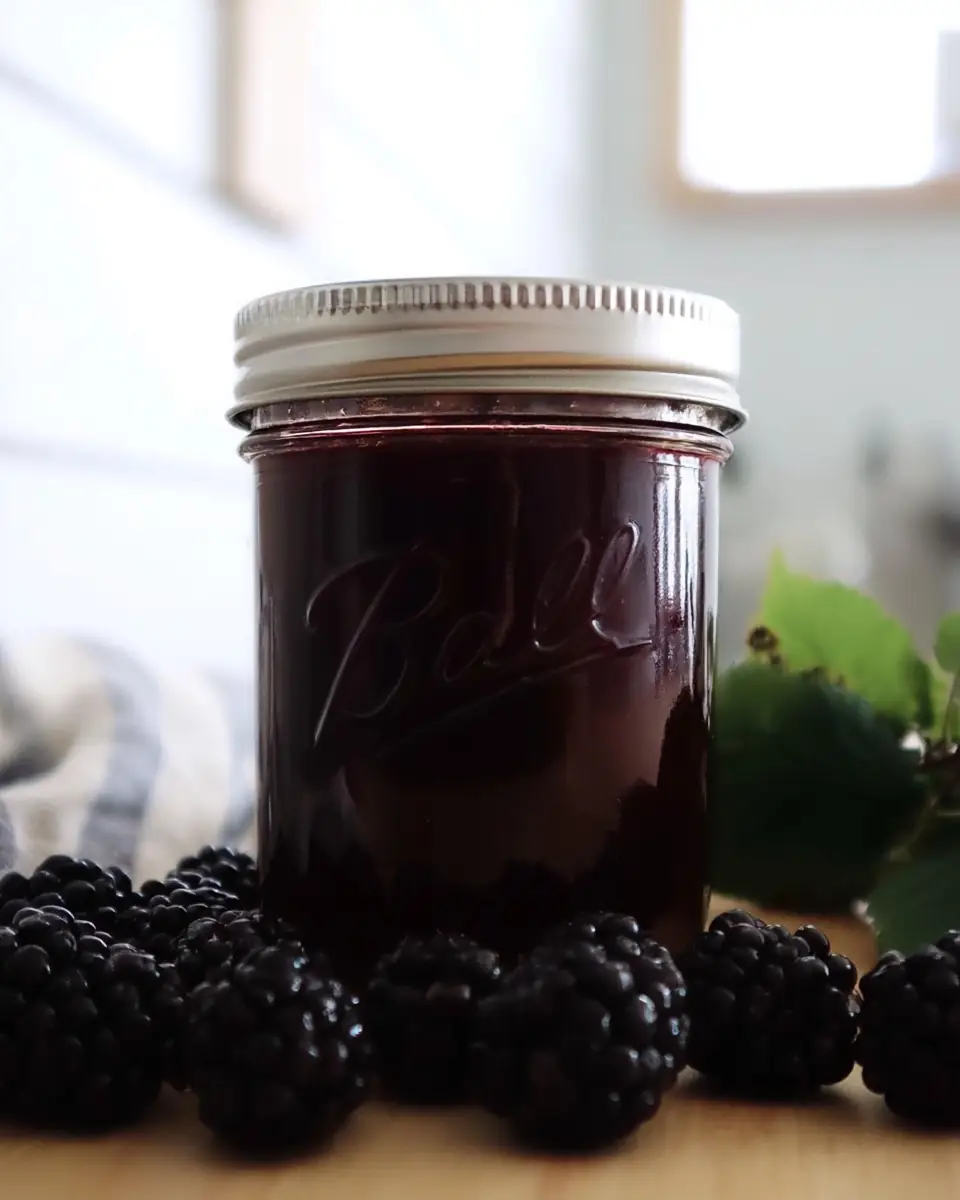
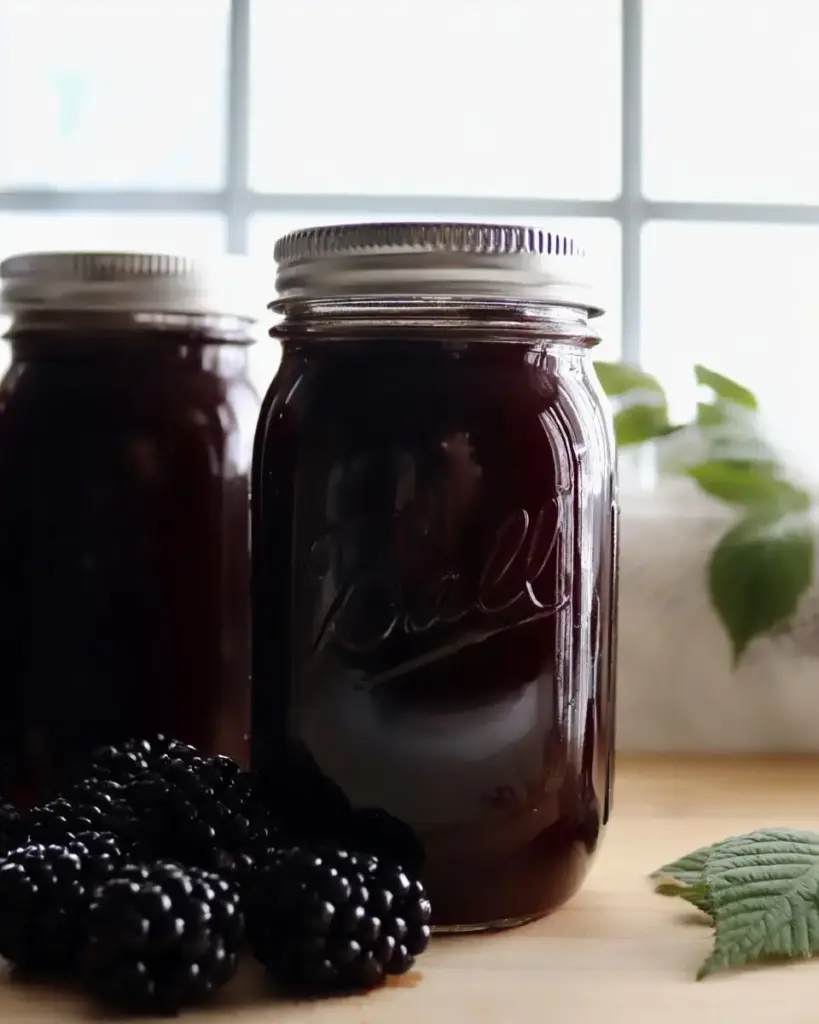
Carefully remove the jars and place them on a clean towel or cooling rack away from drafts. Let them cool completely for 12–24 hours. Check the seals by pressing the center of each lid—it should not flex or pop. Remove the bands, wash the jars, label them with the date and “Homemade Blackberry Juice,” and store in a cool, dark pantry.
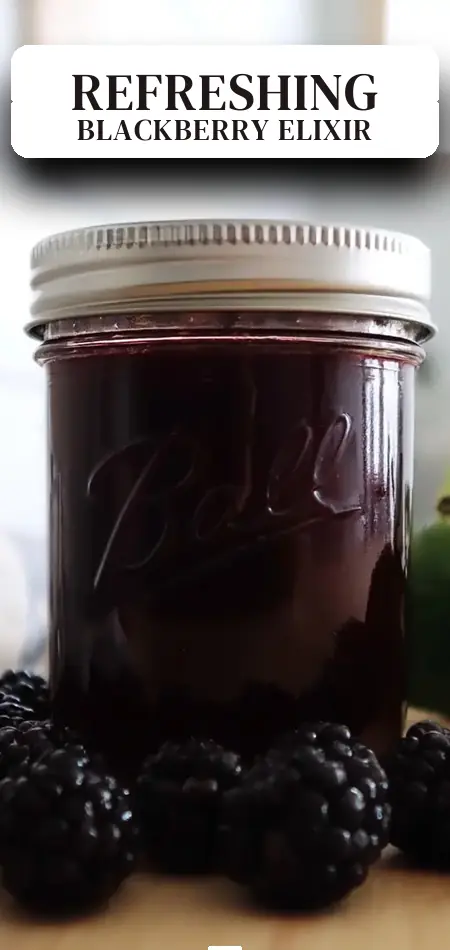
Expert Trick: The beautiful deep purple color you see in the jar is a sign of well-preserved anthocyanins—the powerful antioxidants that make blackberries a nutritional superstar.
Nutritional Information
Per 1-cup serving (based on the provided 67-calorie benchmark for lightly sweetened juice):
- Calories: 67
- Total Carbohydrates: 15–17 g
- Dietary Fiber: 1–2 g (higher if pulp is included)
- Sugars: 10–14 g (naturally occurring plus any added sugar)
- Protein: <1 g
- Vitamin C: 25–40% Daily Value
- Manganese: 15–20% DV
- Antioxidants: Extremely high in anthocyanins, ellagic acid, and polyphenols
Blackberries consistently rank among the top fruits for antioxidant capacity. Regular consumption of blackberry juice has been linked in studies to reduced oxidative stress, better heart health markers, and improved cognitive function. Because this homemade version contains no artificial additives, you get the full nutritional benefit of the berries in every glass.
Healthier Alternatives for the Recipe
- No-Sugar Version: Simply omit the sugar entirely. The natural sweetness of ripe berries is often sufficient, especially if you blend in sweeter fruits like blueberries.
- Lower Calorie Option: Use a natural zero-calorie sweetener such as monk fruit or stevia that is heat-stable and approved for canning.
- Higher Fiber Version: Skip the fine straining and use a food mill to retain more pulp. This creates a nectar-style drink with significantly more fiber and nutrients.
- Anti-Inflammatory Boost: Add fresh ginger or turmeric during the simmering stage for added health benefits without changing the canning safety.
- Kid-Friendly Adaptation: Blend the finished juice with sparkling water and a splash of apple juice to make a naturally sweetened soda alternative that children love.
These modifications allow canning blackberry juice to fit keto, low-sugar, anti-inflammatory, or family-friendly diets while preserving food safety.
Serving Suggestions
Homemade blackberry juice is incredibly versatile:
- Classic Refreshment: Serve chilled over ice with a sprig of fresh mint and a lemon slice.
- Sparkling Blackberry Spritzer: Mix ½ cup juice with sparkling water and a squeeze of lime for a sophisticated non-alcoholic drink.
- Cocktail Base: Use as a mixer in cocktails—blackberry mojitos, margaritas, or whiskey smashes taste exceptional with the real-fruit depth.
- Breakfast Boost: Stir into morning smoothies, oatmeal, or yogurt bowls.
- Warm Comfort: Heat gently with spices for a soothing winter drink or base for mulled beverages.
- Dessert Element: Drizzle over vanilla ice cream, panna cotta, or cheesecake for an elegant finishing touch.
Personal Tip: For summer entertaining, freeze some juice in ice cube trays and use the blackberry ice cubes in lemonade—they keep drinks cold while adding flavor as they melt.
Common Mistakes to Avoid
- Squeezing the Jelly Bag Too Early — Pressing the bag during straining releases bitter compounds from the seeds and creates cloudy juice. Patience yields better flavor and appearance.
- Incorrect Headspace — Using more or less than ¼ inch can affect the seal and safety of your canned blackberry juice.
- Using an Unsafe Canner — This is a high-acid recipe safe for water-bath canning. Never guess—follow tested processing times and altitude adjustments.
- Adding Sugar Before Straining — Sweeten after extracting the juice so you can accurately gauge the natural flavor.
- Skipping the Rest Period — Removing jars immediately after processing can cause liquid to siphon out. The 5-minute rest in the canner is important.
Following these guidelines, based on recommendations from the National Center for Home Food Preservation, virtually guarantees successful results.
Storing Tips for the Recipe
Properly sealed jars of canning blackberry juice maintain best quality for 12–18 months when stored in a cool, dark location between 50–70°F. Avoid areas with temperature fluctuations or direct sunlight, which can degrade color and nutrients.
Once opened, refrigerate the jar and consume within 7–10 days. You can also freeze opened juice in ice cube trays for convenient portioned use later.
Make-Ahead Strategy: Pick and freeze berries in season on parchment-lined trays, then transfer to freezer bags. When you’re ready to can in the off-season, simply thaw them slightly before cooking. This approach lets you spread out the work and enjoy peak-flavor homemade blackberry juice even when fresh berries cost a premium.
Conclusion
This straightforward canning blackberry juice recipe transforms 4–5 pounds of fresh berries into 8 cups of pure, antioxidant-rich homemade juice you can enjoy year-round. With simple ingredients, a quick 10-minute water bath process, and clear steps, it’s an ideal project for both beginners and experienced canners.
Ready to preserve summer in a jar? Try this recipe with your next berry haul, then return to share your results in the comments, upload a photo of your beautiful jars, or leave a review. Subscribe today for more preserving guides, seasonal recipes, and creative ways to use your homemade pantry staples.
FAQs
Is it safe to can blackberry juice in a water bath canner?
Yes. Blackberries are a high-acid fruit, making water-bath canning perfectly safe when you follow tested processing times and headspace guidelines.
Do I have to add sugar when canning blackberry juice?
No. Sugar is entirely optional and can be adjusted to taste or omitted completely. Many people prefer the natural tartness of unsweetened juice.
How long does canned blackberry juice last?
Unopened jars maintain peak quality for 12–18 months in a cool, dark pantry. Always inspect seals and look for signs of spoilage before consuming.
Why does my juice separate in the jar?
Natural separation is common with homemade fruit juices. Simply shake the jar gently before serving. The color and flavor remain excellent.
Can I use frozen blackberries for this recipe?
Yes. Thaw frozen berries in the refrigerator and include any released juice in your measurement. Results are nearly identical to fresh berries.
What’s the difference between using a jelly bag versus cheesecloth?
A jelly bag is reusable and produces the clearest juice. Cheesecloth works well but may need multiple layers and can be messier. Both are acceptable for canning blackberry juice.
Blackberry Juice
Ingredients
Equipment
Method
- Prepare a boiling water canner, along with jars and lids.
- Add blackberries and water to a large stainless-steel saucepan. Bring to a boil, stirring frequently.
- Reduce heat, cover loosely, and simmer gently 5 to 10 minutes, stirring and crushing occasionally, just until berries are softened.
- Transfer the hot berry mixture to a dampened jelly bag or a cheesecloth-lined strainer set over a deep bowl. Let drip undisturbed until it stops dripping.
- Optional for clearer juice: refrigerate strained juice overnight to let sediment settle. Carefully pour off the clear juice and discard sediment.
- Pour juice into a saucepan. Add sugar to taste if desired. Bring juice to a gentle simmer.
- Ladle hot juice into hot jars, leaving 1/4 inch headspace. Wipe rims, apply lids, and tighten bands to fingertip tight.
- Process in a boiling-water canner for 10 minutes, or 15 minutes above 6,000 feet in elevation.
- Turn off heat, remove canner lid, and let jars rest 5 minutes. Remove jars and cool 12 to 24 hours, then check seals.