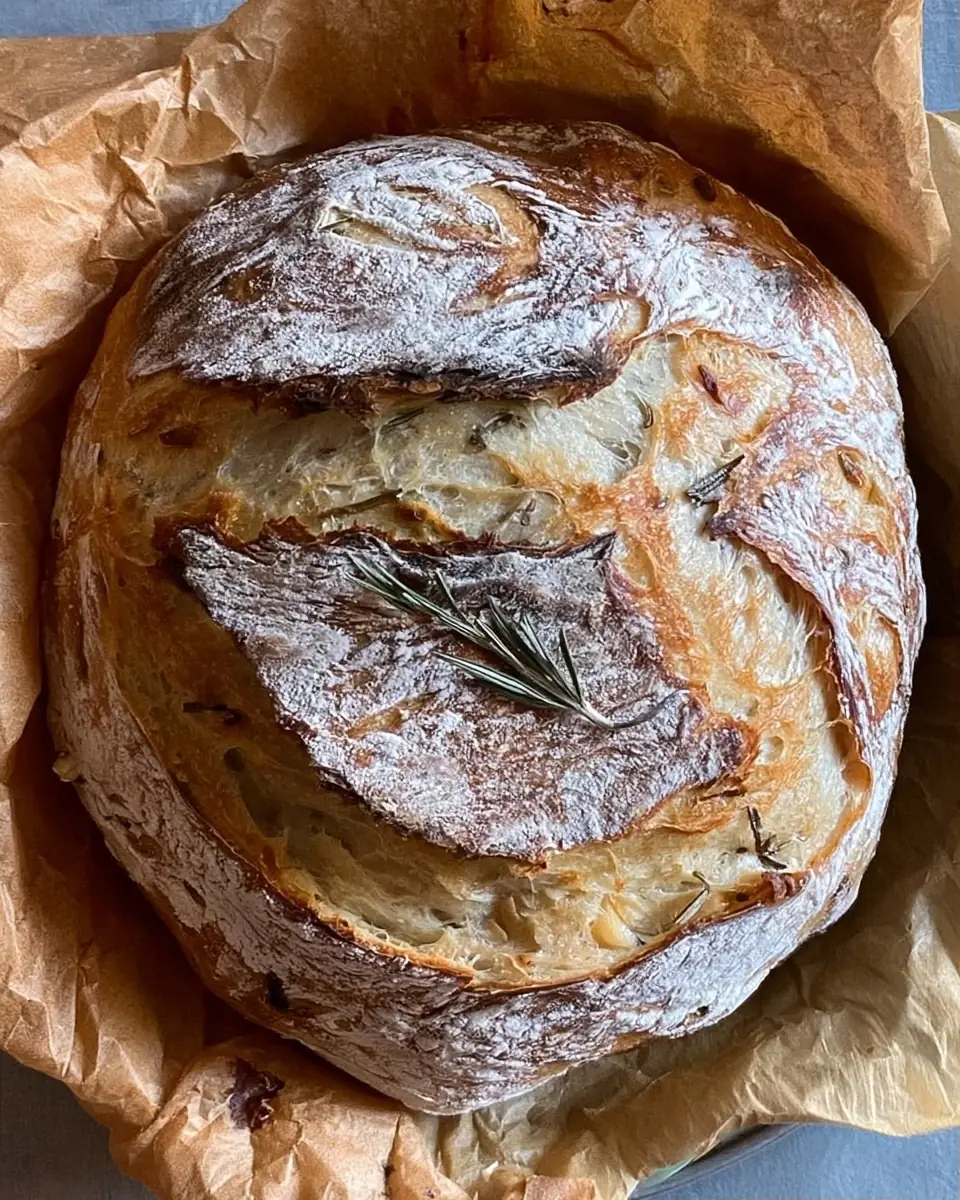
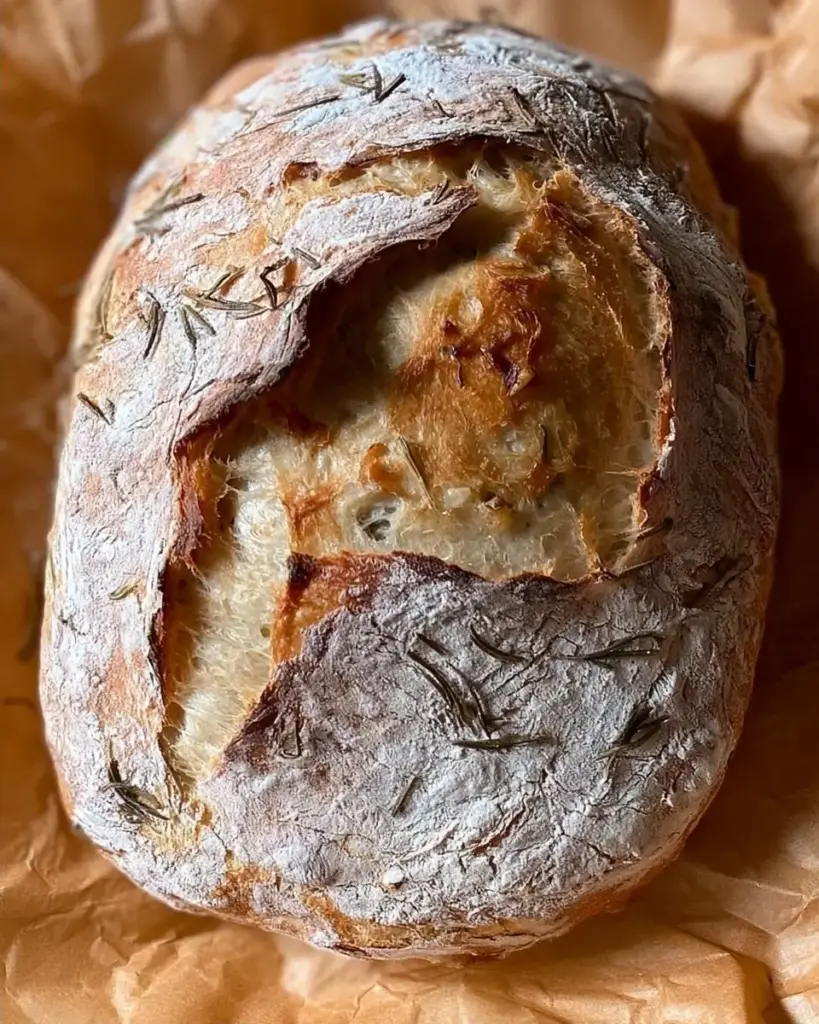
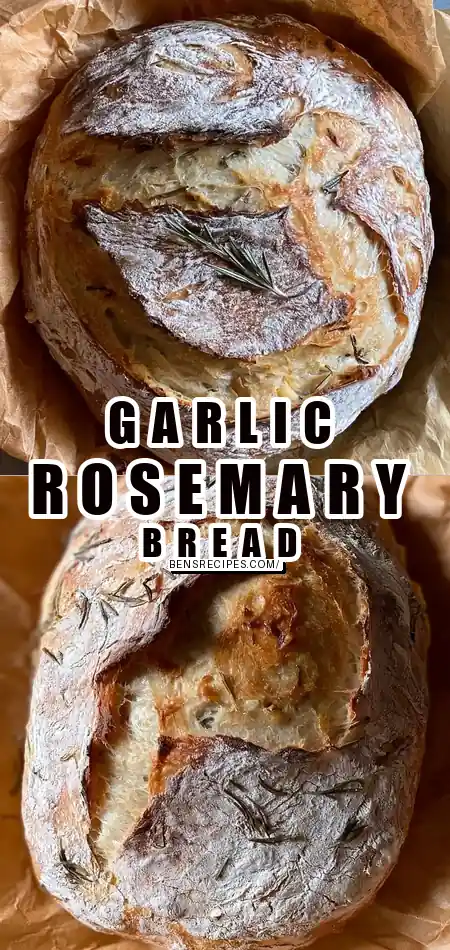
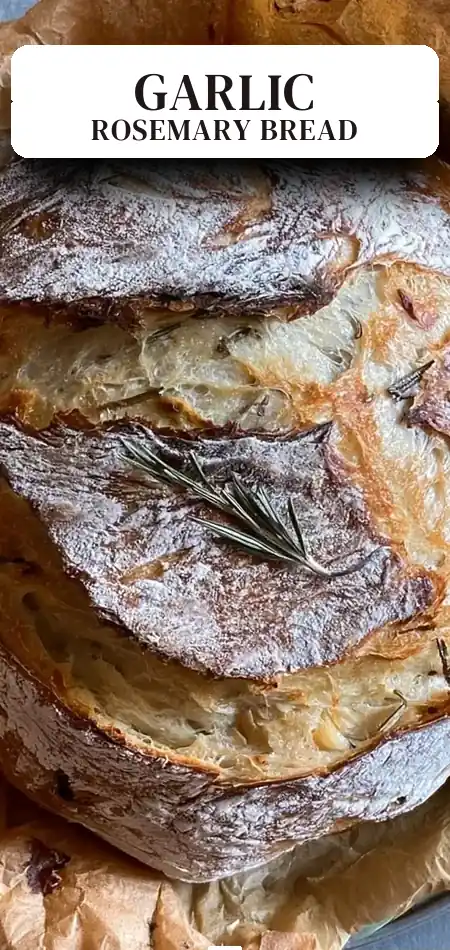
Simple Rosemary and Roasted Garlic Artisan Bread
Have you ever assumed that a genuine artisan loaf with a crackling crust, airy crumb, and deep savory flavor requires either a professional bakery oven or years of bread-making experience? This rosemary and roasted garlic artisan bread recipe completely challenges that belief. In fact, with only 10 minutes of active work you can create a bakery-quality Italian-inspired loaf that outperforms many commercial options.
The secret lies in a long, hands-off fermentation combined with sweet, caramelized roasted garlic and fragrant rosemary. This no-knead rosemary and roasted garlic artisan bread recipe develops complex flavor naturally over 18 hours while delivering the signature blistered crust that comes only from a screaming-hot Dutch oven. At roughly 150 calories per slice, it offers satisfying nourishment without excess.
Whether you’re a beginner or seasoned baker, this recipe turns simple pantry staples into a crusty, aromatic masterpiece perfect for soups, charcuterie, or simply tearing warm from the loaf. The roasted garlic mellows into sweet, nutty pockets while the rosemary and oregano perfume every bite. Ready to master true artisan bread without the intimidation? Let’s walk through every foolproof step.
This method relies on time rather than effort—exactly why it has become a favorite among home bakers seeking maximum flavor with minimal labor.
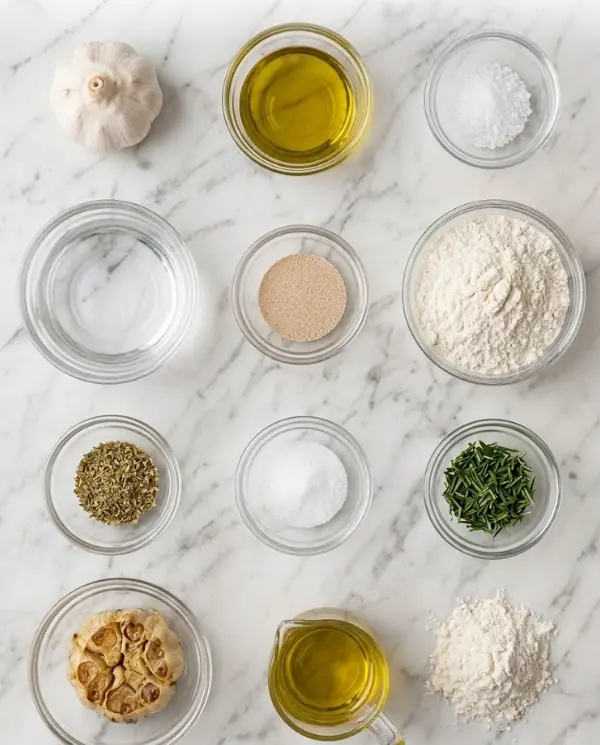
Ingredients List
This rosemary and roasted garlic artisan bread recipe uses minimal ingredients, allowing the long fermentation and bold flavors to shine.
For Roasting the Garlic:
- 1 whole head garlic
- 30 ml extra-virgin olive oil (for drizzling)
- 1 tsp coarse sea salt
- Freshly cracked black pepper
For the Dough:
- 1.5 cups (360 ml) room-temperature water
- 1 tsp active dry yeast
- 375 g bread flour or all-purpose flour (plus extra for dusting)
- ½ tsp dried oregano
- 1 tsp kosher or fine sea salt
- 2 tsp finely chopped fresh rosemary (plus more for topping)
- 1 whole head roasted garlic, cloves smashed
- 15 ml extra-virgin olive oil
Smart Substitutions:
- No fresh rosemary? Use 1 tsp dried rosemary, though fresh delivers brighter aroma.
- Want more whole-grain nutrition? Replace up to 100 g of the flour with white whole wheat flour.
- Instant yeast can replace active dry yeast (use the same amount; no separate blooming needed).
- For a milder garlic flavor, roast two heads and use only half the cloves.
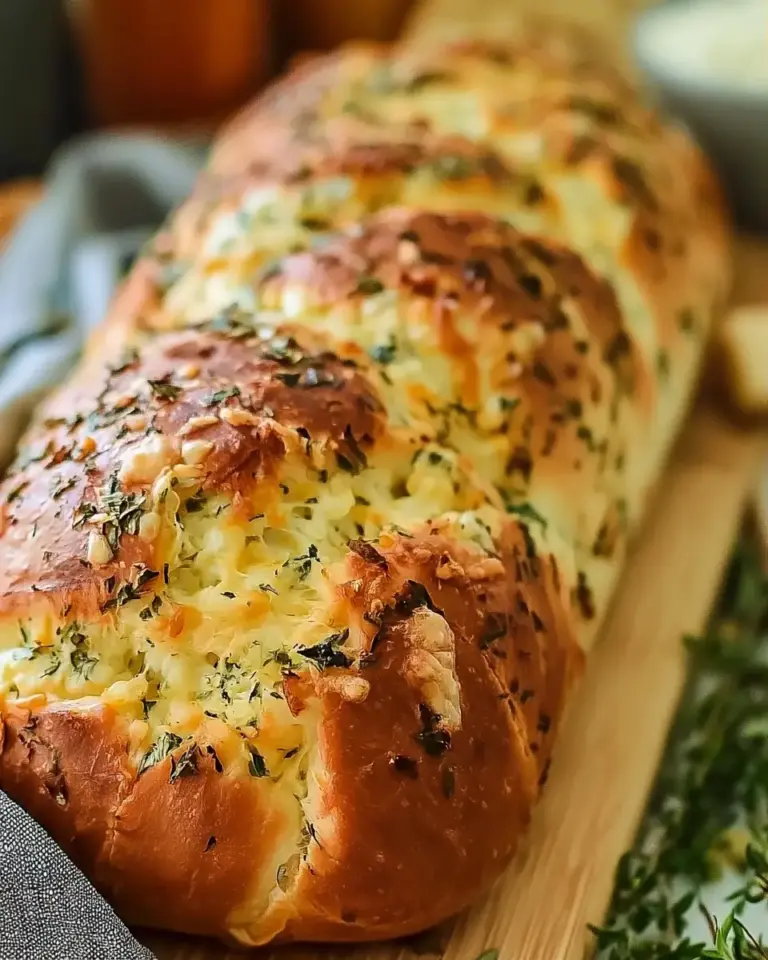
- Add 50 g grated Parmesan or Asiago to the dry ingredients for a cheesy variation that pairs beautifully with the herbs.
The combination of high-quality olive oil, fresh rosemary, and deeply roasted garlic creates an irresistible savory depth that makes this loaf smell like an Italian bakery the moment you lift the Dutch oven lid.
Timing
Prep Time: 10 minutes (plus 40 minutes to roast garlic)
First Rise: 8–10 hours at room temperature
Cold Proof: 8–12 hours (overnight in refrigerator)
Bake Time: 45 minutes
Total Time: Approximately 18 hours 20 minutes
While the clock time is long, actual hands-on time is under 20 minutes. This rosemary and roasted garlic artisan bread recipe is roughly 80% passive, making it far more convenient than kneaded breads that demand constant attention. The extended fermentation (compared to same-day breads) develops superior flavor and digestibility—many bakers report this style is gentler on the stomach than fast-rise loaves. Plan to start the dough the night before or early morning for next-day baking.
Step-by-Step Instructions
Roast the Garlic
Slice one head of garlic in half horizontally. Drizzle the exposed cloves generously with olive oil, sprinkle with coarse sea salt and black pepper, then wrap tightly in foil. Roast on a baking sheet at 400°F (204°C) for 40 minutes until the cloves are golden and soft. Let cool, squeeze the cloves from their skins, smash into a paste, and set aside. This step can be done up to three days ahead and stored in the refrigerator.
Bloom the Yeast and Mix the Dough
When ready to bake, sprinkle 1 tsp active dry yeast over 1.5 cups room-temperature water. Let it sit 10–15 minutes until foamy. In a large bowl, whisk together 375 g flour, ½ tsp dried oregano, 1 tsp salt, and 2 tsp chopped rosemary. Add the yeast mixture, smashed roasted garlic, and 15 ml olive oil. Use a rubber spatula to mix until a shaggy, sticky dough forms. A few dry flour streaks are fine—do not overmix. This no-knead approach relies on time to develop gluten.
First Long Room-Temperature Rise
Cover the bowl tightly with plastic wrap or a damp towel. Place in a warm spot (ideally 70–75°F) and let rise until doubled in size, about 8–10 hours. You’ll notice beautiful bubbles across the surface and a dramatic increase in volume. This slow fermentation is what gives the rosemary and roasted garlic artisan bread recipe its complex flavor and airy crumb.
Fold, Shape, and Cold Proof Overnight
Turn the risen dough out onto a well-floured surface. With floured hands, gently fold the dough into itself 4–6 times until it forms a soft ball. Flip seam-side up into a floured proofing bowl or banneton. Dust the top with flour, cover, and refrigerate overnight (8–12 hours). The cold proof tightens the structure and further develops flavor while making the dough easier to handle.
Preheat the Dutch Oven
Place your Dutch oven (with lid) inside the oven and preheat to 450°F (232°C). The extreme heat creates the perfect environment for oven spring and that signature artisan crust.
Shape, Score, and Bake
Remove the dough from the refrigerator. Turn it seam-side down onto a lightly floured surface and gently shape into a round or oval. Transfer to a sheet of parchment paper. Score the top deeply with a razor blade or sharp knife in your desired pattern (a simple slash or leaf design works beautifully). Carefully remove the hot Dutch oven, lift the parchment with the dough into the pot, cover, and bake for 30 minutes. Remove the lid and bake 15 minutes more until the crust is deep golden brown and the loaf sounds hollow when tapped.
Pro Tip: Adding a few ice cubes to the Dutch oven just before covering creates extra steam for even better oven spring and blistering.
Cool Before Slicing
Using the parchment edges, lift the bread onto a wire rack. Cool at least one hour (ideally two) before slicing. Cutting too early releases steam and results in a gummy texture.
Nutritional Information
Per slice (based on 12 slices per loaf):
- Calories: 150
- Carbohydrates: 26g
- Protein: 4g
- Fat: 3.5g (mostly heart-healthy monounsaturated fats from olive oil)
- Fiber: 1g
- Sodium: 240mg
This rosemary and roasted garlic artisan bread recipe stands out nutritionally because of the olive oil and herbs. Roasted garlic provides antioxidants and potential immune support, while rosemary contains anti-inflammatory compounds. Compared to many commercial artisan breads, this version uses no added sugars or preservatives and offers a cleaner ingredient list. The long fermentation may also improve mineral absorption from the flour.
Healthier Alternatives for the Recipe
Transform this already wholesome loaf to fit specific needs:
- Higher Fiber: Swap 150 g of the bread flour for whole wheat or spelt flour. The rosemary and garlic flavors hold up beautifully.
- Lower Sodium: Reduce salt to ¾ tsp—still flavorful thanks to the herbs and roasted garlic.
- Sourdough Version: Replace the yeast with 100 g active sourdough starter and extend the first rise slightly for natural leavening and gut-friendly benefits.
- Seeded Crust: Brush with egg wash before baking and press sesame, flax, or everything-bagel seasoning on top for added omega-3s and crunch.
- Oil-Free Option: Omit the mixing oil (still use some for roasting garlic) for a leaner loaf, though the crumb will be slightly less tender.
These swaps maintain the signature crust and flavor while supporting various dietary preferences and health goals.
Serving Suggestions
The versatility of this rosemary and roasted garlic artisan bread recipe makes it a kitchen staple. Serve it:
- Warm with a dish of high-quality olive oil and balsamic for dipping
- Alongside hearty Italian soups, minestrone, or roasted tomato bisque
- As the base for gourmet grilled cheese with sharp cheddar and caramelized onions
- Sliced thin for charcuterie boards with cured meats, olives, and aged cheeses
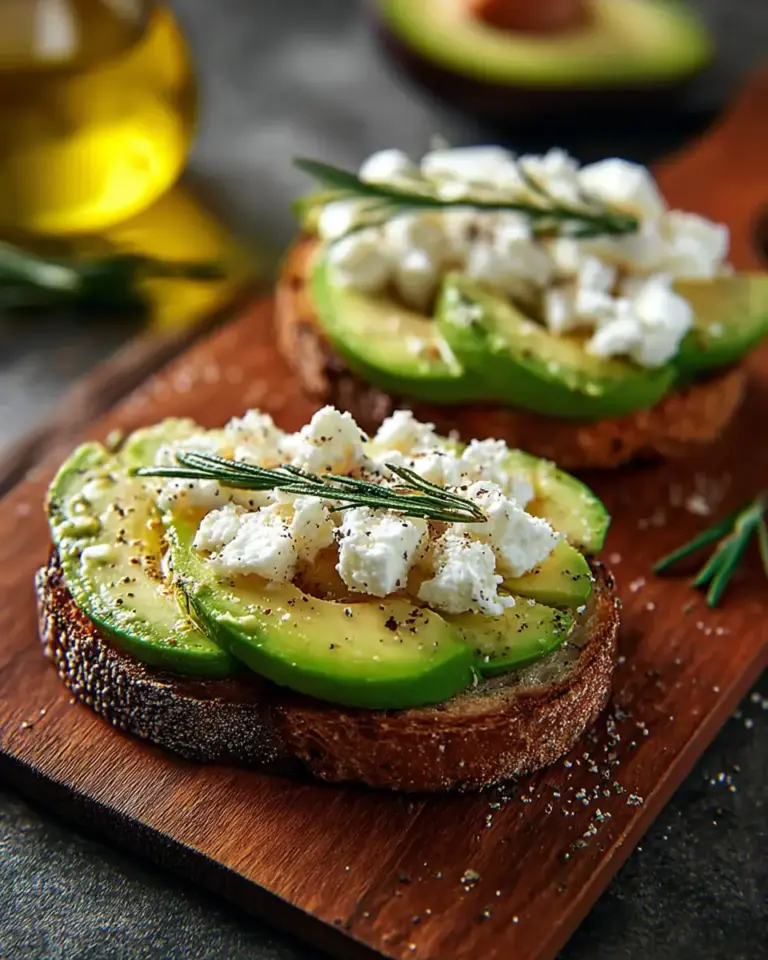
- Toasted and topped with ricotta, honey, and extra rosemary for a sweet-savory brunch treat
- Cubed into croutons for Caesar salads (the garlic flavor is incredible)
For holidays or dinner parties, bake two loaves—one to serve immediately and one to gift. The aroma alone will have guests asking for the recipe.
Common Mistakes to Avoid
Even an easy recipe has pitfalls. Here’s what to watch for:
- Using cold or hot water for yeast — Room temperature is critical. Too cold slows fermentation; too hot kills the yeast.
- Skipping the full rise — Cutting the 8–10 hour room-temperature rise short prevents proper flavor and structure development.
- Not preheating the Dutch oven — A cold pot cannot create the dramatic oven spring and crust this bread is known for.
- Using too little bench flour — The dough is sticky. Generous flouring prevents frustration during shaping.
- Slicing while still hot — Waiting at least one hour allows the crumb to set properly.
Avoiding these mistakes virtually guarantees professional-looking, delicious results every time.
Storing Tips for the Recipe
Store your cooled rosemary and roasted garlic artisan bread recipe in a paper bag or bread box at room temperature for up to 3 days. The crust stays crisp longer in paper than plastic. For longer storage, slice completely cool bread, wrap tightly in plastic, place in a freezer bag, and freeze up to 3 months. Revive frozen slices by placing directly in a 350°F oven for 8–10 minutes or toasting. The bread also makes exceptional breadcrumbs or croutons when it starts to stale.
Conclusion
This rosemary and roasted garlic artisan bread recipe proves that bakery-quality artisan bread is achievable at home with almost no effort. The combination of sweet roasted garlic, fragrant rosemary, a crackling crust, and tender crumb creates a loaf that elevates any meal. With mostly hands-off time and simple ingredients, it delivers impressive results consistently.
Ready to bake? Try this rosemary and roasted garlic artisan bread recipe this week. Share your results in the comments below, leave a star rating, or tell us your favorite way to serve it. Subscribe for more no-knead breads, Dutch oven recipes, and artisan techniques delivered straight to your inbox.
FAQs
Why does this rosemary and roasted garlic artisan bread recipe take so long?
The extended fermentation (8–10 hours plus overnight cold proof) develops deep flavor and beautiful texture that cannot be achieved with faster methods. Most of the time is completely hands-off.
Can I use fresh rosemary instead of dried oregano and rosemary?
Absolutely. Fresh herbs are preferred. Use 2 tsp chopped fresh rosemary and 1 tsp fresh oregano if available for brighter flavor.
Do I need a Dutch oven for this recipe?
A preheated Dutch oven creates the steam and high heat necessary for the signature artisan crust. While possible in a regular oven with a baking stone and steam pan, results are best with cast iron.
How do I know when the bread is fully baked?
The crust should be deep golden brown, and the loaf should sound hollow when tapped on the bottom. Internal temperature should reach about 205–210°F.
Can I add cheese or other ingredients?
Yes. Fold in 50–75 g shredded Parmesan or cubed cheddar during the folding step. Olives, sun-dried tomatoes, or walnuts also pair wonderfully with the rosemary and garlic.
Is this recipe beginner-friendly?
Yes. The no-knead method is very forgiving. As long as you weigh your flour and respect the rising times, even first-time bread bakers achieve excellent results.
How should I store the roasted garlic if I make it ahead?
Roasted garlic cloves keep in an airtight container in the refrigerator for up to 5 days or can be frozen for months. The flavor actually improves slightly after a day.
Rosemary and Roasted Garlic Artisan Bread
Ingredients
Equipment
Method
- Slice the garlic head in half. Drizzle the exposed cloves with olive oil and season with salt and pepper. Wrap in foil and roast on a baking sheet at 400ºF (204ºC) for 40 minutes. Let cool, remove cloves from their skins and set aside.
- When you’re ready to bake, sprinkle the yeast over the water and let it sit for 10-15 minutes. In a large bowl, stir together flour, oregano, salt and rosemary and set aside.
- Add yeast mixture, roasted garlic and olive oil to the bowl then use a rubber spatula to mix it together just until combined. The dough will look a little sticky and stringy and there should still be a little flour around the edges of the bowl.
- Cover and let rise somewhere warm until it has doubled in size, about 8-10 hours.
- Once the dough has doubled in volume, use your hands to pull the dough out onto a floured surface. With floured hands, gently fold the dough into itself several times until a soft, flour-covered ball is formed. Seam side up, lift and place it into a flour dusted bowl. Dust with flour, cover and refrigerate overnight.
- When you’re ready to bake your bread, preheat oven to 450ºF (232ºC) with your Dutch oven inside the oven.
- Once the oven is preheated, uncover then invert the bowl to turn the dough out onto a lightly floured surface seam side down. If needed, gently turn it with your hands and nudge it into the shape of a loaf.
- Place it on a sheet of parchment paper and score the top with a razor blade or the tip of a sharp knife with a design of your choosing.
- Once the oven is preheated, remove the Dutch oven from the oven and transfer the dough, still on the parchment, into the Dutch oven. Cover and bake for 30 minutes, then remove the cover and bake for 15 minutes more.
- Your bread will be done once the top is browned, and it sounds hollow when you tap the top.
- Using parchment edges, lift bread from Dutch oven and transfer it to a wire cooling rack to let cool for up to an hour before slicing.