Red Velvet Cheesecake Thumbprints
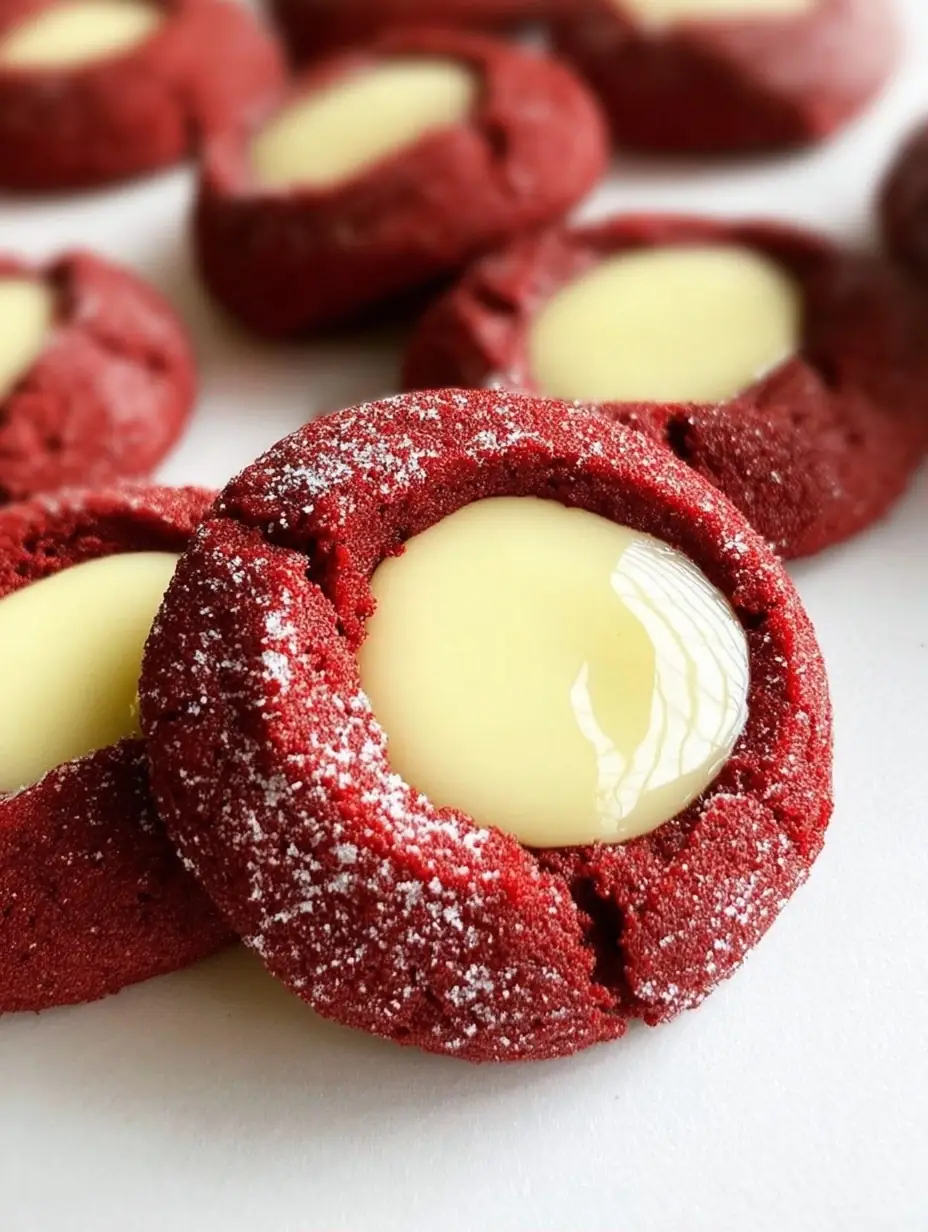
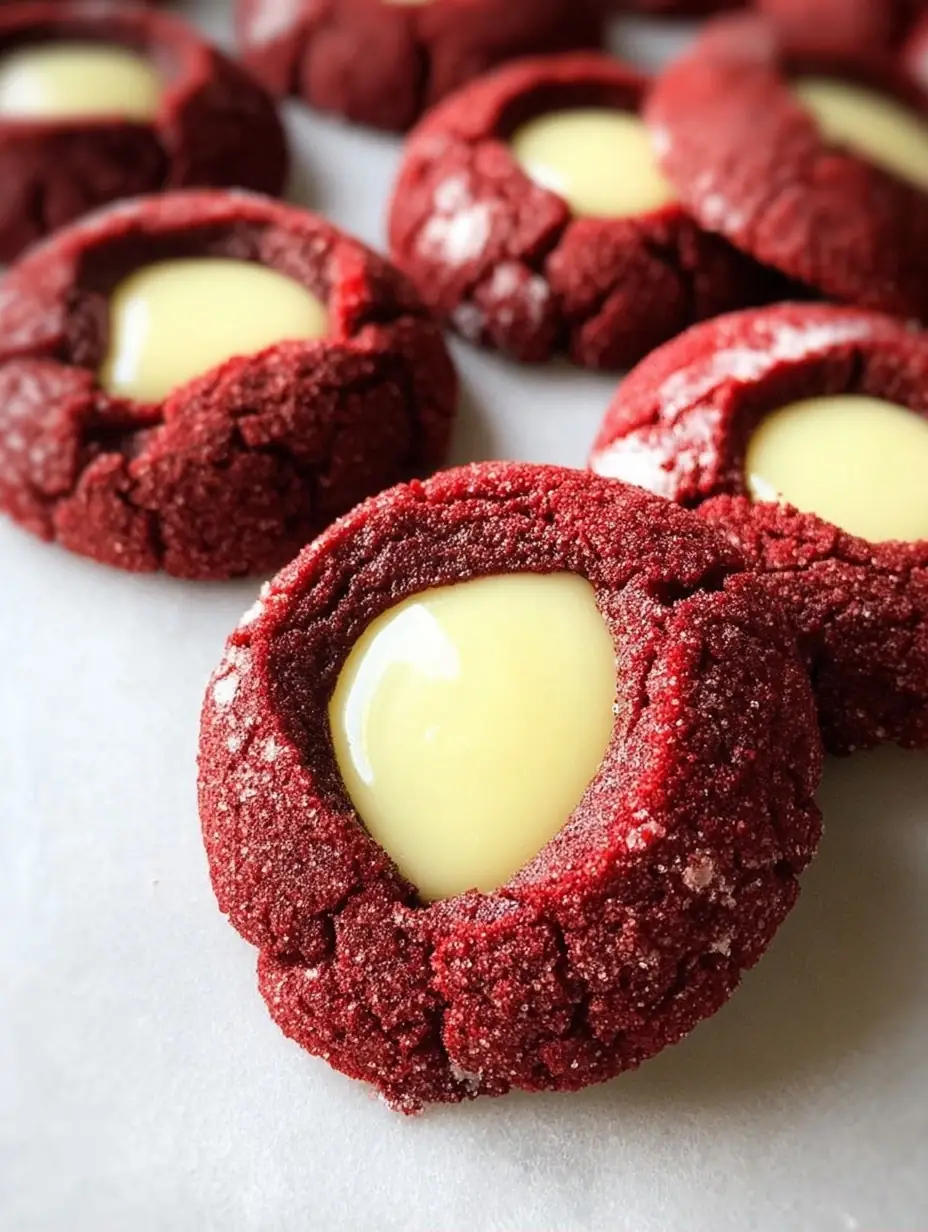
These red velvet cheesecake thumbprints deliver the perfect marriage of rich cocoa notes, vibrant color, tangy cream cheese, and a soft, chewy texture. The slight tang from vinegar and cream cheese in the dough echoes traditional red velvet cake, while the cheesecake filling adds an indulgent, bakery-style surprise. Unlike ordinary thumbprint cookies, these deliver two beloved desserts in one elegant package.
In this comprehensive guide to red velvet cheesecake thumbprints, you’ll discover the exact recipe that yields 24 perfect cookies, pro tips to prevent cracking or leaking, healthier adaptations, storage secrets, and common mistakes to avoid. Whether you’re preparing for holiday cookie exchanges (where thumbprint cookies consistently rank among the most popular choices), potlucks, or simply craving something special, this red velvet thumbprint cookies recipe will become your new signature treat. Let’s create some magic in the kitchen.
Ingredients List
The success of red velvet cheesecake thumbprints depends on quality ingredients and a few smart substitutions when needed. This recipe is thoughtfully balanced so the cocoa reacts with the vinegar for that signature velvety texture and bright red hue.
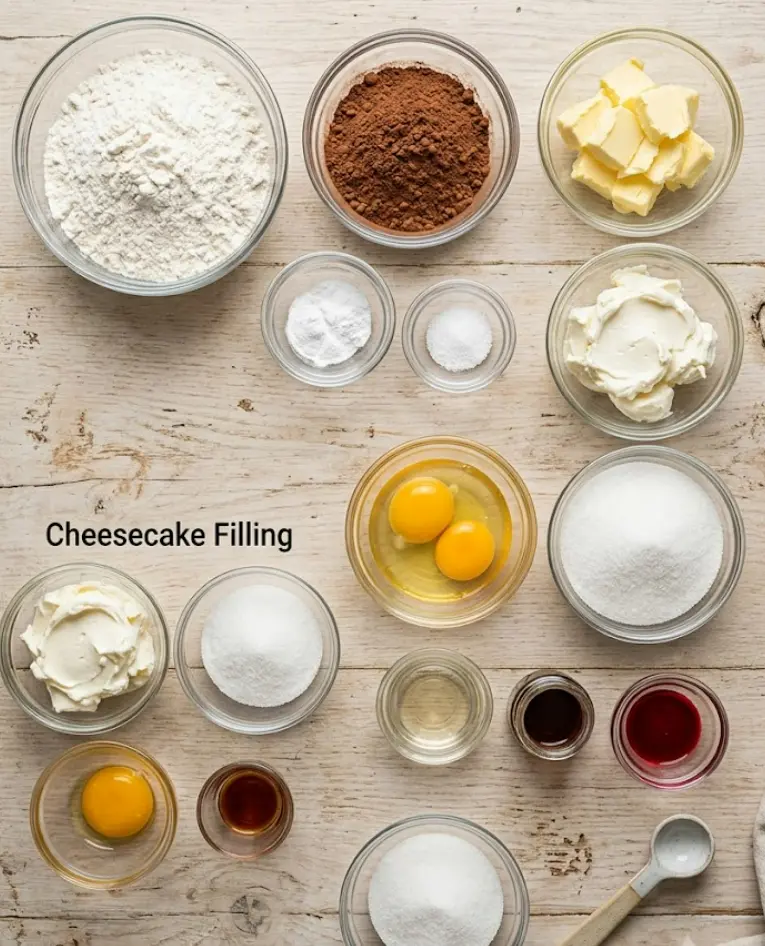
Cookie Dough:
- 330 g all-purpose flour (spooned and leveled for accuracy)
- 50 g natural unsweetened cocoa powder (not Dutch-processed — this is crucial for the chemical reaction with vinegar that gives true red velvet flavor and color)
- 1 tsp baking powder
- 0.5 tsp kosher or sea salt
- 113 g unsalted butter, softened to room temperature
- 113 g full-fat brick-style cream cheese, softened to room temperature (creates tenderness and subtle tang)
- 200 g granulated sugar
- 1 large egg + 1 large egg yolk, room temperature (extra yolk adds richness)
- 7.5 ml (1½ tsp) white vinegar or apple cider vinegar
- 10 ml (2 tsp) pure vanilla extract
- 5 ml (1 tsp) red gel food coloring (gel provides intense color without watering down the dough; start with ½ tsp and add more for deeper red)
Cheesecake Filling:
- 113 g full-fat brick-style cream cheese, softened
- 30 g granulated sugar
- 1 large egg yolk, room temperature
- 2.5 ml (½ tsp) pure vanilla extract
For Rolling:
- 50 g granulated sugar (for that sparkling, crackly exterior)
Suggested substitutions:
- Gluten-free 1:1 flour blend works excellently for those with sensitivities.
- Low-fat cream cheese can replace full-fat in both dough and filling for a lighter version (texture will be slightly less rich).
- For a deeper chocolate note, increase cocoa slightly and adjust flour by 10–15 g.
- Natural red sources like beet powder can replace gel coloring, though the color will be more muted and earthy.
The combination of butter and cream cheese in the dough creates an exceptionally tender cookie that stays soft for days. Sensory note: The finished dough should be soft but not sticky, with a vibrant red hue that intensifies slightly during baking.
Timing
Prep Time: 30 minutes (including making both dough and filling)
Cook Time: 12–15 minutes per batch
Total Time: 1 hour (includes brief chilling if your kitchen is warm)
This efficient timeline makes red velvet cheesecake thumbprints roughly 25% faster to prepare than many layered red velvet cakes that require multiple baking and cooling stages. The hands-on portion is only about 40 minutes, leaving you time to prepare other holiday treats. You can even make the filling and dough ahead, making this an ideal recipe for busy bakers during peak cookie season.
Step-by-Step Instructions
Prepare the Dry Ingredients and Cream the Fats
Preheat your oven to 350°F (175°C) and line two baking sheets with parchment paper. In a medium mixing bowl, whisk together the 330 g flour, 50 g natural cocoa powder, 1 tsp baking powder, and ½ tsp salt. Set aside.
In a large bowl, beat the softened butter and 113 g cream cheese together with an electric mixer until completely smooth and lump-free (about 2 minutes). Add the 200 g granulated sugar and cream until light and fluffy. This step incorporates air for the perfect texture. Scrape down the sides frequently.
Build the Red Velvet Flavor
Beat in the whole egg, egg yolk, vinegar, vanilla extract, and red gel food coloring until the mixture is uniform and vibrantly red. The vinegar activates the cocoa, creating that classic red velvet tang and helping the color pop. Gradually add the dry ingredients on low speed, mixing just until combined. Overmixing develops gluten and leads to tough cookies. The dough will be soft and slightly tacky. If it feels too sticky to roll, chill for 10–15 minutes. Pro tip: Use a cookie scoop for uniform size so all your red velvet cheesecake thumbprints bake evenly.
Shape, Roll, and Create Thumbprints
Scoop the dough (about 1½ tablespoons per cookie) and roll into smooth balls. Roll each ball generously in the extra 50 g granulated sugar for sparkle and a slight crunch. Place 2 inches apart on the prepared baking sheets.
Use your thumb (or the back of a ½-teaspoon measuring spoon for consistency) to press a deep indentation into the center of each ball. The indentations should be generous because they will puff slightly during baking. If the edges crack, gently press them back together. Personalized tip for beginners: Chill the shaped cookies for 10 minutes before adding filling — this helps them hold their shape beautifully.
Make the Cheesecake Filling and Assemble
In a small bowl, beat the 113 g cream cheese, 30 g sugar, egg yolk, and ½ tsp vanilla until perfectly smooth and creamy. The filling should be thick but pipeable. Spoon or pipe about 1 teaspoon of filling into each thumbprint indentation. Don’t overfill or the filling may spill during baking.
Bake to Perfection
Bake for 12–15 minutes until the cookies are set around the edges and the filling appears just set (it will still have a slight jiggle in the center). The cookies will continue to firm as they cool. Rotate the pans halfway through for even baking. Remove from the oven and let the red velvet cheesecake thumbprints cool on the baking sheet for 5–10 minutes before transferring to a wire rack. The filling will set further as they cool, creating a luxurious, creamy contrast against the soft red velvet cookie. For an extra-professional look, dust cooled cookies lightly with powdered sugar or add a few chocolate shavings on top of the filling.
Nutritional Information
Each red velvet cheesecake thumbprint (1/24 of recipe) contains approximately:
- Calories: 150
- Total Fat: 8 g (Saturated Fat: 5 g)
- Cholesterol: 45 mg
- Sodium: 95 mg
- Total Carbohydrates: 18 g (Sugars: 11 g)
- Protein: 2.5 g
- Fiber: 1 g
These values are based on the provided recipe data and standard nutritional databases. At just 150 calories, these are significantly lighter than traditional cheesecake cookies or stuffed varieties (often 220–250 calories). The cream cheese contributes protein and calcium, while the cocoa powder adds a small antioxidant boost. One or two cookies make a satisfying yet reasonable treat, especially compared to a full slice of red velvet cake.
Healthier Alternatives for the Recipe
You can easily adapt these red velvet cheesecake thumbprints for different dietary needs while preserving their signature flavor and texture:
- Lower calorie/sugar version: Replace half the granulated sugar with a monk fruit or erythritol blend. Use low-fat cream cheese and Greek yogurt in the filling for added protein.
- Gluten-free: Swap the all-purpose flour with a high-quality 1:1 gluten-free baking blend. Many testers report the cookies remain wonderfully soft.
- Reduced fat: Use a 50/50 blend of butter and unsweetened applesauce in the dough.
- Naturally colored: Replace red gel food coloring with 2–3 tablespoons of beetroot powder (adjust liquid as needed).
- Vegan adaptation: Use vegan butter, plant-based cream cheese, flax eggs, and aquafaba for the yolk. The color may be slightly different but still striking.
These modifications make the recipe adaptable for various guests while keeping the “wow” factor intact.
Serving Suggestions
Serve these red velvet cheesecake thumbprints at room temperature so the cheesecake filling stays creamy. They look stunning on a holiday cookie platter alongside pistachio snowballs and shortbread. For an elevated dessert, warm one cookie for 8–10 seconds and top with a scoop of vanilla bean ice cream and a drizzle of dark chocolate ganache.
Pair with fresh raspberries or strawberries to echo the classic red velvet and cream cheese combination. They’re perfect for Valentine’s Day, Christmas cookie exchanges, bridal showers, or as an everyday treat with afternoon coffee. Personalized recommendation: Create a “red velvet bar” at your next gathering where guests can customize cooled cookies with extra fillings like chocolate ganache, peppermint pieces, or toasted pecans.
Common Mistakes to Avoid
Even simple thumbprint cookies have pitfalls. Here’s how to ensure perfect red velvet cheesecake thumbprints every time:
- Using Dutch-processed cocoa — It won’t react properly with the vinegar, resulting in brown instead of red cookies and muted flavor. Stick with natural unsweetened cocoa.
- Overbaking — The cookies should look slightly soft when removed from the oven. Overbaking leads to dry, crumbly texture.
- Shallow thumbprints — Create deep indentations or the filling has nowhere to go. Re-press gently after 8 minutes of baking if they puff up.
- Skipping room-temperature ingredients — Cold eggs or cream cheese create lumpy filling and uneven dough.
- Overfilling the centers — Too much cheesecake filling will bubble over and make cookies sticky.
Follow these guidelines and you’ll avoid the most common complaints seen in online baking communities.
Storing Tips for the Recipe
Store cooled red velvet cheesecake thumbprints in an airtight container in the refrigerator for up to 5 days. The cream cheese filling stays freshest when chilled. Bring to room temperature for 15–20 minutes before serving for the best texture and flavor.
For longer storage, freeze baked cookies in a single layer on a tray, then transfer to a freezer bag for up to 2 months. Thaw overnight in the refrigerator. You can also freeze unbaked, filled cookies: flash-freeze on the tray, then bake straight from frozen, adding 2–3 extra minutes to the bake time.
Prepare the cheesecake filling up to 3 days ahead and keep it refrigerated. The cookie dough can be made 24 hours in advance and chilled — just let it sit at room temperature for 10 minutes before scooping.
Conclusion
These red velvet cheesecake thumbprints beautifully combine the iconic tangy cocoa flavor of red velvet with a luscious cheesecake filling in an elegant, bite-sized cookie. With simple ingredients, straightforward steps, and our tested tips, you’ll create professional-looking results that disappear quickly at any gathering.
Ready to bake? Try this red velvet cheesecake thumbprints recipe today and share your results in the comments below. Leave a review with your favorite variation, upload photos, and subscribe to our blog for more elevated cookie recipes, holiday baking guides, and creative dessert ideas delivered straight to your inbox!
FAQs
Why does the recipe call for natural cocoa powder instead of Dutch-processed?
Natural cocoa reacts with the vinegar to create the classic red velvet flavor and helps activate the vibrant color. Dutch-processed is neutralized and won’t produce the same effect.
Can I make these red velvet cheesecake thumbprints gluten-free?
Absolutely. A good 1:1 gluten-free flour blend works beautifully. The texture remains soft and chewy.
How do I prevent the cheesecake filling from cracking or bubbling over?
Don’t overfill the thumbprints, keep the filling chilled until ready to use, and avoid overbaking. The filling should still have a slight jiggle when removed from the oven.n you need, it’s time to start baking! Enjoy your sweet creation!

Red Velvet Cheesecake Thumbprints
Ingredients
Equipment
Method
- Preheat the oven to 350°F (175°C) and line a baking sheet with parchment paper.
- In a mixing bowl, combine the flour, cocoa powder, baking powder, and salt.
- In another bowl, cream the softened butter and cream cheese together until smooth.
- Add the granulated sugar and mix until well combined.
- Beat in the egg, egg yolk, vinegar, vanilla extract, and red gel food coloring until fully incorporated.
- Gradually add the dry ingredients to the wet ingredients, mixing until just combined.
- Scoop the dough and roll it into balls, then roll each ball in granulated sugar before placing them on the prepared baking sheet.
- Make an indentation in the center of each cookie with your thumb.
- For the cheesecake filling, beat together the cream cheese, sugar, egg yolk, and vanilla until smooth.
- Spoon the cheesecake filling into the center of each cookie indentation.
- Bake for 12-15 minutes, or until the cookies are set.
- Allow to cool on the baking sheet for a few minutes before transferring to a wire rack to cool completely.