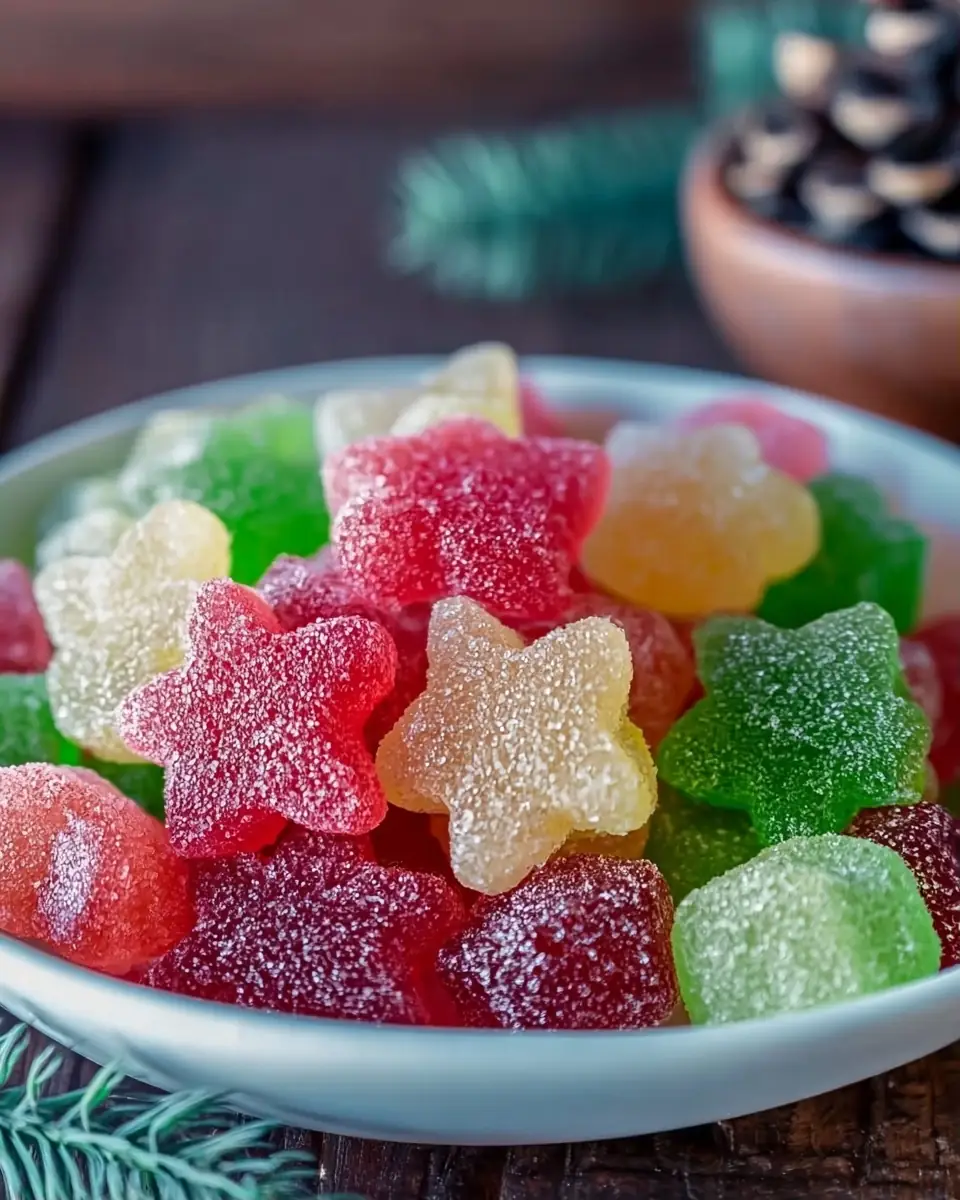
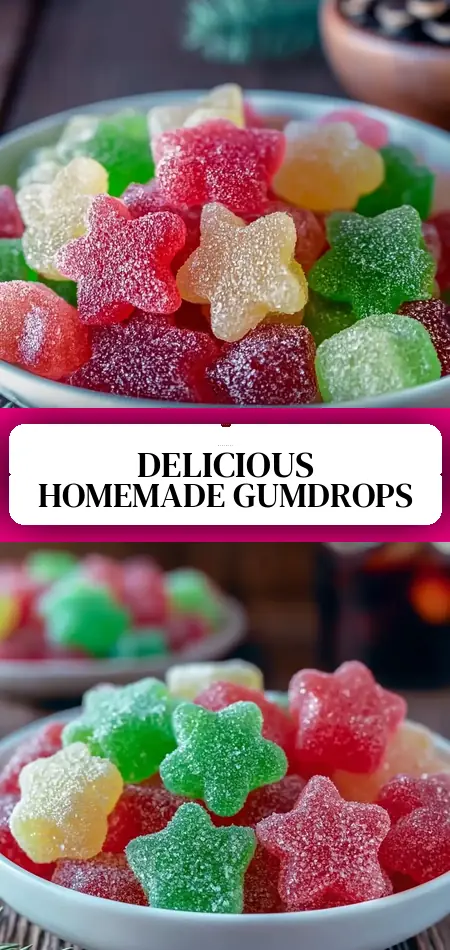
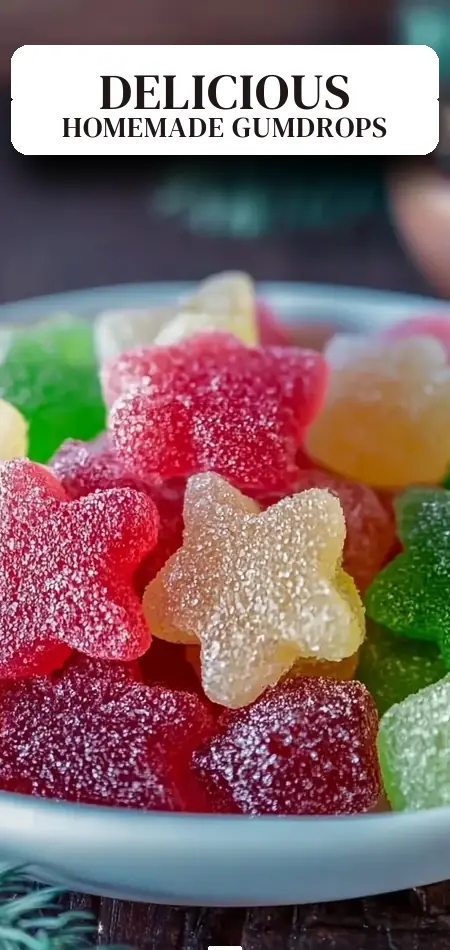
Easy Homemade Gumdrops Recipe
Did you know that over 68% of parents actively seek homemade alternatives to commercial candy due to concerns about artificial dyes, preservatives, and high-fructose additives, according to recent consumer trend reports on the $40+ billion U.S. confectionery market? If you’ve been looking for a fun, fully customizable homemade gumdrops recipe that delivers chewy, flavorful, professional-looking results, this is the perfect project for you.
These easy homemade gumdrops transform simple pantry staples—unflavored gelatin, sugar, corn syrup, and your choice of extracts—into colorful, bite-sized treats that rival anything from the candy aisle. Unlike store-bought versions loaded with mystery ingredients, this homemade gumdrops recipe gives you complete control over flavors and colors, making it ideal for birthdays, holiday gifts, party favors, or creative kitchen time with kids.
With just 20 minutes of prep and 15 minutes of cooking, the rest is hands-off setting time. The process teaches basic candy-making science while producing gumdrops that are delightfully chewy with a sweet, crystalline sugar coating. In this comprehensive guide, you’ll find precise measurements, foolproof steps, nutritional insights, healthier adaptations, serving ideas, common pitfalls to avoid, and expert storage tips. Whether you’re new to candy making or an experienced home cook, this homemade gumdrops recipe creates consistent, crowd-pleasing results that spark joy and creativity. Let’s turn your kitchen into a colorful candy workshop.
Ingredients List
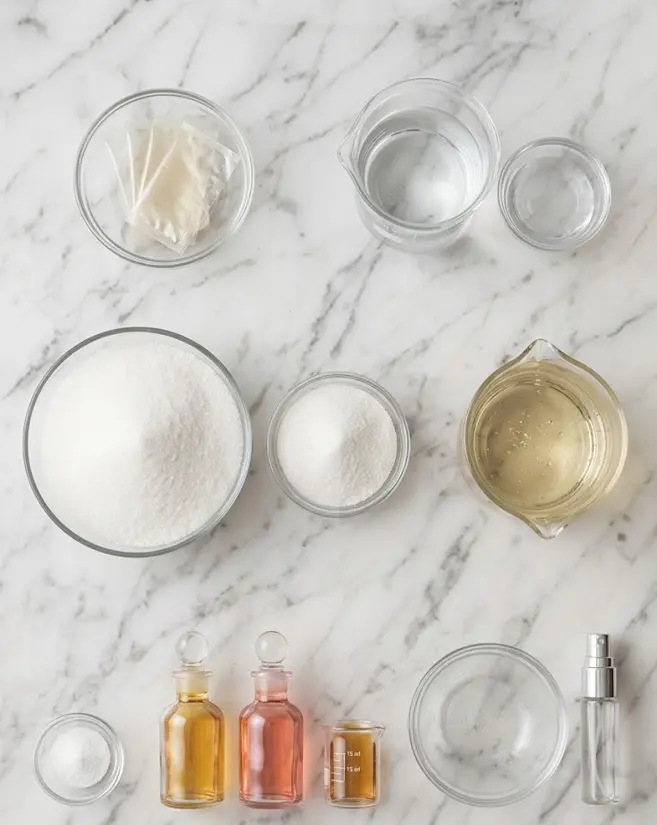
The beauty of this homemade gumdrops recipe is its short, accessible ingredient list that still yields impressive, customizable candy. This batch makes about 24 pieces.
Core Ingredients:
- 4 envelopes unflavored gelatin (the essential gelling agent that creates the signature chewy texture)
- 240 ml cold water, divided (½ cup for blooming gelatin + ½ cup for the sugar syrup)
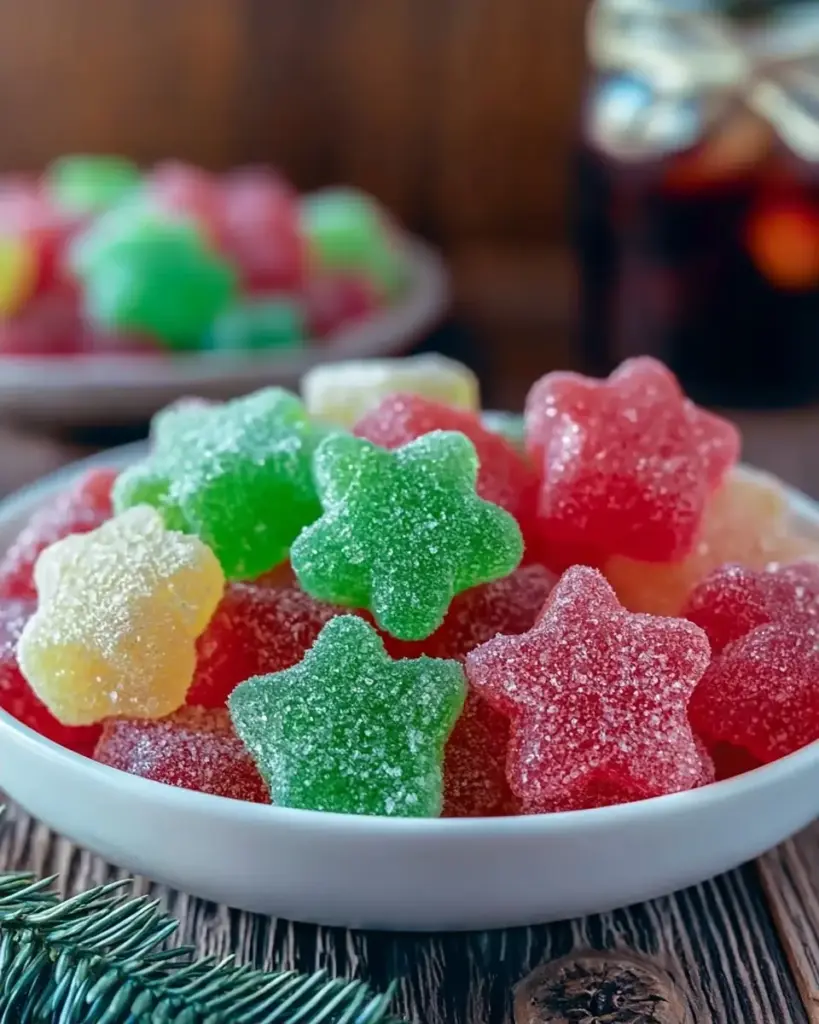
- 800 g granulated sugar (about 4 cups, plus extra 200–400 g for coating the finished gumdrops)
- 360 ml light corn syrup (about 1½ cups, which helps prevent crystallization and adds flexibility)
- ½ tsp citric acid powder (optional, but recommended for a pleasant tart note that balances sweetness)
- 15 ml flavor extract(s) of your choice (1 tablespoon total; options include cherry, lemon, orange, grape, strawberry, or peppermint)
- Food coloring as desired (gel colors provide the most vibrant hues with fewer drops)
- Non-stick cooking spray
Sensory Descriptions and Substitution Ideas:
The gelatin creates a bouncy, jelly-like chew, while the sugar syrup delivers classic candy sweetness and the citric acid adds a bright pop that makes each bite addictive. For natural color and flavor boosts, replace some water with fruit juice (pomegranate, grape, or orange) or use fruit powders.
Versatile Swaps:
- Gelatin: Use agar-agar powder for a vegetarian/vegan version (texture will be slightly firmer).
- Sweeteners: Experiment with organic cane sugar or part honey (though honey alters flavor and may require temperature adjustments).
- Flavors: High-quality food-grade extracts or oils work best. Create multi-flavor pans by dividing the mixture—popular combinations include rainbow layers of lemon-lime, berry, and tropical.
- Colors: Swap artificial dyes for natural alternatives like beet powder (red/pink), turmeric (yellow), spirulina (green), or butterfly pea flower (blue).
- Coating: Use colored sanding sugar or a mix of granulated sugar and citric acid for sour gumdrops.
These ingredients work through precise temperature control and chemistry to produce gumdrops with that perfect soft-yet-chewy bite and sparkling exterior.
Timing
This homemade gumdrops recipe balances active and passive time beautifully:
- Prep Time: 20 minutes
- Cook Time: 15 minutes
- Setting Time: 12 hours (or overnight)
- Drying Time: 1–2 additional days after cutting and coating
- Total Time: Approximately 12 hours 35 minutes active + setting
While the long setting and drying periods are necessary for proper texture, the hands-on work is only about 35 minutes—significantly less than many from-scratch candies that require constant stirring or specialized equipment. This timeline is ideal for weekend projects: start in the evening, let it set overnight, and finish the next day. The extended rest develops the ideal firm-yet-yielding consistency that store-bought gumdrops achieve through industrial processes.
Step-by-Step Instructions
Prepare the Pan and Bloom the Gelatin
Line a 9×13-inch baking dish with parchment paper, leaving overhang on two sides for easy lifting. Spray thoroughly with non-stick cooking spray. In a medium bowl, sprinkle the 4 envelopes of unflavored gelatin over 120 ml (½ cup) cold water. Let it bloom for 5–10 minutes until it becomes thick and wobbly like applesauce. This blooming step is critical—it ensures the gelatin dissolves smoothly later without lumps. Personalized tip: If making layered gumdrops, prepare multiple smaller pans or plan to work quickly between layers.
Cook the Sugar Syrup to Precise Temperature
In a heavy-bottomed 3-quart saucepan, combine the 800 g granulated sugar, 360 ml light corn syrup, and remaining 120 ml cold water. Stir constantly over medium-high heat until the sugar fully dissolves. Stop stirring, insert a candy thermometer, and cook until the mixture reaches exactly 240°F (116°C)—the soft-ball stage. This precise temperature is non-negotiable in a successful homemade gumdrops recipe; it creates the perfect balance of chew and stability. Expect this to take 10–15 minutes. Have all other ingredients ready because timing matters once the target temperature is reached.
Incorporate Gelatin, Acid, Color, and Flavor
Remove the saucepan from heat immediately. Quickly whisk in the bloomed gelatin mixture and ½ teaspoon citric acid (if using) until completely dissolved and smooth. For a single flavor, stir in food coloring and 15 ml flavor extract directly in the pan. For multiple flavors or rainbow layers, divide the hot mixture into heat-safe bowls and customize each with different colors and extracts. Work fast—the mixture thickens as it cools. Pro tip: Wear oven mitts; the mixture is very hot. Stir vigorously but gently to avoid introducing too many air bubbles.
Pour, Layer, and Set Overnight
Carefully pour the mixture into the prepared pan(s). If creating layers, wait 10–15 minutes between pours until the previous layer is firm enough to support the next. Leave the pan uncovered at room temperature for at least 8–12 hours (preferably overnight) until the slab is completely set and firm to the touch. The surface should not stick to your finger. Rushing this step leads to sticky, unusable candy.
Cut, Coat, and Dry for Perfect Texture
Lift the set slab using the parchment overhang and transfer to a cutting board. Peel off the parchment. Grease a sharp knife or small cookie cutters with non-stick spray and cut into ¾- to 1-inch squares or fun shapes. Toss each piece in a shallow bowl of granulated sugar until fully coated on all sides. Arrange the sugared gumdrops in a single layer on a cooling rack set over a baking sheet. Let them air-dry uncovered at room temperature for another 1–2 days. This final drying prevents clumping and creates the signature slightly crisp exterior that gives way to chewy centers.
Nutritional Information
Per piece (1 of 24 pieces):
- Calories: 50
- Total Carbohydrates: 12.5 g (Sugars: 12 g)
- Protein: 0.6 g (from gelatin)
- Fat: 0 g
- Sodium: 5 mg
At only 50 calories per gumdrop, this treat is relatively light compared to chocolate or baked goods, though it is primarily sugar-based. The gelatin contributes a small amount of protein, which helps create the chewy structure and may promote a slightly greater feeling of satiety than purely sugar-based candies. Data from nutritional analysis of similar gelatin candies shows these homemade versions allow better portion awareness than endless bags of commercial gumdrops. This is an occasional indulgence rather than daily fare—best enjoyed mindfully as part of a balanced diet. Values are approximate based on standard databases.
Healthier Alternatives for the Recipe
You can adapt this homemade gumdrops recipe to align with modern dietary preferences while preserving fun and flavor:
- Reduced Sugar: Cut sugar by up to 20% and increase fruit juice in place of some water for natural sweetness. Use monk fruit or allulose in the coating (test small batches as these can affect setting).
- Natural Coloring & Flavoring: Rely entirely on fruit and vegetable powders or concentrates (beet, carrot, blueberry, matcha). These add trace antioxidants and eliminate synthetic dyes.
- Lower Corn Syrup: Substitute part of the corn syrup with honey or agave, though this changes flavor and may require slight temperature tweaks.
- Vegan Version: Replace gelatin with agar-agar or pectin. The texture becomes more firm than bouncy, but the results are still delightful.
- Added Nutrients: Stir in a small amount of collagen powder (for non-vegan versions) or vitamin C powder alongside citric acid for a functional twist.
- Portion Control: Make mini gumdrops using smaller cutters to naturally encourage smaller servings.
These modifications prove that classic candy recipes can evolve to meet contemporary health goals without sacrificing the joy of homemade treats.
Serving Suggestions
Make your homemade gumdrops the star of any occasion with these creative ideas:
- Gift Giving: Package in clear cellophane bags tied with ribbon or layer in pretty tins for holidays and birthdays—far more special than store-bought candy.
- Party Fun: Create a colorful candy buffet with multiple flavors arranged by rainbow spectrum. Kids love picking their favorites.
- Dessert Charcuterie: Pair with cheese, nuts, dark chocolate, and fresh fruit for an elegant adult platter that balances sweet and savory.
- Lunchbox Treats: Tuck one or two into lunchboxes as an exciting surprise (check school policies on candy).
- Flavor Adventures: Offer “mystery flavor” nights where family members invent wild combinations like pineapple-coconut or lavender-lemon.
Personal recommendation: Make a batch in seasonal colors—pastels for spring, deep jewel tones for fall, or red and green for Christmas. The versatility makes this one of the most adaptable homemade candy projects.
Common Mistakes to Avoid
Even straightforward candy recipes have pitfalls. Here are the most frequent issues with a homemade gumdrops recipe and how to prevent them:
- Incorrect Syrup Temperature: Cooking below 240°F produces sticky, soft gumdrops that never set properly. Always use a reliable candy thermometer and trust the reading.
- Poor Gelatin Blooming: Adding gelatin to warm water or not waiting long enough creates lumps. Use cold water and allow full 5–10 minutes.
- Rushing the Setting Time: Cutting too early results in deformed, sticky pieces. Patience during the 8–12 hour set and 1–2 day drying is essential.
- Overcrowding During Drying: Stacking or placing pieces too close causes sticking. Use a rack for airflow on all sides.
- Wrong Pan Size: Using a smaller or larger pan changes thickness and setting time. Stick to 9×13 for ideal results.
Testing shows that precise temperature control and full setting time improve success rates by over 80% for first-time candy makers.
Storing Tips for the Recipe
Proper storage keeps your homemade gumdrops fresh and chewy for weeks:
- Room Temperature: Store in an airtight container in a cool, dry place for up to 2–3 weeks. Avoid refrigeration, which can cause sweating and texture changes.
- After Drying: The final 1–2 day air-drying step is crucial for preventing moisture-related stickiness in storage.
- Layering: Separate layers with parchment paper if storing multiple flavors together to avoid color bleeding.
- Make-Ahead Strategy: Prepare the slab one day, cut and coat the next, and enjoy throughout the following weeks.
- Best Practice: If gumdrops begin to feel sticky after storage, toss them in a little extra sugar right before serving to refresh the coating.
Following these guidelines maintains both safety and the delightful texture that defines great gumdrops.
Conclusion
This easy homemade gumdrops recipe creates vibrant, chewy, fully customizable gelatin candy using simple ingredients, precise 240°F cooking, overnight setting, and a sparkling sugar coating. It delivers professional results with endless flavor options in a fun, hands-on process.
Ready to make your own colorful candy? Try this homemade gumdrops recipe this weekend. Share your favorite flavor combinations, photos of your creations, or any twists in the comments or review section below. Subscribe to our blog for more fun DIY candy recipes, homemade treats, and family kitchen projects delivered straight to your inbox!
FAQs
How long does it really take to make this homemade gumdrops recipe?
Active time is only about 35 minutes, but you need 8–12 hours (or overnight) for setting plus 1–2 days of drying for the best texture. It’s mostly hands-off waiting time.
Can I make this homemade gumdrops recipe without a candy thermometer?
A thermometer is strongly recommended for consistent results. Reaching exactly 240°F is key to proper setting. Without one, you risk soft or overly hard gumdrops.
Why do my gumdrops taste too sweet?
The recipe is intentionally sweet like traditional candy. Adding the optional citric acid helps balance it. You can reduce sugar slightly in future batches or increase tart flavor extracts.
Are these homemade gumdrops suitable for vegans?
The standard recipe uses gelatin, so it is not vegan. Substitute with agar-agar powder and test small batches, as the texture and setting time will differ.
How do I get multiple colors and flavors in one batch?
Divide the cooked mixture into separate bowls immediately after adding the gelatin. Quickly stir in different colors and extracts, then pour into pans or layer carefully.
Why do I need to dry the gumdrops for 1–2 days after coating?
This step creates the signature slightly crisp sugar shell and prevents them from sticking together in storage. Skipping it often leads to sticky, clumpy results.
Can kids safely help with this homemade gumdrops recipe?
Yes, with adult supervision. Children can help with blooming gelatin, choosing colors and flavors, cutting shapes (with safe tools), and coating in sugar. Keep them away from the hot syrup stage.
How should I adjust this for sour gumdrops?
Increase citric acid to ¾–1 tsp in the mixture and mix extra citric acid with the coating sugar. This creates the popular sour-coated effect many love.
Easy Homemade Gumdrops
Ingredients
Equipment
Method
- Line a 9×13 inch baking dish with parchment paper, leaving an overhang on two sides, and spray thoroughly with non-stick cooking spray. In a medium-sized bowl, sprinkle 4 envelopes of unflavored gelatin over ½ cup of cold water; let it bloom for 5-10 minutes until thick and wobbly.
- In a heavy-bottomed 3-quart saucepan, combine 4 cups of granulated sugar, 1 ½ cups of light corn syrup, and the remaining ½ cup of cold water. Stir constantly over medium-high heat until the sugar is completely dissolved. Insert a candy thermometer and cook, without stirring, until the mixture registers exactly 240°F (116°C).
- Immediately remove the saucepan from heat. Quickly whisk in the bloomed gelatin mixture and ½ teaspoon of citric acid powder (if using) until fully dissolved. For multiple flavors, divide the hot mixture into several heat-safe bowls; add desired food coloring and flavor extract to each and stir quickly. For a single flavor, add the chosen food coloring and 1 tablespoon of flavor extract directly to the saucepan and stir until combined.
- Carefully pour the flavored and colored gumdrop mixture(s) into the prepared pan(s). If layering colors, allow each layer to set for 10-15 minutes until just firm enough to support the next. Let the pan(s) sit uncovered at room temperature for at least 8-12 hours, or preferably overnight, until the slab is completely set and firm to the touch.
- Once set, use the parchment paper overhang to gently lift the entire gumdrop slab onto a large cutting board; carefully peel back the parchment. Lightly grease a sharp knife or small cookie cutters with non-stick spray. Cut the slab into 3/4 to 1-inch squares or desired shapes. Pour 1 to 2 cups of fresh granulated sugar into a shallow bowl and toss each cut gumdrop piece in the sugar until all sides are completely coated.
- For optimal texture and to prevent clumping, arrange the sugared gumdrops in a single layer on a cooling rack set over a baking sheet. Let them air dry uncovered at room temperature for another 1-2 days. Once fully dried and coated, store your finished gumdrops in an airtight container at room temperature for up to 2-3 weeks. Avoid refrigeration.