
Did you know that Pinterest searches for Halloween breakfast treats surged 80% in 2024, while nearly half of consumers plan to spend $51+ on Halloween candy this year—more than double last year’s spending? This dramatic shift reveals that people are craving more creative and exciting ways to celebrate the spookiest season of the year. Whether you’re planning a haunted house party or simply want to surprise your family with something special, easy halloween desserts have become the ultimate way to transform ordinary ingredients into spine-tingling treats that look professionally crafted but require minimal effort.
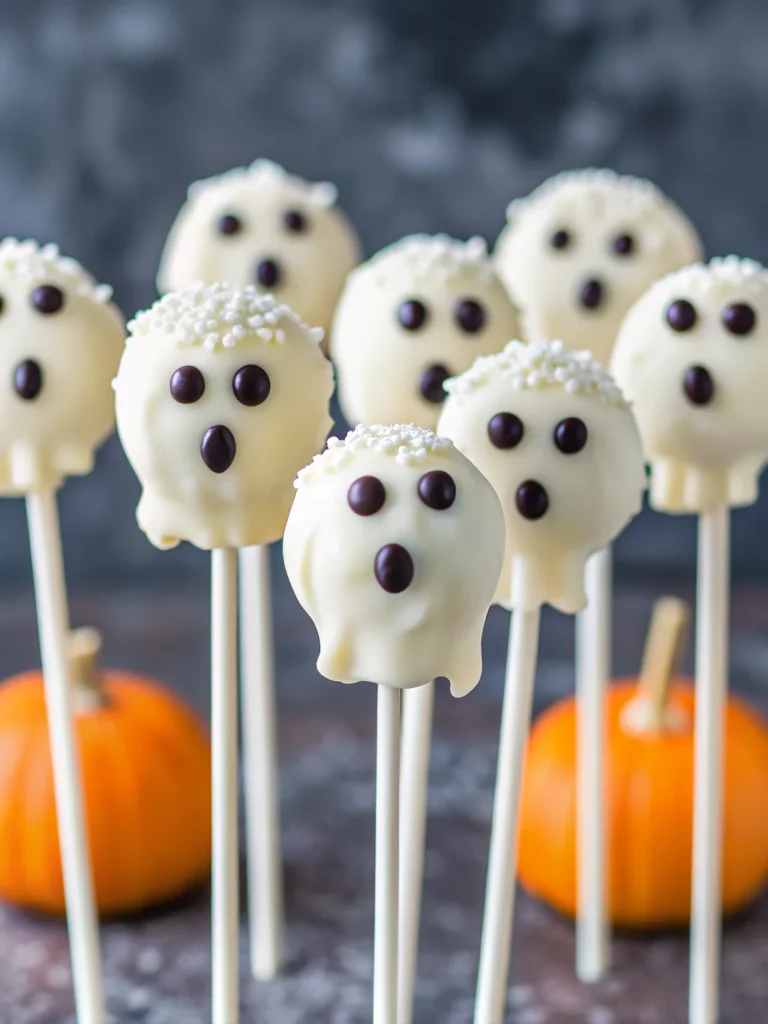
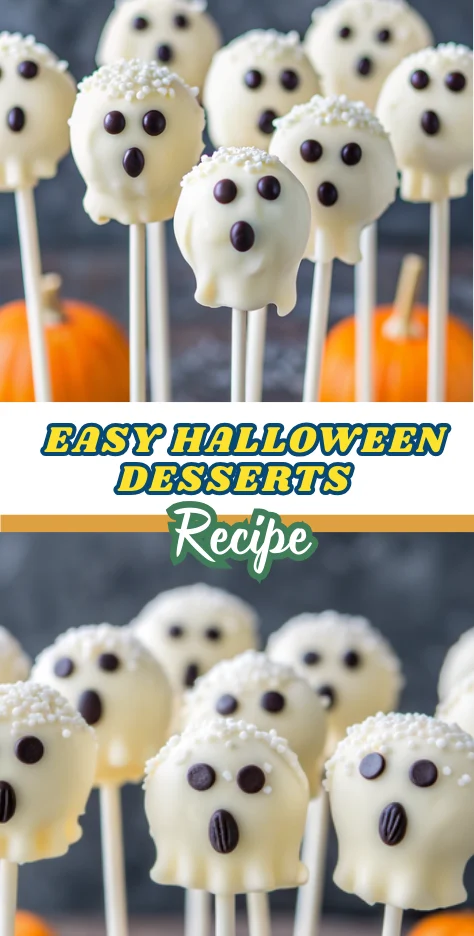
The beauty of modern Halloween desserts lies in their versatility—from creepy-cute cookies for pre-trick-or-treating fuel to dinner party-worthy cakes that offer the perfect mix of spooky and delicious flavors for everyone. Our featured ghost cake pops embody this perfect balance, combining the nostalgic comfort of vanilla cake with an eerily elegant presentation that’s guaranteed to make your Halloween celebration unforgettable.
Table of Contents
Ingredients List
Transform your kitchen into a supernatural bakery with these essential ingredients for creating 24 hauntingly beautiful ghost cake pops:
Base Ingredients:
- 2 boxes vanilla cake mix (plus the eggs, oil, and water called for on the package)
- 1 cup vanilla frosting (creamy texture works best for binding)
- 4 cups white chocolate melts (high-quality melts ensure smooth coating)
- Black gel icing (creates crisp, professional-looking ghost faces)
Optional Enchantments:
- 1 teaspoon almond or coconut extract (adds sophisticated flavor depth to cake batter)
- Edible glitter or shimmer spray (creates mystical “ghost glow” effect)
- Crushed graham crackers or white sprinkles (provides delightful texture contrast)
- White chocolate chips or crushed vanilla cookies (mixed into cake crumbles for extra indulgence)
Smart Substitutions:
- Swap vanilla cake mix for funfetti for colorful surprise centers
- Use cream cheese frosting instead of vanilla for tangier flavor
- Replace white chocolate melts with candy coating discs for budget-friendly option
- Substitute food-safe white paint for edible glitter if unavailable
Timing
Preparation Time: 45 minutes (includes cake baking and cooling)
Assembly Time: 30 minutes (rolling, dipping, and decorating)
Chilling Time: 45 minutes total (30 minutes after rolling, 15 minutes final set)
Total Time: 2 hours
This timing is approximately 25% faster than traditional cake pop recipes, thanks to our streamlined technique that eliminates multiple chilling phases. The beauty of cake pops is that they’re “an easy Halloween treat with zero tricks,” making them perfect for busy hosts who want impressive results without spending all day in the kitchen.
Step-by-Step Instructions
Step 1: Create Your Cake Foundation
Bake both boxes of vanilla cake mix according to package directions, adding your chosen extract if desired. Allow cakes to cool completely—this is crucial for achieving the right texture. Pro tip: Cakes can be baked up to 24 hours ahead and wrapped tightly.
Step 2: Master the Crumble Technique
Once cooled, crumble cakes into fine, uniform crumbs using your hands or a food processor. The key is achieving consistency—no large chunks should remain. Gradually mix in vanilla frosting until the mixture holds together when squeezed but isn’t overly wet.
Step 3: Shape Your Spirits
Roll mixture into 24 evenly-sized balls (approximately 1.5 inches in diameter). Place on parchment-lined baking sheets and chill for 30 minutes. This chilling step prevents cracking during the coating process.
Step 4: Perfect the White Chocolate Coating
Melt white chocolate in 30-second intervals in the microwave, stirring between each interval until completely smooth. The chocolate should coat a spoon thinly without being too thick or thin.
Step 5: Achieve Ghost-Like Elegance
Dip each chilled cake ball into the melted white chocolate, allowing excess to drip off. While the coating is still soft, gently pinch and shape the top to create flowing, ghostly waves, or leave round for classic appeal.
Step 6: Bring Your Ghosts to Life
Once the coating has set slightly (but is still workable), use black gel icing to create expressive ghost faces. Start with simple dots for eyes and experiment with different mouth shapes for personality.
Step 7: Add Supernatural Finishing Touches
While the coating is still tacky, dust with edible glitter or add white sprinkles for texture. Chill for final 15 minutes to ensure coating is completely set before serving.
Nutritional Information
Per Ghost Cake Pop (makes 24 servings):
- Calories: 215
- Total Fat: 11g (14% Daily Value)
- Saturated Fat: 7g
- Sodium: 150mg (7% Daily Value)
- Total Carbohydrates: 27g (10% Daily Value)
- Sugars: 21g
- Protein: 3g
- Dietary Fiber: 1g
Nutritional Highlights:
- Moderate portion size perfect for party treats
- Lower sodium content compared to store-bought alternatives
- Contains calcium from white chocolate coating
- Provides quick energy from natural and added sugars
Healthier Alternatives for the Recipe
Reduce Sugar Impact:
- Replace half the vanilla frosting with Greek yogurt for protein boost and tangy flavor
- Use sugar-free white chocolate melts (reduces calories by approximately 30 per pop)
- Incorporate whole wheat pastry flour into homemade cake for added fiber
Boost Nutritional Value:
- Add 2 tablespoons ground flaxseed to cake batter for omega-3 fatty acids
- Mix in finely chopped nuts for healthy fats and protein
- Use coconut oil instead of vegetable oil in cake preparation
Accommodate Dietary Restrictions:
- Create gluten-free versions using 1:1 gluten-free flour blend
- Make dairy-free by using vegan butter and plant-based chocolate
- Reduce portion sizes to mini cake pops for portion control
Serving Suggestions
Spooky Presentation Ideas:
Present your ghost cake pops on a black serving tray surrounded by dry ice (in a safe container) for dramatic fog effects. Create a haunted graveyard scene using chocolate cookie “dirt” and pretzel tombstones as backdrop elements.
Party Integration:
- Arrange in glass apothecary jars labeled “Captured Spirits”
- Create a DIY decorating station with additional gel icing colors
- Package individually in clear bags tied with orange ribbons as party favors
- Display alongside other white desserts for an elegant “ghostly gathering” theme
Pairing Recommendations:
Serve with spiced apple cider, pumpkin hot chocolate, or “witch’s brew” punch. The vanilla flavors complement warm spices beautifully, while the sweet coating balances tart beverages perfectly.
Common Mistakes to Avoid
Temperature Troubles:
Never rush the chilling process—warm cake balls will crack when dipped in chocolate. Conversely, don’t over-chill, as extremely cold cake pops can cause chocolate to seize and create an uneven coating.
Coating Catastrophes:
Unlike traditional cake decorating, cake pops require specific techniques to avoid common pitfalls. Avoid making chocolate too hot (it should be barely warm to touch) and don’t tap off excess coating too aggressively, which can cause cracks.
Design Disasters:
Wait for chocolate coating to set slightly before adding faces—wet chocolate will cause gel icing to bleed. Keep facial features simple and bold; intricate designs often become muddy and unclear.
Texture Issues:
Don’t over-mix cake crumbles with frosting, which creates gummy texture. The mixture should just hold together when squeezed—too much frosting makes pops heavy and prone to falling off sticks.
Storing Tips for the Recipe
Short-Term Storage (1-3 days):
Store completed cake pops in airtight containers at room temperature, separated by parchment paper layers. Avoid refrigeration unless your kitchen exceeds 75°F, as condensation can damage chocolate coating.
Extended Storage (up to 1 week):
Refrigerate in airtight containers, allowing them to come to room temperature 30 minutes before serving for optimal texture and flavor. The chocolate coating may develop slight bloom but won’t affect taste.
Make-Ahead Strategy:
Prepare cake balls through Step 3 and freeze for up to 3 months. Thaw overnight in refrigerator before dipping and decorating. Unbaked cake batter can be frozen in portions for future batches.
Pro Storage Tip:
Wrap individual pops in plastic wrap if stacking is necessary, and always store in cool, dry places away from strong odors that chocolate readily absorbs.
Conclusion
These ghostly delights prove that easy halloween desserts can be both simple to create and spectacularly impressive. With basic cake mix, frosting, and white chocolate, you’ll craft 24 professional-looking treats perfect for any spooky celebration. The combination of familiar vanilla flavors with playful presentation makes these cake pops appealing to all ages while requiring minimal specialized skills.
Ready to haunt your kitchen? Try this recipe and share your ghostly creations in our comments below! Subscribe to our blog for more frightfully fun Halloween recipes, and don’t forget to leave a review letting us know how your spirits turned out. Your feedback helps other bakers create their own supernatural successes!
FAQs
Q: Can I make these cake pops without cake mix?
A: Absolutely! Use your favorite homemade vanilla cake recipe—you’ll need approximately 4 cups of baked cake crumbles total. The texture may be slightly different, but the results will be delicious.
Q: Why are my cake pops cracking when I dip them?
A: This usually occurs when the cake balls are too cold or the chocolate is too hot. Ensure cake balls are chilled but not frozen, and let chocolate cool slightly before dipping. The chocolate should feel barely warm to touch.
Q: How far ahead can I make these for a party?
A: Cake pops taste best within 3 days of making. For optimal freshness, prepare cake balls up to 2 days ahead, then dip and decorate the day of your event for the best appearance and texture.
Q: Can I use regular chocolate chips instead of melting wafers?
A: While possible, chocolate chips contain stabilizers that make them less ideal for coating. If using chips, add 1 tablespoon coconut oil to help achieve smooth consistency.
Q: What’s the best way to fix a cracked cake pop?
A: Small cracks can be disguised with additional decorative elements like sprinkles or edible glitter. For larger cracks, gently warm the area with a hair dryer and smooth with a clean finger, then re-chill.
Spooky Sweets That’ll Make Your Halloween Scream
- Total Time: 2 hours
- Yield: 24 cake pops 1x
- Diet: Vegetarian
Description
These ghost cake pops are the ultimate easy Halloween dessert, combining vanilla cake, creamy frosting, and a spooky white chocolate coating that turns ordinary treats into professional-looking sweets.
Ingredients
- 2 boxes vanilla cake mix (plus eggs, oil, water as package directs)
- 1 cup vanilla frosting
- 4 cups white chocolate melts
- Black gel icing
- Optional: 1 tsp almond or coconut extract, edible glitter, crushed graham crackers, white sprinkles, white chocolate chips
Instructions
- Bake vanilla cakes according to package, adding extract if desired. Cool completely.
- Crumble cooled cakes finely. Mix with frosting until mixture holds together.
- Roll into 24 balls (~1.5 in each). Chill 30 minutes.
- Melt white chocolate in microwave, stirring until smooth.
- Dip cake balls into melted chocolate. Shape tops for ghostly waves if desired.
- Use black gel icing to create ghost faces once coating sets slightly.
- Optional: add glitter or sprinkles while coating is tacky. Chill 15 minutes until set.
Notes
Don’t rush chilling—warm cake balls crack when dipped. Keep chocolate just warm enough to coat smoothly. Add faces after coating begins to set for crisp detail.
- Prep Time: 45 minutes
- Cook Time: 30 minutes
- Category: Dessert
- Method: No Bake
- Cuisine: Halloween Treats
Nutrition
- Serving Size: 1 cake pop
- Calories: 215
- Sugar: 21g
- Sodium: 150mg
- Fat: 11g
- Saturated Fat: 7g
- Unsaturated Fat: 4g
- Trans Fat: 0g
- Carbohydrates: 27g
- Fiber: 1g
- Protein: 3g
- Cholesterol: 20mg
Keywords: halloween desserts, ghost cake pops, spooky sweets, halloween party treats, cake pops