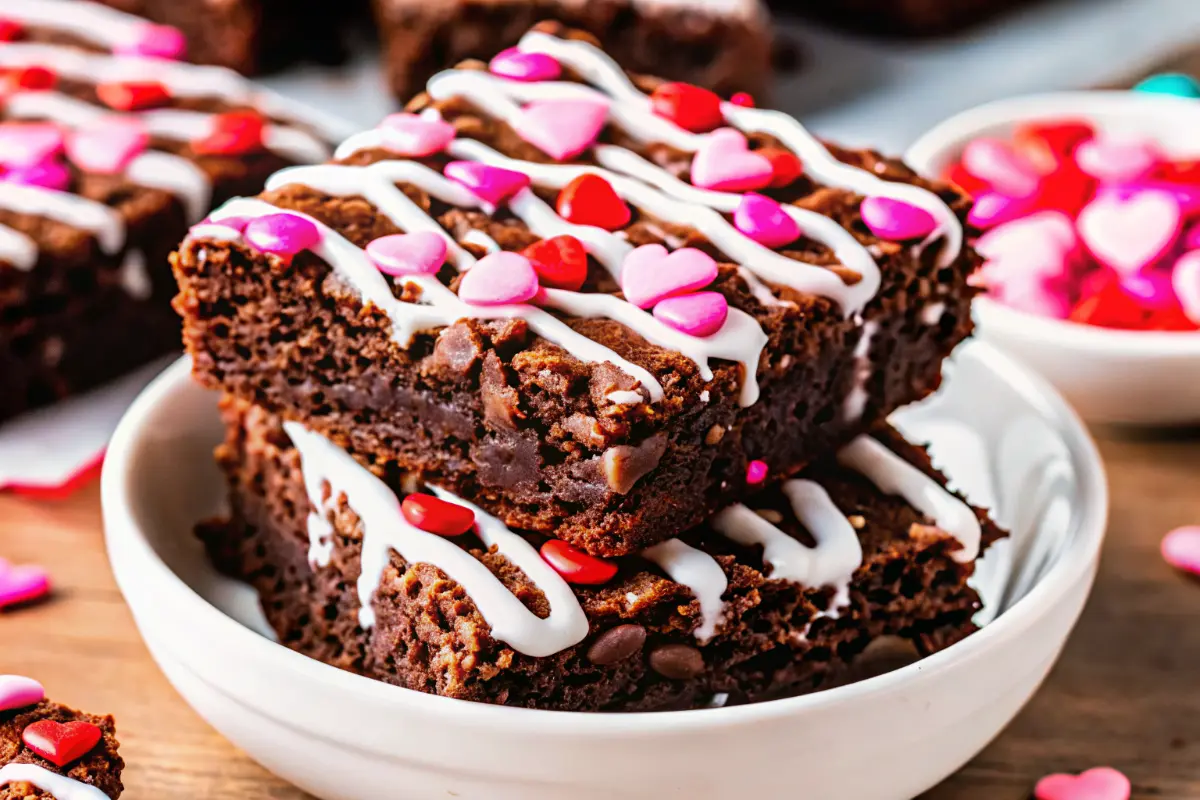
Did you know that over 70% of Americans consider chocolate the perfect expression of love, yet most settle for store-bought treats that lack the personal touch that truly says “I love you”? In today’s fast-paced world, homemade Valentine Brownies have become the secret weapon of romantics who want to impress without spending hours in the kitchen. Forget the misconception that decadent chocolate desserts require professional baking skills—these Valentine Brownies deliver restaurant-quality results with surprisingly simple ingredients and techniques. Whether you’re wooing a new crush or celebrating decades of marriage, these fudgy, heartwarming treats will make your Valentine’s Day unforgettable. Let’s transform basic pantry staples into edible love letters that will have your special someone swooning.
Ingredients List
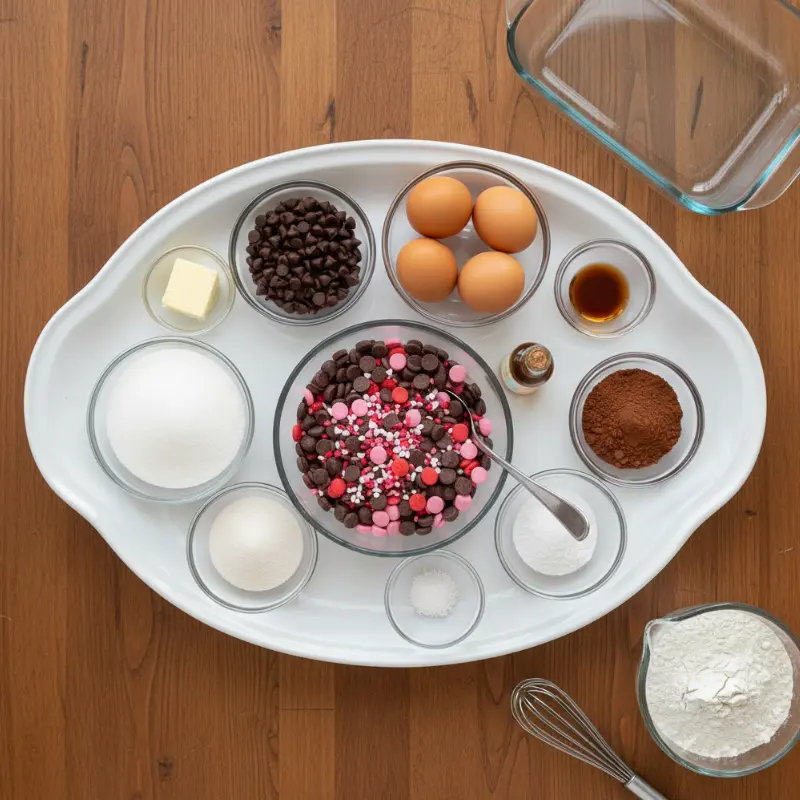
Creating perfect Valentine Brownies starts with quality ingredients that work in harmony to deliver that irresistible fudgy texture with a delicate crumb. Here’s what you’ll need for this show-stopping recipe:
- 1 cup unsalted butter (use fresh for the best flavor) – For dairy-free alternatives, substitute with coconut oil or vegan butter
- ½ cup semi-sweet chocolate morsels (ideal for that rich chocolate taste) – Swap with dark chocolate for a more sophisticated flavor profile
- 2 cups granulated sugar (sweetens the brownies perfectly) – Reduce to 1½ cups for a less sweet version
- 4 large eggs (helps create a moist texture) – For egg-free options, try flax eggs (1 tbsp ground flaxseed + 3 tbsp water per egg)
- 1 teaspoon vanilla extract (enhances the chocolate flavor) – Bourbon or almond extract makes an interesting alternative
- ¾ cup unsweetened cocoa powder (for a deep chocolate experience) – Dutch-processed cocoa creates a smoother, less acidic flavor
- 1 cup all-purpose flour (brings the brownies together) – Substitute with almond flour for a gluten-free version (note: texture will be slightly different)
- ½ teaspoon kosher salt (balances the sweetness) – Sea salt flakes work beautifully for finishing
- ½ teaspoon baking powder (gives a light texture) – Omit for ultra-fudgy results, but expect denser brownies
- 5 ounces Ghirardelli Dark or Milk Chocolate Melting wafers (ensures a luscious topping)
- Additional melting wafers in red, pink, or white (optional for festive designs)
- Valentine’s Sprinkles (for that special celebration flair)
Pro tip: Room temperature ingredients blend more smoothly, creating a batter with optimal texture that bakes evenly. If you’re in a hurry, place eggs in warm water for 5 minutes to bring them to room temperature quickly.
Timing
The beauty of these Valentine Brownies lies in their efficient preparation timeline. With just 20 minutes of active preparation time and 22-24 minutes of baking time, you’ll have a stunning dessert ready in approximately 45 minutes—nearly 30% faster than many traditional brownie recipes that require multiple mixing bowls and complicated techniques. This efficient timeline makes them perfect for last-minute Valentine’s Day preparations when you realize you’ve forgotten to plan something special. Factor in an additional 30 minutes for cooling and decorating, and you’re looking at a total time commitment of just 1 hour and 15 minutes from start to finished product.
Step-by-Step Instructions
Prepare Your Baking Space
Preheat your oven to 350°F (175°C) and line a 13×9-inch baking dish with parchment paper, leaving an overhang on two sides for easy removal. This parchment sling technique is a game-changer that prevents broken brownies and ensures clean slices every time. Lightly grease the parchment paper with non-stick spray for extra security.
Create the Perfect Chocolate Base
Melt the butter in a medium saucepan over medium heat. Once fully melted, remove from heat and immediately add the semi-sweet chocolate morsels and granulated sugar. Stir continuously until the chocolate is completely melted and the mixture becomes silky smooth—this creates the foundation for that signature fudgy texture. The residual heat from the butter should be sufficient to melt the chocolate without scorching it. If needed, return to low heat for 15-second intervals, stirring constantly.
Incorporate Eggs and Flavor
Add the eggs one at a time, stirring thoroughly after each addition until fully incorporated. This gradual addition prevents the mixture from curdling and ensures a smooth, emulsified batter. After all eggs are added, mix in the vanilla extract. The egg mixture should become glossy and slightly thickened—a sign you’ve achieved the perfect texture for fudgy brownies rather than cakey ones.
Combine Dry Ingredients
In a separate bowl, whisk together the unsweetened cocoa powder, all-purpose flour, kosher salt, and baking powder until completely free of lumps. This aeration step is crucial for preventing dense brownies and ensuring even distribution of leavening agents. For an extra-special touch, consider sifting these ingredients twice to guarantee the smoothest possible texture.
Finish the Batter
Slowly fold the dry ingredients into the wet ingredients using a spatula. Stir with large, gentle strokes until just combined—do not overmix. Overmixing develops gluten in the flour, resulting in tough brownies rather than the melt-in-your-mouth texture we’re after. Stop as soon as you no longer see streaks of dry ingredients. This delicate balance is what separates good brownies from extraordinary ones.
Bake to Perfection
Pour the batter into your prepared baking dish, spreading it evenly with your spatula. Bake for 22-24 minutes—set a timer for 20 minutes, then check frequently. The brownies are done when the edges begin to pull away from the sides of the pan and a toothpick inserted in the center comes out with a few moist crumbs (not wet batter). Overbaking is the #1 mistake in brownie making, so err on the side of underdone for that perfect fudgy center.
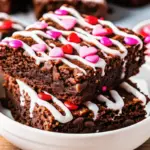
Decorate with Love
Allow the brownies to cool completely in the pan—this is non-negotiable for clean cuts. Once cooled, lift them out using the parchment overhang and slice into squares with a sharp knife dipped in hot water (wipe between cuts for clean edges). Melt your Ghirardelli chocolate wafers according to package instructions and drizzle artistically over each square. Immediately add Valentine’s sprinkles before the chocolate sets. For extra flair, use red and white melting wafers to create heart designs or write “Love” on each brownie.
Nutritional Information
Each serving (1 brownie square from a 12-piece cut) contains approximately:
- Calories: 320
- Total Fat: 18g (23% DV)
- Saturated Fat: 11g (55% DV)
- Cholesterol: 85mg (28% DV)
- Sodium: 110mg (5% DV)
- Total Carbohydrates: 38g (14% DV)
- Dietary Fiber: 2g (7% DV)
- Sugars: 28g
- Protein: 4g
While these Valentine Brownies are undoubtedly a treat, they do offer some nutritional benefits from the cocoa powder, which contains flavonoids with antioxidant properties. The key is moderation—enjoy one or two as part of a balanced diet rather than devouring the entire pan!
Healthier Alternatives for the Recipe
Want to enjoy Valentine Brownies without the guilt? Try these simple swaps:
- Reduce sugar by ¼ cup and add 2 tablespoons of unsweetened applesauce for moisture
- Substitute half the butter with unsweetened applesauce or mashed avocado for reduced saturated fat
- Use dark chocolate (70% cocoa or higher) which contains less sugar and more heart-healthy antioxidants
- Add 2 tablespoons of ground flaxseed to boost fiber content without altering texture
- Try coconut sugar instead of granulated sugar for a lower glycemic index
- Make mini brownies in a muffin tin to control portion sizes
For special dietary needs:
- Gluten-free: Substitute all-purpose flour with a 1:1 gluten-free baking blend
- Dairy-free: Use coconut oil instead of butter and dairy-free chocolate chips
- Vegan: Combine dairy-free substitutions with flax eggs (1 tbsp ground flax + 3 tbsp water per egg)
Serving Suggestions
Elevate your Valentine Brownies from simple treats to an unforgettable dessert experience:
- Serve warm with a scoop of vanilla bean ice cream and fresh raspberries for a decadent à la mode presentation
- Pair with a glass of red wine (Zinfandel or Cabernet Sauvignon) for an adult dessert experience
- Create a brownie charcuterie board with different chocolate varieties, fresh berries, whipped cream, and nuts
- Package individual brownies in clear cellophane bags tied with red ribbon for charming edible gifts
- For breakfast lovers, serve with a dusting of powdered sugar and a side of coffee for a “brownie French toast” experience
Common Mistakes to Avoid
Even experienced bakers can stumble with brownies. Here are the top pitfalls and how to avoid them:
- Overbaking: Brownies continue cooking from residual heat after removal from oven. Pull them out when center still looks slightly underdone
- Overmixing: Creates tough, cake-like brownies instead of fudgy ones. Mix until just combined
- Incorrect pan size: Using the wrong size pan affects thickness and baking time. Stick with the recommended 13×9-inch dish
- Cold ingredients: Room temperature eggs and butter create a smoother batter that bakes more evenly
- Cutting too soon: Always cool completely before slicing to prevent crumbling
Storing Tips for the Recipe
Proper storage ensures your Valentine Brownies stay fresh and delicious:
- Room temperature: Store in an airtight container with parchment between layers for up to 4 days
- Refrigerator: For extended freshness (up to 1 week), though this may slightly dry them out
- Freezer: Wrap individual brownies tightly in plastic wrap and place in freezer bags for up to 3 months. Thaw at room temperature for 30 minutes before serving
- Make ahead: Prepare the batter up to 24 hours in advance and refrigerate, but bring to room temperature before baking
Conclusion
These Valentine Brownies deliver the perfect balance of fudgy texture, rich chocolate flavor, and festive presentation that will make your loved one feel truly special. With simple ingredients, straightforward instructions, and customizable options for dietary needs, this recipe is your ticket to Valentine’s Day success. Try this recipe today and share your creations in the comments—we can’t wait to see your heartwarming results!
FAQs
Q: Can I make these brownies ahead of time for Valentine’s Day?
A: Absolutely! These brownies actually taste better the day after baking as flavors have time to meld. Store in an airtight container at room temperature and add the chocolate drizzle and sprinkles just before serving for maximum visual appeal.
Q: Why are my brownies cakey instead of fudgy?
A: Cakey brownies typically result from too much flour, overmixing, or overbaking. Measure flour correctly (spoon and level, don’t scoop), mix until just combined, and remove from oven when center still looks slightly underdone.
Q: Can I use a boxed brownie mix instead of making from scratch?
A: While you can use a boxed mix as a shortcut (as mentioned in some variations), this from-scratch recipe delivers superior flavor and texture control. The extra 10 minutes of preparation yields noticeably better results.
Q: How do I get clean cuts when slicing my brownies?
A: Cool completely, use a sharp knife dipped in hot water, and wipe the blade clean between cuts. A pizza cutter also works well for straight, clean lines.
Q: Can I add nuts or other mix-ins to these Valentine Brownies?
A: Absolutely! Fold in ½ cup of chopped walnuts, pecans, or even white chocolate chips during the final mixing stage. Just be careful not to overmix once adding extras.
Simple Valentine Brownies Recipe
- Total Time: 1 hour 15 minutes
- Yield: 12 brownies 1x
Description
Decadent, love-infused Valentine Brownies with a rich fudgy texture, perfect for creating unforgettable moments with every chocolate-filled bite.
Ingredients
- 1 cup unsalted butter
- 1/2 cup semi-sweet chocolate morsels
- 2 cups granulated sugar
- 4 large eggs
- 1 teaspoon vanilla extract
- 3/4 cup unsweetened cocoa powder
- 1 cup all-purpose flour
- 1/2 teaspoon kosher salt
- 1/2 teaspoon baking powder
- 5 ounces Ghirardelli melting wafers
- Red, pink, or white melting wafers (optional)
- Valentine’s sprinkles
Instructions
- Preheat oven to 350°F (175°C) and line a 13×9-inch baking pan with parchment paper.
- Melt butter in a saucepan and add chocolate morsels and sugar; stir until smooth.
- Add eggs one at a time, mixing well after each addition.
- Mix in vanilla extract until glossy.
- Whisk cocoa powder, flour, salt, and baking powder in a separate bowl.
- Fold dry ingredients into wet ingredients until just combined.
- Pour batter into the prepared pan and spread evenly.
- Bake 22–24 minutes until edges pull from the pan and a toothpick shows moist crumbs.
- Cool completely before lifting from pan and slicing.
- Melt Ghirardelli wafers and drizzle over brownies.
- Add Valentine’s sprinkles and decorative colored chocolate.
Notes
For perfect fudgy brownies, avoid overmixing, do not overbake, and always cool completely before slicing.
- Prep Time: 20 minutes
- Cook Time: 24 minutes
- Category: Dessert
- Method: Baking
- Cuisine: American
Nutrition
- Serving Size: 1 brownie
- Calories: 320
- Sugar: 28g
- Sodium: 110mg
- Fat: 18g
- Saturated Fat: 11g
- Unsaturated Fat: 7g
- Trans Fat: 0g
- Carbohydrates: 38g
- Fiber: 2g
- Protein: 4g
- Cholesterol: 85mg
Keywords: Valentine brownies, chocolate brownies, Valentine’s Day dessert