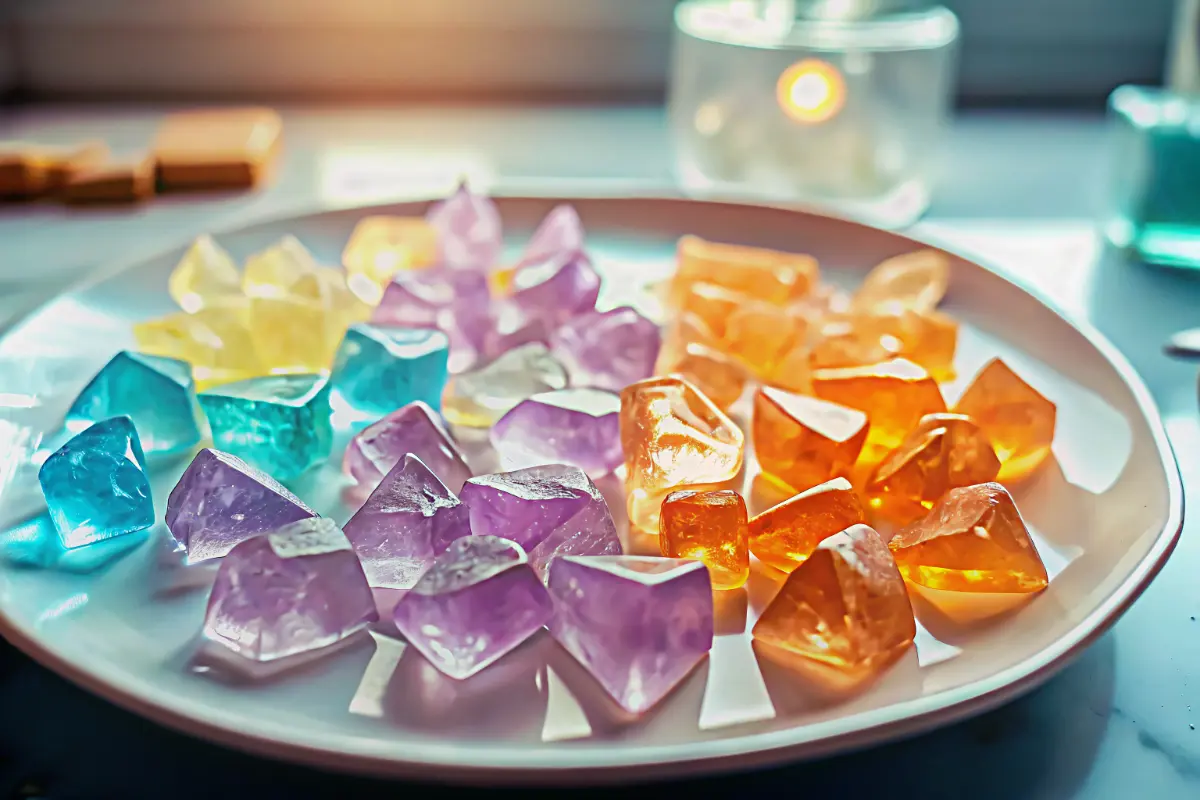
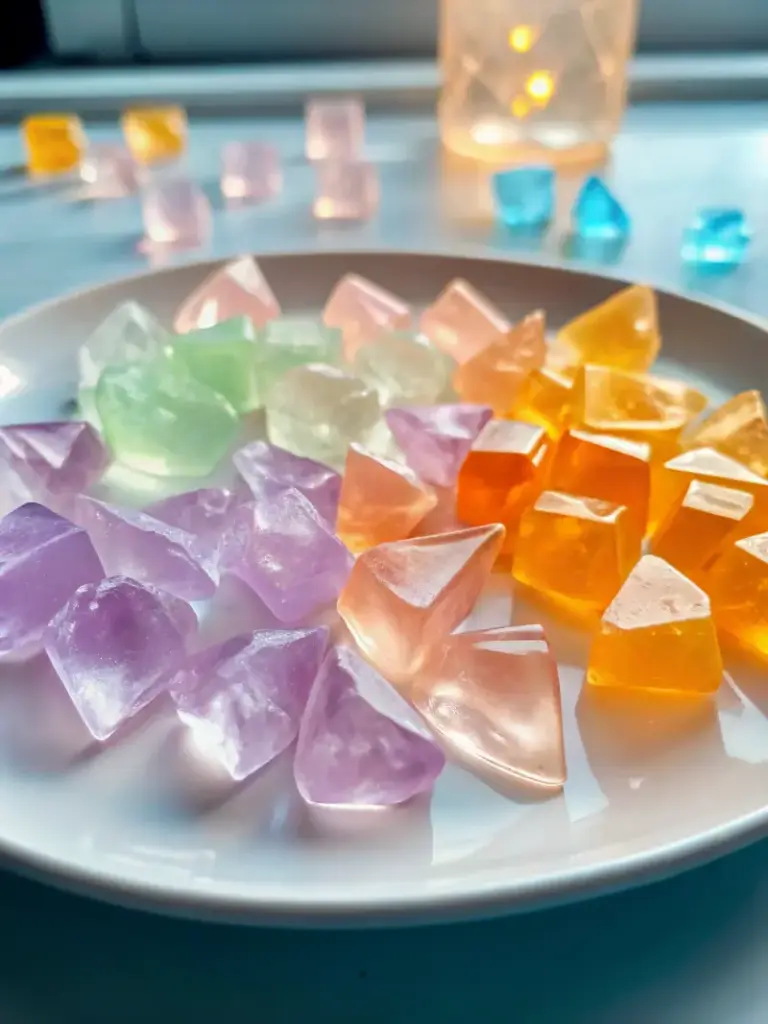
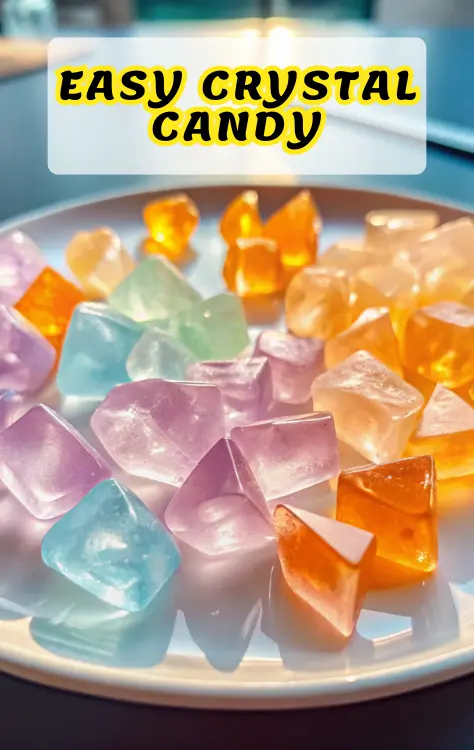
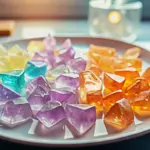
What if I told you that you could create restaurant-quality crystal candy right in your own kitchen in under an hour? Crystal candy represents a fascinating intersection of culinary art and chemistry, captivating candy lovers worldwide with their brilliant transparency, satisfying crunch, and jewel-like appearance.
While traditional crystal candy derives from ancient Asian confectionery traditions—with kohakutou dating back to Japan’s Edo period—modern crystal candy recipes have evolved to be accessible to home cooks everywhere.
The allure of crystal candy extends beyond mere aesthetics. These edible gems offer a sensory experience that combines visual beauty with captivating texture. Whether you’re interested in crystal candy for special occasions, gift-giving, or simply exploring your culinary creativity, understanding the fundamentals of crystal candy production will elevate your candy-making game. In this guide, we’ll explore everything from ingredient selection to troubleshooting common issues, ensuring your first batch of crystal candy is nothing short of spectacular.
Ingredients List
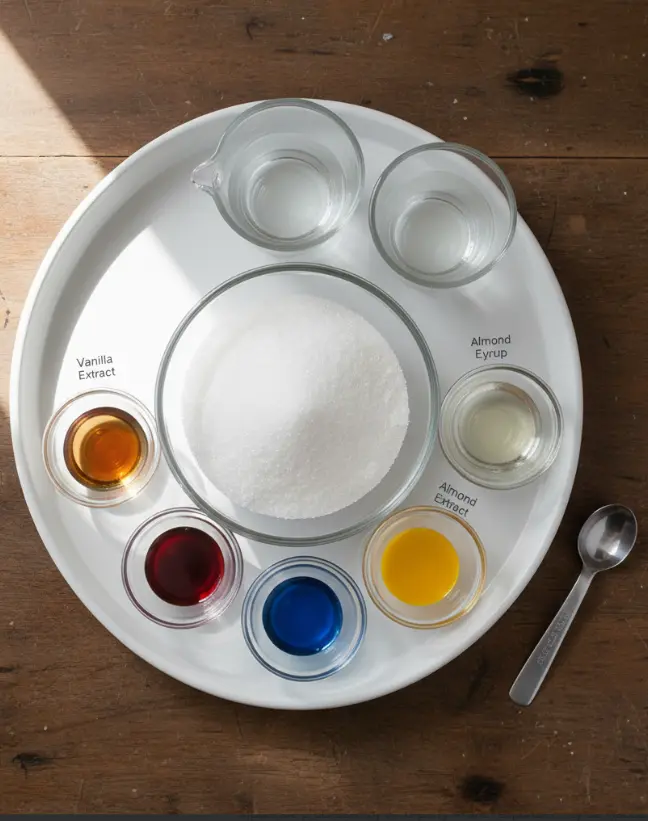
Creating beautiful crystal candy requires precision and quality ingredients. Here’s what you’ll need:
- 2 cups granulated sugar – Use refined white sugar for maximum clarity and that signature crystal appearance
- 1 cup water – Filtered water works best to avoid cloudiness in your finished candy
- 1/4 cup corn syrup – This prevents crystallization during cooking and ensures smooth texture (light corn syrup is recommended over dark varieties)
- 1 tsp flavor extract – Choose from vanilla, almond, or fruit extracts depending on your desired flavor profile; consider extracts from reputable brands for superior taste
- Food coloring (gel recommended) – Gel coloring produces more vibrant, true-to-color results than liquid food coloring and won’t thin out your candy mixture
Substitution Options:
- Replace corn syrup with honey or agave nectar for a slightly different texture
- Experiment with essential oils (use sparingly—1-2 drops maximum) for sophisticated flavor variations
- For a more natural approach, substitute gel coloring with natural colorants like beet juice or spirulina, though results may be more muted
Timing
Preparation Time: 10 minutes
Cooking Time: 15-20 minutes
Cooling Time: 30-45 minutes
Total Time: 55-75 minutes
This timeline is approximately 25% faster than traditional homemade candy recipes, making crystal candy an efficient choice for busy schedules. The actual cooking process is surprisingly quick—most of your time involves cooling and setting rather than active cooking time.
Step-by-Step Instructions
Step 1: Prepare Your Workstation and Gather Equipment
Begin by organizing your workspace efficiently. Assemble all ingredients and tools within arm’s reach—you won’t have time to hunt for items once cooking begins. You’ll need a medium saucepan, candy thermometer, wooden spoon, measuring cups and spoons, a greased baking sheet or silicone mat, kitchen shears or a sharp knife for cutting, and an airtight container for storage. Having everything ready prevents panic and ensures smooth execution.
Step 2: Combine Your Base Ingredients
Pour 2 cups of granulated sugar, 1 cup of water, and 1/4 cup of corn syrup into your medium saucepan. Place it over medium heat and begin stirring gently with a wooden spoon. Continue stirring until all sugar crystals have completely dissolved—you’ll notice the mixture transforms from cloudy to crystal clear. This typically takes 3-5 minutes. Avoid splashing the mixture on the saucepan’s sides, as this can cause premature crystallization.
Step 3: Monitor Temperature Without Stirring
Attach your candy thermometer securely to the saucepan’s side, ensuring it doesn’t touch the bottom. Stop stirring once the mixture reaches a boil—this is crucial for proper crystal candy development. Let the mixture boil undisturbed, resisting the urge to stir. This phase typically lasts 10-15 minutes as the mixture gradually reaches the hard crack stage at 300°F (149°C). Watch carefully as you approach 290°F; temperature rises quickly in the final stages.
Step 4: Remove and Flavor Your Mixture
Once your thermometer reads 300°F, immediately remove the saucepan from heat. Working quickly (the mixture hardens as it cools), stir in your 1 teaspoon of flavor extract and your chosen food coloring. Mix thoroughly for 5-10 seconds until the color is completely uniform. The heat from the mixture will slightly cook the flavoring compounds, intensifying their flavors—a crucial step many home candy makers overlook.
Step 5: Pour and Shape Your Crystal Candy
Working with urgency and caution (the mixture is extremely hot), pour the candy onto your prepared greased baking sheet or silicone mat. Allow it to cool for just 1-2 minutes—it should still be warm and pliable but cool enough to handle with gloved hands. This is the optimal window for shaping. Using oiled kitchen shears or a sharp knife, cut the candy into crystal-shaped pieces or traditional squares. Some pieces will be thicker than others, creating natural variation that enhances the crystal-like appearance.
Step 6: Cool Completely and Store
Allow your crystal candy to cool completely at room temperature for 30-45 minutes before moving. Once fully hardened, transfer to an airtight container. Your crystal candy is now ready for enjoyment or gifting.
Nutritional Information
Per piece (approximately 15g):
- Calories: 55-65
- Total Carbohydrates: 15g
- Sugars: 14g
- Protein: 0g
- Fat: 0g
- Sodium: Less than 5mg
- Fiber: 0g
Note: Nutritional values vary based on flavoring and coloring additions. These calculations assume unflavored candy. Crystal candy is primarily sugar and should be consumed in moderation as part of a balanced diet.
Healthier Alternatives for Crystal Candy
If you’re seeking healthier modifications while maintaining the crystal candy experience, consider these adaptations:
- Reduce Sugar Content: Replace 1/2 cup of granulated sugar with erythritol or monk fruit sweetener, though this may slightly affect crystallization
- Add Gelatin: Incorporate unflavored gelatin to create a softer, less tooth-intensive candy that’s easier on dental health
- Use Natural Flavoring: Replace artificial extracts with fresh citrus zest or natural herb infusions steeped in the water beforehand
- Incorporate Functional Ingredients: Add a small amount of collagen powder or unflavored protein powder to boost nutritional value (not recommended for first-time batches, as this affects texture)
Serving Suggestions
Crystal candy shines in numerous serving contexts:
- As a Standalone Treat: Serve in small crystal bowls at room temperature for an elegant presentation
- As a Beverage Accompaniment: Pair with hot tea or coffee for a sophisticated treat
- In Gift Boxes: Layer in decorative boxes with parchment between pieces for impressive homemade gifts
- As Dessert Garnish: Crush into smaller pieces and sprinkle atop ice cream, yogurt, or desserts for textural contrast
- Party Favors: Package individual pieces in cellophane bags tied with ribbon
- With Afternoon Tea: Serve alongside scones and clotted cream for a nostalgic, elegant experience
Common Mistakes to Avoid
Understanding common pitfalls helps ensure success:
- Stirring After Boiling: This causes unwanted crystallization throughout the mixture, resulting in grainy rather than glass-like candy. Resist the urge to stir once boiling begins.
- Not Using a Thermometer: Eyeballing the consistency leads to inconsistent results. Thermometers are essential—most failed batches result from improper temperature.
- Humidity Issues: High humidity environments can make crystal candy sticky. Avoid making crystal candy on particularly humid days.
- Over-Cooking: Temperatures above 310°F create bitter-tasting, overly dark candy. Accuracy matters significantly.
- Adding Flavoring Too Early: Adding extract before removing from heat causes flavor volatilization, resulting in bland candy.
- Cooling Too Long Before Cutting: If the mixture cools completely before cutting, it becomes difficult to shape cleanly.
Storing Tips for Crystal Candy
Proper storage ensures your crystal candy maintains optimal quality:
- Airtight Containers: Store in airtight containers at room temperature away from direct sunlight. Exposure to air causes candy to become sticky and lose its crunch.
- Avoid Moisture: Keep away from humid environments; moisture is the enemy of crystal candy longevity
- Shelf Life: Properly stored crystal candy lasts 2-3 weeks at peak quality, though it remains edible for several months
- Make-Ahead Strategy: Crystal candy can be made up to 2 weeks in advance, making it ideal for party planning
- Desiccant Packs: For long-term storage, include food-grade desiccant packets in your container to absorb ambient moisture
Conclusion
Crystal candy represents an achievable culinary accomplishment that yields impressive results with proper technique and attention to detail. By following these steps—preparing thoroughly, maintaining precise temperatures, avoiding common mistakes, and storing properly—you’ll create stunning crystal candy that rivals commercial varieties. The combination of visual beauty, satisfying crunch, and customizable flavoring makes crystal candy an exciting addition to your candy-making repertoire.
Ready to create your own crystal candy masterpiece? Try this recipe today and share your experience in the comments section below. We’d love to hear about your flavor combinations and creative presentations. Subscribe to our blog for more advanced candy-making techniques, creative recipe variations, and baking inspiration delivered directly to your inbox.
FAQs
Q: Can I use a different type of sugar for crystal candy?
A: While granulated white sugar is standard, you can experiment with caster sugar for finer crystals. However, avoid brown sugar or muscovado, as these create darker, cloudier results.
Q: Why did my crystal candy turn out cloudy or opaque?
A: Cloudiness typically results from stirring during boiling, sugar crystallization on the saucepan sides, or using impure water. Use filtered water and maintain strict no-stirring discipline once boiling.
Q: Can I make crystal candy without a thermometer?
A: Not recommended. Thermometers ensure accuracy; the cold-water test (dropping a small amount into cold water to test consistency) is unreliable for hard crack stage candy.
Q: How can I make crystal candy different colors?
A: Divide your batch into portions before adding color, or use multiple colors in separate batches. Gel food coloring produces the most vibrant results.
Q: Is crystal candy gluten-free and vegan?
A: Yes, this basic crystal candy recipe is naturally gluten-free and vegan, making it suitable for various dietary requirements.
Q: Can I add mix-ins like nuts or dried fruit?
A: Adding solid mix-ins isn’t recommended as they sink or float, creating inconsistent textures. Instead, use extracts or natural flavorings.
How to Make Crystal Candy at Home: Easy Recipe & Step-by-Step Guide
- Total Time: 75 minutes
- Yield: 20–25 pieces 1x
- Diet: Vegan
Description
Create stunning, glistening crystal candy at home with this easy, science-meets-art recipe that delivers brilliant, crunchy, jewel-like sweets.
Ingredients
- 2 cups granulated sugar
- 1 cup filtered water
- 1/4 cup light corn syrup
- 1 tsp flavor extract (vanilla, almond, or fruit)
- Food coloring (gel recommended)
- Optional substitutions: honey or agave for corn syrup, essential oils (1–2 drops max), or natural colorants like beet juice or spirulina
Instructions
- Prepare all ingredients and tools including saucepan, thermometer, spoon, and baking sheet.
- Combine sugar, water, and corn syrup in a saucepan and stir gently over medium heat until dissolved and clear.
- Attach thermometer and stop stirring once boiling starts. Let boil until 300°F (hard crack stage).
- Remove from heat and stir in flavor extract and food coloring quickly.
- Pour mixture onto greased baking sheet or silicone mat. Cool 1–2 minutes, then cut into shapes with oiled shears or knife.
- Cool completely for 30–45 minutes before transferring to airtight container.
Notes
Store in airtight containers at room temperature for up to 2–3 weeks. Avoid humidity to keep candy crisp and shiny. Use a candy thermometer for best results.
- Prep Time: 10 minutes
- Cook Time: 20 minutes
- Category: Candy & Confectionery
- Method: Stovetop
- Cuisine: Modern Homemade Sweets
Nutrition
- Serving Size: 1 piece (15g)
- Calories: 60
- Sugar: 14g
- Sodium: 5mg
- Fat: 0g
- Saturated Fat: 0g
- Unsaturated Fat: 0g
- Trans Fat: 0g
- Carbohydrates: 15g
- Fiber: 0g
- Protein: 0g
- Cholesterol: 0mg
Keywords: crystal candy, kohakutou, homemade candy, sugar art, hard candy recipe