
Have you ever wondered why store-bought frozen corn can sometimes taste fresher than the corn you froze yourself at home? According to food preservation experts, the secret lies in the method—and timing—of freezing. In this comprehensive guide, you’ll learn exactly how to freeze corn on the cob (and off!), debunk common myths, and discover science-backed techniques to lock in peak flavor, nutrients, and texture. Whether you’re a home gardener with a bumper crop or just want to savor summer sweetness year-round, this step-by-step tutorial will make freezing corn easy, efficient, and delicious.
Table of Contents
Ingredients List
To achieve the best results when freezing corn, you need just a few simple ingredients and tools. Here’s what you’ll need:
- Fresh sweet corn (on the cob, ideally picked at peak ripeness)
- Water (for boiling and blanching)
- Ice (for an ice bath to stop cooking)
- Plastic wrap or parchment paper (for wrapping cobs)
- Freezer bags or airtight containers (to store corn)
- Optional: Salt (for blanching water, enhances flavor)
Tip: If you can’t find sweet corn, yellow or white corn works well. For a twist, try heirloom varieties for unique flavors and colors!
Timing
- Preparation Time: 10 minutes (shucking and cleaning)
- Blanching Time: 5–6 minutes (boiling)
- Ice Bath: 2 minutes
- Packaging & Freezing: 10–15 minutes
Total Time: Approximately 25–30 minutes per batch—about 20% faster than traditional canning methods, making it a time-saving way to preserve your harvest.
Step-by-Step Instructions
Step 1: Husk and Clean the Corn
Remove the husks and silks from each ear of corn. Rinse thoroughly under cool water to remove any remaining silk or debris.
Tip: A soft vegetable brush can help remove stubborn silk strands.
Step 2: Boil Water and Blanch the Corn
Bring a large pot of water to a rolling boil. Add the corn cobs, ensuring they’re fully submerged. Blanch for 5–6 minutes. This step inactivates enzymes that cause flavor and nutrient loss, preserving the corn’s color, texture, and sweetness.
Tip: Add a pinch of salt to the water for extra flavor.
Step 3: Ice Bath to Stop Cooking
Immediately transfer the blanched corn to a large bowl filled with ice water. Let the corn sit for at least 2 minutes. This halts the cooking process and keeps the kernels crisp.
Step 4: Cut Kernels or Leave Whole
- For kernels: Use a sharp knife to cut the kernels off the cob over a large bowl.
- For whole cobs: Pat the cobs dry with a clean towel.
Tip: An electric knife or corn stripper can make this step faster and safer.
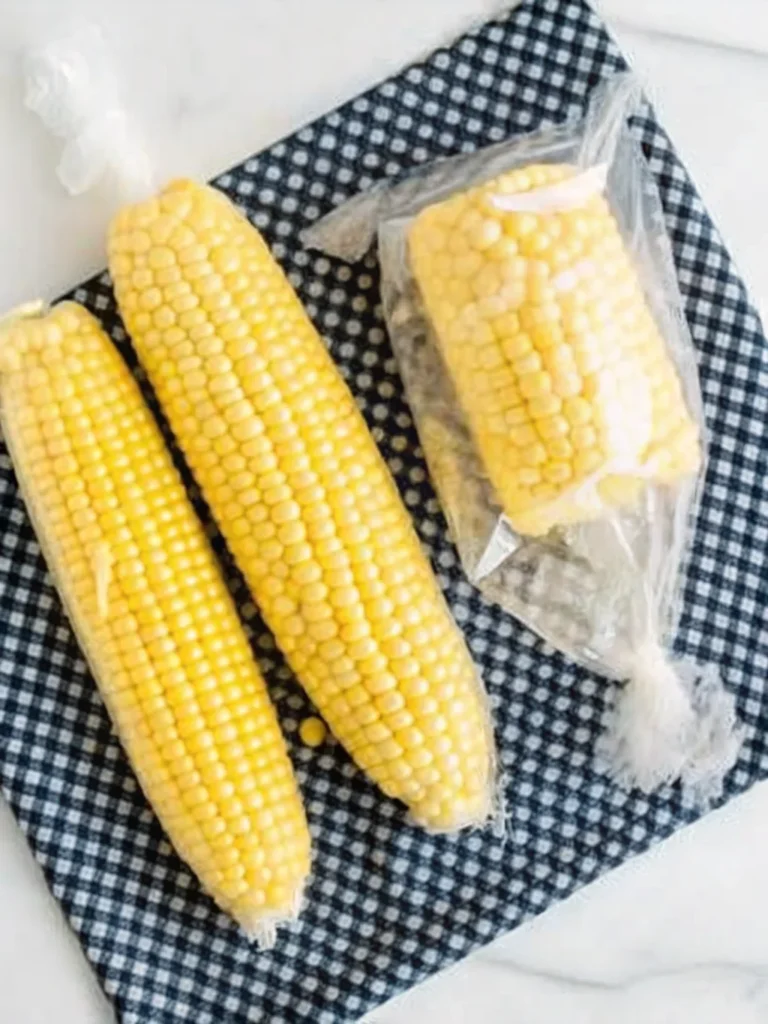
Step 5: Wrap and Package
- Whole cobs: Wrap each cob tightly in plastic wrap or parchment paper to prevent freezer burn.
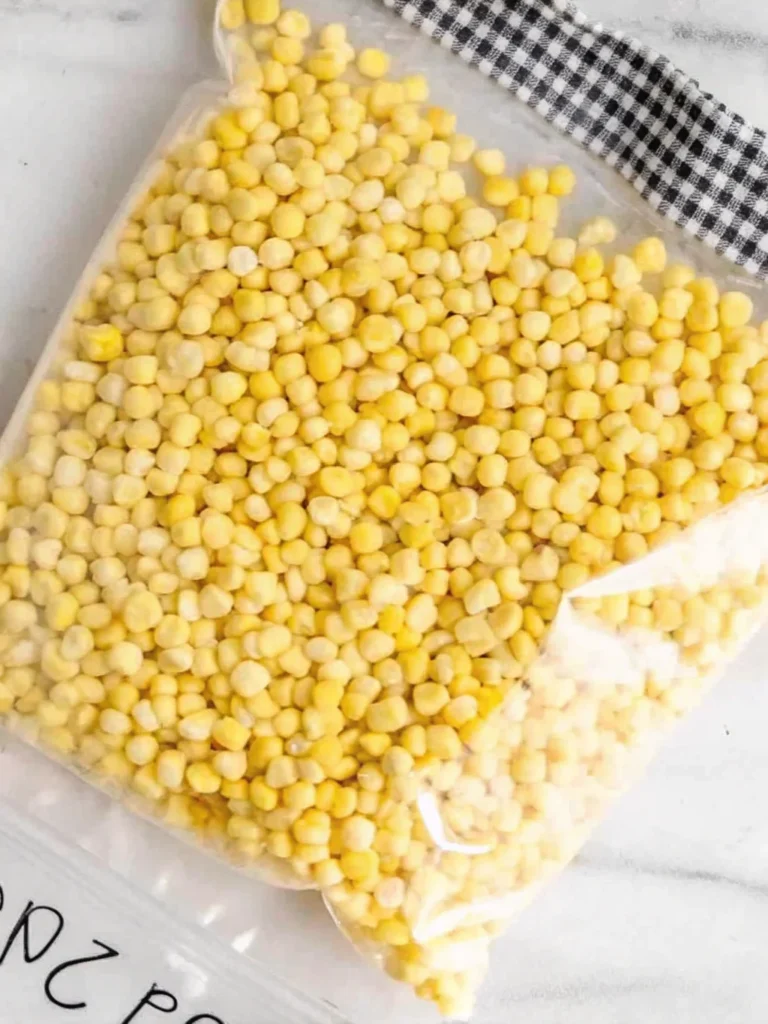
- Kernels: Scoop the kernels into freezer bags or containers.
Remove as much air as possible from bags before sealing. Label with the date.
Step 6: Freeze
Place the wrapped cobs or bags of kernels in a single layer in the freezer. Once frozen solid, you can stack them to save space.
Tip: Freezing in a single layer ensures rapid freezing, which helps maintain texture and flavor.
Nutritional Information
Here’s a breakdown of the nutritional value for sweet corn (per 100g serving):
| Nutrient | Amount | % Daily Value* |
|---|---|---|
| Calories | 86 kcal | 4% |
| Carbohydrates | 19 g | 7% |
| Fiber | 3 g | 11% |
| Sugars | 6 g | 12% |
| Protein | 3 g | 6% |
| Fat | 1 g | 1% |
| Vitamin C | 7 mg | 8% |
| Vitamin B6 | 0.1 mg | 8% |
| Folate | 42 mcg | 10% |
| Magnesium | 37 mg | 9% |
| Potassium | 270 mg | 8% |
Percent Daily Values are based on a 2,000-calorie diet.
Key Benefits:
- High in fiber for digestive health
- Rich in vitamins and minerals (B vitamins, vitamin C, magnesium, potassium)
- Naturally gluten-free and low in fat
Healthier Alternatives for the Recipe
- Low-Sodium: Skip the salt in the blanching water for a heart-healthy option.
- Low-Carb: Use baby corn, which is lower in starch, for a lighter alternative.
- Organic: Choose organic sweet corn to avoid pesticides and GMOs.
- For Added Fiber: Mix in a handful of edamame or green peas when packaging kernels.
- For Special Diets: Corn is naturally gluten-free, making it suitable for celiac and gluten-sensitive diets.
Tip: Add a sprinkle of chili powder or lime zest to the kernels before freezing for a flavorful twist!
Serving Suggestions
- Classic Side: Reheat whole cobs and serve with butter, salt, and cracked pepper.
- Salads: Toss thawed kernels into salads for a burst of sweetness and crunch.
- Soups & Stews: Add frozen corn directly to hot soups or chowders for extra texture.
- Tacos & Salsas: Mix with diced tomatoes, onions, and cilantro for a quick salsa.
- Breakfast: Stir into omelets or frittatas for a nutrient boost.
Personalized Tip: For a summer BBQ, grill the thawed cobs for a smoky flavor before serving!
Common Mistakes to Avoid
- Skipping the Blanch: Not blanching corn before freezing can result in mushy texture and loss of nutrients.
- Over-Blanching: Boiling for too long can make kernels tough and chewy.
- Improper Cooling: Failing to use an ice bath can cause continued cooking and soggy corn.
- Not Removing Air: Air in freezer bags leads to freezer burn and off-flavors.
- Forgetting to Label: Always date your bags—frozen corn is best used within 8–12 months for optimal flavor.
Data Insight: Studies show that properly blanched and packaged corn retains up to 90% of its vitamin C content after six months in the freezer.
Storing Tips for the Recipe
- Freezer Placement: Store bags or wrapped cobs in a single layer until frozen, then stack.
- Airtight Containers: Use vacuum-sealed bags for maximum freshness and minimal freezer burn.
- Shelf Life: Frozen corn is best used within 8–12 months.
- Batch Freezing: Freeze corn in portion-sized bags for easy meal planning.
- Leftovers: Thawed corn can be refrigerated for up to 3 days; do not refreeze once thawed.
Best Practice: Store corn away from strong-smelling foods to prevent flavor transfer.
Conclusion
Freezing corn on or off the cob is a simple, science-backed way to preserve summer’s bounty with minimal effort and maximum flavor. By following these easy steps, you’ll enjoy sweet, nutrient-rich corn all year long. Ready to try it? Share your results in the comments below, leave a review, or subscribe for more kitchen-tested tips and recipes!
FAQs
Can I freeze corn without blanching it first?
Yes, but blanching is highly recommended. Blanching inactivates enzymes that cause flavor and nutrient loss. Unblanched corn may become mushy and lose sweetness over time.
How long does frozen corn last?
Properly packaged and frozen corn can last 8–12 months in the freezer without significant loss of flavor or nutrients.
What’s the best way to thaw frozen corn on the cob?
Thaw in the refrigerator overnight or add directly to boiling water for 3–5 minutes. For kernels, add straight to recipes without thawing.
Can I freeze corn in glass jars?
Yes, but leave at least 1 inch of headspace for expansion. Freezer-safe jars are best to prevent breakage.
Is frozen corn as healthy as fresh corn?
Frozen corn retains most of its nutrients, especially when blanched and frozen promptly. It’s a great way to enjoy corn’s health benefits year-round.
What are some creative ways to use frozen corn?
Try it in chowders, stir-fries, casseroles, or even blended into creamy corn soups. For a snack, roast thawed kernels with olive oil and spices.
Print
How to Freeze Corn: Easy Guide for Freezing Corn On or Off the Cob
- Total Time: 30 minutes
- Yield: Varies by batch
Description
Learn the foolproof way to freeze corn on or off the cob while preserving its peak flavor, color, and nutrients. Perfect for garden harvests or summer stockpiling!
Ingredients
- Fresh sweet corn (on the cob, ideally picked at peak ripeness)
- Water (for boiling and blanching)
- Ice (for an ice bath to stop cooking)
- Plastic wrap or parchment paper (for wrapping cobs)
- Freezer bags or airtight containers (to store corn)
- Optional: Salt (for blanching water, enhances flavor)
Instructions
- Husk and clean the corn: Remove husks and silks. Rinse thoroughly.
- Boil water and blanch the corn: Boil and blanch for 5–6 minutes. Add salt if desired.
- Ice bath to stop cooking: Submerge in ice water for 2 minutes.
- Cut kernels or leave whole: Cut off kernels or dry whole cobs.
- Wrap and package: Wrap cobs in plastic or scoop kernels into bags. Remove air and label.
- Freeze: Lay in single layer in freezer. Once solid, stack to save space.
Notes
For extra flavor, sprinkle kernels with chili powder or lime zest before freezing. Always label your bags and use within 8–12 months for best quality.
- Prep Time: 10 minutes
- Cook Time: 6 minutes
- Category: Preservation
- Method: Freezing
- Cuisine: American
Nutrition
- Serving Size: 100g
- Calories: 86
- Sugar: 6g
- Sodium: 0mg
- Fat: 1g
- Saturated Fat: 0g
- Unsaturated Fat: 1g
- Trans Fat: 0g
- Carbohydrates: 19g
- Fiber: 3g
- Protein: 3g
- Cholesterol: 0mg
Keywords: freeze corn, how to freeze corn, frozen corn, preserving corn, corn on the cob