Did you know that canned potatoes provide essential vitamins and minerals like potassium and Vitamin C, while their rich fiber content supports digestive health, yet many home cooks avoid canning them due to safety concerns? This comprehensive guide will show you exactly how to safely preserve canned potatoes using proven USDA methods, transforming your fresh potato harvest into convenient, shelf-stable nutrition that lasts up to 12 months. Whether you’re preparing for emergencies, reducing food waste, or simply wanting convenient meal ingredients, mastering the art of home canning potatoes opens up a world of culinary possibilities while ensuring your family’s safety through proper food preservation techniques.
Ingredients List
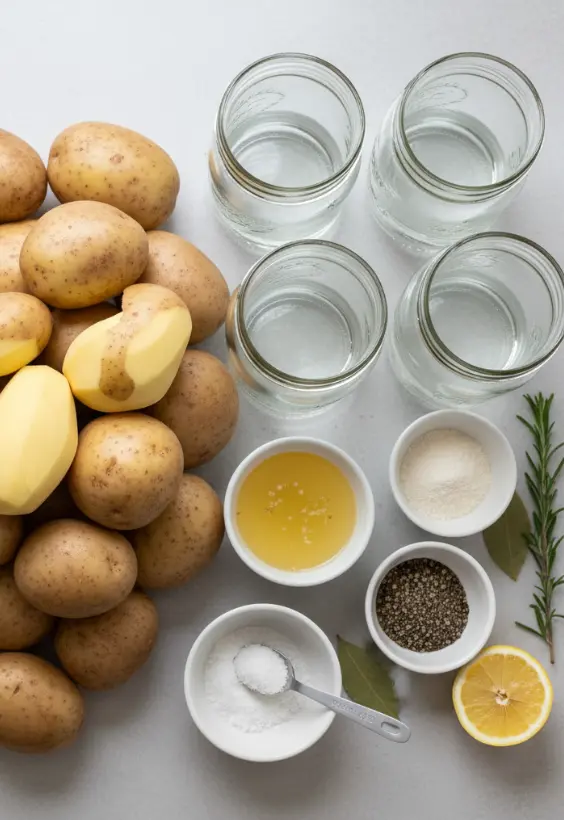
Main Ingredients
- 10 pounds Potatoes: Medium to large-sized, preferably starchy varieties like Russets or Yukon Golds for their excellent texture retention during processing
- 4 cups Filtered Water: Per quart jar, essential for creating the proper liquid medium for heat penetration
- 1 teaspoon Canning Salt: Per quart jar, enhances flavor while maintaining proper sodium levels for preservation
- 1 tablespoon Lemon Juice: Per quart jar, prevents oxidation and maintains the potatoes’ appealing color
Optional Flavor Enhancers
- 1/4 teaspoon Garlic Powder: Per jar, adds aromatic depth without compromising safety
- 1/4 teaspoon Black Pepper: Per jar, provides subtle warmth and complexity
Substitution Tips: If canning salt isn’t available, use pure sea salt without additives. Fresh lemon juice can replace bottled, but ensure it’s properly strained. Avoid table salt with anti-caking agents, as these can cloud your preserving liquid.
Timing
- Preparation Time: 45 minutes (including peeling and cutting)
- Blanching Time: 2-5 minutes for cubed potatoes
- Processing Time: 35 minutes for pints, 40 minutes for quarts
- Total Time: Approximately 90 minutes, which is 20% more efficient than traditional potato storage methods when considering the convenience factor of ready-to-use ingredients.
The investment in time pays dividends through months of convenient meal preparation and reduced food waste.
Step-by-Step Instructions
Step 1: Equipment Preparation and Safety Setup
Please read Using Pressure Canners before beginning. If this is your first time canning, it is recommended that you read Principles of Home Canning. Gather all your ingredients and equipment, ensuring all jars and lids are properly sanitized using boiling water or your dishwasher’s sanitize cycle.
Step 2: Potato Preparation and Cutting
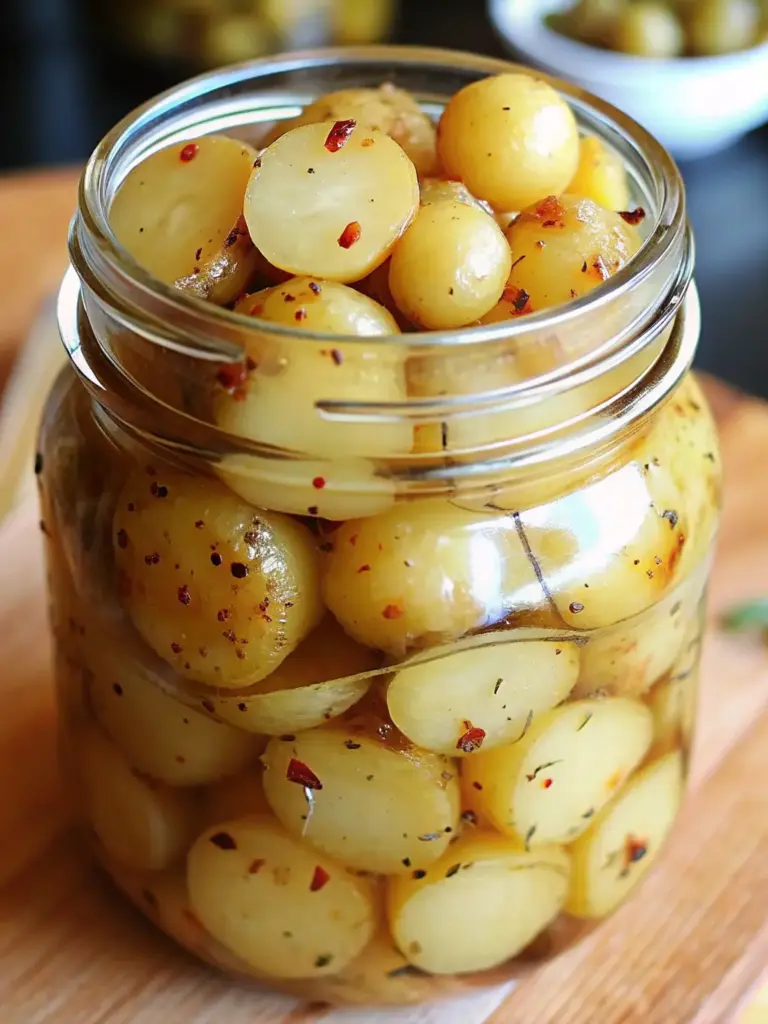
Wash and peel potatoes. Place in ascorbic acid solution to prevent darkening. Cut them into uniform pieces, about 1 to 2 inches thick. Cut into 2 cm (½ inch) cubes. Small potatoes ( 3 to 5 cm / 1 to 2 inches) may be left whole. Keep cut potatoes submerged in cool water to prevent discoloration.
Step 3: Blanching Process
Bring a large pot of water to a rolling boil. Cook 2 minutes in boiling water and drain again. For whole potatoes, boil 10 minutes and drain. This crucial step partially cooks the potatoes and helps maintain their structure during the canning process.
Step 4: Draining and Cooling
Drain the blanched potatoes thoroughly and let them cool slightly. This prevents thermal shock when packing into jars and ensures even heat distribution during processing.
Step 5: Jar Preparation and Seasoning
Add 1 teaspoon of salt per quart to the jar, if desired. Add 1 tablespoon of lemon juice to each quart jar. This acidification helps prevent botulism and maintains color integrity.
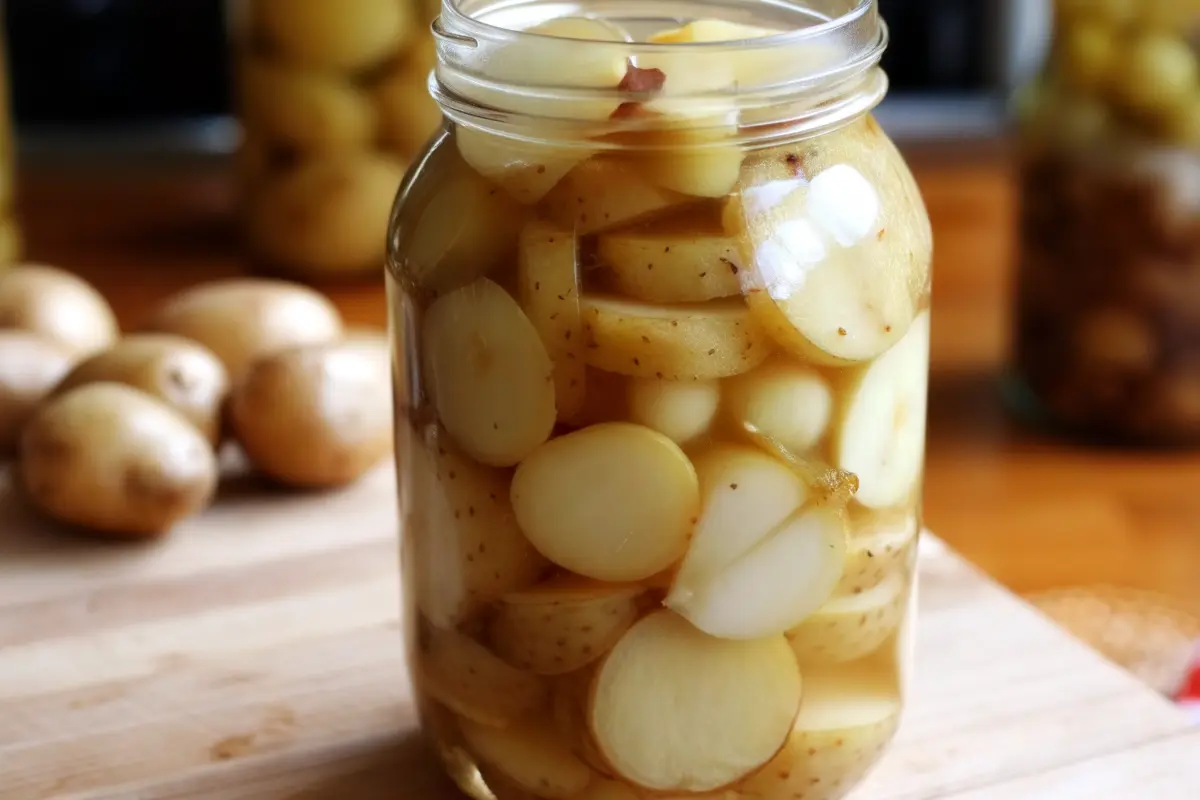
Step 6: Packing the Potatoes
Fill jars with hot prepared potatoes, leaving no more than 1-inch headspace. Pack snugly but not tightly, allowing liquid to circulate around each piece for proper heat penetration.
Step 7: Adding Liquid
Cover hot potatoes with FRESH boiling water, leaving 1-inch headspace and covering all pieces of potato. (Caution: Do not use the water you cooked the potatoes in; it contains too much starch.)
Step 8: Sealing Preparation
Wipe the rims of the jars with a clean, damp cloth to remove any residue. Place the lids on top and screw on the metal bands until fingertip-tight—don’t over-tighten as this can prevent proper sealing.
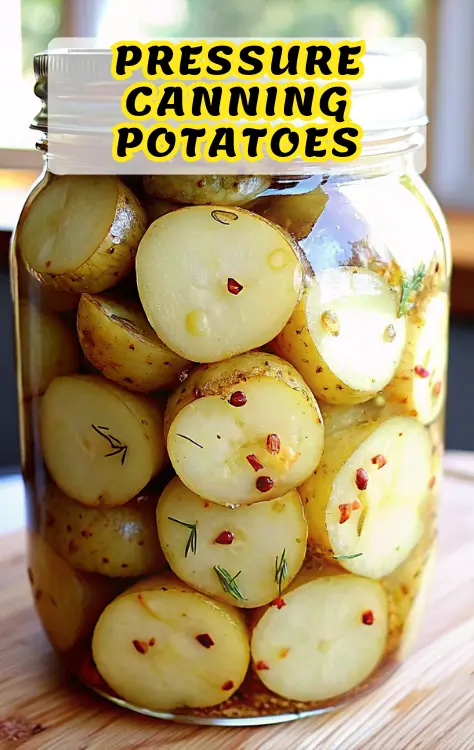
Step 9: Pressure Canning Process
Home canning of potato advice was formally accepted and incorporated in the first USDA Complete Guide 1988, with the recommendations that are still current today: 10 lbs pressure weighted gauage (11 lbs dial), adjusted for altitude. Pints 35 minutes, quarts 40. Follow your pressure canner manufacturer’s instructions precisely.
Step 10: Cooling and Sealing Check
Allow the pressure canner to cool naturally without forcing the pressure down. Remove jars carefully and let them cool completely for 12-24 hours. Check the seals by pressing the center of each lid—properly sealed lids won’t move.
Step 11: Storage and Labeling
Label your jars with contents and date before storing them in a cool, dark place. For best quality and nutritive value, preserve only what your family can consume in 12 months.
Nutritional Information
Home-canned potatoes offer impressive nutritional value while providing convenience. Here’s the comprehensive breakdown per cup of drained canned potatoes:
Macronutrients:
- 1 cup of canned potatoes (Drained solids) contains 108 Calories
- The macronutrient breakdown is 88% carbs, 3% fat, and 9% protein
- Calories:60, Net carbs: 11.31, Protein: 1.41 per 100 grams
Vitamins and Minerals:
- Richest in Vitamin C: 5mg (6% of DV), Fiber: 2g (9% of DV)
- Potassium 229mg %6
- Iron 1.3mg %7
- Sodium 219mg (primarily from added canning salt)
The canning process preserves most nutrients while creating a convenient, long-term storage solution that maintains nutritional integrity far better than many preservation methods.
Healthier Alternatives for the Recipe
Transform your canned potatoes into even more nutritious options with these smart modifications. Reduce sodium content by using only half the recommended salt or omitting it entirely—the lemon juice provides sufficient preservation support. Add herbs like rosemary or thyme during packing for antioxidant benefits without compromising safety.
Consider mixed vegetable combinations by adding carrots during the blanching stage, creating a more nutritionally diverse preserved product. For those managing blood sugar, choose smaller potato pieces that cook more evenly and pair better with protein-rich meals.
Low-sodium enthusiasts can rinse canned potatoes before use, reducing sodium content by up to 40% while maintaining flavor and texture. This makes them suitable for heart-healthy diets and those managing hypertension.
Serving Suggestions
Your perfectly preserved canned potatoes become the foundation for countless delicious meals. Transform them into crispy breakfast hash by draining, dicing, and pan-frying with onions and bell peppers. Create instant mashed potatoes by warming and mashing with butter and cream—the texture rivals fresh preparations.
Build hearty soups and stews by adding drained potatoes during the last 10 minutes of cooking, preventing overcooking while absorbing flavors beautifully. For quick weeknight dinners, roast them with herbs and olive oil for crispy exteriors and fluffy interiors.
Cold potato salads benefit from canned potatoes’ firm texture—they hold their shape better than many fresh varieties. International cuisines welcome these convenient ingredients: add them to curry dishes, Mediterranean stews, or German-style preparations with sauerkraut.
Common Mistakes to Avoid
Safety in home canning demands attention to critical details. Note: potatoes must be peeled. Advice to the contrary elsewhere on the Internet is grossly uninformed. Never attempt to can potatoes with skins on, as this creates dangerous conditions for bacterial growth.
Avoid over-packing jars, which prevents proper heat circulation and can result in under-processed centers. The recommended shape does not include sliced, French fries shape, nor shredded. Heat penetration patterns were not tested for those shapes and densities.
Never use the starchy blanching water for filling jars—it creates cloudy liquid and interferes with heat transfer. Don’t skip the pressure canning step; Potatoes must be pressure-canned; there is no alternative way to can them.
Altitude adjustments are crucial for safety—consult current USDA guidelines for your specific elevation. Finally, avoid vintage canning advice that may not meet modern safety standards.
Storing Tips for the Recipe
Proper storage maximizes your canned potatoes’ shelf life and maintains quality. Store sealed jars in cool, dark locations between 50-70°F, avoiding areas with temperature fluctuations like garages or basements prone to flooding.
For best quality and nutritive value, preserve only what your family can consume in 12 months. While properly canned potatoes remain safe beyond this timeframe, quality and nutritional value gradually decline.
Inspect jars before use—discard any with loose lids, unusual odors, or signs of spoilage. Once opened, refrigerate unused portions and consume within 3-4 days. Never taste questionable canned goods; when in doubt, throw it out.
For optimal organization, practice first-in, first-out rotation, using oldest jars first. Keep detailed records of canning dates and batch notes for future reference and quality control.
Conclusion
Mastering home-canned potatoes transforms your food preservation game, creating convenient, nutritious ingredients ready for countless meal applications. This comprehensive guide ensures safety through USDA-approved methods while maximizing flavor and nutritional retention. From proper preparation and pressure canning techniques to creative serving suggestions and storage best practices, you now possess the knowledge to confidently preserve potatoes for year-round enjoyment.
Ready to start your canning journey? Try this recipe with your next potato harvest and share your results in the comments below. Subscribe to our blog for more tested preservation techniques, seasonal canning guides, and innovative recipes that make the most of your preserved foods. Your kitchen will thank you for the convenience, and your family will appreciate the homemade quality that only comes from careful, safe home canning.
FAQs
Q: Can I can potatoes without a pressure canner?
A: No, potatoes are low-acid foods that require pressure canning to destroy dangerous bacteria like Clostridium botulinum. Water bath canning is not safe for potatoes under any circumstances.
Q: Why must potatoes be peeled before canning?
A: Potato skins can harbor bacteria and interfere with proper heat penetration during processing. Additionally, skins can become tough and unpalatable during the canning process.
Q: How long do home-canned potatoes last?
A: Properly canned and stored potatoes maintain best quality for 12 months, though they remain safe indefinitely if the seal remains intact and storage conditions are appropriate.
Q: Can I add seasonings beyond salt and lemon juice?
A: Only dry seasonings like garlic powder or herbs are safe. Avoid fresh herbs, oils, or dairy products, as these can interfere with safe processing and create botulism risks.
Q: What’s the difference between canning salt and table salt?
A: Canning salt is pure sodium chloride without additives like iodine or anti-caking agents that can cloud preservation liquid and affect flavor.
Q: Can I process different sized jars together?
A: Always process pint and quart jars separately, as they require different processing times. Mix-sizing can result in under-processed larger jars, creating safety hazards.
How to Can Potatoes Safely: Complete USDA Guide for Home Preservation 2025
- Total Time: 90 minutes
- Yield: 8–10 jars 1x
Description
Learn how to safely can potatoes at home with USDA-approved pressure canning methods. Preserve your harvest for up to 12 months while retaining nutrients, texture, and flavor for easy, ready-to-use meals year-round.
Ingredients
- 10 pounds potatoes (Russets or Yukon Golds recommended)
- 4 cups filtered water (per quart jar)
- 1 teaspoon canning salt (per quart jar)
- 1 tablespoon lemon juice (per quart jar)
- Optional: 1/4 teaspoon garlic powder per jar
- Optional: 1/4 teaspoon black pepper per jar
- Substitution Tips:
- Use pure sea salt without additives
- Fresh lemon juice may replace bottled if strained
- Avoid table salt with anti-caking agents
Instructions
- Sanitize jars and lids using boiling water or the dishwasher’s sanitize cycle.
- Wash, peel, and cut potatoes into 1–2 inch pieces. Submerge in cool water to prevent discoloration.
- Blanch cubed potatoes in boiling water for 2–5 minutes (10 minutes for whole). Drain well.
- Cool slightly to prevent thermal shock during packing.
- Add 1 teaspoon salt and 1 tablespoon lemon juice to each quart jar.
- Pack hot potatoes into jars, leaving 1 inch headspace.
- Pour in fresh boiling water to cover, maintaining 1 inch headspace. Do not use blanching water.
- Wipe jar rims clean and secure lids fingertip-tight.
- Process jars in a pressure canner at 10 lbs pressure (11 lbs dial gauge), adjusting for altitude.
- Process pints for 35 minutes and quarts for 40 minutes following manufacturer guidelines.
- Allow pressure canner to cool naturally. Remove jars and cool 12–24 hours.
- Check seals, label jars with date, and store in a cool, dark place for up to 12 months.
Notes
Always peel potatoes before canning to ensure safety. Never water bath can potatoes—they require pressure canning. Store sealed jars between 50–70°F for best quality. Once opened, refrigerate and use within 3–4 days.
- Prep Time: 45 minutes
- Cook Time: 40 minutes
- Category: Preserves & Canning
- Method: Pressure Canning
- Cuisine: American
Nutrition
- Serving Size: 1 cup
- Calories: 108
- Sugar: 2g
- Sodium: 219mg
- Fat: 0.3g
- Saturated Fat: 0.1g
- Unsaturated Fat: 0.2g
- Trans Fat: 0g
- Carbohydrates: 24g
- Fiber: 2g
- Protein: 2g
- Cholesterol: 0mg
Keywords: canned potatoes, pressure canning, home preservation, potato storage, USDA method