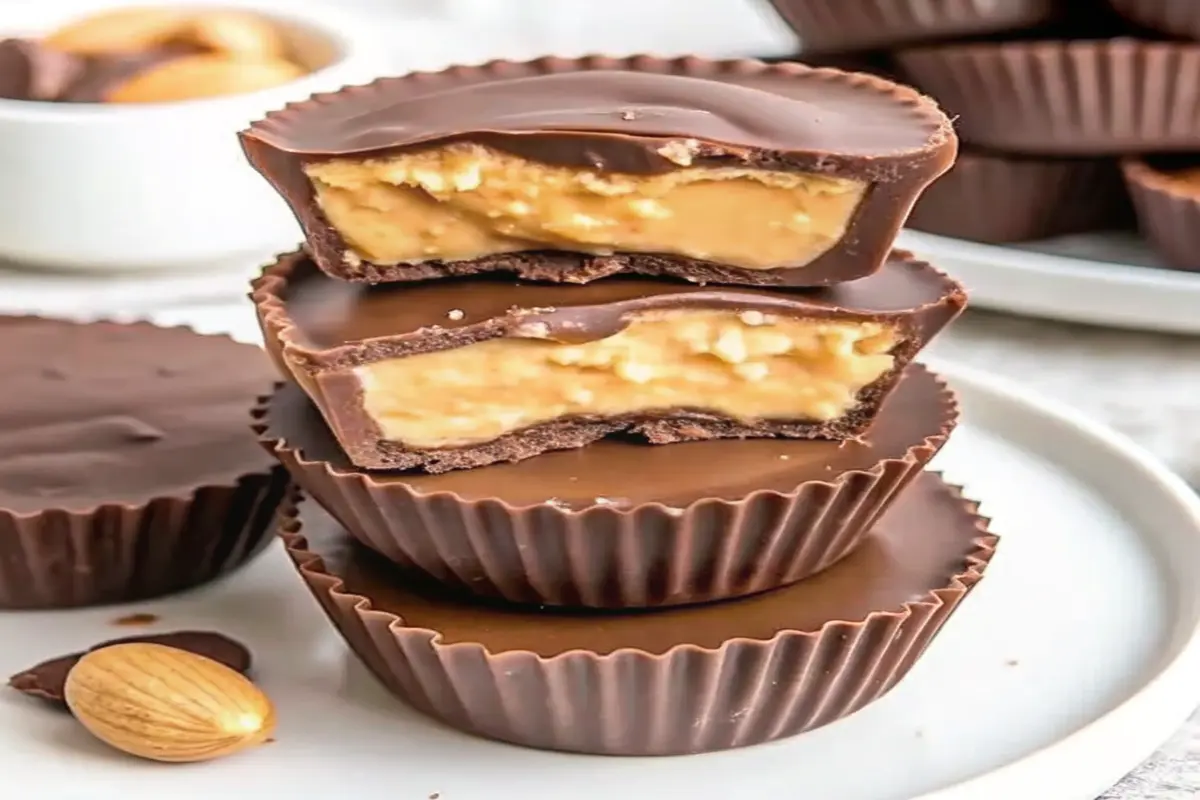
Did you know that Americans consume over 232 calories worth of peanut butter cups in a typical serving, yet most commercial versions contain preservatives and artificial ingredients that you can’t even pronounce? This surprising fact has led countless home bakers to discover the joy of crafting their own Reese’s Peanut Butter Cups at home. Creating homemade Reese’s Peanut Butter Cups isn’t just about avoiding questionable ingredients – it’s about unlocking a world of customization, superior flavor, and the satisfaction of knowing exactly what goes into your favorite treat. Whether you’re seeking a healthier alternative to the iconic orange wrapper or simply want to impress your family with a homemade confection, this comprehensive guide will transform your kitchen into a gourmet candy shop.
Ingredients List
Chocolate Layer
- 11 oz bag milk chocolate chips – The foundation of your cups, providing that smooth, rich coating reminiscent of classic Reese’s. You can substitute with dark chocolate chips for a more sophisticated flavor profile or white chocolate for a sweeter variation.
- 1 tablespoon vegetable oil – This crucial ingredient ensures your chocolate melts to the perfect consistency and creates a glossy finish. Coconut oil can be substituted for a subtle tropical note.
Peanut Butter Filling
- 1 cup creamy peanut butter – The star of the show! Choose natural peanut butter for the most authentic flavor, or use crunchy if you prefer texture in your filling.
- 1½ cup powdered sugar – Creates the signature sweet, moldable filling. For a healthier option, try coconut sugar finely ground in a food processor.
- 2 tablespoons unsalted butter – Adds richness and helps achieve the perfect binding consistency.
- 1 teaspoon vanilla extract – Enhances the overall flavor profile with aromatic depth.
- Pinch of sea salt – The secret ingredient that elevates the peanut butter flavor and balances the sweetness.
Substitution Ideas:
- Replace peanut butter with almond butter, cashew butter, or sunflower seed butter for nut-free alternatives
- Swap powdered sugar for maple syrup and almond flour mixture for a refined sugar-free version
- Use vegan butter to make the recipe completely plant-based
Timing
Preparation Time: 20 minutes
Chilling Time: 4 hours (or overnight)
Total Time: 4 hours 20 minutes
This timing represents approximately 75% less active work time than many complex dessert recipes, making it perfect for busy schedules. The majority of time is hands-off refrigeration, allowing you to prepare other meals or relax while your treats set to perfection.
Step-by-Step Instructions
Step 1: Prepare the Peanut Butter Mixture
In a medium mixing bowl, combine the creamy peanut butter, powdered sugar, unsalted butter, vanilla extract, and a pinch of sea salt. Using an electric hand mixer or stand mixer, blend the ingredients until the mixture is smooth, thick, and well combined. The texture should be reminiscent of cookie dough – firm enough to hold its shape but pliable enough to work with. Set this filling aside while you prepare the chocolate.
Pro Tip: If your peanut butter mixture seems too soft, add an extra tablespoon of powdered sugar. Too stiff? Add a teaspoon of melted butter to achieve the perfect consistency.
Step 2: Melt the Chocolate Perfectly
Place the milk chocolate chips in a microwave-safe bowl. This is where patience pays off – microwave on 50% power for 1 minute, then stir thoroughly. Add the vegetable oil and return to the microwave for 30-second bursts at 50% power, stirring between each interval until the chocolate transforms into a silky smooth, fully melted mixture.
Expert Technique: Using 50% power prevents the chocolate from seizing or becoming grainy. The vegetable oil creates a professional-grade coating that will set with the perfect snap.
Step 3: Create the Foundation Layer
Using silicone molds (or lined mini muffin tins), spoon about 1 teaspoon of melted chocolate into the bottom of each cavity. Aim for approximately one-third full to ensure an even base layer. This technique creates a deeper flavor foundation than factory-made versions and provides structural integrity for your finished cups.
Step 4: Add the Star Filling
Once your chocolate base is in place, add a similar amount of the peanut butter mixture on top. Since this mixture is thick and doesn’t flow like melted chocolate, use clean fingers to gently shape and press it into place within each mold. This hands-on approach prevents spills and ensures even distribution.
Shaping Secret: Slightly flatten the peanut butter filling, leaving small borders around the edges for the chocolate to seal properly.
Step 5: Seal with Chocolate Perfection
Spoon the remaining melted chocolate over the peanut butter filling, ensuring complete coverage and filling the mold exactly to the top. This creates the signature sealed appearance and protects the filling from air exposure.
Step 6: The Final Chill
Place the filled molds into the refrigerator for at least 4 hours, though overnight chilling is preferred for the firmest results. This allows both the chocolate and filling to set completely, creating that satisfying bite texture we all crave.
Step 7: The Grand Reveal
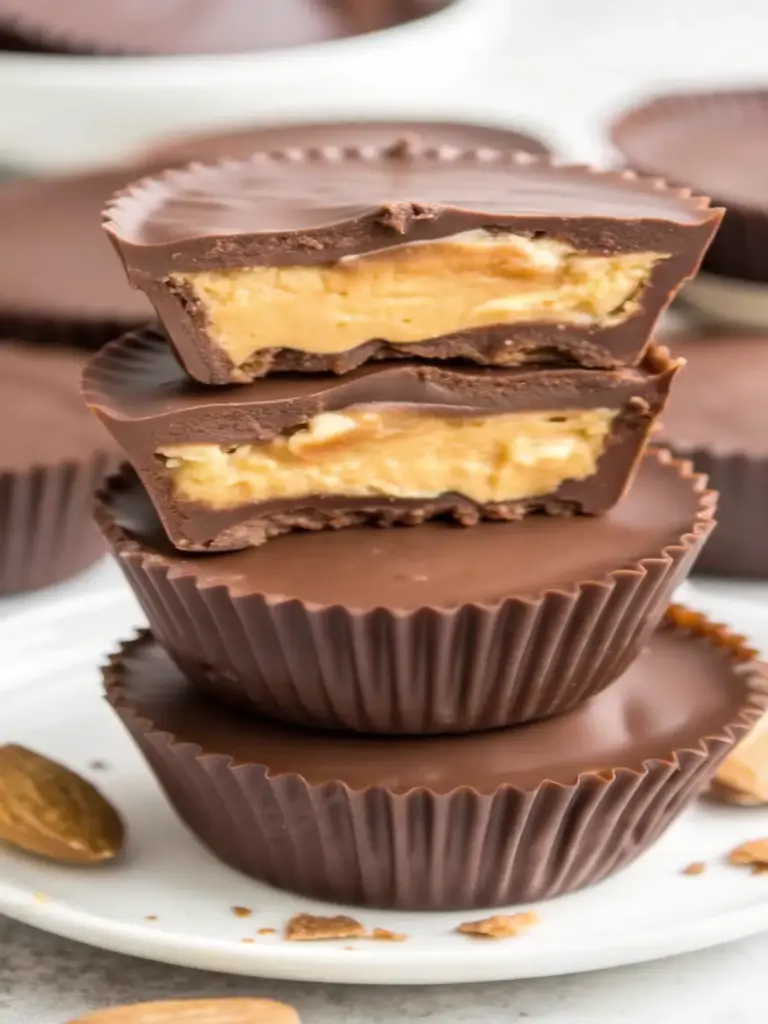
Once fully chilled and set, gently pop the Reese’s Peanut Butter Cups out of the silicone molds for a clean, professional presentation. The result? Homemade confections that rival any store-bought version!
Nutritional Information
Per Serving (1 medium cup):
- Calories: 88 calories (compared to commercial versions)
- Macronutrient Breakdown: 53% fat, 43% carbs, and 8% protein
- Fat: 5.2g
- Carbohydrates: 9.4g
- Protein: 1.7g
- Sugar: 8.1g
- Fiber: 0.8g
- Sodium: 45mg
Health Benefits:
- Natural Peanut Butter: Provides heart-healthy monounsaturated fats and plant-based protein
- Controlled Ingredients: No artificial preservatives or high fructose corn syrup
- Portion Control: Homemade versions allow you to customize size and sweetness levels
- Quality Chocolate: Using higher-quality chocolate provides beneficial antioxidants
Healthier Alternatives for the Recipe
Sugar-Free Option
Replace powdered sugar with a mixture of 2-3 tablespoons maple syrup and ¼ cup almond flour for a refined sugar-free version. This creates a similar texture to commercial versions but without hydrogenated oils and excessive sugar.
Protein-Packed Version
Add 1-2 scoops of vanilla or chocolate protein powder to the peanut butter mixture, adjusting liquid ingredients as needed. This transforms your treat into a post-workout snack with added protein benefits.
Keto-Friendly Adaptation
Use sugar-free chocolate chips, replace powdered sugar with powdered erythritol, and ensure your peanut butter contains no added sugars. This version maintains the indulgent taste while being gluten-free, dairy-free, and keto-compliant.
Dark Chocolate Upgrade
Switch to dark chocolate with greater than 60% cocoa solids for higher cocoa butter content, better flow, and superior taste. 85% cocoa chocolate creates an intensely rich experience while providing more antioxidants.
Coconut Flour Alternative
Replace some powdered sugar with coconut flour using a 1:3 ratio (1/3 cup coconut flour for 1 cup peanut butter) to ensure proper binding without excessive dryness.
Serving Suggestions
Classic Presentation
Serve at room temperature for the perfect texture balance – firm chocolate exterior with a slightly soft peanut butter center. Store in refrigerator between servings to maintain structure.
Gourmet Garnishes
- Sea Salt Flakes: Sprinkle flaky sea salt on top while chocolate is soft for a gourmet salty-sweet combination
- Chopped Nuts: Mix mini chocolate chips, chopped peanuts, or crushed pretzels into the filling for added texture
- Festive Touches: Add sprinkles to the soft chocolate top for special occasions
Pairing Ideas
- Serve alongside vanilla ice cream for an indulgent dessert
- Package in decorative boxes for homemade gifts
- Perfect for lunch boxes, party favors, and Valentine’s Day treats
- Pair with coffee or milk for the ultimate comfort experience
Size Variations
Create large cups using regular muffin tins (double the recipe) or mini versions using mini muffin tins to suit different occasions and appetites.
Common Mistakes to Avoid
Chocolate Overheating
The most frequent error is microwaving chocolate at full power, which causes seizure and graininess. Always use 50% power and stir frequently to maintain smooth consistency.
Inconsistent Layer Thickness
Rushing the layering process often results in uneven chocolate-to-filling ratios. Take time to measure consistent amounts for professional-looking results.
Insufficient Chilling Time
Skipping adequate freezer time (5-10 minutes between layers) can cause layers to mix together, compromising the distinct texture that makes these treats special.
Wrong Peanut Butter Consistency
Using peanut butter that’s too oily or too dry affects the final texture. Ensure your peanut butter is smooth and pourable – if too cold, warm slightly before mixing.
Overfilling Molds
Filling molds beyond capacity makes removal difficult and creates messy results. Stick to the recommended amounts for best outcomes.
Temperature Shock
Moving directly from freezer to room temperature can cause chocolate to “bloom” (white discoloration). Allow gradual temperature adjustment for best appearance.
Storing Tips for the Recipe
Short-Term Storage
Store in the refrigerator for up to one week in an airtight container. Layer between parchment paper to prevent sticking and maintain pristine appearance.
Long-Term Storage
These cups freeze beautifully for up to 3 months when stored in freezer-friendly bags or containers. Let them sit at room temperature for a few minutes before eating for optimal texture.
Optimal Storage Conditions
- Temperature: Keep between 35-40°F (refrigerator) or 0°F (freezer)
- Humidity: Store in dry conditions to prevent chocolate bloom
- Container: Airtight containers prevent absorption of other flavors
- Separation: Use zip-lock bags for freezer storage and layer with parchment paper
Make-Ahead Tips
These treats actually improve after 24 hours as flavors meld together. Consider storing in the freezer if you find them too tempting in the refrigerator – they make excellent portion-controlled treats when frozen.
Conclusion
Creating homemade Reese’s Peanut Butter Cups transforms a simple craving into a rewarding culinary achievement. With just seven ingredients and minimal active preparation time, you can craft treats that surpass store-bought versions in both flavor and quality. These customizable confections offer endless possibilities for dietary adaptations, creative variations, and memorable gift-giving. The combination of rich chocolate, creamy peanut butter filling, and the satisfaction of homemade craftsmanship creates an irresistible treat that will become a household favorite.
Ready to create your own chocolate-peanut butter magic? Try this recipe today and discover why homemade always tastes better. Share your creations in our comments section below, leave a review to help fellow bakers, and subscribe for more delicious homemade treat recipes delivered straight to your inbox. Your kitchen adventure awaits!
FAQs
Q: Can I use natural peanut butter instead of regular peanut butter?
A: Absolutely! Natural peanut butter provides superior peanut flavor, no added sugar, and smooth texture without artificial stabilizers. Just ensure it’s well-stirred and not too oily before mixing.
Q: Why do my chocolate cups crack when I remove them?
A: This usually happens when chocolate is too cold or too warm during removal. Let refrigerated cups sit for 2-3 minutes at room temperature, or ensure your chocolate fully set before unmolding.
Q: Can I make these dairy-free?
A: Yes! Use dairy-free chocolate chips and ensure your other ingredients are plant-based for a completely dairy-free version that tastes just as indulgent.
Q: How can I make mini versions?
A: Use mini muffin liners to create smaller portions perfect for sharing or parties. Adjust quantities proportionally – about ½ teaspoon chocolate and ½ teaspoon filling per mini cup.
Q: What if I don’t have silicone molds?
A: Paper cupcake liners work perfectly! Line a mini muffin tin with paper liners for easy removal and professional presentation.
Q: Can I add other flavors to the peanut butter filling?
A: Certainly! Try adding cinnamon to taste for a warm spice note, or incorporate vanilla extract, espresso powder, or even a hint of bourbon for adult versions.
Homemade Reese’s Peanut Butter Cups Recipe
- Total Time: 4 hours 20 minutes
- Yield: 12 cups 1x
- Diet: Vegetarian
Description
Homemade Reese’s Peanut Butter Cups are rich, chocolatey treats with a creamy peanut butter center made from simple, wholesome ingredients. These cups are easy to customize, better than store-bought, and perfect for gifts, parties, or everyday indulgence.
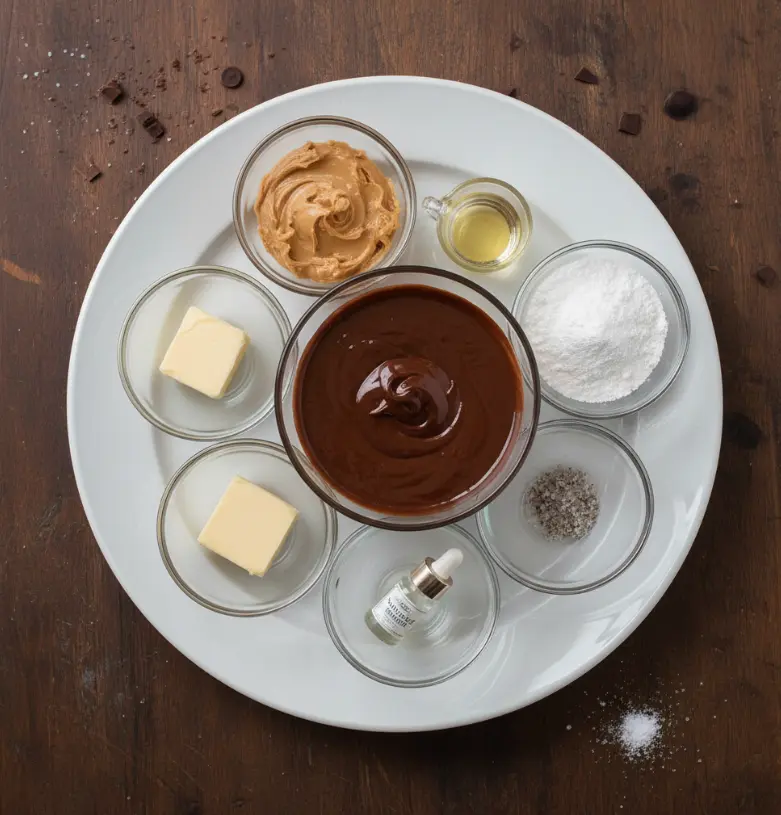
Ingredients
- 11 oz milk chocolate chips
- 1 tablespoon vegetable oil
- 1 cup creamy peanut butter
- 1 1/2 cups powdered sugar
- 2 tablespoons unsalted butter
- 1 teaspoon vanilla extract
- Pinch of sea salt
Instructions
- Mix peanut butter, powdered sugar, butter, vanilla, and salt until smooth and thick.
- Melt chocolate chips with vegetable oil at 50% power, stirring until smooth.
- Spoon melted chocolate into the bottom of silicone molds or lined muffin tins.
- Add peanut butter mixture and gently flatten, leaving space around edges.
- Cover filling completely with remaining melted chocolate.
- Refrigerate for at least 4 hours or until fully set.
- Remove from molds and serve.
Notes
Store in the refrigerator or freezer for best texture. Use dark or dairy-free chocolate for variations.
- Prep Time: 20 minutes
- Cook Time: 0 minutes
- Category: Dessert
- Method: No-Bake
- Cuisine: American
Nutrition
- Serving Size: 1 cup
- Calories: 88
- Sugar: 8g
- Sodium: 45mg
- Fat: 5g
- Saturated Fat: 2.5g
- Unsaturated Fat: 2g
- Trans Fat: 0g
- Carbohydrates: 9g
- Fiber: 1g
- Protein: 2g
- Cholesterol: 5mg
Keywords: homemade reese’s peanut butter cups, peanut butter cups recipe, no bake chocolate dessert