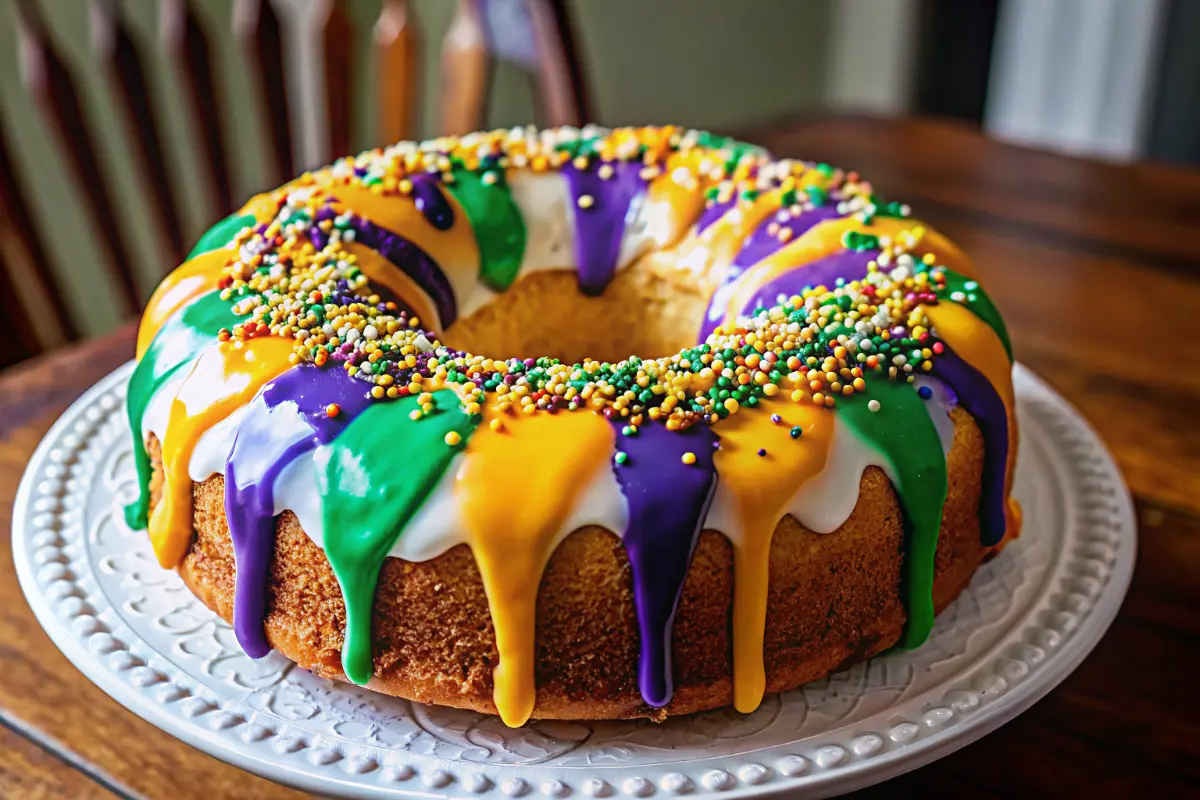
When French settlers arrived in Louisiana in the 1870s, they brought this beloved tradition with them, blending it with Spanish Carnival celebrations to create the New Orleans king cake tradition we know today. The iconic colors—purple, green, and gold—weren’t added until after 1872, when the Rex organization selected these hues for a Mardi Gras parade, and they soon became symbolic of the celebration itself: purple representing justice, green representing faith, and gold representing power.
Ingredients for Authentic Traditional King Cake
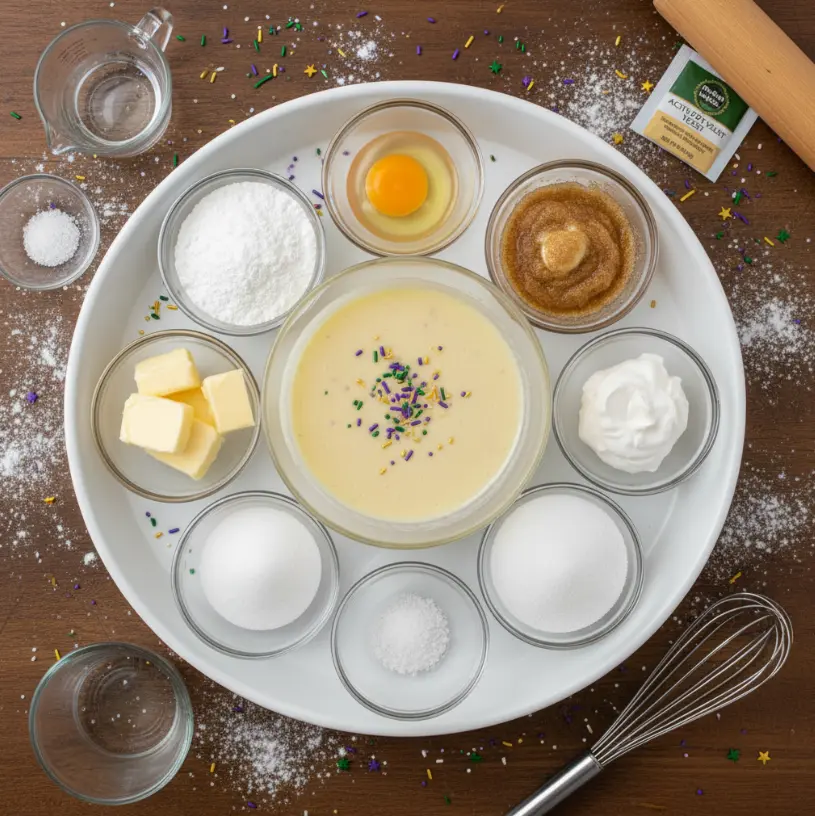
Creating an authentic traditional king cake requires quality ingredients and careful measurement. Here’s everything you’ll need:
For the Dough:
- ¼ oz active dry yeast (2¼ teaspoons or 1 packet)
- ¼ cup warm water (100°-110°F)
- ½ tablespoon granulated sugar
- 8 oz full-fat sour cream
- 2 tablespoons granulated sugar
- 2 tablespoons unsalted butter
- ½ teaspoon salt
- 1 large egg, lightly beaten
- 3 to 3½ cups bread flour (all-purpose can also be used)
For the Filling:
- ⅓ cup unsalted butter, softened
- ½ cup granulated sugar
- 1½ teaspoons ground cinnamon
For the Glaze:
- 3 cups powdered sugar
- 3 tablespoons cream cheese, softened (butter can substitute)
- 2-4 tablespoons milk
- 2 tablespoons fresh lemon juice
- ¼ teaspoon vanilla extract
- Purple, green, and gold sprinkles for decoration
Optional Substitutions: You can swap all-purpose flour for bread flour, use butter instead of cream cheese in the glaze, and adjust the lemon juice to taste for a more subtle citrus note.
Timing Your Traditional King Cake
The complete process for baking a traditional king cake takes approximately 2.5 to 3 hours total, including rising time. Here’s the breakdown:
- Preparation time: 20-25 minutes
- First rise: 60 minutes
- Shaping and second rise: 20-30 minutes
- Baking time: 25-35 minutes
- Cooling and glazing: 15-20 minutes
This timeline is actually quite efficient compared to many traditional enriched dough recipes, making a homemade king cake accessible for both experienced bakers and enthusiasts attempting their first attempt at this classic dessert.
Step-by-Step Instructions for Your Traditional King Cake
Step 1: Activate the Yeast
Begin by creating the foundation for your dough’s rise. In a small bowl or glass measuring cup, combine the active dry yeast, ¼ cup warm water, and ½ tablespoon granulated sugar. Stir gently and let the mixture sit undisturbed for exactly 5 minutes. You’ll notice the surface becoming foamy and developing a yeasty aroma—this visual cue confirms your yeast is alive and ready to work its magic. This activation step is critical; without proper foaming, your king cake won’t achieve the light, airy crumb structure that makes this dessert so memorable.
Step 2: Prepare the Sour Cream Mixture
The sour cream base is what distinguishes an authentic traditional king cake from standard bread recipes. In a medium saucepan over low heat (or a microwave-safe cup), combine 8 oz full-fat sour cream, 2 tablespoons granulated sugar, 2 tablespoons unsalted butter, and ½ teaspoon salt. Heat gently, stirring frequently, until the butter completely melts—this should take approximately 3-5 minutes. Remove from heat immediately and allow the mixture to cool to 100°-110°F (approximately 5-10 minutes). This temperature range is essential; if the mixture is too hot when combined with yeast, you’ll kill the living cultures and compromise your king cake’s rise.
Step 3: Mix the Dough
Pour the cooled sour cream mixture into the bowl of a stand mixer fitted with a dough hook. Add the activated yeast mixture, the beaten egg, and approximately half of your flour (about 1.5 to 1.75 cups). Using a spatula, stir briefly to combine these ingredients roughly, then switch on the mixer to medium speed. Gradually introduce the remaining flour while mixing on low speed, adding just enough until a soft, cohesive dough forms. The dough should pull away from the bowl’s sides but shouldn’t be sticky or overly dry.
Step 4: Knead the Dough
Lower your mixer speed to low and continue kneading for 8-10 minutes. Watch the transformation as the shaggy dough becomes smooth, elastic, and beautifully developed. You’ll notice the dough becoming increasingly smooth and slightly glossy. This proper kneading develops gluten structure, essential for achieving the tender yet structured crumb your king cake needs. The dough should feel soft and slightly tacky but not sticky—imagine the consistency of a soft earlobe.
Step 5: Proof the Dough
Transfer your kneaded dough to a lightly greased bowl, turning it once to coat all sides lightly with oil. Cover the bowl with plastic wrap or a clean cloth to prevent the surface from drying out. Place it in a warm location (ideally 75-78°F—a kitchen counter away from drafts or an oven with the light on works well). Let the dough rise undisturbed for 1 hour, or until it has approximately doubled in size. This first rise develops flavor complexity and fermentation benefits that make homemade king cake infinitely superior to store-bought versions.
Step 6: Prepare the Cinnamon-Sugar Filling
While your dough rises, prepare the aromatic filling. In a small bowl, whisk together ½ cup granulated sugar and 1½ teaspoons ground cinnamon until evenly distributed. Set this mixture aside within arm’s reach—you’ll need it during the shaping stage. The aroma of this simple combination will be utterly enticing.
Step 7: Shape the Dough
After the first rise, transfer your doubled dough to a lightly floured surface. Divide it in half using a bench scraper or sharp knife. Take one portion and roll it into a rectangle measuring approximately 16 inches long and 8-9 inches wide. Spread half of the softened ⅓ cup butter over the dough surface, leaving a 1-inch border all around. This border prevents filling from escaping during rolling. Sprinkle exactly half of your cinnamon-sugar mixture evenly across the buttered surface.
Step 8: Roll and Create the Spirals
Starting from the bottom long edge, roll the dough tightly toward you, similar to rolling a cinnamon roll. As you roll, apply gentle, consistent pressure to eliminate air pockets. Once completely rolled, pinch the seam tightly closed to prevent unraveling during the rise and bake. Repeat this entire process—rolling, buttering, sprinkling—with your remaining dough portion.
Step 9: Braid and Form the Ring
Arrange both dough rolls seam-side down on a parchment-lined baking sheet. This is where your traditional king cake takes its iconic shape. Pinch one set of ends together securely. Now, twist the two rolls over and around each other in a braiding motion, creating an elegant spiral effect. Once you’ve braided the length, pinch the opposite ends together to complete the ring and seal it into the characteristic circle shape symbolic of a crown. This ring shape isn’t merely decorative—it represents the circular journey the Three Wise Men took to reach the Christ Child.
Step 10: Second Rise
Cover your shaped cake loosely with plastic wrap and place it in the same warm location as before. Allow it to rise for 20-30 minutes until noticeably puffy and increased in volume. You don’t want a full doubling at this stage—you’re looking for a gentle rise that indicates readiness for baking. This shorter second rise prevents over-fermentation and keeps your traditional king cake tender rather than yeasty.
Step 11: Bake Your King Cake
Preheat your oven to 350°F (175°C). Once the oven reaches temperature, carefully place your baking sheet inside. Bake for 25-35 minutes, monitoring closely during the final 10 minutes. Your finished king cake should be a beautiful golden brown color, slightly darker on the ridges created by your braiding. A wooden toothpick inserted into the thickest part should come out clean or with just a few moist crumbs. Allow the cake to cool on the baking sheet for 10 minutes, then transfer to a wire rack for further cooling. This cooling phase is crucial—glazing a too-warm cake causes the glaze to slide off rather than coat evenly.
Step 12: Prepare the Glaze
In a large bowl, combine 3 cups powdered sugar, 3 tablespoons softened cream cheese (or butter), 2-4 tablespoons milk, 2 tablespoons fresh lemon juice, and ¼ teaspoon vanilla extract. Using a hand mixer or vigorous whisking, beat these ingredients until completely smooth and creamy, resembling the consistency of thick paint. Adjust the milk content if necessary—you want a glaze that flows slightly but holds its shape somewhat.
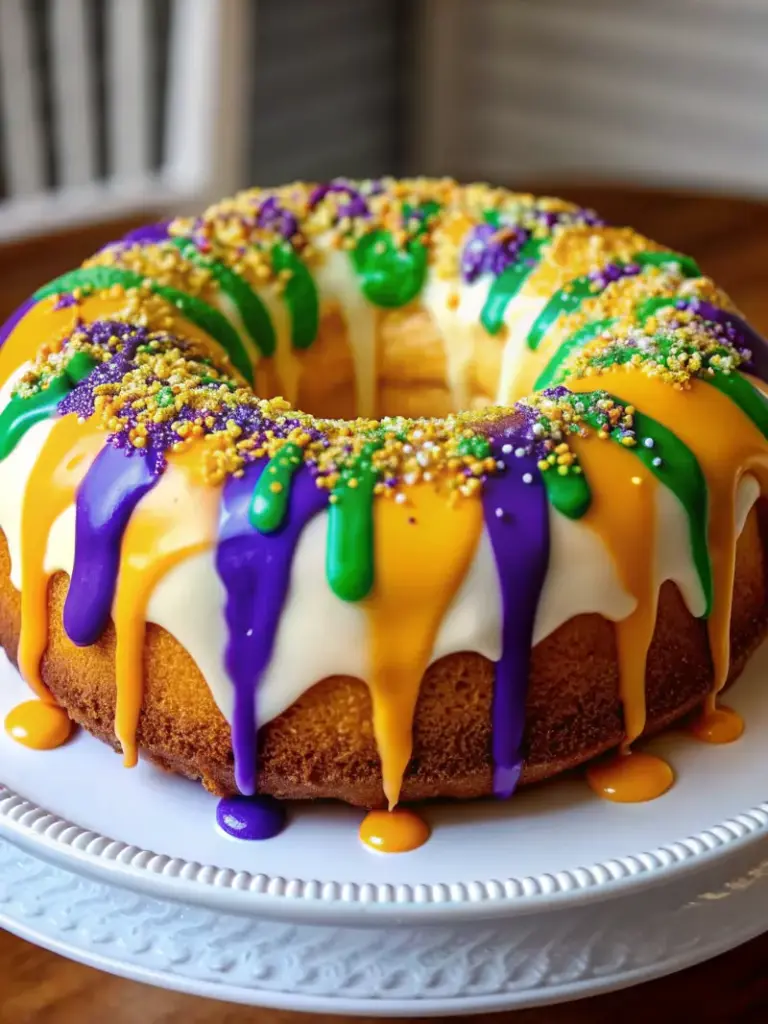
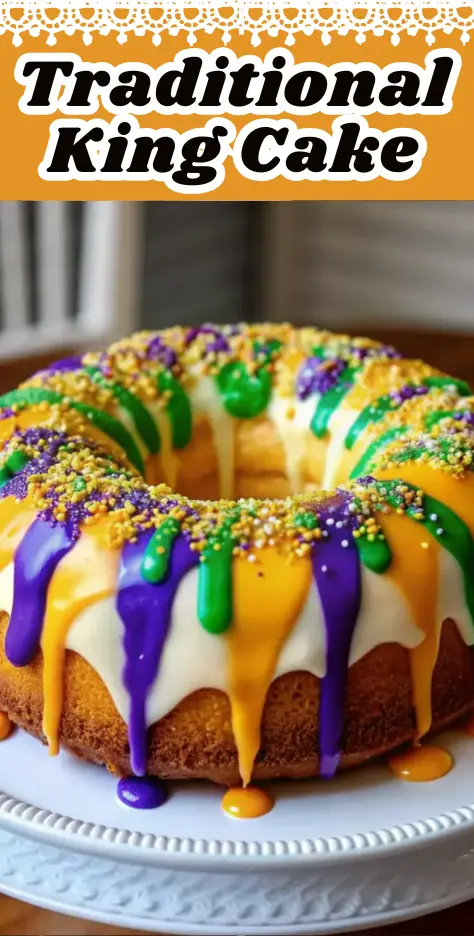
Step 13: Decorate Your King Cake
Once your cake has cooled to warm (not hot), pour the glaze evenly over the top, allowing it to cascade down the sides naturally. Working quickly before the glaze sets, sprinkle the purple, green, and gold sprinkles in alternating bands across the cake’s surface, following the spiral created by your braiding. These iconic colors immediately identify your creation as a traditional king cake and add festive visual appeal.
Step 14: Final Cooling and Serving
Allow your completed king cake to cool completely to room temperature before serving. This patience allows the glaze to set properly and makes slicing cleaner. According to tradition, a small plastic baby figurine is often baked inside the cake; whoever discovers it is crowned the evening’s “King” or “Queen”—though this is optional for homemade versions due to safety considerations.
Nutritional Information for Traditional King Cake
Each serving of traditional king cake (per slice, assuming 12 slices per cake) contains approximately:
| Nutrient | Amount |
|---|---|
| Calories | 385-420 |
| Total Fat | 12-14g |
| Saturated Fat | 7-8g |
| Carbohydrates | 62-65g |
| Dietary Fiber | 1g |
| Protein | 5-6g |
| Sodium | 220-240mg |
| Sugar | 48-52g |
Important Note: These values are estimates based on standard ingredient portions and don’t account for the plastic baby figurine if used (which shouldn’t be consumed!). The richness comes from the combination of sour cream, butter, and cream cheese glaze—traditional ingredients that create the distinctive flavor profile expected in authentic king cake.
Healthier Alternatives for Traditional King Cake
While a traditional king cake is undeniably indulgent, several modifications can reduce calories and sugar without sacrificing authentic taste:
Flour Substitutions: Replace 1 cup of bread flour with white whole wheat flour or spelt flour. This adds fiber and nutrients while maintaining the cake’s structure better than you might expect.
Reduce Sugar in the Filling: Lower the cinnamon-sugar filling to ⅓ cup sugar instead of ½ cup. The cinnamon’s natural sweetness compensates, and most tasters won’t notice the reduction.
Glaze Modifications: Create a lighter glaze using Greek yogurt instead of cream cheese, reducing the powdered sugar to 2 cups and using the same liquid ratios. This dramatically reduces saturated fat while maintaining creaminess.
Butter Reduction: Use 1½ tablespoons unsalted butter in the dough and filling instead of 2 and ⅓ cup respectively. Your king cake will still achieve excellent texture with slightly less richness.
Natural Sweeteners: Experiment with coconut sugar or maple syrup in place of granulated sugar (use slightly less as these are sweeter). The flavor profile changes subtly, creating a more complex taste experience.
Egg Substitution: Replace the egg with a flax egg (1 tablespoon ground flaxseed mixed with 3 tablespoons water) for a vegan-friendly version that maintains binding ability.
These modifications allow you to enjoy traditional king cake traditions while aligning with dietary preferences or health goals.
Serving Suggestions for Traditional King Cake
A traditional king cake shines brightest when served thoughtfully:
Classic Presentation: Serve slices slightly warm with strong coffee or hot chocolate, honoring the European tradition of pairing enriched doughs with hot beverages. The warmth brings out the cake’s aromatic qualities.
Brunch Centerpiece: Feature your king cake as the elegant centerpiece of a Mardi Gras-themed brunch, surrounded by beignets, café au lait, and fresh berries.
Dessert Course: Present slices after dinner with champagne or sparkling cider, elevating the experience to celebration-worthy status.
Party Portions: Cut into smaller pieces (20-24 pieces rather than 12) for a cocktail party where guests gather around to discover the hidden baby figurine, creating interactive entertainment.
À la Mode Serving: Top warm slices with vanilla ice cream, creating a luxurious contrast between the warm cake and cold cream.
Fruit Pairings: Accompany slices with fresh strawberries, raspberries, or candied orange peel to add bright flavors that cut through the richness.
Gift-Giving: Wrap a cooled king cake beautifully to share with neighbors, friends, or colleagues during Carnival season or the Epiphany celebration.
Common Mistakes to Avoid When Baking Traditional King Cake
Even experienced bakers encounter challenges with king cake recipes. Here are the most common pitfalls:
Mistake 1: Incorrect Yeast Activation
Many bakers use water that’s too hot, killing the yeast, or too cold, preventing activation. Solution: Use an instant-read thermometer to confirm your water measures exactly 100°-110°F. If foam doesn’t appear within 5 minutes, your yeast is dead—start over with fresh yeast.
Mistake 2: Skipping the Cooling Step
Adding still-hot sour cream mixture to yeast kills it instantly. Solution: Always cool your sour cream mixture to the proper temperature before combining. This single step prevents countless failures.
Mistake 3: Over-Kneading or Under-Kneading
Too little kneading produces a dense cake; too much creates toughness. Solution: Knead exactly 8-10 minutes as specified. Your dough should be smooth and elastic but not overly developed.
Mistake 4: Inadequate Rise Time
Rushing the rise prevents proper fermentation and results in a dense, less flavorful cake. Solution: Allow the full hour for the first rise, resisting the urge to speed up with heat. Proper fermentation develops the traditional king cake’s characteristic flavor complexity.
Mistake 5: Baking at Wrong Temperature
Ovens vary significantly. Baking at 375°F instead of 350°F burns the exterior while leaving the interior underbaked. Solution: Use an oven thermometer to verify accuracy. Adjust your oven rack to the middle position for even baking.
Mistake 6: Glazing While Too Warm
A too-warm cake causes glaze to pool and run rather than coat smoothly. Solution: Wait until the cake reaches warm (not hot) temperature before glazing. This allows the glaze to set properly.
Mistake 7: Over-Filling
Excess cinnamon-sugar filling leaks during baking, creating burnt spots. Solution: Measure filling ingredients precisely and spread to leave the 1-inch border as instructed. This prevents overflow.
Mistake 8: Improper Sealing
Failure to pinch seams tightly causes the spiral to unravel during baking. Solution: After rolling, pinch the seam thoroughly for its entire length. During the ring formation, ensure both connection points are firmly sealed.
Conclusion
The traditional king cake represents far more than a seasonal treat—it embodies centuries of European heritage, spiritual significance, and festive celebration transformed into an edible masterpiece. From its medieval French origins through its journey to New Orleans, this iconic dessert carries stories of kings, Three Wise Men, and joyful celebrations. By following this comprehensive guide to creating an authentic king cake, you’re not merely baking; you’re participating in a tradition that connects you to countless generations of bakers and celebrants.
FAQs About Traditional King Cake
Q: What does the baby figurine in king cake symbolize?
A: Traditionally, the hidden baby represents the Christ Child. The person who discovers it becomes the “King” or “Queen” for the evening and is often responsible for hosting the next celebration. This tradition dates back to French Twelfth Night celebrations from the 17th century.
Q: Can I make traditional king cake without the baby figurine?
A: Absolutely. While traditional, the figurine is optional for safety reasons, especially if children will be eating the cake. The cake remains authentic and delicious without it, honoring the dessert’s primary purpose: celebration and joy.
Q: What’s the difference between king cake and regular sweet bread?
A: Traditional king cake specifically uses sour cream in the dough, creating a distinctively tender crumb with subtle tang. The braided ring shape, cinnamon-sugar filling, and cream cheese glaze further distinguish it from standard sweet breads. The cultural and historical context also defines what makes a cake “king cake.”
.
Print
Easy Traditional King Cake Recipe
- Total Time: 3 hours
- Yield: 12 slices 1x
- Diet: Vegetarian
Description
Ce king cake traditionnel est une brioche moelleuse garnie de cannelle et décorée de glaçage aux couleurs emblématiques du Mardi Gras. Une recette authentique inspirée de la tradition de la Nouvelle-Orléans, parfaite pour célébrer l’Épiphanie et le carnaval.
Ingredients
- 2¼ c. à café levure sèche active
- ¼ tasse eau tiède (100–110°F / 38–43°C)
- ½ c. à soupe sucre
- 225 g crème sure entière
- 2 c. à soupe sucre
- 2 c. à soupe beurre non salé
- ½ c. à café sel
- 1 gros œuf, battu
- 3 à 3½ tasses farine (pain ou tout usage)
- ⅓ tasse beurre ramolli (pour la garniture)
- ½ tasse sucre (pour la garniture)
- 1½ c. à café cannelle moulue
- 3 tasses sucre glace
- 3 c. à soupe fromage à la crème ramolli
- 2–4 c. à soupe lait
- 2 c. à soupe jus de citron
- ¼ c. à café vanille
- Décorations violettes, vertes et dorées
Instructions
- Mélanger la levure, l’eau tiède et le sucre puis laisser mousser 5 minutes.
- Chauffer doucement la crème sure, le sucre, le beurre et le sel jusqu’à fonte du beurre.
- Laisser tiédir puis ajouter la levure activée et l’œuf.
- Incorporer progressivement la farine jusqu’à obtention d’une pâte souple.
- Pétrir 8 à 10 minutes jusqu’à ce que la pâte soit lisse et élastique.
- Laisser lever 1 heure dans un bol huilé, couvert.
- Mélanger le sucre et la cannelle pour la garniture.
- Diviser la pâte en deux et étaler chaque portion en rectangle.
- Badigeonner de beurre, saupoudrer de sucre à la cannelle.
- Rouler chaque rectangle en boudin et pincer les joints.
- Tresser les deux boudins et former une couronne.
- Laisser lever 20 à 30 minutes.
- Cuire à 175°C (350°F) pendant 25 à 35 minutes.
- Mélanger les ingrédients du glaçage jusqu’à consistance lisse.
- Glacer le gâteau refroidi et décorer de sucres colorés.
Notes
Traditionnellement, un petit bébé en plastique est caché dans le gâteau après cuisson. La personne qui le trouve est désignée roi ou reine.
- Prep Time: 25 minutes
- Cook Time: 35 minutes
- Category: Dessert
- Method: Baking
- Cuisine: Louisiana
Nutrition
- Serving Size: 1 slice
- Calories: 400
- Sugar: 50g
- Sodium: 230mg
- Fat: 13g
- Saturated Fat: 8g
- Unsaturated Fat: 5g
- Trans Fat: 0g
- Carbohydrates: 63g
- Fiber: 1g
- Protein: 6g
- Cholesterol: 55mg
Keywords: traditional king cake, mardi gras dessert, king cake recipe, new orleans king cake