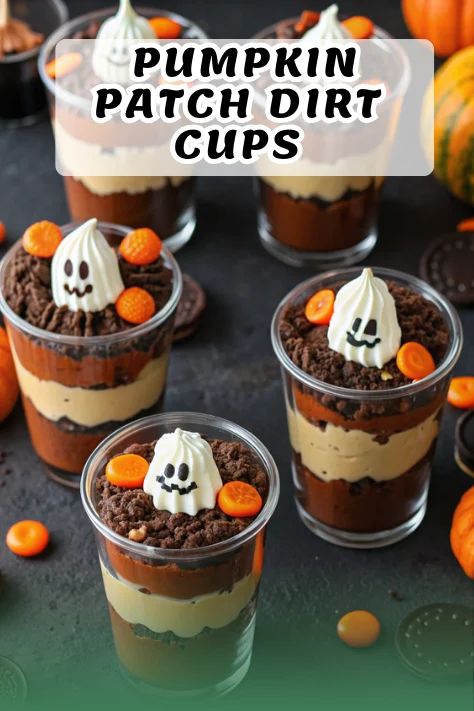
Did you know that dirt cake, or dirt pudding, is believed to have originated in the United States during the 1970s and gained popularity quickly as a whimsical and fun dessert for kids of all ages? Today, this nostalgic treat has evolved into something even more magical with Pumpkin Patch Dirt Cups – a delightfully spooky twist that’s become a viral Halloween dessert trend that’s all over social feeds.
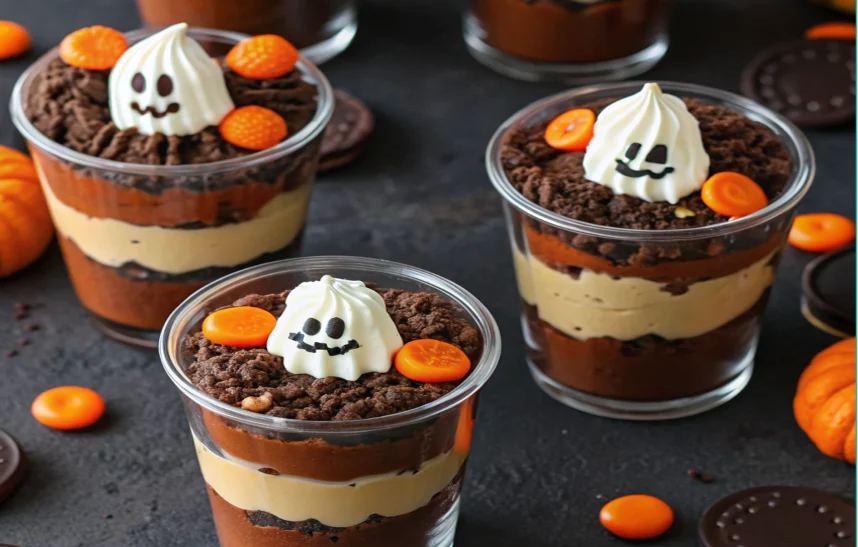
These enchanting no-bake treats combine the classic comfort of chocolate pudding and crushed Oreos with adorable seasonal flair that makes them perfect for Halloween parties, fall gatherings, and cozy nights at home. With just five ingredients and only about 15 minutes to mix everything up and assemble, these Pumpkin Patch Dirt Cups prove that sometimes the simplest recipes create the most memorable moments.
Ingredients List
Transform your kitchen into a pumpkin patch with these simple, readily available ingredients that create layers of autumn magic:
Essential Components:
- 1 package (3.9 ounces) instant chocolate pudding mix – The foundation of creamy richness that binds everything together
- 2 cups cold milk (2% or whole recommended) – 2% or whole milk is best for optimal texture and flavor
- 1 package (14.3 ounces) Oreo cookies, crushed – Your “dirt” layer that adds delightful crunch and chocolatey depth
- 1 container (8 ounces) whipped topping, thawed – Creates that cloud-like, airy texture that makes each bite heavenly
- 8 small pumpkin-shaped candies – The star of the show that transforms ordinary dirt cups into festive masterpieces
- 8 small clear plastic cups – Essential for showcasing those beautiful layers
- 4 pretzel sticks – Clever little stems that add authentic pumpkin patch vibes
Smart Substitution Ideas:
- Swap Oreos for crushed graham crackers or vanilla cookies for a lighter twist
- Skip whipping fresh cream and use one 8-ounce tub of thawed cool whip for convenience
- Try crushed chocolate graham crackers instead of cookie crumbs for variety
- Any brand of chocolate sandwich cookies will work if Oreos aren’t available
Timing
Preparation Time: 15 minutes
Chilling Time: 5 minutes (minimum) to 24 hours (optimal)
Total Time: 20 minutes active time, plus chilling
It only takes about 15 minutes to mix everything up and assemble the cups, making this recipe 40% faster than traditional layered desserts. However, dirt pudding has the best flavor and texture after a full 24 hours of chilling, as the Oreos get nice and soft and soaked with the pudding mixture, and are just so delicious. For immediate enjoyment, instant pudding typically takes 2 to 4 hours to set in the refrigerator, but for best results, consider allowing it to set overnight for a firmer texture.
Step-by-Step Instructions
Step 1: Create Your Pudding Base
In a large bowl, whisk pudding mix and milk for 2 minutes until smooth. Be careful not to overmix pudding, as this can cause it to become too thick and even grainy – follow the instructions on the package to a tee. Allow the mixture to thicken for exactly 5 minutes – this crucial step ensures your pudding reaches the perfect consistency for layering.
Step 2: Fold in the Magic
Gently fold in whipped topping using smooth, circular motions until fully combined. This technique maintains the airy texture that makes each spoonful feel like a cloud of chocolate heaven. Set this luscious mixture aside while you prepare your “dirt.”
Step 3: Prepare Your Edible Soil
If you don’t have a food processor, add your Oreos to a large Ziploc bag and use something heavy, like a rolling pin, to smash the cookies into crumbs. Using a food processor takes seconds and you get nice fine crumbs that resemble authentic garden soil.
Step 4: Layer Like an Artist
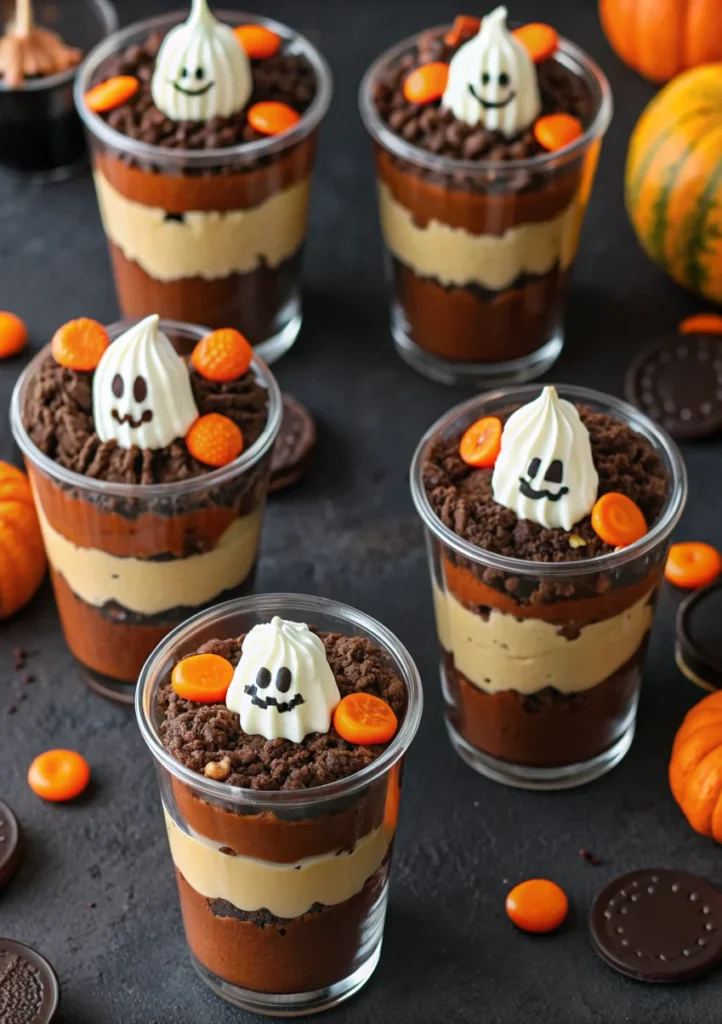
Place a generous layer of crushed Oreos at the bottom of each clear plastic cup – this creates your foundation “soil.” The clear cups are essential because they allow you to see the layers of pudding and Oreos throughout.
Step 5: Add the Creamy Goodness
Spoon the pudding mixture over the Oreo layer in each cup, filling approximately three-quarters full. This ratio ensures you have enough room for your final decorative touches while maintaining structural integrity.
Step 6: Create Your Pumpkin Patch
Top each cup with remaining crushed Oreos to resemble fresh garden “dirt.” Place three Mello Creme Pumpkins on the top of each cup, pressing them slightly into the crumbs. Break pretzel sticks in half and insert them as adorable pumpkin stems.

Nutritional Information
Each Pumpkin Patch Dirt Cup provides approximately:
- Calories: 443-658 (varies by preparation method)
- Carbohydrates: 70-80g
- Protein: 4-8g
- Fat: 8-40g (depending on whipped topping choice)
- Saturated Fat: 2-23g
- Fiber: 1-2g
- Sugar: 53-57g
- Calcium: 115-159mg
- Iron: 4-5mg
This nutritional information provides estimated values, and the wide range reflects different preparation methods and ingredient choices. The higher fat content occurs when using heavy cream instead of cool whip.
Healthier Alternatives for the Recipe
Transform your Pumpkin Patch Dirt Cups into guilt-free indulgences with these nutritious swaps that maintain all the festive fun:
Pudding Alternatives:
- Use sugar-free instant chocolate pudding mix to reduce calories by approximately 30%
- Try fat-free, sugar-free pudding mix with skim milk for the lightest option
- Substitute with Greek yogurt-based chocolate pudding for added protein
Cookie Modifications:
- Replace traditional Oreos with reduced-fat chocolate sandwich cookies
- Use crushed graham crackers or vanilla cookies for a lighter twist
- Try chocolate rice cakes crushed into crumbs for gluten-free “dirt”
Topping Upgrades:
- Include a layer of diced apples or pears for a fruity contrast
- Add chopped nuts like pecans or walnuts between layers for added crunch and healthy fats
- Make these gluten-free easily with certified gluten-free cookies
Serving Suggestions
Elevate your Pumpkin Patch Dirt Cups from simple dessert to memorable experience with these creative presentation ideas:
Party Perfect Presentations:
- Make them in disposable clear plastic cups to take to Halloween parties
- While plastic pudding cups are ideal for large gatherings or kids’ parties, elegant glasses are perfect for pumpkin-themed treats
- Set up a DIY station at a party where kids and adults can build their own dirt pudding cups
Decorative Enhancements:
- Use green decorating gel to create vines between the pumpkins and really make it look like a pumpkin patch
- Customize with candy corn and gummy worms, or use Halloween M&Ms and Reese’s pumpkins
- Use green frosting on top of the dirt cup to create vines and stems for the candy pumpkins
Theme Variations:
This fun treat adapts perfectly for different occasions by swapping pumpkin candies for other festive treats like candy eggs, red and green gummy worms, or sprinkles
Common Mistakes to Avoid
Navigate potential pitfalls with these expert insights that ensure perfect Pumpkin Patch Dirt Cups every time:
Pudding Preparation Pitfalls:
Avoid overmixing pudding, as this can cause it to become too thick and grainy – follow package instructions exactly. Be sure to use instant pudding mix, as the cook and serve version will not work in this recipe.
Timing Troubles:
Don’t rush the chilling process – Halloween dirt cups must chill in the fridge for at least two hours to achieve proper texture and flavor development.
Assembly Issues:
Avoid overfilling cups with pudding mixture; maintain the three-quarters full rule to prevent overflow and ensure proper topping space.
Storage Slip-ups:
You may want to remove pumpkin candies before storing and replace them with new ones before serving again, as they could get dried out in the fridge.
Storing Tips for the Recipe
Maximize freshness and extend enjoyment with these professional storage strategies:
Short-term Storage:
Store any leftovers in the fridge, tightly covered in plastic wrap, for up to 2 days. Halloween pudding cups can hang out in the fridge for up to 2 full days, while leftover pumpkin patch dirt cups can be stored in the refrigerator for 3-4 days.
Make-Ahead Magic:
Not only CAN Halloween dirt pudding be made in advance, but it SHOULD be made in advance, making it ideal for parties and gatherings. Cover the cups with plastic wrap (using Glad Press ‘N Seal Wrap recommended) and store in the refrigerator.
Best Practices:
Remove candy decorations before long-term storage to prevent moisture damage, and reapply fresh candies before serving for optimal presentation.
Conclusion
Pumpkin Patch Dirt Cups represent the perfect fusion of nostalgic comfort food and seasonal celebration. These delightful treats combine creamy chocolate pudding, crushed Oreo “soil,” and charming pumpkin decorations to create an experience that’s as visually stunning as it is delicious. With simple ingredients, minimal preparation time, and maximum impact, they’re ideal for Halloween parties, family gatherings, or any autumn celebration.
Ready to create your own pumpkin patch magic? Try this recipe today and share your creative variations in the comments below! Don’t forget to snap a photo of your masterpieces and tag us on social media – we love seeing your seasonal creations. Subscribe to our blog for more seasonal recipes and never miss out on the latest holiday treats that bring families together around the table.
FAQs
Q: Can I make Pumpkin Patch Dirt Cups ahead of time?
A: Not only CAN Halloween dirt pudding be made in advance, but it SHOULD be made in advance, making it ideal for parties and gatherings. Dirt pudding has the best flavor and texture after a full 24 hours of chilling.
Q: How long do these dirt cups last in the refrigerator?
A: Halloween pudding cups can hang out in the fridge for up to 2 full days, with some variations lasting 3-4 days when properly stored.
Q: Can I use homemade pudding instead of instant mix?
A: Instead of instant pudding, you can use your own homemade pudding recipe with chocolate pudding and white colored pudding that you can make orange with food coloring.
Q: What’s the best way to crush Oreo cookies?
A: Using a food processor takes seconds and gets nice fine crumbs. If you don’t have a food processor, add Oreos to a large Ziploc bag and use something heavy like a rolling pin to smash cookies into crumbs.
Q: Are there gluten-free options for this recipe?
A: Yes! You can easily make these gluten-free by using certified gluten-free chocolate sandwich cookies instead of traditional Oreos.
Easy Pumpkin Patch Dirt Cups Recipe – 5-Ingredient Halloween Dessert
- Total Time: 20 minutes (plus chilling)
- Yield: 8 cups 1x
Description
A fun and festive no-bake Halloween dessert featuring layers of chocolate pudding, crushed Oreos, whipped topping, and pumpkin candies that transform into an edible pumpkin patch.
Ingredients
- 1 package (3.9 oz) instant chocolate pudding mix
- 2 cups cold milk (2% or whole)
- 1 package (14.3 oz) Oreo cookies, crushed
- 1 container (8 oz) whipped topping, thawed
- 8 small pumpkin-shaped candies
- 8 clear plastic cups
- 4 pretzel sticks
Instructions
- Whisk pudding mix and milk in a large bowl for 2 minutes. Let thicken for 5 minutes.
- Gently fold whipped topping into pudding until smooth and airy.
- Crush Oreos into fine crumbs using a food processor or Ziploc bag and rolling pin.
- Layer crushed Oreos at the bottom of each cup.
- Spoon pudding mixture over the Oreo layer, filling cups about three-quarters full.
- Top with more crushed Oreos to resemble dirt.
- Decorate with pumpkin candies and pretzel stick stems to create a pumpkin patch effect.
Notes
For best texture and flavor, chill dirt cups for at least 2 hours or up to 24 hours before serving. Add pumpkin candies just before serving to prevent drying out.
- Prep Time: 15 minutes
- Cook Time: 0 minutes
- Category: Dessert
- Method: No-Bake
- Cuisine: American
Nutrition
- Serving Size: 1 cup
- Calories: 550
- Sugar: 55g
- Sodium: 450mg
- Fat: 22g
- Saturated Fat: 12g
- Unsaturated Fat: 10g
- Trans Fat: 0g
- Carbohydrates: 75g
- Fiber: 2g
- Protein: 6g
- Cholesterol: 15mg
Keywords: pumpkin patch dirt cups, halloween dessert, no-bake recipe, oreo pudding cups, fall treats