Did you know that homemade Greek yogurt bagels require just four basic ingredients and can be ready in under 40 minutes—making them 60% faster than traditional yeast-based bagel recipes? If you’re tired of store-bought bagels packed with preservatives and looking for a protein-rich breakfast solution, Greek yogurt bagels are about to become your new kitchen staple.
This revolutionary approach to bagel-making combines the tanginess of Greek yogurt with the chewiness of a traditional bagel, all without requiring yeast, extensive kneading, or hours of rising time. Whether you’re a busy professional, a health-conscious home cook, or someone exploring new breakfast ideas, Greek yogurt bagels deliver restaurant-quality results in your own kitchen. In this comprehensive guide, we’ll walk you through everything you need to know about creating perfectly fluffy, delicious bagels that will transform your morning routine.
Ingredients List
Creating homemade Greek yogurt bagels is refreshingly simple. Here’s what you’ll need to bring this modern breakfast classic to life:
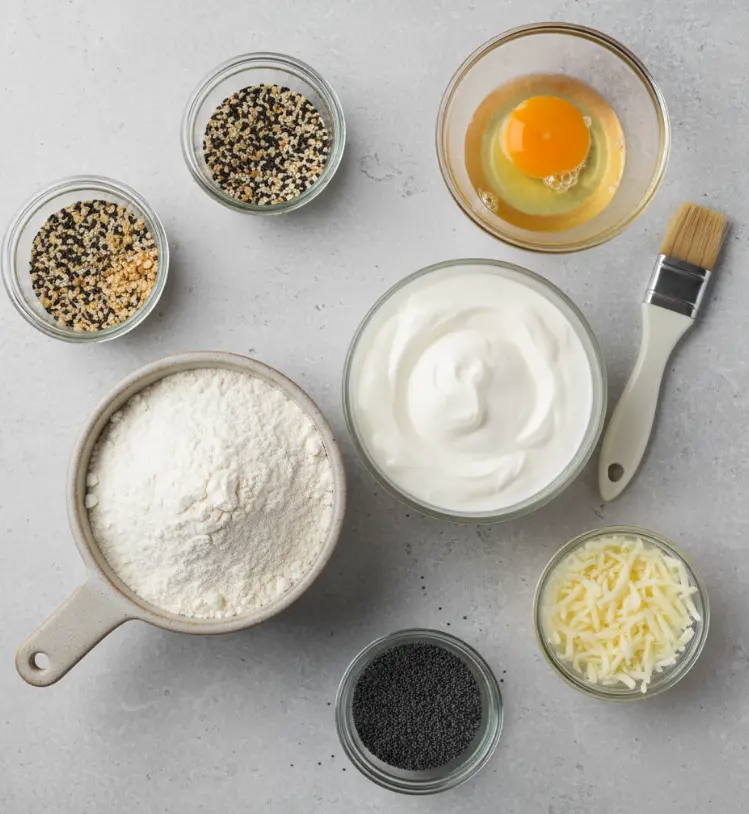
Essential Ingredients:
- 1 cup self-rising flour (the foundation of your bagel dough)
- 1 cup plain Greek yogurt (full-fat or low-fat varieties work equally well)
- 1 egg, beaten (for a golden, glossy finish)
- Optional toppings: everything bagel seasoning, sesame seeds, poppy seeds, shredded cheese, or dried herbs
Smart Substitution Suggestions:
If you don’t have self-rising flour on hand, don’t worry—this ingredient swap is seamless: combine 1 cup all-purpose flour with 1½ teaspoons baking powder and ¼ teaspoon salt. This homemade version works beautifully in Greek yogurt bagel recipes.
For those seeking gluten-free options, substitute all-purpose flour with a quality gluten-free flour blend—you may need to add an extra tablespoon of yogurt to achieve the right consistency.
Timing
Understanding the time investment helps you plan your breakfast preparation efficiently:
Preparation Time: 10-15 minutes (mixing, kneading, and shaping)
Baking Time: 22-25 minutes
Cooling Time: 5-10 minutes
Total Time: 37-50 minutes
This timeline is remarkably efficient compared to traditional bagel recipes, which typically require 2-3 hours when accounting for rising time. You’re looking at approximately 75% less time investment while achieving comparable (or superior) results.
Step-by-Step Instructions
Step 1: Preheat Your Oven and Prepare Your Workspace
Begin by preheating your oven to 375°F (190°C). This temperature is crucial for achieving that perfect golden-brown exterior while maintaining a soft, chewy interior. Line your baking sheet with parchment paper to prevent sticking and make cleanup effortless. A prepared workspace sets the foundation for success in creating flawless Greek yogurt bagels.
Step 2: Combine Your Dry and Wet Ingredients
In a medium mixing bowl, add your 1 cup of self-rising flour and 1 cup of Greek yogurt. Using a sturdy wooden spoon or spatula, stir these ingredients together until a shaggy dough forms. The mixture will initially look somewhat lumpy and uneven—this is perfectly normal. The key is ensuring there are no dry flour pockets remaining at the bottom of the bowl.
Step 3: Knead the Dough Into Submission
Transfer your dough to a lightly floured surface and begin kneading by hand for approximately 2-3 minutes. The dough should gradually transform from rough and sticky to smooth and slightly tacky. Don’t overwork it—you’re aiming for a texture that’s manageable to handle but still maintains some moisture. If the dough feels too sticky, dust with small amounts of flour as needed.
Step 4: Divide Into Equal Portions
Once your dough reaches the ideal consistency, divide it into 4 equal pieces. You can use a bench scraper or simply pull the dough apart with your hands. Precision here matters—equal portions ensure uniform baking and a more professional appearance. Roll each piece gently into a ball on your work surface.
Step 5: Shape Into Bagel Perfection
Take each dough ball and roll it into a rope approximately ¾-inch thick, then form it into a bagel by connecting the ends and pressing them firmly together. Some bakers prefer poking a hole through the center and stretching it into shape. Either method works beautifully for creating authentic-looking Greek yogurt bagels.
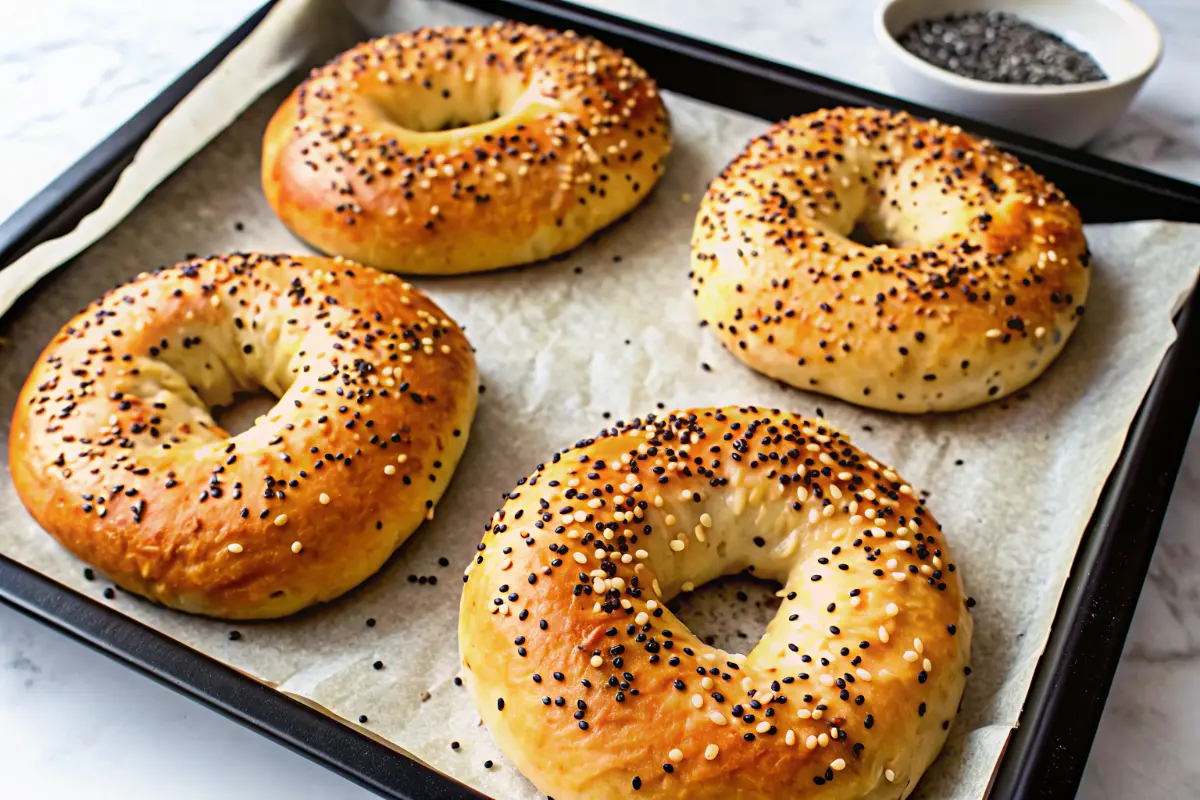
Step 6: Apply Egg Wash and Toppings
Place your shaped bagels on the parchment-lined baking sheet, spacing them approximately 2 inches apart. Using a pastry brush, apply your beaten egg wash generously to each bagel, covering all visible surfaces including the top and sides. This creates that beautiful, glossy finish. Immediately sprinkle your chosen toppings—whether everything bagel seasoning, sesame seeds, poppy seeds, or a combination—while the egg wash is still wet, ensuring they adhere properly.
Step 7: Bake Until Golden Brown
Place your baking sheet in the preheated 375°F oven and bake for 22-25 minutes until the bagels achieve a gorgeous golden-brown color. Watch carefully during the final minutes to avoid over-baking. For extra crispiness on the exterior, you can broil for 1-2 minutes at the end, though this step is optional.
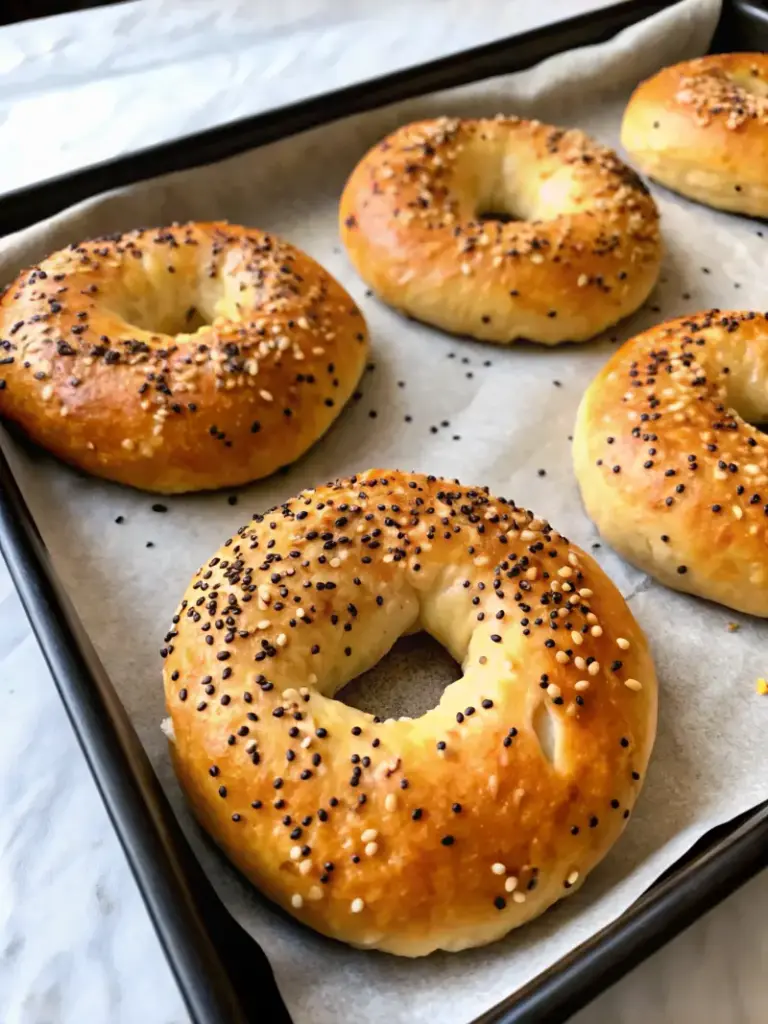
Step 8: Cool and Serve
Remove from the oven and allow your Greek yogurt bagels to cool on the baking sheet for 5-10 minutes. This cooling period allows the interior to set slightly while the exterior remains crispy. Slice and serve plain, toasted, or with your favorite spreads—cream cheese, lox, peanut butter, or honey.
Nutritional Information
Greek yogurt bagels pack impressive nutritional punch compared to traditional bagel varieties:
Per Bagel (approximate):
| Nutrient | Amount |
|---|---|
| Calories | 110-130 |
| Protein | 10-12g |
| Carbohydrates | 15-18g |
| Fat | 1-2g |
| Fiber | 0.5-1g |
| Sodium | 280-320mg |
One of the standout benefits is the protein content—each Greek yogurt bagel delivers approximately 10-12 grams of protein, making these an excellent post-workout breakfast option. This protein density contributes to sustained satiety and stable blood sugar levels throughout your morning.
The low-fat profile (especially when using non-fat Greek yogurt) makes these bagels suitable for various dietary preferences, while still maintaining that desirable chewy texture. The protein-to-carbohydrate ratio makes Greek yogurt bagels particularly attractive for anyone following moderate-protein diets or seeking nutrient-dense breakfast options.
Healthier Alternatives for the Recipe
Looking to customize your Greek yogurt bagels for specific dietary goals? Consider these nutrient-boosting modifications:
Whole Grain Version: Replace half your self-rising flour with whole wheat flour for increased fiber and micronutrients. This modification maintains the bagel’s structure while boosting nutritional density.
Sweet Breakfast Bagels: Add ¼ teaspoon ground cinnamon and a touch of vanilla extract to your dough. Top with cinnamon sugar or a light honey drizzle post-baking for a naturally sweet treat without excessive added sugar.
Herb and Garlic Elevation: Mix dried Italian herbs, minced garlic, and a pinch of nutritional yeast into your dough for a savory, umami-forward variation that works beautifully for open-faced sandwiches.
Seeded Power Bagels: Incorporate ground flaxseeds, chia seeds, or pumpkin seeds directly into your dough for omega-3 fatty acids and additional micronutrients while maintaining the original texture.
Dairy-Free Adaptation: Substitute Greek yogurt with coconut yogurt or cashew cream in equal proportions for a dairy-free version without sacrificing the bagel’s signature chewiness.
Serving Suggestions
Transform your Greek yogurt bagels into versatile vessels for countless delicious combinations:
Classic Breakfast: Toast your bagel and top with cream cheese, sliced tomato, fresh dill, and smoked salmon for an elegant morning meal.
Protein-Packed Power Breakfast: Layer with almond butter, sliced banana, and a sprinkle of granola for sustained energy and delightful texture contrast.
Savory Breakfast Sandwich: Toast, then build with scrambled eggs, avocado, crispy bacon, and a spread of everything bagel-seasoned cream cheese.
Lunch-Ready Option: Create an open-faced sandwich with hummus, roasted vegetables, feta cheese, and fresh spinach—perfect for meal prep containers.
Dessert Indulgence: Spread with Nutella, fresh berries, or mascarpone mixed with honey for an unexpectedly sophisticated sweet treat.
Grab-and-Go Option: Pair plain bagels with a container of Greek yogurt, honey, and berries for a portable, protein-rich breakfast requiring no assembly.
Common Mistakes to Avoid
Even with its forgiving nature, the bagel recipe can encounter pitfalls. Here’s how to sidestep common issues:
Mistake #1: Using Regular Yogurt Instead of Greek Yogurt
The higher protein and lower moisture content of Greek yogurt is essential to this recipe’s success. Regular yogurt will result in excessively sticky dough and bagels with an undesirable texture. Stick with genuine Greek yogurt varieties.
Mistake #2: Overmixing or Overworking the Dough
Unlike bread dough that benefits from extensive kneading, bagel dough should be handled minimally. Overworking develops excess gluten, creating dense, tough bagels. Mix just until combined, then knead gently for only 2-3 minutes.
Mistake #3: Using Expired Baking Powder
If using self-rising flour or adding baking powder separately, freshness matters significantly. Expired leavening agents won’t activate properly, resulting in flat, dense bagels. Replace baking powder annually.
Mistake #4: Baking Sheet Spacing Issues
Crowding your baking sheet prevents proper heat circulation and even baking. Space bagels at least 2 inches apart to allow for adequate oven air flow.
Mistake #5: Opening the Oven Door Repeatedly
Resist the urge to check on your bagels mid-bake. Each oven opening releases heat and disrupts the baking process, potentially resulting in uneven browning or collapsed centers.
Storing Tips for the Recipe
Proper storage ensures your Greek yogurt bagels remain fresh and delicious:
Short-Term Storage (1-2 Days):
Place cooled bagels in an airtight container at room temperature. This method maintains optimal texture without hardening or becoming stale.
Freezer Storage (Up to 1 Month):
Once completely cooled, place bagels in a freezer-safe bag or airtight container, separating layers with parchment paper to prevent sticking. Label with the date for easy tracking.
Reheating Instructions:
Toast frozen bagels directly from the freezer for 2-3 minutes to restore softness and warmth. Alternatively, thaw at room temperature for 30 minutes before toasting for a gentler approach.
Make-Ahead Dough Preparation:
You can prepare the dough, shape it into bagels, cover them loosely with plastic wrap, and refrigerate for up to 24 hours before baking. Add an extra 2-3 minutes to the baking time if using refrigerated dough.
Ingredient Prep:
Self-rising flour doesn’t require special storage beyond a cool, dry pantry location. Greek yogurt should always remain refrigerated until use and consumed within its expiration date for best results.
Conclusion
Greek yogurt bagels represent a modern, efficient, and delicious approach to homemade breakfast. By combining just four basic ingredients—self-rising flour, Greek yogurt, an egg, and your favorite toppings—you can create restaurant-quality bagels in under 40 minutes. These protein-packed, lower-fat alternatives to traditional bagels deliver impressive nutritional value without sacrificing taste or texture. Whether you’re refining your breakfast routine or exploring creative cooking projects, this recipe offers reliable results and endless customization possibilities. Start making Greek yogurt bagels today and experience the satisfaction of fresh, homemade breakfast.

FAQs
Q: Can I make Greek yogurt bagels without self-rising flour?
A: Absolutely! Mix 1 cup all-purpose flour with 1½ teaspoons baking powder and ¼ teaspoon salt for a perfect homemade alternative. The results are virtually identical.
Q: Why does my dough feel too sticky?
A: Greek yogurt moisture content varies between brands. If your dough is overly sticky, dust with small amounts of flour during kneading. Conversely, if it’s too dry, add a teaspoon of yogurt at a time until you achieve the right consistency.
Q: Do I need to boil Greek yogurt bagels like traditional bagels?
A: No—one of the primary advantages of this recipe is eliminating the boiling step entirely. These bagels bake directly without requiring water bath preparation.
Q: Can I use non-fat Greek yogurt?
A: Yes, both full-fat and non-fat varieties work beautifully. Full-fat yogurt may create slightly richer flavor, while non-fat options produce equally delicious results with marginally fewer calories.
Q: How do I achieve extra-crispy exteriors?
A: After baking for 22-25 minutes, switch your oven to broil and place bagels on the top rack for 1-2 minutes. Watch carefully to avoid burning—this optional step creates wonderfully crispy exteriors.
Q: Can these bagels be made in an air fryer?
A: Yes! Air fry at 375°F for approximately 12-15 minutes, checking halfway through for even browning. Air fryer results are typically crispier than oven-baked versions.
Q: Are Greek yogurt bagels suitable for meal prep?
A: Definitely. These bagels freeze beautifully and can be toasted directly from frozen. Prepare a week’s worth at once for convenient grab-and-go breakfast options.

Easy Greek Yogurt Bagels Recipe: Homemade in Just 4 Ingredients
- Total Time: 40 minutes
- Yield: 4 bagels 1x
Description
These 4-ingredient Greek yogurt bagels are fluffy, chewy, and packed with protein—ready in under 40 minutes with no yeast or boiling required.
Ingredients
- 1 cup self-rising flour
- 1 cup plain Greek yogurt
- 1 egg, beaten (for egg wash)
- Optional toppings: everything bagel seasoning, sesame seeds, poppy seeds, shredded cheese, or dried herbs
Instructions
- Preheat oven to 375°F (190°C) and line a baking sheet with parchment paper.
- In a bowl, combine self-rising flour and Greek yogurt. Mix until a shaggy dough forms.
- Transfer dough to a floured surface and knead 2–3 minutes until smooth and slightly tacky.
- Divide dough into 4 equal portions and roll each into a ball.
- Shape each ball into a rope and connect the ends to form bagels, or poke and stretch a center hole.
- Place bagels on the prepared baking sheet, brush with beaten egg, and add toppings of choice.
- Bake for 22–25 minutes or until golden brown. For extra crispiness, broil for 1–2 minutes.
- Cool for 5–10 minutes before slicing and serving with your favorite spreads.
Notes
If dough feels sticky, add a sprinkle of flour. For gluten-free versions, use a quality gluten-free flour blend and add 1 tbsp extra yogurt. Bagels can be frozen up to 1 month and toasted straight from frozen.
- Prep Time: 15 minutes
- Cook Time: 25 minutes
- Category: Breakfast
- Method: Baked
- Cuisine: American
Nutrition
- Serving Size: 1 bagel
- Calories: 120
- Sugar: 2g
- Sodium: 300mg
- Fat: 2g
- Saturated Fat: 1g
- Unsaturated Fat: 1g
- Trans Fat: 0g
- Carbohydrates: 17g
- Fiber: 1g
- Protein: 11g
- Cholesterol: 25mg
Keywords: greek yogurt bagels, high protein breakfast, easy bagels, 4 ingredient bagels