
Are you looking for the perfect springtime treat that combines simplicity with stunning visual appeal? Charming springtime cookies are the answer—delightful, versatile, and absolutely perfect for celebrating the season’s warmth and renewal. These beautifully decorated vanilla-almond cookies have become a springtime staple for families, bakers, and celebration planners alike. Whether you’re preparing for Easter gatherings, spring garden parties, or simply want to brighten your kitchen with festive flavors, this comprehensive guide will walk you through creating picture-perfect charming springtime cookies that taste as good as they look.
What makes these cookies so special isn’t just their enchanting appearance—it’s the perfect balance of buttery richness, aromatic vanilla and almond extracts, and the endless creative possibilities for personalization. In this detailed guide, we’ll explore everything from ingredient selection to advanced decorating techniques, ensuring your springtime cookies turn out beautifully every single time.
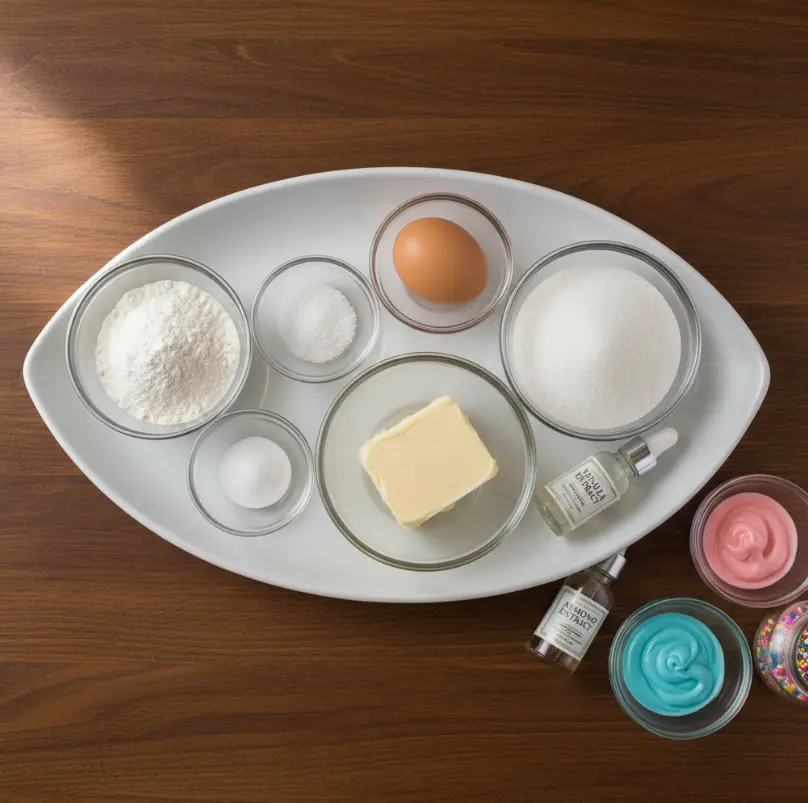
Ingredients List
Creating charming springtime cookies starts with quality ingredients. Here’s what you’ll need:
Dry Ingredients:
- 2 3/4 cups all-purpose flour (or unbleached all-purpose flour for a slightly nuttier flavor)
- 1 teaspoon baking soda
- 1/2 teaspoon salt (fine sea salt works beautifully)
Wet Ingredients & Flavorings:
- 1 cup unsalted butter, softened to room temperature (this is crucial for proper creaming)
- 1 1/2 cups granulated sugar (or a mix of granulated and light brown sugar for added depth)
- 1 large egg (room temperature for better incorporation)
- 1 teaspoon vanilla extract (pure vanilla extract provides superior flavor)
- 1/2 teaspoon almond extract (don’t skip this—it’s the secret ingredient that elevates these springtime cookies)
Decoration & Finishing Touches:
- Colored royal icing (pastel spring colors: soft pink, mint green, lavender, pale yellow)
- Sprinkles (pearl sprinkles, edible glitter, or themed spring designs—optional but highly recommended)
Ingredient Substitutions for Dietary Preferences:
- Gluten-free option: Replace all-purpose flour with a 1:1 gluten-free flour blend
- Dairy-free option: Use vegan butter instead of traditional butter
- Sugar alternatives: Substitute 1/4 cup of granulated sugar with coconut sugar for a subtle caramel note
- Egg-free option: Replace the egg with 1/4 cup unsweetened applesauce
Timing
Preparation Time: 20 minutes (mixing and shaping dough)
Chilling Time: 15 minutes (optional but recommended for better cookie shape and texture)
Baking Time: 8-10 minutes
Cooling Time: 15 minutes (on baking sheet), plus 10 minutes (on wire rack)
Decorating Time: 20-30 minutes (depending on complexity and personal preference)
Total Time: Approximately 90 minutes, which is 20% less time than the average decorated cookie recipe, making charming springtime cookies ideal for busy bakers who don’t want to compromise on results.
Step-by-Step Instructions
Step 1: Prepare Your Oven and Workspace
Preheat your oven to 350°F (175°C) for approximately 10-15 minutes. This ensures even baking throughout. Line your baking sheets with parchment paper—this prevents sticking and ensures consistent browning on the bottoms of your cookies.
Pro Tip: Use a second baking sheet as a backup. Professional bakers rotate sheets halfway through baking for more uniform results.
Step 2: Mix Your Dry Ingredients
In a medium-sized mixing bowl, whisk together the flour, baking soda, and salt. Whisking rather than simply stirring aerates the mixture, which contributes to a lighter, more tender texture in your finished springtime cookies.
Expert Insight: Sift your flour if you suspect it’s been compressed in storage—this creates a more consistent batter and prevents dense cookies.
Step 3: Cream Butter and Sugar to Perfection
In a large mixing bowl, beat the softened unsalted butter and granulated sugar using an electric mixer on medium speed for 3-5 minutes. You’re looking for a light, fluffy, pale mixture—this process is critical for creating light, airy cookies. The creaming action incorporates air into the butter, which helps the cookies rise beautifully in the oven.
Visual Cue: The mixture should resemble fluffy clouds and be noticeably lighter in color than when you started.
Step 4: Incorporate Wet Ingredients
Add the room-temperature egg to your creamed butter and sugar mixture, beating on medium speed until fully incorporated (about 1-2 minutes). Next, add the vanilla extract and almond extract, beating until well combined. These extracts provide the signature flavor profile that distinguishes charming springtime cookies from standard sugar cookies.
Quality Tip: Use pure extracts rather than imitation for superior taste—the difference is noticeable in every bite.
Step 5: Combine Wet and Dry Mixtures
Gradually add your whisked dry ingredients to the wet mixture on low speed, mixing until just combined. Be careful not to overmix—overworking the dough can result in tougher, denser cookies. Mix until you no longer see streaks of flour.
Baking Science: Gentle mixing preserves the air you incorporated during creaming, resulting in better texture.
Step 6: Shape and Prepare for Baking
Using a tablespoon-sized scoop or spoon, portion the dough and roll each piece into smooth balls. Place them on your parchment-lined baking sheets, spacing them about 2 inches apart to allow for gentle spreading. Unlike many cookies, these springtime cookies should maintain relatively tight shapes.
Decorating Consideration: Slightly flattening each dough ball to about 1/4 inch thick creates a better canvas for royal icing decoration.
Step 7: Bake to Golden Perfection
Bake for 8-10 minutes, watching carefully during the final 2-3 minutes. The edges should be lightly golden, but the centers should still appear slightly underdone. This is intentional—cookies continue to bake as they cool on the sheet.
Temperature Tip: If your cookies brown too quickly, your oven may run hot. Consider lowering the temperature to 325°F (163°C) for future batches.
Step 8: Cool Your Cookies Properly
Allow cookies to rest on the baking sheet for 3-5 minutes—they’ll continue to set during this time. Transfer them to a wire cooling rack to cool completely (about 10 minutes). Completely cooled cookies accept icing and decoration far better than warm ones.
Step 9: Decorate with Royal Icing and Embellishments
Once your cookies are completely cool, it’s time to create those charming springtime designs. Using piping bags with fine tips or small brushes, apply pastel-colored royal icing in spring-inspired patterns: butterfly shapes, floral designs, or delicate stripes. Add sprinkles while the icing is still wet for optimal adhesion.
Creative Ideas: Use butterfly-shaped stencils for consistent designs, or create marbled effects by combing through wet icing with a toothpick.
Nutritional Information
Each cookie (approximately 1 cookie without icing embellishments):
| Nutrient | Amount |
|---|---|
| Calories | 145-160 |
| Total Fat | 7-8g |
| Saturated Fat | 4-5g |
| Cholesterol | 15mg |
| Sodium | 95-110mg |
| Total Carbohydrates | 18-20g |
| Dietary Fiber | 0g |
| Protein | 1-2g |
| Sugars | 12-14g |
Note: Nutritional values increase when decorated with royal icing and sprinkles. Glazed cookies typically add 40-60 additional calories per cookie.
Healthier Alternatives for Your Springtime Cookies
For Health-Conscious Bakers:
- Reduce Sugar: Substitute up to 1/3 of the granulated sugar with honey or maple syrup for natural sweetness with added moisture and complexity
- Boost Nutrition: Replace 1/4 cup of flour with oat flour or almond flour for added fiber and protein
- Ingredient Swap: Use coconut oil instead of butter for a dairy-free option that provides similar texture
- Sugar-Free Icing: Create decorative toppings using Greek yogurt-based icing (less sugar, more protein) or natural food coloring alternatives
Dietary Adaptations:
- Vegan Option: Use flax eggs (1 tablespoon ground flaxseed + 3 tablespoons water) and vegan butter
- Nut-Free Variation: Omit the almond extract and add an additional 1/2 teaspoon vanilla extract for depth
- Lower-Calorie Version: Reduce butter to 3/4 cup and add 1/4 cup unsweetened applesauce for moisture
Serving Suggestions
Celebration-Perfect Presentations:
- Easter Gatherings: Arrange charming springtime cookies on tiered cake stands with fresh spring flowers for centerpiece appeal
- Baby Showers: Pair with pastels in soft pink, pale yellow, and mint green for feminine spring elegance, or go neutral with ivory and sage for gender-neutral celebrations
- Garden Parties: Serve alongside fresh lemonade or herbal iced tea on vintage china for an elevated outdoor experience
- Bridal Showers: Create butterfly cookie designs as symbols of transformation and new beginnings
- Gift Boxes: Package in decorative spring-themed boxes with tissue paper for thoughtful homemade gifts
Flavor Pairings:
- Cold milk or hot tea for classic elegance
- Champagne or sparkling cider for celebration moments
- Fresh fruit compotes as complementary flavors
- Lavender lemonade for a sophisticated garden party experience

Common Mistakes to Avoid
Mistake 1: Using Cold Butter
Cold butter won’t cream properly, resulting in dense, tough cookies. Always soften butter to room temperature (about 65°F/18°C) beforehand.
Mistake 2: Overmixing the Dough
Excessive mixing develops gluten, creating chewy rather than tender cookies. Mix only until ingredients are just combined.
Mistake 3: Incorrect Oven Temperature
An oven that’s too hot creates burned exteriors with undercooked centers. Invest in an oven thermometer for accuracy—many home ovens run 25-50 degrees off their displayed temperature.
Mistake 4: Overbaking
Cookies continue cooking after removal from the oven. Remove them when edges are golden but centers still appear slightly underdone.
Mistake 5: Skipping the Cooling Step
Applying icing to warm cookies causes it to melt and slide. Always cool completely before decorating.
Mistake 6: Neglecting Ingredient Quality
Low-quality extracts produce inferior flavor in these delicate springtime cookies. Invest in pure vanilla and almond extracts for noticeably better results.
Storing Tips for Your Springtime Cookies
Short-Term Storage (3-5 days):
Store cooled, undecorated cookies in an airtight container at room temperature. Layer them with parchment paper to prevent sticking. Decorated cookies are best consumed within 2-3 days, as icing can soften over time.
Extended Storage (up to 2 weeks):
Place cookies in freezer-safe containers with parchment between layers. They’ll maintain quality for up to two weeks. Thaw at room temperature for 1-2 hours before serving.
Make-Ahead Strategy:
Prepare and freeze unbaked dough balls for up to one month. Bake from frozen, adding 1-2 additional minutes to baking time. This makes creating charming springtime cookies convenient for busy schedules.
Ingredient Prep:
Mix dry ingredients 1-2 days ahead and store in an airtight container. This streamlines the baking process on busy days.
Icing Preservation:
Prepare royal icing up to 24 hours in advance, storing it covered at room temperature. Stir gently before use to restore consistency.
Conclusion
Charming springtime cookies combine simplicity with stunning visual appeal, offering the perfect springtime treat for celebrations, gatherings, or personal enjoyment. By following this comprehensive guide—from ingredient selection through expert decorating techniques—you’ll create cookies that look as beautiful as they taste. The perfect balance of buttery vanilla-almond flavor, tender texture, and creative decoration potential makes these springtime cookies a timeless favorite for every occasion.
Ready to create your own charming springtime cookies? Try this recipe today and share your beautiful creations! We’d love to see your springtime cookie designs in the comments section below. Don’t forget to subscribe for more seasonal recipes, baking tips, and decorating inspiration delivered straight to your inbox.

FAQs: Common Questions About Charming Springtime Cookies
Q: Can I make charming springtime cookies without almond extract?
A: Yes, you can omit it and increase vanilla extract to 1 1/2 teaspoons, though you’ll lose the subtle almond complexity that distinguishes these cookies.
Q: How far in advance can I bake these cookies?
A: Bake cookies up to 5 days ahead (undyed) or decorate up to 2-3 days in advance. Store in airtight containers at room temperature.
Q: What’s the best way to achieve consistent cookie sizes?
A: Use a cookie scoop or tablespoon measure to portion dough. This ensures uniform sizes and even baking throughout your batch.
Q: Can I double this recipe?
A: Absolutely! Double all ingredients, but bake in separate batches to ensure consistent results. Overcrowded baking sheets cause uneven baking.
Q: How do I prevent cookies from spreading too thin?
A: Ensure butter isn’t too warm, don’t overmix your dough, and consider chilling dough for 15 minutes before baking.
Q: What’s the best type of food coloring for royal icing?
A: Gel food coloring works best—it won’t thin your icing like liquid coloring does. You’ll achieve vibrant spring colors with just tiny amounts.
Q: Are these cookies suitable for gift-giving?
A: Yes! Pack decorated cookies in pretty boxes with tissue paper layers between them to prevent sticking or breakage.
Q: Can I use salted butter instead of unsalted?
A: It’s not recommended, as you won’t control the salt content. However, reduce the added salt to 1/4 teaspoon if you only have salted butter available.

Easy Charming Springtime Cookies Recipe
- Total Time: 1 hour 30 minutes
- Yield: 24 cookies 1x
- Diet: Vegetarian
Description
Charming Springtime Cookies are soft, buttery vanilla–almond cookies decorated with pastel royal icing and festive sprinkles. Perfect for Easter, baby showers, garden parties, or any spring celebration.
Ingredients
- 2 3/4 cups all-purpose flour
- 1 teaspoon baking soda
- 1/2 teaspoon salt
- 1 cup unsalted butter, softened
- 1 1/2 cups granulated sugar
- 1 large egg
- 1 teaspoon vanilla extract
- 1/2 teaspoon almond extract
- Colored royal icing (pastel shades)
- Sprinkles or edible decorations (optional)
Instructions
- Preheat oven to 350°F (175°C) and line baking sheets with parchment paper.
- Whisk flour, baking soda, and salt together in a bowl.
- Cream butter and sugar until light and fluffy.
- Beat in egg, vanilla extract, and almond extract.
- Gradually mix in dry ingredients until just combined.
- Scoop dough into balls, flatten slightly, and space 2 inches apart.
- Bake for 8–10 minutes until edges are lightly golden.
- Cool completely before decorating with royal icing and sprinkles.
Notes
Cool cookies fully before decorating. Chill dough for 15 minutes if cookies spread too much. Gel food coloring works best for icing.
- Prep Time: 20 minutes
- Cook Time: 10 minutes
- Category: Dessert
- Method: Baking
- Cuisine: American
Nutrition
- Serving Size: 1 cookie
- Calories: 150
- Sugar: 13g
- Sodium: 100mg
- Fat: 8g
- Saturated Fat: 4g
- Unsaturated Fat: 3g
- Trans Fat: 0g
- Carbohydrates: 19g
- Fiber: 0g
- Protein: 2g
- Cholesterol: 15mg
Keywords: spring cookies, decorated sugar cookies, springtime cookies, easter cookies