Did you know that authentic French croissants aren’t actually French at all? This surprising truth about one of the world’s most beloved pastries challenges everything we thought we knew about French culinary tradition. While France has perfected and popularized the croissant as an iconic symbol of its gastronomy, the origin story of this flaky, buttery delicacy reveals a fascinating cultural exchange spanning centuries and continents.
The croissant we know today is the result of Austrian ingenuity meeting French refinement. Understanding this rich heritage not only deepens your appreciation for the pastry but also empowers you to recreate authentic French croissants in your own kitchen. Whether you’re a seasoned baker or embarking on your first laminated dough adventure, this comprehensive guide will walk you through everything you need to master the art of making French croissants at home. By the end, you’ll understand why French croissants remain a cornerstone of Parisian breakfast culture and how to achieve that coveted golden-brown exterior and delicate, flaky layers that make them irresistible.
A Brief History: How French Croissants Became a Symbol of French Pastry
The story of French croissants begins not in France, but in Vienna, Austria. The croissant’s origins trace back to 1683, when Vienna faced a siege by Ottoman forces. According to legend, Viennese bakers working in underground cellars heard the sound of Turkish soldiers tunneling beneath the city walls and alerted the authorities, allowing defenders to thwart the attack. To commemorate this victory, local bakers created a pastry shaped like a crescent moon—a symbol from the Ottoman flag—calling it the “kipferl” in Austrian.
The kipferl remained a Central European specialty for over 150 years until Austrian artillery officer August Zang changed everything. In 1837-1839, Zang opened the Boulangerie Viennoise (Viennese Bakery) at 92 Rue de Richelieu in Paris, introducing Parisian society to authentic Viennese pastries, including the kipferl. Parisians embraced this new confection enthusiastically, and French bakers quickly began imitating the Austrian pastry in their own shops, naming it “croissant” after its distinctive crescent shape.
The transformation from Austrian kipferl to iconic French croissant accelerated during the 19th century. By the 1889 Exposition Universelle, croissants had gained significant popularity throughout France. However, the defining evolution occurred in 1915 when French pastry chef Sylvain Claudius Goy recorded the first documented French croissant recipe, revolutionizing the pastry by replacing the brioche-style dough with laminated yeast dough. This technique—folding butter into dough to create thin, flaky layers—became the hallmark of modern French croissants and remains the gold standard today.
Ingredients
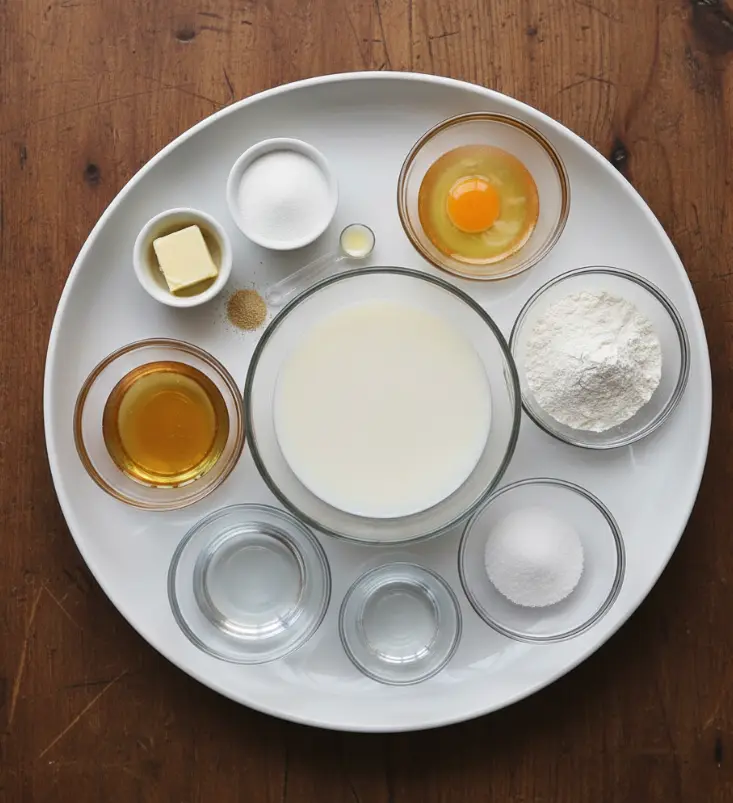
Creating authentic French croissants requires precision and quality ingredients. Here’s everything you’ll need:
Dough Base (Détrempe)
- 85 g milk (⅓ cup), lukewarm
- 60 g water (¼ cup), lukewarm
- 6 g active dry yeast (about 2 tsp)
- 5 g honey (1 tsp) — malt syrup or sugar as alternatives
- 25 g butter (1 ½ tbsp), melted and cooled
- 20 g white sugar (generous 1 ½ tbsp)
- 250 g all-purpose flour (2 cups, spoon and leveled)
- 5 g salt (about 1 tsp)
Butter Block (Tourrage)
- 140 g butter (10 tbsp), cold — European-style butter with higher fat content preferred for optimal lamination
Egg Wash
- 1 egg yolk
- 2 tbsp milk and/or cream
Pro Tip on Ingredient Selection: The quality of your butter directly impacts your croissant’s final texture and flavor. High-fat European-style butter (82-86% butterfat) creates superior flakiness compared to standard American butter. For the flour, bread flour with slightly higher protein content can enhance lamination, though all-purpose flour works well for home bakers.
Timing
Homemade French croissants require patience and strategic planning, but the time investment yields professional-quality results:
- Preparation Time: 30 minutes
- Dough Proofing: 1 hour
- Freezing (First): 4 hours minimum (or overnight — highly recommended)
- Lamination & Chilling: 2-3 hours total (including rest periods between folds)
- Final Proofing: 2-3 hours
- Baking Time: 20-30 minutes
- Cooling: 15-20 minutes
Total Active Time: 45-60 minutes spread across 2-3 days
Total Elapsed Time: 10-24 hours (depending on freezing duration)
This timeline is approximately 25% longer than quick croissant recipes using shortcuts like all-butter laminated doughs without proper fermentation, but the superior flavor development and authentic texture justify the additional time investment.
Step-by-Step Instructions
Step 1: Activate Your Yeast
Begin by creating the perfect environment for yeast activation. Dissolve 5g of honey into 85g of lukewarm milk (approximately 90-100°F or 32-38°C) in a mixing bowl. The honey provides essential nutrients that energize the yeast. Whisk in your 6g of active dry yeast and let the mixture sit undisturbed for 10-20 minutes. You’ll notice it become foamy and fragrant—this is your visual confirmation that the yeast is alive and ready to work. This activation step is crucial because it ensures consistent fermentation throughout the lamination process.
Step 2: Build Your Dough Base
Add your ingredients to the bowl in this specific order: water, melted butter, sugar, flour, and finally salt. The deliberate sequencing prevents salt from inhibiting yeast activity (salt should never directly contact yeast). Stir with a spatula or wooden spoon until a scraggly, shaggy dough forms. Don’t worry if it looks messy at this stage—that’s exactly what you want. The dough should be slightly sticky but cohesive.
Step 3: Knead to Develop Gluten Structure
Knead the dough in the bowl by hand for 1-2 minutes to bring it together, then turn it onto a work surface and knead for 4 minutes until the dough becomes smooth but retains its soft texture. You’re aiming for a silky feel, not an elastic, fully developed dough as you’d create for bread. The key difference is that laminated dough requires less gluten development to maintain its tender crumb. Return the dough to the bowl and cover it with plastic wrap.
Step 4: Proof Your Dough
Place the covered bowl in a warm, draft-free environment (ideally 75-80°F or 24-27°C). A slightly warm oven with the light on, a proofing box, or even a cooler with warm water works perfectly. Let the dough proof until doubled in size—approximately 1 hour. You’ll see it rise noticeably; this fermentation develops flavor compounds and begins establishing the structure that lamination will enhance.
Step 5: Shape and Freeze Your Dough
Turn the proofed dough onto a lightly floured surface and flatten gently to knock out excess air (but don’t deflate it completely). Transfer to parchment paper and shape into a rectangle approximately 7 x 10 inches. Cover with additional parchment and plastic wrap, place on a baking pan, and freeze for at least a few hours or overnight. Freezing is essential because it allows you to handle the dough easily during lamination and serves as a built-in break point. The cold dough also helps maintain proper butter-to-dough ratio during the folding process.
Step 6: Prepare Your Butter Block (Tourrage)
While your dough freezes, create the butter block that will create those iconic flaky layers. Slice 140g of cold butter very thinly and arrange the slices within a 5 x 6.5 inch marked rectangle on parchment paper. Fold the parchment over the butter slices and use a rolling pin to gently spread and evenly flatten the butter into a consistent sheet. The butter should be soft enough to mold but still cold enough to maintain its shape. Chill in the fridge until firm—ideally overnight. This preparation ensures the butter distributes evenly during lamination, creating uniform, thin layers.
Step 7: Prepare for Lamination
Remove your dough from the freezer and let it soften slightly if it’s frozen solid (about 5-10 minutes at room temperature). Remove the parchment and roll the dough back to a 7 x 10 inch rectangle if needed. Unwrap your prepared butter block but keep it on parchment, then place it on one half of the dough. Pat gently to bind, then peel off the parchment. Fold the exposed dough half over the butter, seal all edges by pressing firmly with your fingers, and chill if the dough has warmed during handling. This step is the critical foundation for successful lamination.
Step 8: First Lamination (Double Fold)
This is where the magic begins. Flour your work surface and dough generously, then roll the dough lengthwise to approximately 16 inches while maintaining a 5-inch width. Fold in 1/8th of the dough toward the center, then bring the opposite end to meet it. Cut small corners at the folds to release tension and prevent thick layers. Brush off excess flour, then fold the dough in half lengthwise, tap gently to establish shape, and cut corners again. Wrap and chill for 30-60 minutes. You’ve now completed one double fold, creating multiple layers of butter and dough.
Step 9: Second Lamination (Single Fold)
Flour your surface again and roll the dough to approximately 15 inches with a 5-inch width. This time, perform a single fold: fold in 1/3 from one end (about 5 inches), cut corners, brush off flour, then fold the opposite side over the first fold. Cut corners again, wrap, and chill for 30-60 minutes. This second lamination creates the fine, delicate layers that distinguish premium croissants. The combination of a double fold followed by a single fold produces optimal results.
Step 10: Sheet Your Dough to Proper Thickness
Roll your dough on a floured towel with the folds facing toward you to approximately 1cm thickness and 8-9 inches width. Wrap and chill for 30-45 minutes. Roll again to 4-5mm thickness and 9.5-10 inches wide. It’s essential to keep the dough cold throughout to prevent butter from leaking out and to maintain layer integrity. Use flour liberally to prevent sticking, and work with confidence but without excessive pressure.
Step 11: Cut Your Croissant Triangles
Trim the edges to create a clean 9-inch width, cutting straight and even. Mark 3.5-inch intervals on one long edge, then offset your marks on the opposite edge to create a staggered pattern. Cut along the marked lines to create approximately 6 triangles plus one or two leftover pieces (which you can reshape). Precision in cutting ensures uniform baking and that classic croissant appearance.
Step 12: Roll and Shape Your Croissants
Brush off excess flour from each triangle. Make a small 1cm cut at the midpoint of the triangle’s base. Beginning at the base, roll upward gently while pulling the corners outward to widen the base and create tension. Roll the remainder of the triangle, ensuring the tip ends centered underneath. Place each croissant on a parchment-lined baking pan with the tip tucked underneath, and gently press to seal. The rolling technique is what creates that distinctive crescent shape and ensures even, consistent baking.
Step 13: Final Proof Your Croissants
Cover the croissants loosely with plastic wrap and place another tray on top to create a humid environment. Proof in a warm space (approximately 25°C / 77°F) until doubled and distinctly pillowy, about 2-3 hours. Properly proofed croissants should feel light and airy when gently touched. Under-proofing results in dense croissants; over-proofing can cause them to spread excessively during baking.
Step 14: Preheat and Prepare for Baking
Heat your oven to 375°F (190°C) at least 30 minutes before baking. This preheating time ensures even heat distribution and proper oven spring. While the oven preheats, prepare your egg wash by whisking together 1 egg yolk with 2 tablespoons of milk or cream until well combined.
Step 15: Apply Egg Wash and Bake
Gently brush each croissant with the egg wash using a soft pastry brush, creating an even, glossy coating without saturating the dough. Bake in your conventional oven at 375°F for 20-30 minutes. Rotate the baking pan halfway through if you notice uneven browning. The croissants are done when they achieve a deep golden-brown exterior and sound slightly hollow when tapped.
Step 16: Cool Properly to Set the Structure
Remove the croissants from the oven and let them cool on the baking pan for just a few minutes—this allows the exterior to firm up slightly. Transfer to a wire rack to cool further for 15-20 minutes. This gradual cooling is essential for allowing the interior structure to set while the exterior remains crispy. Eating a croissant too soon while the interior is still steaming results in a gummy texture; proper cooling ensures that ideal contrast between crispy exterior and tender, flaky interior.
Nutritional Information
Per Croissant (based on recipe yielding approximately 6 croissants):
| Nutrient | Amount |
|---|---|
| Calories | 240-260 kcal |
| Total Fat | 14-16g |
| Saturated Fat | 8-9g |
| Trans Fat | 0-0.5g |
| Cholesterol | 35-45mg |
| Sodium | 180-200mg |
| Total Carbohydrates | 24-26g |
| Dietary Fiber | <1g |
| Sugars | 3-4g |
| Protein | 4-5g |
Key Nutritional Insights:
French croissants are calorie-dense pastries, reflecting their butter-rich composition. The majority of calories (approximately 55-60%) derive from fat, which creates the characteristic flaky texture and rich flavor. A single croissant provides modest amounts of protein (helpful for satiety) but minimal fiber, making them best enjoyed as part of a balanced breakfast that includes protein-rich items like eggs, Greek yogurt, or cheese. The sodium content remains reasonable due to the limited salt in the dough. European-style croissants typically contain slightly higher fat content than American versions, contributing to superior flavor and texture but also increasing caloric density.
Healthier Alternatives and Modifications
Whole Grain Integration
Replace 25-30% of the all-purpose flour with whole wheat pastry flour or spelt flour. This substitution increases fiber content by 2-3 grams per croissant while adding subtle nutty flavors. However, whole grain flours require additional hydration—add 1-2 tablespoons extra water to maintain proper dough consistency, as these flours absorb more liquid than refined flour.
Reduced-Fat Approach
Substitute 20g of the butter in the butter block with coconut oil or refined avocado oil. This modification reduces saturated fat while maintaining lamination capability. The flavor profile shifts slightly, but the flaky layers remain intact. This approach reduces fat content by approximately 15-20% without dramatically compromising the croissant’s texture.
Natural Sweetener Swap
Replace the 20g white sugar with coconut sugar or maple syrup (use 15g to account for liquid content). These alternatives provide similar caramelization during baking while offering minimal glycemic impact. The flavor becomes slightly more complex, appealing to those seeking less refined sugar.
Enriched Dough Variations
Add one of these options to the dough base for nutritional enhancement:
- 1 tablespoon ground flaxseed (adds omega-3 fatty acids and fiber)
- 1 tablespoon ground chia seeds (boosts fiber and nutrient density)
- ½ teaspoon vanilla extract (enhances flavor without calories)
- A pinch of turmeric or cinnamon (adds anti-inflammatory compounds)
Serving Suggestions
Classic Parisian Breakfast
Serve warm French croissants alongside a small cup of strong espresso or café au lait (coffee mixed with hot milk). This pairing remains the quintessential Parisian breakfast experience. Add a small dish of jam (apricot or strawberry preserve traditionally) for dipping or spreading.
Croissant Sandwich (Croissant Garni)
Split a cooled croissant horizontally and fill with quality ham, aged Emmental cheese, Dijon mustard, and fresh butter lettuce. This savory application transforms the croissant into a light lunch item. Wrap in parchment for easy eating and portability.
Chocolate-Filled Variation
While the dough is at the sheeting stage (Step 10), sprinkle dark chocolate chips or place a chocolate bar (like Lindt or high-quality baking chocolate) on half the dough before completing the final lamination. This creates pain au chocolat, a beloved variation throughout France.
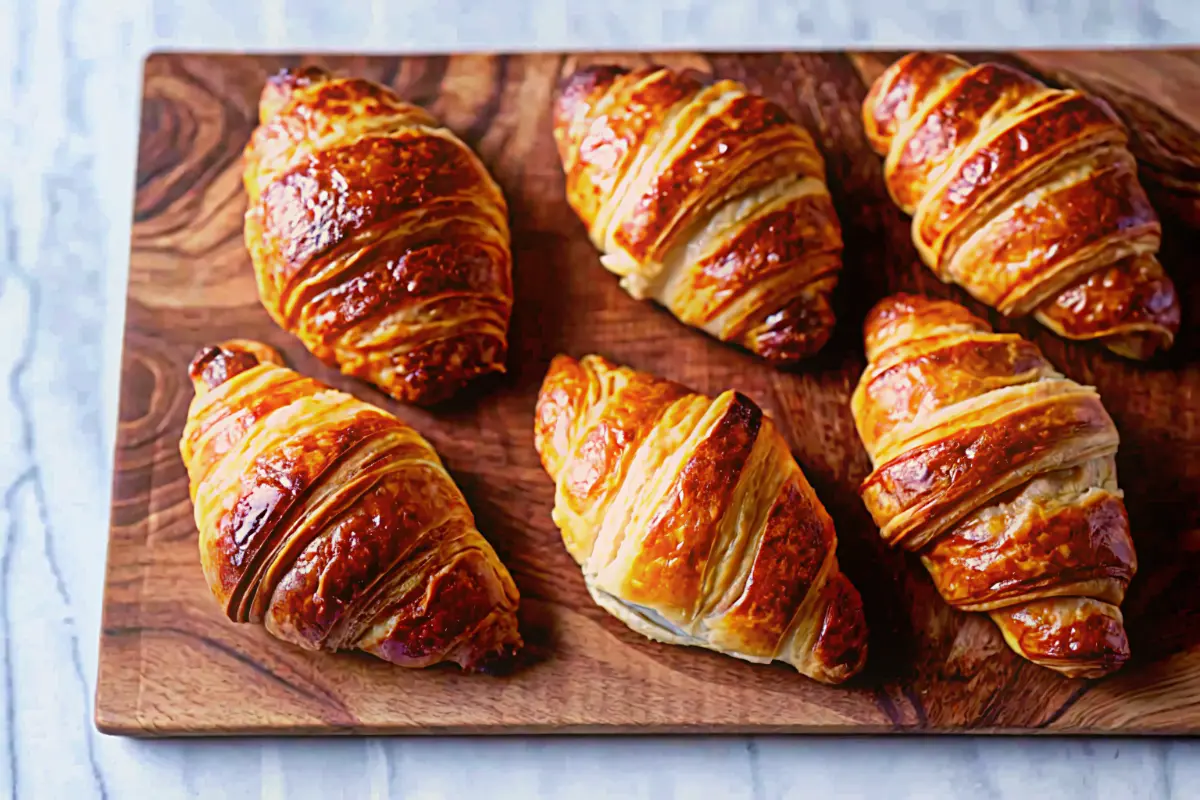
Brunch Presentation
Arrange warm croissants on a wooden board alongside fresh berries, sliced stone fruits, artisan cheeses, and honey. Drizzle honey directly on croissants for added sweetness. This elegant presentation elevates croissants to impressive brunch fare suitable for entertaining.
Almond Croissant Topping
After applying egg wash, immediately sprinkle croissants with sliced almonds, a light dusting of pearl sugar, and a tiny pinch of fleur de sel. This creates textural contrast and elevates the pastry’s sophistication.
Protein-Paired Breakfast Bowl
Tear a croissant into pieces and serve alongside scrambled eggs, crispy bacon, and fresh fruit. The croissant’s buttery richness complements savory breakfast proteins perfectly.

Common Mistakes to Avoid
Butter Leaking During Lamination
The Problem: Butter seeps out of the dough edges, resulting in greasy croissants with poor structure.
The Solution: Maintain proper dough temperature throughout lamination (ideally 65-68°F or 18-20°C). If dough warms above 70°F, chill immediately for 15-20 minutes. Ensure butter is evenly distributed within the dough before each fold, and seal all edges firmly. Cold butter and cool working conditions are essential.
Dense, Heavy Croissants
The Problem: The final product lacks the characteristic flaky, airy texture.
The Solution: This typically results from insufficient lamination or skipping necessary rest periods. Never rush the chilling phases—they allow gluten to relax and butter to firm up. Ensure you complete both the double fold and single fold as specified. Under-proofing in the final stage also contributes to density; properly proofed croissants should visibly double in size.
Uneven Browning
The Problem: Some croissants brown beautifully while others remain pale.
The Solution: Rotate your baking pan halfway through baking. Position croissants evenly on the pan without crowding (ideally 2 inches apart). If using a convection oven, reduce temperature by 25°F and monitor closely. Uneven oven heat distribution is the primary culprit; rotating compensates for this.
Croissants Spreading Excessively During Baking
The Problem: Croissants lose their defined shape and spread into irregular forms.
The Solution: Over-proofing is the leading cause. Final proof should reach the “pillowy, doubled” stage, not beyond. If dough appears excessively soft before baking, refrigerate for 15 minutes to firm the structure. Additionally, ensure your oven is properly preheated; a cool oven allows dough to spread before setting.
Lack of Flakiness
The Problem: Despite proper technique, the croissant interior lacks distinct flaky layers.
The Solution: This usually indicates insufficient lamination or that butter mixed too thoroughly with the dough. Ensure butter remains in distinct layers—it shouldn’t homogenize with the dough. If you’ve accidentally warmed the dough excessively during lamination, the butter melts and incorporates incorrectly. Maintain vigilant temperature control and work efficiently.
Flat Croissants That Don’t Rise
The Problem: Croissants bake but fail to achieve proper height and volume.
The Solution: This commonly stems from yeast that wasn’t properly activated (check that your yeast activated foamily in Step 1) or from insufficient dough fermentation. Ensure initial proofing reaches the “doubled” stage, and verify that final proofing is sufficiently long (2-3 hours). Cold kitchens require longer proofing times; consider using a proofing box or warm environment.
Storing Tips for Maximum Freshness
Short-Term Storage (1-2 Days)
Store cooled croissants in an airtight container at room temperature. The interior remains soft for approximately 24 hours, though the exterior gradually loses crispness as moisture equilibrates. For optimal texture within the first day, consume at room temperature or briefly warm in a 300°F oven for 5 minutes to re-crisp the exterior.
Refrigeration (Not Recommended)
Avoid refrigerating croissants, as cold temperatures accelerate staling through retrogradation of the starch structure. If you must refrigerate, store in an airtight container for maximum 3 days, and always rewarm in a 350°F oven for 8-10 minutes before serving.
Freezing for Extended Storage
Freeze cooled croissants in a single layer on a baking sheet for 2 hours, then transfer to a freezer bag or airtight container. They maintain quality for up to 3 months. To thaw, place on a wire rack at room temperature for 30-45 minutes, or reheat directly from frozen in a 350°F oven for 12-15 minutes until heated through and the exterior re-crisps.
Pre-Baked Dough Storage
Store shaped croissants (after Step 12 but before final proofing) in the freezer for up to 2 weeks. Thaw overnight in the refrigerator, then proceed with final proofing and baking. This method is invaluable for meal planning—you can prepare croissants ahead and bake fresh croissants whenever desired.
Laminated Dough Storage
After completing lamination (Step 9), wrap dough tightly and freeze for up to 1 month. Thaw in the refrigerator overnight before sheeting and cutting. This approach is ideal if you want homemade croissants without committing a full day.
Storing Unbaked Shaped Croissants
If you’ve shaped croissants (Step 12) but want to bake them later, freeze immediately after shaping before final proofing. Bake directly from frozen, but extend baking time to 25-35 minutes and apply egg wash immediately before baking. The inside remains perfectly moist while the exterior achieves that ideal golden-brown finish.
Conclusion
Mastering French croissants at home transforms your baking skills and provides an intimate understanding of how Austrian heritage merged with French refinement to create one of the world’s most beloved pastries. This comprehensive guide—covering the fascinating history of how croissants evolved from Vienna’s victorious 1683 celebration to becoming synonymous with French gastronomy—equips you with everything necessary to replicate authentic French croissants in your own kitchen. By following the detailed step-by-step instructions, maintaining proper temperature control, avoiding common pitfalls, and embracing the lamination process, you’ll achieve that professional-quality exterior crispness and delicate, flaky interior that defines exceptional French croissants. The time investment of 10-24 hours yields dividends in flavor complexity and authentic texture that justify every minute.
We’d love to hear about your croissant-baking journey! Share your results in the review section below—did you achieve that perfect golden-brown exterior? What surprised you most about the lamination process? Leave a comment describing your experience, and don’t forget to subscribe to our baking blog for weekly recipes, expert tips, and culinary insights that will continue expanding your pastry skills.

Frequently Asked Questions
Q: Can I use instant yeast instead of active dry yeast?
A: Yes, you can use instant yeast (also called bread machine yeast) at a ratio of 4-5g instead of 6g active dry yeast. Instant yeast has slightly higher viability, so you need marginally less. The activation and proofing times remain essentially identical. Avoid nutritional yeast entirely, as it doesn’t ferment.
Q: What’s the difference between my homemade croissants and bakery croissants?
A: Bakeries often employ several techniques unavailable to home bakers: commercial dough conditioners that strengthen gluten, specialized laminating machines that create perfectly uniform layers, humidity-controlled proofing boxes, and deck ovens with steam injection capability. Additionally, professional bakers may use different flour types and butter compositions optimized for commercial production. However, following this recipe yields croissants that rival quality bakery products, particularly regarding flavor development from proper fermentation.
Q: Why do my croissants have gaps or holes instead of compact layers?
A: Large air pockets typically result from one of two issues: either insufficient dough development during the initial kneading stage (Step 3), or excessive gas production before lamination that isn’t adequately released when flattening the dough. Ensure you knead for the full 4 minutes on the work surface, and deliberately flatten the proofed dough to release most—but not all—air before freezing in Step 5.
Q: Can I skip the freezing steps to speed up the process?
A: Freezing serves critical functions beyond convenience: it allows you to handle the dough easily, provides necessary rest periods that relax gluten and firm butter, and enables make-ahead preparation. While technically possible to skip freezing and work with chilled refrigerated dough instead, this significantly increases difficulty and reduces success rates. The butter may melt into the dough, compromising lamination. Professional bakers use freezing strategically; I recommend preserving this step.
Q: How do I know when my croissants are properly proofed before baking?
A: Properly proofed croissants will have visibly doubled in size from when you placed them in the proof environment. Gently poke the dough with a floured finger—it should spring back slowly (within 1-2 seconds) rather than immediately or not at all. The texture should feel pillowy and airy. If it springs back instantly, proof longer; if the indentation remains, you’ve over-proofed slightly (though this is often salvageable with slightly reduced baking time).
Q: What temperature should my kitchen be for optimal proofing?
A: Ideal proofing temperature ranges from 75-78°F (24-26°C). Warmer kitchens (above 80°F) can cause butter to soften excessively during lamination, while cooler kitchens (below 70°F) extend all proofing times significantly. If your kitchen is cool, use a proofing box, slightly warmed oven with the light on, or place the dough inside an insulated cooler with a container of warm (not hot) water replaced every 30 minutes.
Q: Can I make croissants with all-butter lamination instead of adding it gradually?
A: The lamination method in this recipe uses a butter block (tourrage) method, which distributes fat through strategic folding. Some recipes use all-butter laminated doughs with different fold patterns. The method described here is more forgiving for home bakers and produces excellent results. Advanced bakers may experiment with all-butter methods, but the recipe as written is optimized for consistency and success.
Q: Why is my dough tearing when I roll it during lamination?
A: Dough tears when it’s either too cold and stiff (becoming brittle) or too warm and over-developed (becoming elastic). If too cold, let it sit at room temperature for 5-10 minutes before rolling. If too warm, refrigerate immediately. Additionally, ensure you’re using sufficient flour on your work surface and rolling pin to prevent sticking, which increases pressure and causes tearing.
Q: How much active work time does this recipe actually require?
A: The active work time—hands-on labor when you’re actively mixing, kneading, laminating, or shaping—totals approximately 45-60 minutes spread across 2-3 days. Most time is passive (freezing, proofing, chilling), during which the dough develops flavor and structure with no intervention required. This makes the recipe manageable even for busy home bakers who can dedicate 20-30 minutes on separate days.
Print
Best Homemade French Croissants Recipe
- Total Time: 10 à 24 heures
- Yield: 6 croissants 1x
- Diet: Vegetarian
Description
Ces croissants français faits maison sont feuilletés, dorés et ultra-beurrés, avec des couches légères et croustillantes obtenues grâce à une lamination traditionnelle et une fermentation lente.
Ingredients
Détrempe (Pâte)
- 85 g lait tiède
- 60 g eau tiède
- 6 g levure sèche active
- 5 g miel
- 25 g beurre fondu refroidi
- 20 g sucre blanc
- 250 g farine tout usage
- 5 g sel
Beurre de tourage
- 140 g beurre froid (type européen recommandé)
Dorure
- 1 jaune d’œuf
- 2 c. à soupe lait ou crème
Instructions
- Activer la levure avec le lait tiède et le miel jusqu’à formation de mousse.
- Ajouter l’eau, le beurre fondu, le sucre, la farine puis le sel et mélanger.
- Pétrir jusqu’à obtenir une pâte lisse et souple.
- Laisser lever la pâte jusqu’à ce qu’elle double de volume.
- Façonner en rectangle, couvrir et congeler plusieurs heures.
- Former le beurre en plaque régulière et garder bien froid.
- Enfermer le beurre dans la pâte et réaliser un tour double.
- Réfrigérer puis effectuer un tour simple.
- Abaisser la pâte, découper en triangles et rouler en croissants.
- Laisser pousser jusqu’à texture légère et gonflée.
- Dorer à l’œuf puis cuire à 190°C jusqu’à coloration dorée.
Notes
Le respect des temps de repos et une température froide sont essentiels pour obtenir un feuilletage parfait.
- Prep Time: 30 minutes
- Cook Time: 25 minutes
- Category: Breakfast
- Method: Baking
- Cuisine: French
Nutrition
- Serving Size: 1 croissant
- Calories: 250
- Sugar: 4g
- Sodium: 190mg
- Fat: 15g
- Saturated Fat: 9g
- Unsaturated Fat: 5g
- Trans Fat: 0g
- Carbohydrates: 25g
- Fiber: <1g
- Protein: 5g
- Cholesterol: 40mg
Keywords: homemade french croissants, classic croissants, laminated dough, french pastry