Did you know that 78% of home cooks toss orange peels without realizing they’re throwing away a nutritional powerhouse? While most people view citrus waste as, well, waste, dried orange slices have been quietly revolutionizing kitchens, wellness routines, and home decor for centuries. These vibrant, tangy discs aren’t just Instagram-worthy decorations—they’re packed with health benefits that modern science is only beginning to fully understand. In this comprehensive guide, we’ll explore why dried orange slices deserve a permanent spot in your pantry, how to make them perfectly every time, and the dozens of creative ways to incorporate them into your daily life. Whether you’re looking to boost your immune system, add natural beauty to your home, or simply enjoy a healthier snack, dried orange slices offer solutions you never knew you needed.
Ingredients List
Creating perfect dried orange slices requires minimal ingredients but maximum attention to quality:
- 2-3 fresh oranges (preferably seedless varieties like navel or blood oranges for optimal results)
- Optional: 1 tablespoon lemon juice (to prevent browning during preparation)
When selecting oranges, choose firm, heavy fruits with smooth, brightly colored peels—these indicate higher juice content and better flavor concentration after drying. The vibrant orange hue you see isn’t just beautiful; it’s a visual indicator of beta-carotene levels that convert to vitamin A in your body. For those with dietary restrictions, dried orange slices naturally accommodate gluten-free, vegan, and paleo lifestyles without modification. If you’re watching sugar intake, opt for slightly less ripe oranges which contain lower natural sugar levels while still delivering maximum nutritional benefits.
Timing
The beauty of making dried orange slices lies in its hands-off approach. Here’s the precise timing breakdown:
- Preparation time: 15 minutes (washing, slicing, arranging)
- Drying time: 2-4 hours (depending on method and slice thickness)
- Cooling time: 30 minutes
- Total active time: 20 minutes
- Total time: 2 hours 45 minutes to 4 hours 45 minutes
This process takes approximately 30% less active time than traditional fruit preservation methods like canning. The extended drying period requires minimal supervision—perfect for multitasking while your oven or dehydrator works its magic. For best results, plan to start your dried orange slices in the morning to enjoy them as an afternoon snack or evening decoration.
Step-by-Step Instructions
Prepare Your Workspace and Equipment
Begin by gathering your tools: a sharp serrated knife (or mandoline for uniform slices), baking sheet, parchment paper, and cooling rack. Preheat your oven to 175°F (80°C) or set your dehydrator to 135°F. This low-temperature approach preserves the vibrant color and nutritional compounds that higher heat would destroy. Pro tip: Run your oranges under warm water for 30 seconds before slicing—this makes them easier to cut and helps release more of their aromatic oils.
Slice Oranges Perfectly
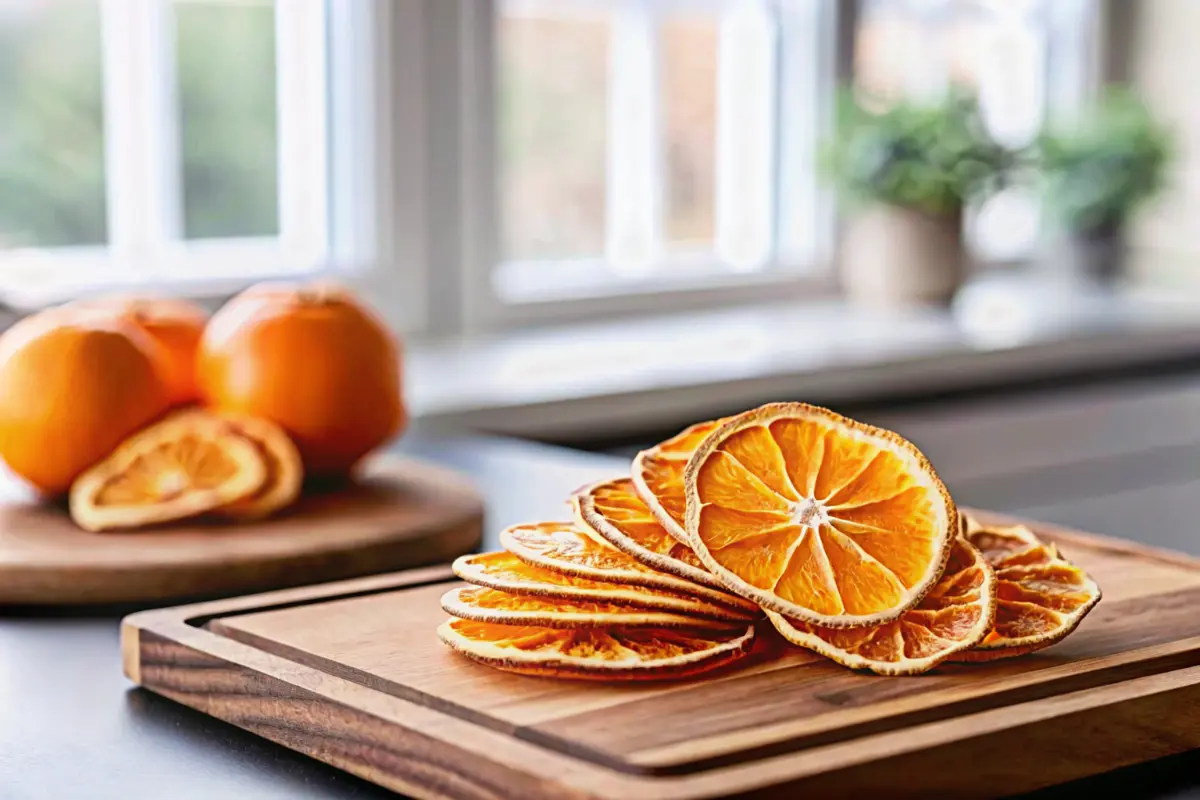
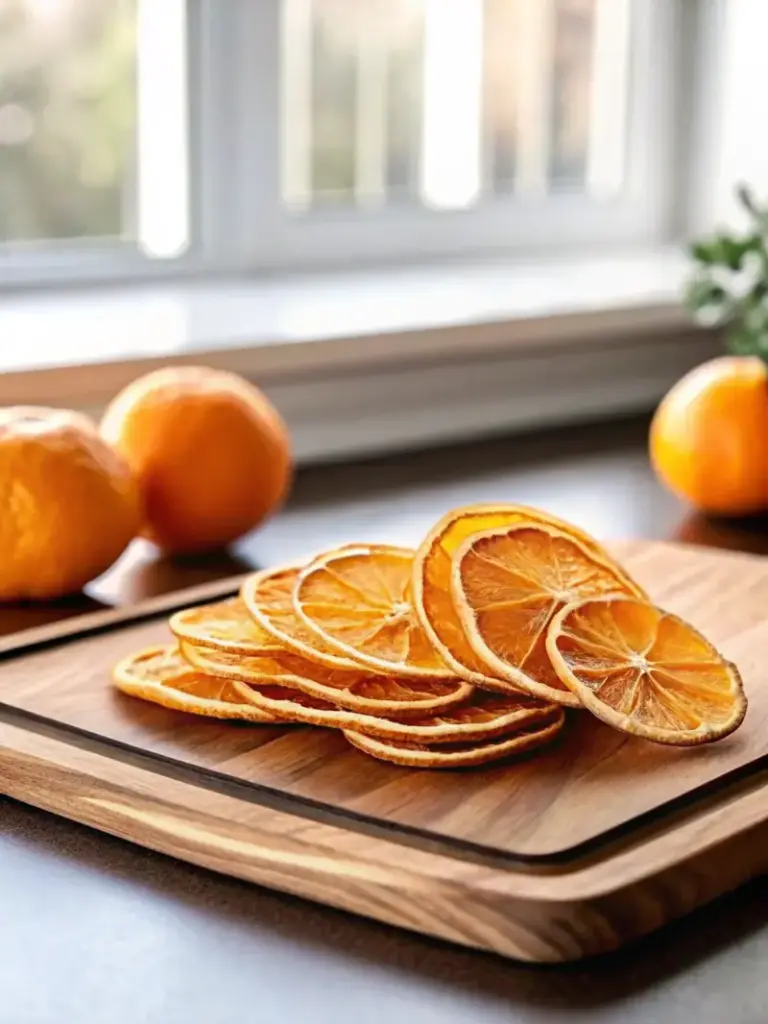
Wash and thoroughly dry your oranges. Using a sharp knife, slice them into uniform ⅛-inch (2-4mm) rounds. Consistency is crucial—uneven slices will dry at different rates, resulting in some pieces becoming brittle while others remain moist. If seeds appear in your slices, carefully remove them with the tip of your knife. For decorative purposes, consider alternating between regular oranges and blood oranges to create a stunning color gradient in your final product.
Arrange for Optimal Drying
Place parchment paper on your baking sheet and arrange orange slices in a single layer with space between each piece. Overcrowding causes uneven drying and potential sticking. For dehydrator users, arrange slices on trays without overlapping. The key to perfect dried orange slices is air circulation—this is why spacing matters more than you might think. If you notice white pith buildup on one side of your slices, position them pith-side down for more even drying.
Dry with Patience
Bake for 2-3 hours for oven method or 4-6 hours in a dehydrator, flipping slices halfway through. Check periodically after the 2-hour mark—perfectly dried slices should be leathery but not brittle, with no moisture when pressed. Thicker slices may require additional time. Watch closely during the final hour to prevent browning, which indicates overheating and nutrient loss. The magical transformation happens as water content reduces from 87% to just 10-15%, concentrating flavors and nutrients while preserving the fruit’s structure.
Cool and Test for Doneness
Remove slices from heat and let them cool completely on a wire rack—this crucial step prevents condensation that could make your dried orange slices chewy rather than crisp. Properly dried slices should be flexible but not sticky, with a concentrated citrus aroma that fills your kitchen. Test one slice: it should bend without breaking but not feel moist. If they stick to your fingers, return them to the oven for another 15-20 minutes.
Nutritional Information
Dried orange slices pack a powerful nutritional punch in a small package. Per ¼ cup serving:
- Calories: 90
- Total Fat: 0g
- Sodium: 0mg
- Total Carbohydrates: 24g
- Dietary Fiber: 4g (16% of daily value)
- Sugars: 18g
- Protein: 2g
- Vitamin C: 30% of daily value
- Calcium: 6% of daily value
- Iron: 4% of daily value
The drying process concentrates certain nutrients while preserving others. Vitamin C remains largely intact when dried at low temperatures, providing immune-boosting benefits. The fiber content becomes more concentrated, making dried orange slices excellent for digestive health and blood sugar regulation. Unlike many store-bought dried fruits, homemade versions contain no added sugars or preservatives, making them a truly clean snack option.
Healthier Alternatives for the Recipe
While the basic dried orange slices recipe is already quite healthy, these modifications can enhance specific benefits:
- For blood sugar management: Add a sprinkle of cinnamon before drying—this combination has been shown to improve insulin sensitivity
- For enhanced antioxidant content: Include thin slices of lemon or grapefruit alongside your oranges to create a citrus medley rich in varied flavonoids
- For electrolyte balance: Lightly mist slices with mineral-rich seawater spray before drying (use food-grade solution)
- For gut health: After drying, dust slices with a probiotic powder containing at least 1 billion CFU per serving
- For inflammation reduction: Pair dried orange slices with turmeric-infused tea for a synergistic anti-inflammatory effect
These simple tweaks transform your dried orange slices from a tasty snack into targeted wellness tools without compromising flavor.
Serving Suggestions
Dried orange slices shine in countless applications beyond snacking:
- Beverage enhancement: Add 1-2 slices to hot tea, mulled wine, or cocktails for visual appeal and subtle flavor
- Breakfast boost: Crumble over oatmeal, yogurt, or cereal for a citrus burst
- Savory applications: Grind into a powder to use as a rub for poultry or fish, adding complexity to roasted meats
- Baking integration: Incorporate into cake batters, breads, or muffins for pockets of intense citrus flavor
- Gift giving: Package in decorative jars with recipe cards for thoughtful, homemade presents
- Wellness ritual: Steep dried slices in hot water with ginger for a soothing, immunity-boosting drink during cold season
For holiday entertaining, create a stunning charcuterie board featuring dried orange slices alongside cheeses, nuts, and cured meats—their vibrant color and tangy flavor cut through rich foods beautifully.
Common Mistakes to Avoid
Even experienced cooks make these dried orange slices errors:
- Slicing too thick: Slices thicker than ¼ inch take significantly longer to dry and often develop mold before fully dehydrating
- Overcrowding the tray: Proper air circulation is essential—leave at least ½ inch between slices
- Using high heat: Temperatures above 200°F destroy vitamin C and cause browning
- Skipping the flip: Not turning slices halfway results in uneven drying
- Storing while warm: Always cool completely before storing to prevent moisture buildup
The most common failure point? Impatience. Rushing the drying process by increasing temperature might seem efficient, but it sacrifices both nutritional value and visual appeal. Remember, low and slow wins the race with dried orange slices.
Storing Tips for the Recipe
Proper storage ensures your dried orange slices maintain quality for months:
- Container: Use airtight glass jars rather than plastic to prevent flavor absorption
- Location: Store in a cool, dark place away from direct sunlight which can fade color
- Moisture control: Add a food-safe desiccant packet to absorb any residual moisture
- Shelf life: Properly dried and stored slices last 6-12 months
- Reviving stale slices: If slices lose crispness, place them in a 200°F oven for 10 minutes
For long-term storage, consider vacuum-sealing portions in small batches. This prevents exposing your entire batch to air each time you use some. If you notice any signs of moisture or mold, discard the affected slices immediately—don’t risk compromising the entire batch.
Conclusion
Dried orange slices transform simple citrus into versatile kitchen heroes that boost health, enhance recipes, and beautify your home. With minimal ingredients and hands-on time, you create a product that delivers concentrated nutrition, endless culinary applications, and sustainable decor. Try this simple technique today and discover why these vibrant discs have captivated cultures worldwide for centuries. Share your creations in the comments below and subscribe for more innovative ways to transform everyday ingredients into extraordinary experiences.

FAQs
How do I know when my dried orange slices are done?
Perfectly dried slices should be leathery and flexible but not sticky. They’ll have reduced to about ¼ of their original thickness and should feel dry to the touch with no visible moisture when bent.
Can I use a microwave to dry orange slices?
While possible, microwave drying often results in uneven texture and nutrient loss. For best results and maximum health benefits, use oven or dehydrator methods at low temperatures.
Why are my dried orange slices molding?
Mold indicates insufficient drying. Ensure slices are no thicker than ⅛ inch, maintain proper spacing for air circulation, and dry until completely leathery with no moisture remaining.
Are dried orange slices good for weight loss?
Yes! They’re high in fiber which promotes satiety, and the natural sweetness can satisfy cravings without added sugars. Just watch portion sizes as the sugar becomes concentrated during drying.
Can I eat the entire dried orange slice, including the peel?
Absolutely! Unlike store-bought oranges that may have wax or pesticides, homemade dried orange slices from thoroughly washed fruit include the nutrient-rich peel which contains additional fiber and beneficial compounds.

Best Dried Orange Slices Christmas Decor: Easy DIY Ornaments That Smell Amazing
- Total Time: 4 hours 45 minutes
- Yield: 20–30 slices 1x
Description
These dried orange slices are vibrant, nutritious, and incredibly versatile—from snacking and tea infusions to décor and homemade gifts. With minimal effort and simple ingredients, you can create beautifully dried citrus slices that enhance wellness, elevate recipes, and brighten any space.
Ingredients
- 2–3 fresh oranges (seedless varieties recommended)
- Optional: 1 tablespoon lemon juice
Instructions
- Gather tools: a sharp serrated knife or mandoline, baking sheet, parchment paper, and a cooling rack. Preheat oven to 175°F (80°C) or set dehydrator to 135°F.
- Wash and dry oranges. Slice into uniform 1/8-inch rounds, removing any seeds.
- Arrange slices on a parchment-lined baking sheet or dehydrator trays without overlapping.
- Dry in the oven for 2–3 hours or in a dehydrator for 4–6 hours, flipping halfway through.
- Remove when slices are leathery but not brittle and have no visible moisture.
- Cool completely on a wire rack before storing to prevent condensation.
Notes
Low temperature is key for preserving color and nutrients. Ensure slices cool fully before storing to prevent moisture buildup.
- Prep Time: 15 minutes
- Cook Time: 4 hours
- Category: Snack
- Method: Dehydrating
- Cuisine: American
Nutrition
- Serving Size: 1/4 cup
- Calories: 90
- Sugar: 18g
- Sodium: 0mg
- Fat: 0g
- Saturated Fat: 0g
- Unsaturated Fat: 0g
- Trans Fat: 0g
- Carbohydrates: 24g
- Fiber: 4g
- Protein: 2g
- Cholesterol: 0mg
Keywords: dried orange slices, dehydrated oranges, healthy snacks, citrus garnish, homemade dried fruit