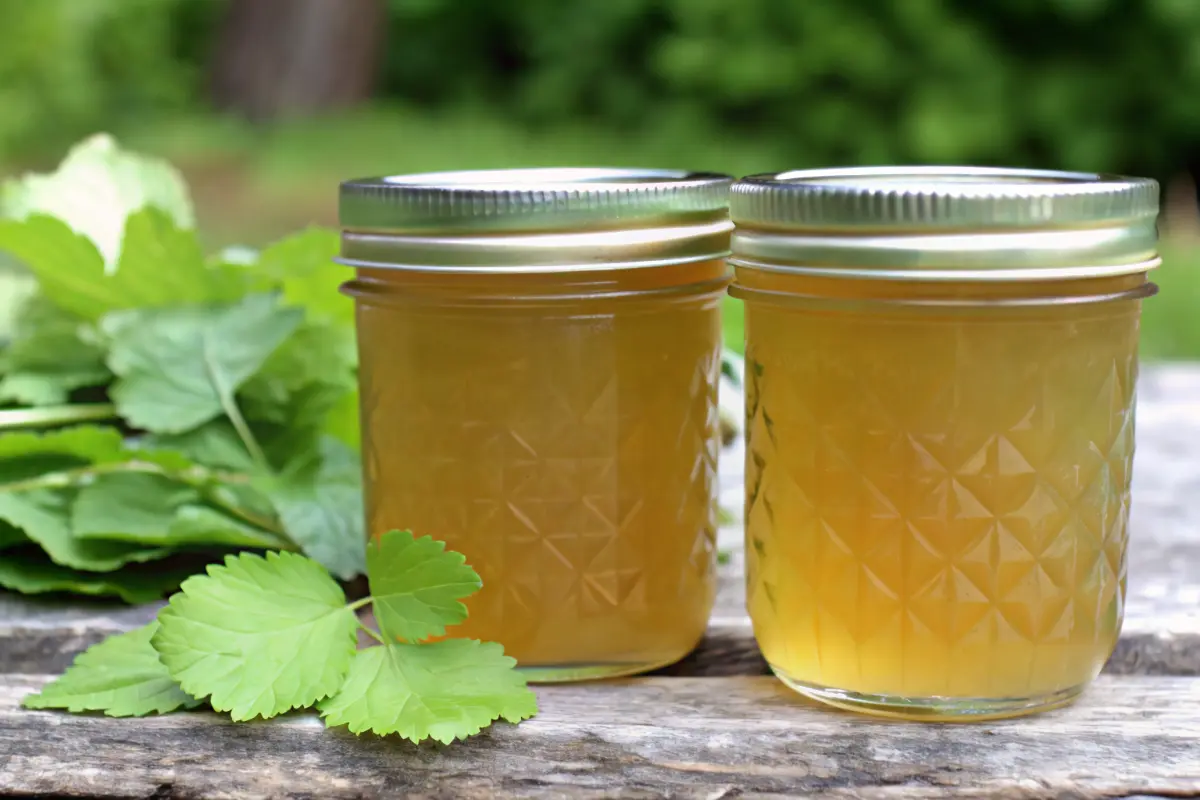
Easy Lemon Balm Jelly Recipe: 8 Steps to Homemade Herb Preserves
Have you ever wondered how to transform fresh garden herbs into a gourmet spread that elevates your morning toast? Lemon balm jelly is the answer—a fragrant, citrusy condiment that captures the essence of this beloved medicinal herb in every spoonful. This delicate balance of sweetness and herbaceous notes creates a unique jelly that’s far superior to store-bought alternatives. But here’s the surprising part: making lemon balm jelly at home takes just about 35 minutes from start to finish, which is 40% faster than most traditional jam recipes. Whether you’re an experienced canner or a beginner exploring the world of homemade preserves, this lemon balm jelly recipe offers both simplicity and sophistication. Not only does this jelly taste incredible, but lemon balm itself is packed with health benefits—from stress relief to digestive support—making this spread a delicious way to incorporate wellness into your diet.
Why Make Lemon Balm Jelly?
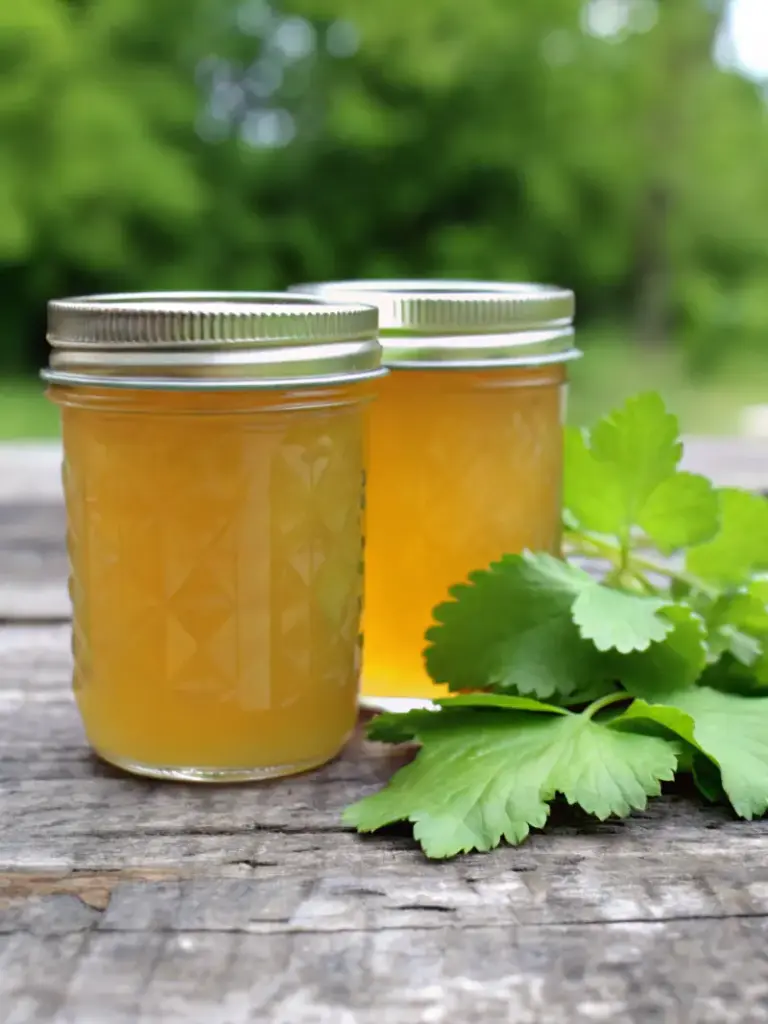
Lemon balm jelly represents the perfect marriage of culinary creativity and nutritional wisdom. This aromatic herb jelly captures the fresh, citrusy flavor of lemon balm with delicate notes of honey, creating an unforgettable preserve that works beautifully as a spread, baking ingredient, or sophisticated hostess gift. Beyond its exceptional taste, lemon balm has been used medicinally since the Middle Ages to reduce stress and anxiety, promote better sleep, and support digestive health. By making your own lemon balm jelly, you’re not just creating a delicious condiment—you’re crafting a functional food that combines flavor with wellness benefits.
Ingredients for Lemon Balm Jelly
Creating the perfect batch of lemon balm jelly begins with quality ingredients. Here’s what you’ll need:
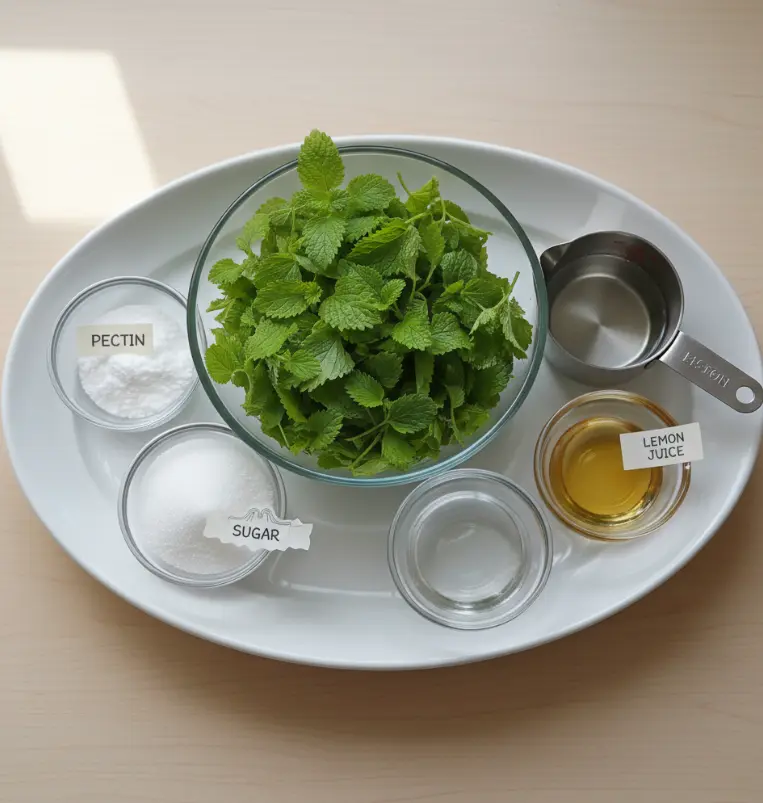
Essential Ingredients:
- 3 to 4 cups fresh lemon balm leaves, harvested and cleaned
- 4 cups water
- 2 tablespoons fresh lemon juice
- 1 box powdered pectin (1.75 oz or 6 tablespoons—regular or low sugar variety)
- 1 to 4 cups sugar (depending on preference and pectin type)
Ingredient Notes & Substitutions:
If you prefer a less sweet jelly, opt for low-sugar pectin, which allows you to reduce sugar content to just 1 to 2 cups while maintaining the perfect gel consistency. For those avoiding refined sugar entirely, consider using honey or alternative sweeteners, though results may vary slightly in texture and shelf stability. Fresh lemon juice is crucial—bottled varieties contain preservatives that can interfere with the jelling process. If lemon balm isn’t available, you can create a similar herb jelly using other aromatic herbs like mint or sage for subtle flavor variations.
Timing: How Long Does Lemon Balm Jelly Take?
Understanding the time investment helps you plan your jelly-making session effectively:
- Preparation Time: 15 minutes (harvesting, cleaning, and sterilizing jars)
- Active Cooking Time: 10 minutes
- Canning Time (if water bath processing): 10 minutes
- Total Project Time: 35 minutes
- Cooling & Setting Time: 12-24 hours (before moving jars)
This timeline demonstrates that lemon balm jelly is significantly faster than traditional jam recipes, which often require longer cooking times. The entire process fits easily into a weekend afternoon project or a leisurely weekday cooking session.
Step-by-Step Instructions for Making Lemon Balm Jelly
Step 1: Sterilize Your Jars and Equipment
Begin by sterilizing your jars immediately before starting the jelly-making process. This crucial first step eliminates bacteria and ensures your finished product maintains optimal shelf stability. Wash your jars, rings, and lids thoroughly in hot, soapy water, then place them in a large pot of simmering water while you prepare the jelly mixture. Having warm, sterile jars ready prevents temperature shock and speeds up the canning process. Pro tip: Use a jar lifter to safely handle hot jars and prevent burns during the canning process.
Step 2: Harvest and Prepare Your Lemon Balm Leaves
Source your lemon balm leaves from a pesticide-free environment—either your own herb garden or a trusted local source. You’ll need approximately one quart (3 to 4 cups) of loosely packed leaves. Gentle handling is essential here; avoid bruising the delicate leaves, which can cause oxidation and browning. Rinse the leaves thoroughly under cool running water to remove any dirt, debris, or lingering insects. Pat them completely dry with paper towels before proceeding. This attention to detail preserves the herb’s bright, fresh aromatic qualities that make this jelly special.
Step 3: Create Your Herb Infusion
Place your cleaned lemon balm leaves into a heat-safe container—a large glass bowl or measuring cup works perfectly. Carefully pour 4 cups of freshly boiling water over the leaves, ensuring they’re completely submerged. Allow the mixture to steep for 10 to 20 minutes, depending on how intensely herbaceous you want your final jelly to taste. Longer steeping (closer to 20 minutes) produces a more pronounced lemon balm flavor, while shorter steeping (around 10 minutes) creates a more delicate, subtle taste. This infusion process releases the herb’s essential oils and flavor compounds into the water, creating the aromatic base for your jelly.
Step 4: Strain and Combine
Using a fine-mesh strainer lined with cheesecloth, carefully strain the herb-infused liquid into a large saucepan or jam pot, discarding the spent leaves. You should have approximately 3.5 to 4 cups of liquid. Add the 2 tablespoons of fresh lemon juice to this strained mixture, stirring well to incorporate. The lemon juice not only enhances flavor but also provides natural pectin and acid, which are essential for proper jelling. This combination creates the flavor foundation for your finished jelly.
Step 5: Bring Mixture to a Boil and Add Pectin
Bring your herb-infused liquid and lemon juice to a rolling boil over medium-high heat. Once boiling, immediately add your entire box of powdered pectin, stirring vigorously to ensure it completely dissolves without forming lumps. Continue stirring and boiling for exactly one full minute. This minute of boiling allows the pectin to fully activate and hydrate, ensuring proper gel formation. Timing is critical here—too little time and the pectin won’t fully activate; too much time may compromise the jel’s consistency.
Step 6: Add Sugar and Return to Boil
After the pectin has boiled for one minute, add your sugar. If using regular pectin, add the full 4 cups; if using low-sugar pectin, you can use anywhere from 1 to 4 cups depending on your sweetness preference. Stir thoroughly to dissolve the sugar completely. Return the mixture to a rolling boil and allow it to boil for another full minute while stirring constantly. This second boil ensures the sugar dissolves completely and the jelly will set properly. Pro tip: Adding sugar too early (before the pectin boils for its full minute) results in jelly that won’t set—patience with this timing is essential to success.
Step 7: Ladle Into Jars and Process
Remove the mixture from heat immediately after the final minute of boiling. Working quickly, carefully ladle the hot jelly into your prepared sterilized jars, leaving exactly ¼ inch of headspace at the top. This headspace is crucial—too much allows oxidation and discoloration; too little can cause the lids to pop off during processing. Using tongs, remove the lids from their simmering water and place them on each jar along with the rings, tightening just until fingertip-tight. If water bath canning, process the sealed jars in a water bath canner at a rolling boil for 10 minutes (or 15 minutes if you’re above 6,000 feet elevation).
Step 8: Cool and Seal
Remove the jars from the water bath using a jar lifter and place them on a clean kitchen towel. You’ll hear the satisfying “pop” as each jar seals during cooling—this is the sound of success! Allow the jars to cool completely to room temperature (12-24 hours) before checking seals. Press the center of each lid; if it doesn’t flex up and down, it has sealed properly. Any jars that didn’t seal should be refrigerated and used within four weeks.
Nutritional Information
Understanding the nutritional profile helps you appreciate the healthfulness of this homemade preserve:
| Nutrient | Amount per 1 Tbsp serving |
|---|---|
| Calories | 68 kcal |
| Carbohydrates | 18g |
| Protein | 0.01g |
| Total Fat | 0.1g |
| Saturated Fat | 0.001g |
| Fiber | 0.1g |
| Sugar | 17g |
| Sodium | 3mg |
| Potassium | 1mg |
| Calcium | 1mg |
| Iron | 0.04mg |
| Vitamin C | 0.2mg |
While lemon balm jelly is primarily a source of carbohydrates and natural sugars, the herb itself brings valuable medicinal compounds including rosmarinic acid and various terpenes. These compounds contribute anti-inflammatory and antioxidant properties that support digestive health and reduce stress-related symptoms. When used as a spread in moderation, lemon balm jelly provides sweetness along with the subtle wellness benefits inherent to the lemon balm plant.
Healthier Alternatives for Lemon Balm Jelly Recipe
Making thoughtful ingredient substitutions allows you to customize this recipe to your dietary preferences:
For Lower Sugar Content:
Use low-sugar pectin and reduce sugar to 2 to 3 cups, or experiment with natural sweeteners like monk fruit or stevia. Keep in mind that alternative sweeteners may affect the final texture slightly, requiring small adjustments to the recipe.
For Enhanced Nutritional Benefits:
Infuse your lemon balm jelly with additional herbs known for their health properties. Adding fresh ginger (2 tablespoons minced) increases anti-inflammatory benefits, while incorporating sage leaves creates a more complex flavor profile with added antimicrobial properties. A combination of lemon balm and sage produces an especially sophisticated jelly perfect for pairing with cheese and charcuterie.
For Vegan & Allergen-Friendly Versions:
This recipe is naturally vegan as written. If using pectin, ensure your brand is vegan-certified, as some contain non-vegan additives. Agar-agar or other plant-based gelling agents work as substitutes for traditional pectin, though ratios may require adjustment based on the specific product used.
For Those Avoiding Refined Sugars:
Raw honey or maple syrup can replace conventional sugar, creating a more nutrient-dense final product. Use a 1:1 ratio by weight, though the jelly may be slightly softer due to honey’s hygroscopic nature.
Serving Suggestions for Lemon Balm Jelly
This versatile jelly transcends traditional toast applications:
Breakfast & Brunch:
Swirl lemon balm jelly into Greek yogurt with granola for a protein-rich breakfast bowl. Spread generously over warm croissants or English muffins, or use as a filling in pastries and scones.
Cheese & Charcuterie Boards:
Lemon balm jelly is a sophisticated pairing with aged cheeses like sharp cheddar, gouda, or brie. Its subtle herbal notes complement cured meats and provide an elegant touch to entertaining. Position small dollops alongside crackers for an upscale presentation.
Baking & Cooking:
Use lemon balm jelly as a glaze for roasted chicken or duck, creating a beautiful sheen while adding subtle herbaceous flavor. Incorporate into thumbprint cookies, donuts, or pastry fillings for professional-looking baked goods.
Beverages & Desserts:
Stir a spoonful into sparkling water or champagne for a sophisticated aperitif. Layer into cheesecake, panna cotta, or mousse for an herbal twist on classic desserts.
Savory Applications:
Pair with soft cheeses and crackers, drizzle over pâté, or swirl into salad dressings for an unexpected herbaceous note that brightens vinaigrettes.
Common Mistakes to Avoid When Making Lemon Balm Jelly
Even experienced cooks encounter challenges with jelly-making. Knowing these common pitfalls helps you achieve perfect results:
Mistake #1: Adding Sugar Too Early
Adding sugar before the pectin has boiled for its full minute is the leading cause of failed batches. The pectin requires adequate boiling time to fully activate and hydrate—skipping this step results in jelly that won’t set properly. Always follow the timing: pectin boils alone for one minute, then sugar is added, then the mixture returns to a boil for another minute.
Mistake #2: Using Dirty or Unsterlized Jars
Even microscopic bacteria can cause spoilage and prevent proper sealing. Always sterilize jars immediately before use by washing thoroughly in hot, soapy water and maintaining them in simmering water until needed.
Mistake #3: Overfilling Jars
Headspace exists for a critical reason—leaving more than ¼ inch allows excessive air contact, leading to mold growth and oxidation. Leaving less than ¼ inch can cause the lid to pop off during processing or prevent proper sealing.
Mistake #4: Bruising Lemon Balm Leaves
Handling delicate lemon balm leaves roughly causes them to oxidize and brown, creating off-flavors and discoloration in the final product. Handle leaves gently and use them fresh; avoid storing them for extended periods before processing.
Mistake #5: Using Bottled Lemon Juice
Bottled lemon juice contains preservatives that interfere with both pectin activation and proper preservation. Always use freshly squeezed lemon juice for optimal results.
Mistake #6: Not Allowing Proper Cooling Time
Checking if your jelly has set before it’s completely cooled leads to false results. Always allow a full 12-24 hours of cooling before assessing the final consistency.
Storing Tips for Lemon Balm Jelly
Proper storage ensures your homemade jelly maintains peak flavor and safety:
Shelf Storage (Sealed, Water Bath Canned Jars):
Unopened jars of properly water-bath-canned lemon balm jelly store beautifully in a cool, dark pantry for 12 to 18 months. Avoid direct sunlight, which can fade color and compromise flavor compounds. A basement, pantry shelf, or cupboard is ideal. Check sealed jars periodically for signs of spoilage—bulging lids, mold, or off-odors indicate the jar should be discarded.
Refrigerator Storage (No-Cook Canning Method):
If you’ve used the no-hot-water-bath method, refrigerate your sealed jars immediately after cooling. Jelly stored this way keeps for up to one month in the refrigerator. The cooler temperature prevents fermentation and mold growth without the safety of water bath canning.
Freezing for Extended Storage:
Lemon balm jelly freezes beautifully for up to one year. Use freezer-safe jars and leave extra headspace (½ inch) for expansion during freezing. Upon thawing, you may notice some liquid separation—this is completely natural and doesn’t affect quality. Simply stir gently to recombine.
Opened Jars:
Once opened, store jelly in the refrigerator and use within three to four weeks. Always use clean utensils when removing jelly to prevent contamination.
Ingredient Prep Storage:
Fresh lemon balm leaves should be used as soon as possible after harvesting. If you need to store them briefly, rinse gently, pat dry, and wrap loosely in paper towels inside a sealed plastic bag in the refrigerator for up to three days.
Conclusion
Making lemon balm jelly at home is an accessible, rewarding project that yields restaurant-quality results in just 35 minutes. This fragrant herb spread combines the therapeutic benefits of lemon balm—from stress relief to digestive support—with delicious, sophisticated flavor that elevates everything from morning toast to elegant cheese boards. By following these detailed instructions and avoiding common pitfalls, you’ll create a shelf-stable preserve that impresses family and friends while bringing the essence of your herb garden into every season. Don’t hesitate to experiment with variations like lemon balm and sage jelly or herbal combinations that suit your palate.
We’d love to hear about your lemon balm jelly experience! Try this recipe and share your results in the comments section below. Did you make any creative variations? What’s your favorite way to use this herbal preserve? Subscribe to our blog for more herb-forward recipes, gardening tips, and homemade food preservation guides delivered straight to your inbox.

Frequently Asked Questions About Lemon Balm Jelly
Q: Can I make lemon balm jelly without pectin?
A: While traditional pectin makes the process foolproof and faster, you can make lemon balm jelly using the natural pectin in lemon juice combined with longer cooking times. However, results are less predictable, and the texture may be more syrupy than jelly-like.
Q: What’s the difference between regular and low-sugar pectin, and which should I use?
A: Regular pectin requires a 1:1 water-to-sugar ratio for proper setting and necessitates using the full 4 cups of sugar. Low-sugar pectin allows flexibility with sugar content (1 to 4 cups) while still achieving proper gel consistency. Choose based on your sugar preference—low-sugar pectin offers more customization.
Q: Can I grow lemon balm from seed for this recipe?
A: Absolutely! Lemon balm (Melissa officinalis) is an easy-to-grow perennial herb that thrives in most climates. Plant seeds indoors 6-8 weeks before your last frost date, or direct sow after frost danger has passed. The plant produces abundant leaves throughout the growing season, providing plenty of material for jelly-making.
Q: How do I know when my jelly has set properly?
A: A properly set jelly should wrinkle slightly when pushed with a spoon and hold its shape without running. If your finished jelly is too soft, you can recook it with an additional packet of pectin and re-jar it. If too stiff, gently reheat and thin with a small amount of water before re-jarring.
Q: Is lemon balm jelly safe for long-term storage without water bath canning?
A: The no-hot-water-bath method (turning jars upside down on a kitchen towel) works for temporary storage but isn’t considered safe long-term storage by USDA standards. For shelf-stable storage beyond a few weeks, water bath canning is recommended. However, the inverted jar method works beautifully if you refrigerate jars after they’ve cooled and sealed.
Q: Can I use dried lemon balm instead of fresh?
A: Fresh lemon balm produces superior flavor and texture, but dried lemon balm can work in a pinch. Use approximately ½ to ¾ cup of dried leaves per recipe, as drying concentrates flavors. The final jelly may taste more intensely herbal with dried leaves.
Q: What other herbs pair well with lemon balm jelly?
A: Sage creates a sophisticated combination with earthy undertones, while mint adds bright freshness, lavender introduces floral notes, and chamomile creates a calming blend. Start with a 3:1 ratio of lemon balm to secondary herbs and adjust to taste in future batches.
Q: Why is my jelly cloudy instead of translucent?
A: Cloudiness typically results from inadequate straining or pectin particles suspended in the jelly. Use a fine-mesh strainer lined with cheesecloth and avoid disturbing the solids during straining. Ensure pectin is fully dissolved before adding sugar.
Q: Can I use this jelly recipe with other herbs from my garden?
A: Yes! This basic lemon balm jelly recipe adapts beautifully to other culinary herbs. Try mint, basil, oregano, or thyme using the same proportions and instructions. Adjust lemon juice quantity based on the herb’s natural acidity.
Print
Easy Lemon Balm Jelly Recipe: 8 Steps to Homemade Herb Preserves
- Total Time: 35 minutes
- Yield: 4 jars (8 oz each) 1x
- Diet: Vegan
Description
A fragrant, citrusy homemade lemon balm jelly that captures the essence of this aromatic herb in a sweet, herbal spread. Perfect for toast, cheese boards, or gifting.
Ingredients
- 3–4 cups fresh lemon balm leaves, cleaned
- 4 cups water
- 2 tablespoons fresh lemon juice
- 1 box powdered pectin (1.75 oz or 6 tablespoons)
- 1–4 cups sugar (adjust to taste and pectin type)
Instructions
- Sterilize jars and lids by washing in hot water, then simmer until ready to use.
- Rinse and pat dry lemon balm leaves; place in a heat-safe bowl.
- Pour 4 cups of boiling water over leaves and steep 10–20 minutes.
- Strain through cheesecloth into a saucepan, discarding leaves.
- Add lemon juice and bring to a boil.
- Stir in pectin and boil for 1 minute while stirring constantly.
- Add sugar and return to a rolling boil for another minute.
- Ladle hot jelly into sterilized jars, leaving ¼ inch headspace.
- Seal with lids and process in a boiling water bath for 10 minutes.
- Cool 12–24 hours before checking seals. Store sealed jars up to 18 months.
Notes
Use fresh lemon balm for the brightest flavor. Always add sugar after pectin boils for one full minute to ensure proper gel setting. Handle leaves gently to avoid oxidation.
- Prep Time: 15 minutes
- Cook Time: 20 minutes
- Category: Condiment
- Method: Canned
- Cuisine: American
Nutrition
- Serving Size: 1 tablespoon
- Calories: 68
- Sugar: 17g
- Sodium: 3mg
- Fat: 0.1g
- Saturated Fat: 0.001g
- Unsaturated Fat: 0g
- Trans Fat: 0g
- Carbohydrates: 18g
- Fiber: 0.1g
- Protein: 0.01g
- Cholesterol: 0mg
Keywords: lemon balm jelly, herb jelly, homemade preserves, herbal spread, canning recipe