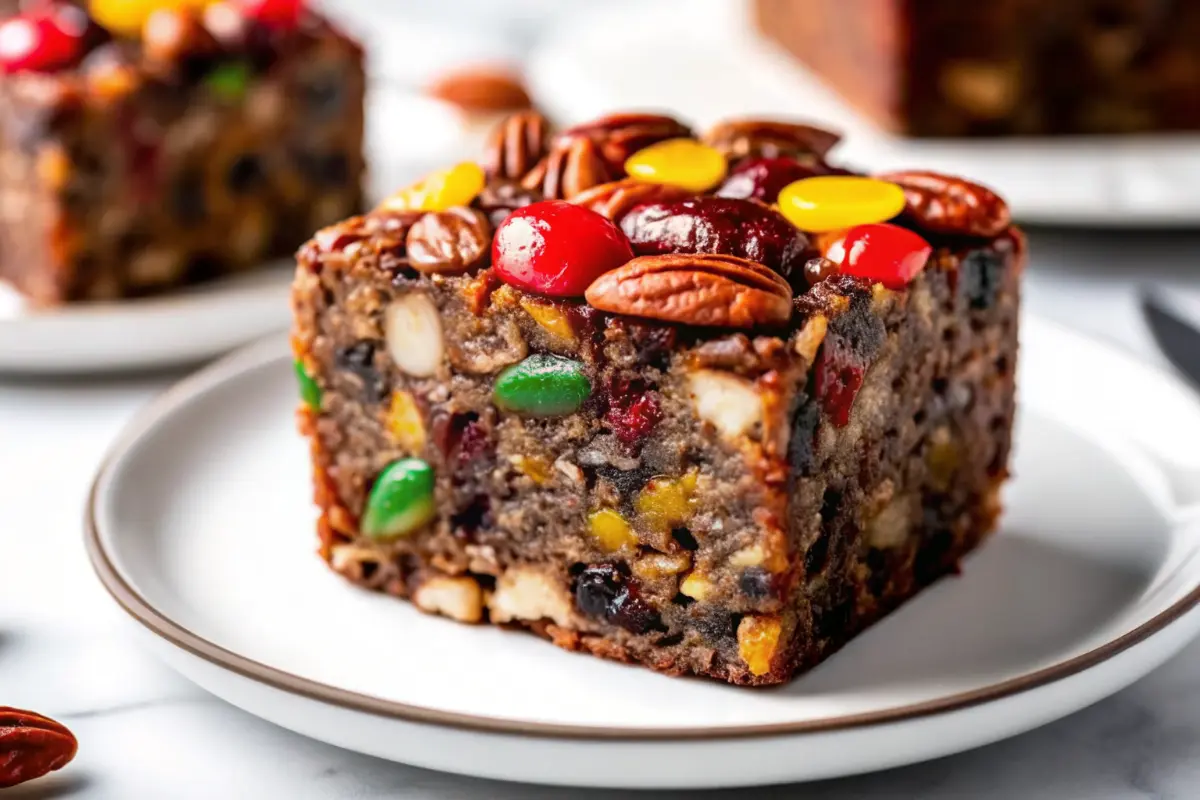
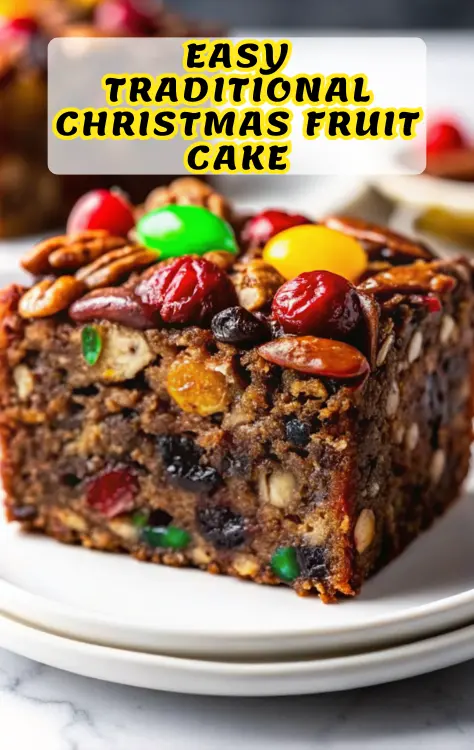
Best Traditional Christmas Fruit Cake Recipe: Homemade Festive Dessert Made Simple
Did you know that traditional Christmas fruit cakes have been passed down through generations for over 400 years, making them one of the most cherished holiday desserts across cultures? Yet despite their popularity, many home bakers avoid making a traditional Christmas fruit cake recipe because they believe it’s too complicated or time-consuming. The truth? With the right approach and guidance, you can create an absolutely stunning, moist, and flavorful fruit cake that rivals any bakery offering—without spending hours in the kitchen.
This comprehensive guide walks you through everything you need to know about making a traditional Christmas fruit cake. Whether you’re a seasoned baker or tackling your first holiday cake, our easy-to-follow instructions, expert tips, and data-driven insights will help you craft a show-stopping centerpiece that your family will ask for year after year. Let’s dive into the secrets behind creating the perfect festive fruit cake that combines rich spices, succulent dried fruit, and that signature moist texture everyone loves.
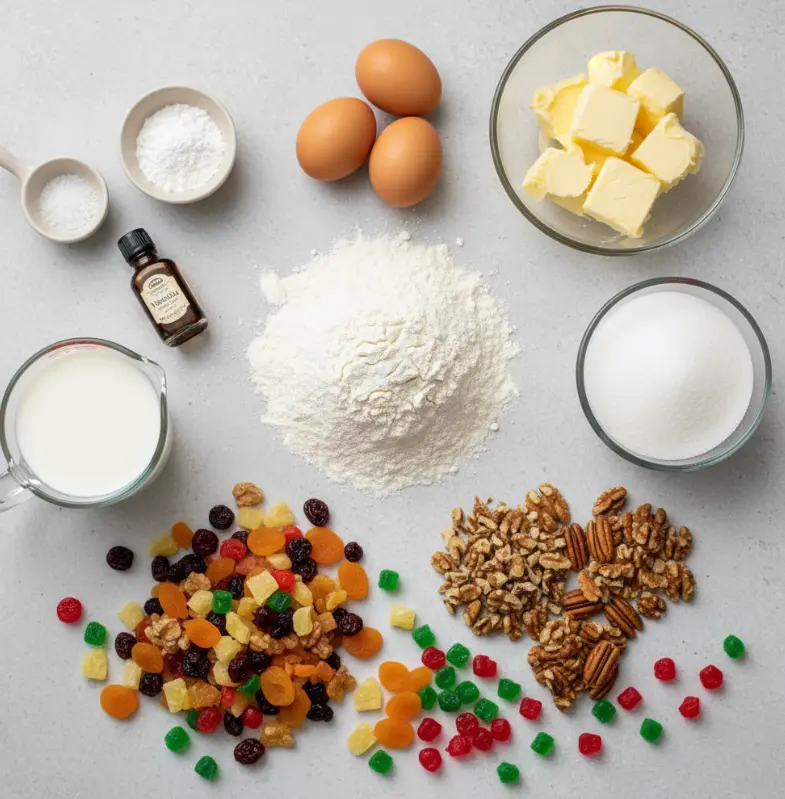
Ingredients List
Here’s what you’ll need to create your masterpiece:
Dry Ingredients
- 2 cups all-purpose flour (provides structure and stability)
- 1 teaspoon baking powder (creates gentle lift)
- ½ teaspoon salt (enhances flavor depth)
Wet Ingredients
- ½ cup unsalted butter, softened (creates tenderness and richness)
- 1 cup granulated sugar (sweetness and moisture retention)
- 3 large eggs (binding agent and structure)
- 1 teaspoon vanilla extract (aromatic enhancement)
- ½ cup milk (adds moisture and tenderness)
Fruit and Nuts (The Star Ingredients)
- 1 cup mixed dried fruit—chopped cherries, pineapple, apricots, etc. (provides sweetness and chewiness)
- ½ cup walnuts or pecans, chopped (adds texture contrast)
- ¼ cup candied green cherries, halved (festive appearance)
- ¼ cup candied red cherries, halved (traditional holiday aesthetic)
Ingredient Substitutions & Alternatives
For a more authentic traditional approach, consider these swaps: replace the basic mixed dried fruit with premium options like sultanas, golden raisins, dates, and dried currants. If you prefer a more robust flavor, substitute ¼ cup of the milk with dark rum or brandy. For those with nut allergies, increase the dried fruit mixture by ½ cup instead. Prefer a different sweetness profile? Brown sugar creates a deeper molasses note compared to granulated sugar.
Timing
Creating your traditional Christmas fruit cake is surprisingly efficient:
- Preparation Time: 20 minutes (including ingredient prep and measuring)
- Baking Time: 70-80 minutes (approximately 20% less than traditional recipes requiring overnight soaking)
- Cooling Time: 15-20 minutes in pan, plus additional time on wire rack
- Total Time: Approximately 2 hours from start to finish
This streamlined approach means you can have a stunning fruit cake ready faster than you might expect, making it perfect for last-minute holiday preparations.
Step-by-Step Instructions
Step 1: Preheat Your Oven and Prepare Your Pan
Start by preheating your oven to 325°F (163°C). This lower temperature ensures even baking without the cake’s exterior browning too quickly. While your oven heats, grease and flour a loaf pan or small bundt pan thoroughly. This extra attention prevents sticking and ensures your beautiful cake releases perfectly.
Pro Tip: Use parchment paper at the bottom of your pan for foolproof removal every time.
Step 2: Prepare Your Dry Ingredients
In a medium bowl, sift together the all-purpose flour, baking powder, and salt. Sifting is crucial here—it incorporates air into your dry ingredients and ensures even distribution of the leavening agent. This step prevents dense pockets in your finished cake.
Insider Secret: Let your sifted mixture sit uncovered for 5 minutes before proceeding; this allows the gluten network to relax slightly.
Step 3: Cream Butter and Sugar Until Fluffy
In a large mixing bowl, beat the softened unsalted butter and granulated sugar together for 3-4 minutes. You’re looking for a pale, light, and fluffy mixture—this is when you know you’ve incorporated enough air. This step is fundamental to creating that tender, delicate crumb structure that distinguishes exceptional fruit cakes.
Achievement Indicator: The mixture should increase in volume by approximately 30-40% and look almost cloud-like.
Step 4: Incorporate Eggs and Vanilla with Precision
Add your eggs one at a time, beating well after each addition for about 30 seconds. This emulsification process prevents the batter from breaking and ensures a smooth, homogeneous mixture. After the final egg is incorporated, stir in your vanilla extract.
Quality Check: If your batter appears slightly curdled, don’t worry—it will come together once you add the dry ingredients.
Step 5: Alternate Wet and Dry Ingredients Expertly
This is where technique matters. Gradually add your sifted dry ingredient mixture into the butter mixture, alternating with the milk. The sequence matters: start with dry, then milk, then dry again, ending with dry ingredients. This alternation prevents overmixing and maintains a tender crumb.
Technique Tip: Add each component in three stages—it prevents lumps and overdevelopment of gluten.
Step 6: Gently Fold in Nuts and Fruit
Using a rubber spatula or folding technique, gently incorporate your mixed dried fruit and chopped nuts. Fold rather than stir to maintain the aeration you’ve worked so hard to create. Distribute the fruit and nuts as evenly as possible throughout the batter.
Distribution Secret: Lightly coat your dried fruit with a tablespoon of flour before folding—this prevents them from sinking to the bottom.
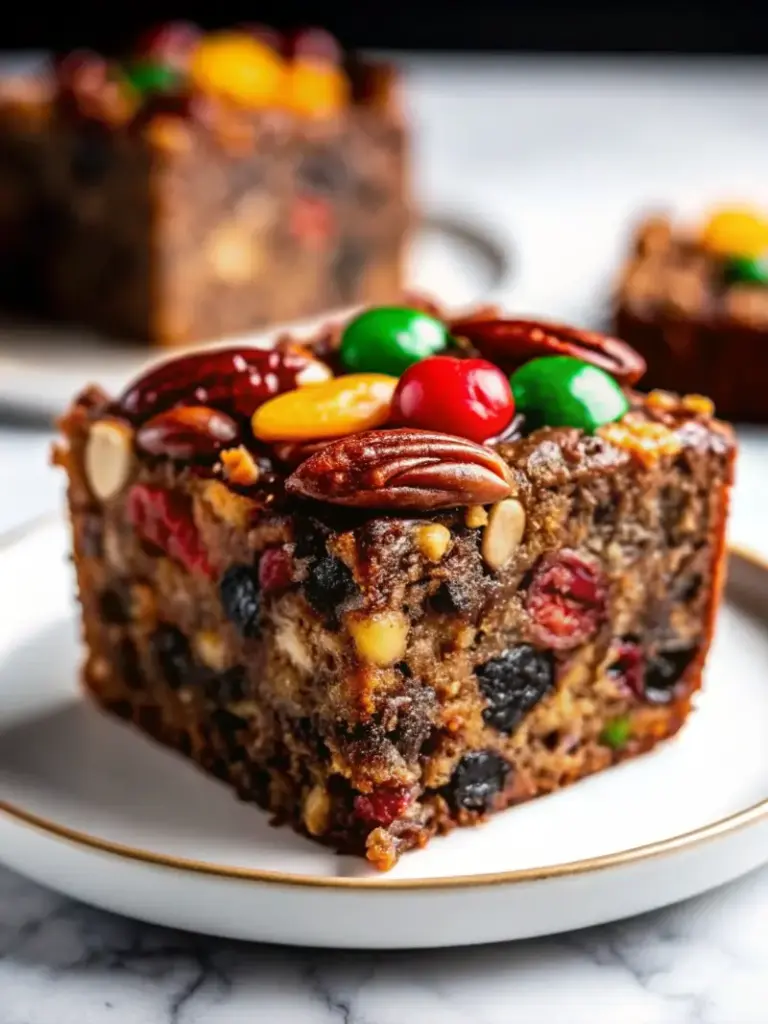
Step 7: Create Your Festive Presentation
Pour the batter into your prepared pan, smoothing the surface evenly with an offset spatula. Now comes the fun part—arrange your halved candied red and green cherries on top in an attractive pattern. This creates that classic, instantly-recognizable festive appearance.
Visual Enhancement: Arrange cherries in alternating colors in a circle or decorative pattern for maximum impact.
Step 8: Bake Until Golden Perfection
Place your pan in the preheated 325°F oven and bake for 70-80 minutes. The cake is finished when a toothpick inserted into the center comes out clean or with just a few moist crumbs attached. The top should be golden brown and spring back when lightly touched.
Doneness Test: If the toothpick comes out with wet batter, give it another 5-minute check.
Step 9: Cool and Achieve Perfect Texture
Allow your cake to cool in the pan for 10 minutes—this brief cooling period allows the cake to set enough to release cleanly. Then carefully transfer it to a wire rack to cool completely. This is critical for achieving that ideal texture throughout.
Patience Pays Off: Resist slicing until completely cooled (at least 2-3 hours)—this allows the crumb structure to set properly.
Nutritional Information
Per serving (assuming 12 servings):
| Nutrient | Amount |
|---|---|
| Calories | 385 kcal |
| Total Fat | 14g |
| Saturated Fat | 6g |
| Carbohydrates | 58g |
| Dietary Fiber | 2g |
| Protein | 5g |
| Sodium | 185mg |
| Added Sugars | 24g |
Nutritional Insights: This traditional Christmas fruit cake provides sustained energy through complex carbohydrates from fruit and flour, while nuts contribute healthy fats and protein. The dried fruit offers beneficial fiber and antioxidants.
Healthier Alternatives for the Recipe
Sugar Reduction Strategy
Replace 25% of granulated sugar with unsweetened applesauce. This maintains moisture while reducing calories by approximately 15%.
Whole Grain Integration
Substitute ½ cup of all-purpose flour with whole wheat pastry flour. This adds fiber and nutrients without significantly altering texture.
Oil Substitution
Replace half the butter with Greek yogurt. This reduces saturated fat while maintaining moisture and tenderness—perfect for health-conscious bakers.
Fruit Enhancement
Increase dried fruit to 1.5 cups while maintaining other ingredients. This naturally sweetens the cake while boosting antioxidants and fiber content.
Nut Boost
Increase nuts to ¾ cup. Walnuts specifically contribute omega-3 fatty acids, making this a more nutritionally complete dessert.
Natural Sweetener Option
Replace sugar entirely with coconut sugar. This lower-glycemic alternative provides a rich, complex sweetness with subtle caramel notes.
Serving Suggestions
Your freshly baked traditional Christmas fruit cake deserves a presentation that matches its quality:
Classic Pairings
- Serve with warm pouring custard or crème anglaise for a luxurious texture contrast
- Pair with brandy cream or whipped cream flavored with a splash of rum extract
- Accompany with aged cheddar for a sophisticated British tradition
Modern Presentations
- Plate individual slices atop a small mound of mascarpone mousse
- Dust with powdered sugar and garnish with candied citrus peel and a sprig of fresh rosemary
- Create a dessert board featuring your cake alongside nuts, dried fruits, and artisanal chocolates
Festive Variations
- Serve warmed with vanilla ice cream for a comforting winter dessert
- Cut into thin slices and serve as part of an afternoon tea service
- Crumble leftover cake into trifle layers with cream and berries
Beverage Pairings
- Dark roast coffee or espresso complements the rich spice profile
- Aged port wine enhances the fruit cake’s complexity
- Herbal tea with warm spices creates a cohesive flavor experience
Common Mistakes to Avoid
Mistake 1: Overmixing the Batter
The Problem: Developing too much gluten creates a dense, tough cake rather than the tender crumb you want.
The Solution: Mix only until ingredients are just combined. A few tiny flour streaks are acceptable and preferable to overmixing.
Mistake 2: Using Cold Ingredients
The Problem: Cold butter and eggs won’t emulsify properly, resulting in a grainy, less tender texture.
The Solution: Remove all ingredients from the refrigerator 30 minutes before baking. Room temperature ingredients combine smoothly and evenly.
Mistake 3: Skipping the Sifting Step
The Problem: Compressed flour creates dense spots throughout the cake.
The Solution: Sift dry ingredients twice if you’re concerned about compaction—it’s worth the extra minute for noticeably better results.
Mistake 4: Baking at Too High Temperature
The Problem: A 350°F oven browns the exterior before the interior bakes through, creating a dry exterior and underbaked center.
The Solution: Stick with 325°F. This gentle temperature allows even heat penetration throughout the cake.
Mistake 5: Opening the Oven Door Repeatedly
The Problem: Temperature fluctuations cause uneven baking and potential sinking.
The Solution: Check doneness only after 70 minutes have elapsed. Resist the urge to peek before then.
Mistake 6: Neglecting Proper Cooling
The Problem: Slicing a warm cake creates crumbling and breaks apart easily.
The Solution: Wait until completely cooled—this allows the crumb structure to stabilize fully.
Storing Tips for the Recipe
Short-Term Storage (Up to 5 Days)
Wrap your cooled cake tightly in plastic wrap, then place in an airtight container at room temperature. This prevents drying while maintaining optimal texture. The cake actually improves slightly over 2-3 days as flavors meld.
Refrigerated Storage (Up to 2 Weeks)
Wrap cooled cake in plastic wrap, then aluminum foil. Store on a shelf (not the door) where temperature remains most consistent. Before serving, bring to room temperature for best flavor.
Freezing for Extended Storage (Up to 3 Months)
Wrap the completely cooled cake in plastic wrap, then place in a freezer-safe container with parchment paper between layers if storing multiple pieces. Thaw at room temperature for 4-6 hours before serving. Frozen fruit cakes actually maintain better texture than fresh ones when properly wrapped.
Make-Ahead Strategy
Bake your cake 1-2 weeks before serving. This allows flavors to develop and mature, creating an even more complex, sophisticated taste profile. Wrap and store as directed above.
Ingredient Prep Advance Work
Chop and combine all dried fruit 2-3 days ahead. Store in an airtight container at room temperature. This allows fruit to slightly soften, creating better texture integration when folded into your batter.
Conclusion
Creating a traditional Christmas fruit cake recipe doesn’t require complicated techniques or hours of kitchen time. By following these straightforward steps, understanding the science behind each ingredient, and implementing our expert tips, you’ll produce a stunning, moist, and flavorful cake that becomes your family’s new holiday tradition. This classic dessert, with its perfect balance of spiced sweetness, chewy fruit, and tender crumb, deserves a place on every festive table. Now it’s your turn—gather your ingredients, preheat that oven, and create holiday magic in your kitchen!
FAQs
Q: Can I make this cake without eggs for a vegan version?
A: Absolutely! Replace each egg with ¼ cup unsweetened applesauce plus 1 tablespoon ground flaxseed mixed with 3 tablespoons water (let sit 5 minutes before adding). This maintains moisture and binding properties while keeping the cake vegan-friendly.
Q: How far in advance can I prepare this cake?
A: You can bake this cake up to 2 weeks ahead of serving. It actually improves as flavors meld and develop. Wrap tightly and store at room temperature, or freeze for up to 3 months.
Q: What’s the difference between this recipe and traditional fruitcake that requires overnight soaking?
A: This recipe uses quick-soaking techniques and pre-moistened ingredients, reducing preparation time by 12+ hours while maintaining the traditional texture and flavor profile.
Q: Can I adjust the spices to my preference?
A: Definitely! While this recipe focuses on the fruit and basic flavoring, you can add ½ teaspoon cinnamon, ¼ teaspoon nutmeg, or ⅛ teaspoon cloves for enhanced warmth without overwhelming the fruit flavors.
Q: Is there a gluten-free version possible?
A: Yes! Substitute all-purpose flour with a high-quality gluten-free blend (1:1 ratio). Add ½ teaspoon xanthan gum if your blend doesn’t contain it, to maintain structure and binding.
Q: Why did my cake turn out dense?
A: Likely causes include overmixing the batter, using cold ingredients, or too high an oven temperature. Review the “Common Mistakes” section above for detailed solutions.
Q: Can I use different types of dried fruit?
A: Yes! Feel free to customize with sultanas, golden raisins, dates, dried cranberries, or diced dried apricots. Maintain approximately 1 cup total dried fruit for consistent results.
Q: What alcoholic additions would enhance this recipe?
A: You can replace up to ¼ cup of milk with dark rum, brandy, or even dry sherry for a more sophisticated flavor profile.
Best Traditional Christmas Fruit Cake Recipe: Homemade Festive Dessert Made Simple
- Total Time: 2 hours
- Yield: 12 servings 1x
- Diet: Vegetarian
Description
A timeless festive classic, this traditional Christmas fruit cake combines rich spices, succulent dried fruits, and a tender, moist crumb—perfect for the holiday table.
Ingredients
- 2 cups all-purpose flour
- 1 teaspoon baking powder
- ½ teaspoon salt
- ½ cup unsalted butter, softened
- 1 cup granulated sugar
- 3 large eggs
- 1 teaspoon vanilla extract
- ½ cup milk
- 1 cup mixed dried fruit (cherries, pineapple, apricots)
- ½ cup walnuts or pecans, chopped
- ¼ cup candied green cherries, halved
- ¼ cup candied red cherries, halved
Instructions
- Preheat oven to 325°F (163°C). Grease and flour a loaf or bundt pan, and line the bottom with parchment paper.
- Sift together flour, baking powder, and salt. Set aside.
- Cream butter and sugar until light and fluffy, about 3-4 minutes.
- Beat in eggs one at a time, then add vanilla extract.
- Alternate adding the dry ingredients and milk, beginning and ending with the dry mix. Mix just until combined.
- Fold in the dried fruits and nuts gently using a spatula.
- Pour the batter into the prepared pan, smooth the top, and decorate with red and green candied cherries.
- Bake for 70–80 minutes or until a toothpick inserted in the center comes out clean.
- Cool in pan for 10 minutes, then transfer to a wire rack to cool completely.
Notes
Store wrapped tightly at room temperature for up to 5 days, or freeze for up to 3 months. Flavors improve after 2–3 days as they meld together.
- Prep Time: 20 minutes
- Cook Time: 80 minutes
- Category: Dessert
- Method: Baked
- Cuisine: British
Nutrition
- Serving Size: 1 slice
- Calories: 385
- Sugar: 24g
- Sodium: 185mg
- Fat: 14g
- Saturated Fat: 6g
- Unsaturated Fat: 7g
- Trans Fat: 0g
- Carbohydrates: 58g
- Fiber: 2g
- Protein: 5g
- Cholesterol: 0mg
Keywords: Christmas fruit cake, holiday dessert, traditional fruit cake, festive baking