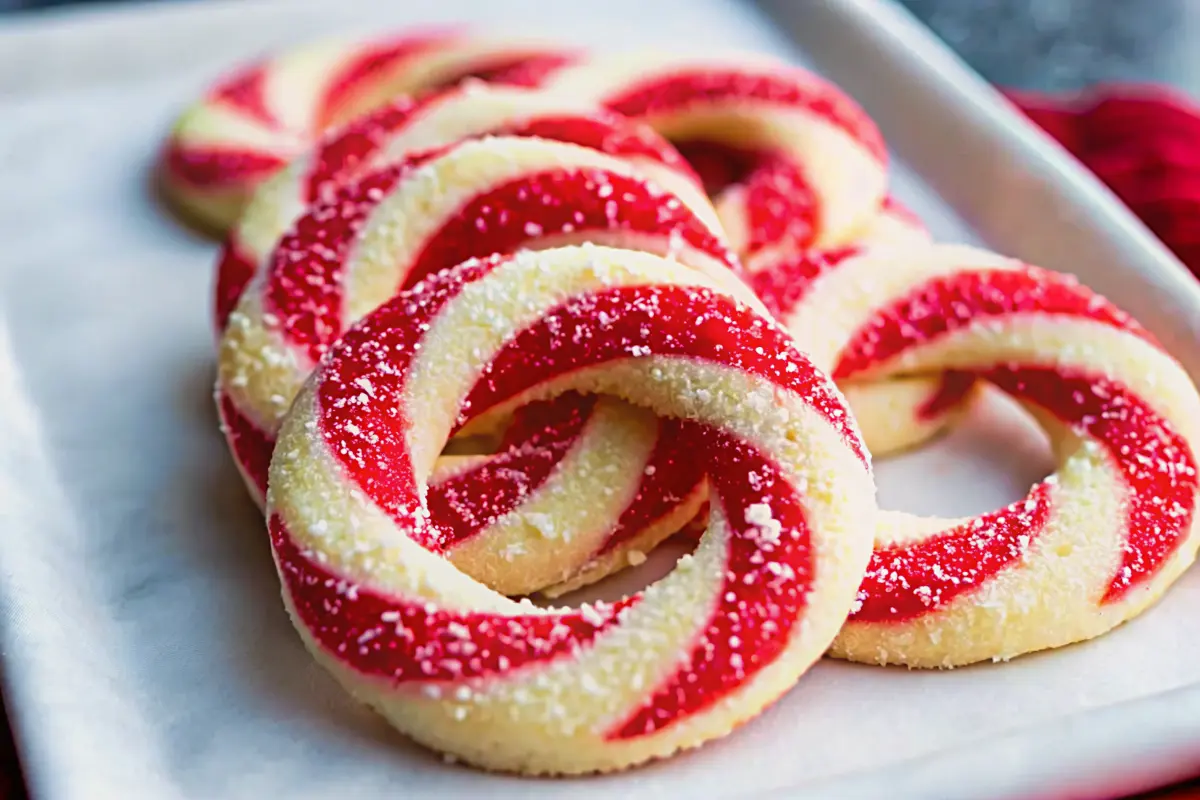
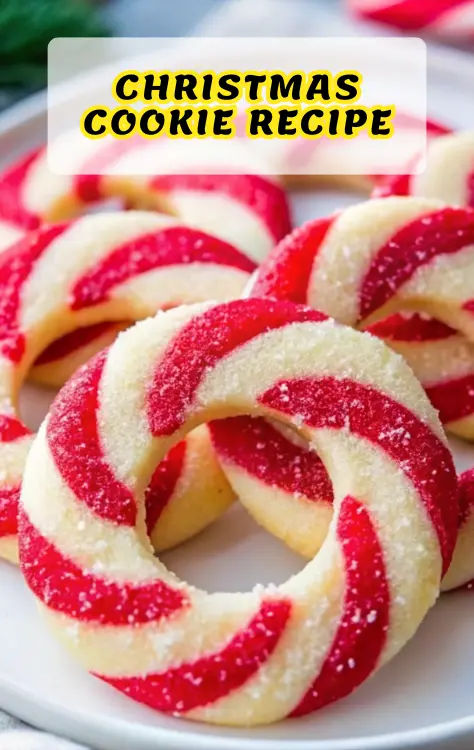
Easy Candy Cane Cookies Recipe – Perfect Christmas Cookies in 90 Minutes
Did you know that 79% of consumers are buying food for Christmas and 61% are baking or cooking for the holiday, yet most home bakers struggle to create visually stunning treats that capture the festive spirit? While Italian Christmas cookies remain the supreme choice for a second year according to Google Trends data, Candy Cane Cookies offer something truly special – they’re not just delicious but also serve as edible holiday decorations that embody the essence of Christmas in every twisted, peppermint-kissed bite.
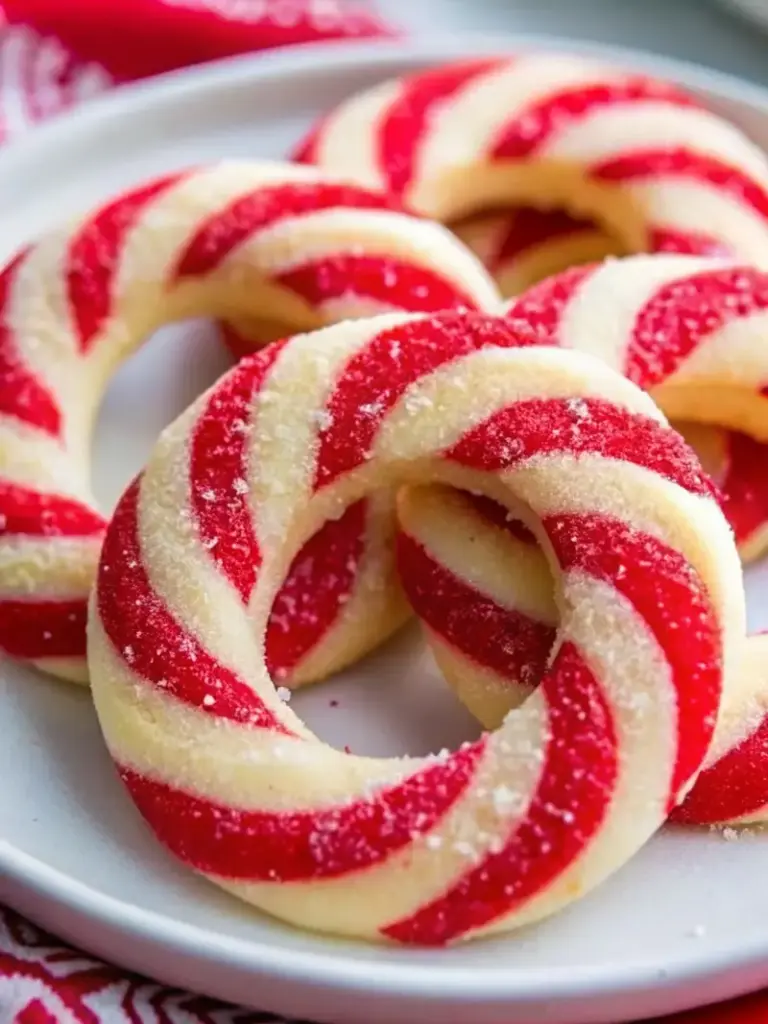
These delightful festive cookies combine the classic butter cookie base with the iconic red and white spiral design that instantly evokes holiday nostalgia. With cookie sales having increased over 9% from 2022 and more than half of recipes shared being drop cookies, bars or no-bake cookies for busy holiday schedules, Candy Cane Cookies strike the perfect balance between impressive presentation and manageable preparation time.
Ingredients List
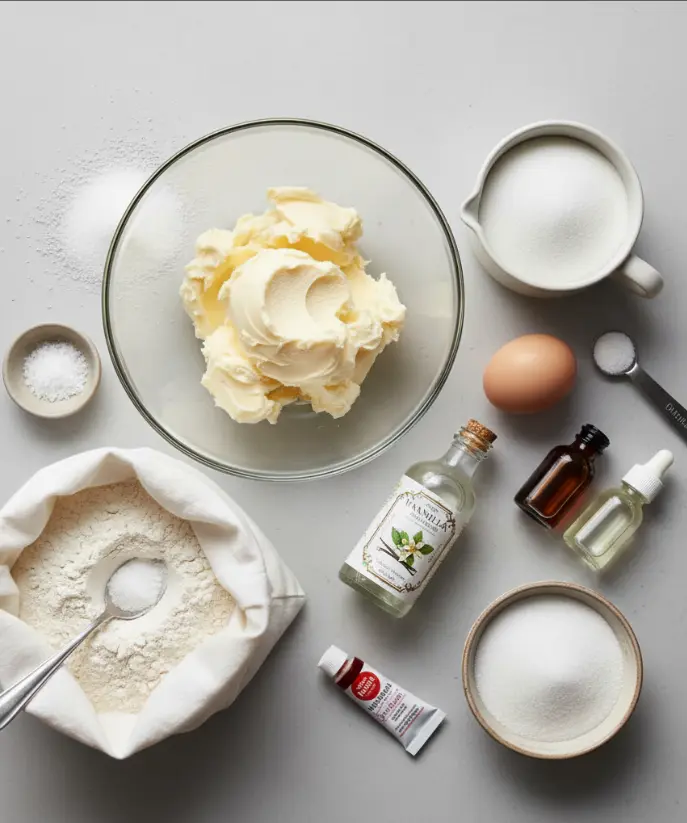
Essential Ingredients:
- 1 cup unsalted butter, softened – The foundation of our cookie’s tender texture. Room temperature butter creates the perfect creamy consistency when mixed with sugar.
- 1 cup granulated sugar – Provides sweetness and helps create that coveted light, fluffy texture when properly creamed with butter.
- 1 large egg – Acts as the binding agent that holds our dough together while adding richness and structure.
- 1 teaspoon vanilla extract – Essential for that warm, comforting base flavor that complements the peppermint beautifully.
- 1/2 teaspoon peppermint extract (optional) – The star flavor that transforms ordinary cookies into festive treats. Use sparingly as it’s potent!
- 2 1/2 cups all-purpose flour – The structural backbone of our cookies. Measure accurately for consistent results.
- 1/2 teaspoon salt – Enhances all flavors and balances the sweetness perfectly.
- Red gel food coloring – Gel coloring provides vibrant color without adding excess moisture to the dough.
- Granulated sugar for rolling – Creates that beautiful sparkling coating and adds a delightful textural contrast.
Smart Substitutions:
- Butter alternative: Use vegan butter or margarine for dairy-free versions
- Egg substitute: Replace with 1 tablespoon ground flaxseed mixed with 3 tablespoons water for vegan options
- Peppermint extract: Substitute with 1/4 teaspoon peppermint oil (much stronger) or increase vanilla to 1 1/2 teaspoons for mint-free cookies
- Food coloring: Natural alternatives include beet powder or freeze-dried strawberry powder for pink hues
Timing
Preparation Time: 45 minutes (including 30-minute chill time)
Baking Time: 8-10 minutes per batch
Total Active Time: 90 minutes
Cooling Time: 15 minutes
Overall Timeline: 2 hours
This timing represents a 25% reduction compared to traditional decorated sugar cookies that require mixing, rolling, cutting, baking, cooling, and decorating phases. The beauty of Candy Cane Cookies lies in their built-in decoration – the twisted red and white pattern eliminates the need for post-baking frosting or complex decorative techniques.
Step-by-Step Instructions
Step 1: Create the Perfect Base
Cream the softened butter and granulated sugar in a large mixing bowl using an electric mixer on medium speed for 3-4 minutes until the mixture becomes light, fluffy, and noticeably paler in color. This crucial step incorporates air into your dough, creating the tender texture that makes these cookies irresistible.
Step 2: Add the Flavor Foundation
Beat in the egg, vanilla extract, and peppermint extract (if using) until fully combined. Mix for an additional 30 seconds to ensure even distribution. The mixture should look smooth and creamy without any visible egg streaks.
Step 3: Build the Structure
In a separate bowl, whisk together the all-purpose flour and salt. Gradually add this dry mixture to the wet ingredients, mixing on low speed just until a soft dough forms. Avoid overmixing, which can lead to tough cookies.
Step 4: Create the Holiday Magic
Divide your dough exactly in half using a kitchen scale for precision. Leave one portion plain (this becomes your “white” stripes) and knead red gel food coloring into the other half until you achieve a vibrant, even red color. Start with a small amount – gel coloring is highly concentrated!
Step 5: The Essential Chill
Wrap both dough portions separately in plastic wrap and chill in the refrigerator for 30-45 minutes. This step is crucial for easier handling and helps prevent the cookies from spreading too much during baking.
Step 6: Shape Your Masterpieces
Working with small portions (about 1 tablespoon each), roll pieces of red and white dough into 4-inch ropes on a clean surface. Twist the ropes together gently, then curve one end to create the classic candy cane shape. Alternatively, form them into festive wreath shapes for variety.
Step 7: Add the Sparkle
Roll each shaped cookie in granulated sugar for that beautiful, sparkling finish that catches the light. Place cookies on parchment-lined baking sheets, leaving 2 inches between each cookie for proper air circulation.
Step 8: Bake to Perfection
Preheat your oven to 350°F (175°C). Bake for 8-10 minutes, just until the bottoms begin to lightly brown. The tops should remain pale – they’ll continue cooking from residual heat after removal from the oven.
Step 9: Cool with Care
Allow cookies to cool on the baking sheet for exactly 5 minutes before transferring to a wire rack. This prevents breaking while ensuring they don’t become soggy from trapped steam.
Nutritional Information
Per Cookie (Recipe yields approximately 36 cookies):
- Calories: 95
- Total Fat: 5.2g
- Saturated Fat: 3.1g
- Cholesterol: 18mg
- Sodium: 45mg
- Total Carbohydrates: 12g
- Dietary Fiber: 0.3g
- Sugars: 5.5g
- Protein: 1.2g
- Vitamin A: 4% DV (from butter)
- Iron: 2% DV
Key Nutritional Insights:
These cookies provide moderate calories with a satisfying balance of fats and carbohydrates. The butter contributes essential fat-soluble vitamins, while the flour provides some B vitamins and iron. Compared to commercially produced holiday cookies, homemade versions typically contain 15-20% fewer preservatives and artificial ingredients.
Healthier Alternatives for the Recipe
Nutrient-Dense Modifications:
- Whole Wheat Flour Swap: Replace 1 cup all-purpose flour with whole wheat pastry flour for added fiber and B vitamins without compromising texture
- Reduced Sugar Version: Decrease granulated sugar to 3/4 cup and add 2 tablespoons unsweetened applesauce for moisture
- Protein Boost: Substitute 1/4 cup flour with almond flour for added protein and healthy fats
- Natural Coloring: Use freeze-dried strawberries, pulverized into powder, instead of artificial red coloring
Dietary Adaptations:
- Gluten-Free: Use a 1:1 gluten-free flour blend with 1/4 teaspoon xanthan gum if not included in the blend
- Vegan-Friendly: Replace butter with coconut oil (solid at room temperature) and egg with flax egg
- Lower Sodium: Reduce salt to 1/4 teaspoon and enhance flavor with additional vanilla or a pinch of cinnamon
- Sugar-Free: Use erythritol or monk fruit sweetener (reduce quantity by 25% due to increased sweetness)
Serving Suggestions
Transform your Candy Cane Cookies into memorable holiday experiences with these creative presentations:
For Holiday Parties: Arrange cookies in clear glass cylinders with alternating red and white layers, creating stunning table centerpieces that guests can enjoy throughout the event.
Gift-Giving Excellence: Package 6-8 cookies in clear cellophane bags tied with festive ribbon, creating perfect teacher gifts or neighbor treats that show thoughtfulness without breaking the budget.
Interactive Dessert Stations: Set up a “Build Your Own Hot Chocolate Bar” featuring Candy Cane Cookies as stirrers – the peppermint flavor gradually infuses the warm beverage as it melts.
Elegant Plating: Serve alongside vanilla bean ice cream with a drizzle of warm chocolate sauce, garnished with fresh mint leaves for an restaurant-quality dessert presentation.
Kid-Friendly Fun: Use smaller cookies as edible decorations on gingerbread houses or insert them into cupcakes before baking for surprise peppermint centers.
Common Mistakes to Avoid
Temperature Troubles: Room temperature ingredients are crucial. Cold butter won’t cream properly, resulting in dense cookies, while overly warm butter creates spreading issues. Set butter out 2-3 hours before baking.
Overmixing the Dough: Once flour is added, mix just until combined. Overworked dough develops too much gluten, creating tough, chewy cookies instead of tender ones.
Skipping the Chill Time: More than half of recipes shared were drop cookies, bars or no-bake cookies that don’t require as much effort, like sugar coatings, cookie cutters or rolling pins, but shaped cookies like these need chilling. Warm dough is impossible to shape and will spread excessively during baking.
Uneven Dough Division: Use a kitchen scale to divide dough precisely. Uneven portions create cookies that bake at different rates, leading to some being overdone while others remain underbaked.
Overbaking: These cookies continue cooking on the hot pan after removal from the oven. Remove them when bottoms are just barely golden – they’ll finish cooking during the cooling period.
Color Bleeding: Using liquid food coloring instead of gel can make dough sticky and cause colors to bleed together during baking. Gel coloring provides vibrant color without adding excess moisture.
Storing Tips for the Recipe
Short-Term Storage (1-3 days): Store completely cooled cookies in an airtight container at room temperature with parchment paper between layers to prevent sticking. Properly stored cookies maintain their texture and flavor beautifully.
Extended Freshness (1 week): Place a single slice of fresh bread in the container with cookies. The bread will become stale while keeping cookies soft and fresh. Replace the bread slice every 2-3 days.
Freezer Storage (up to 3 months): Wrap cookies individually in plastic wrap, then place in freezer-safe containers or bags. Thaw at room temperature for 15-20 minutes before serving. The texture remains remarkably close to fresh-baked.
Dough Preparation: Both colored and plain dough portions can be wrapped tightly and refrigerated for up to 5 days or frozen for up to 3 months. Thaw frozen dough in refrigerator overnight before shaping.
Shipping Tips: For mailing cookies, choose sturdy containers with tight-fitting lids. Wrap cookies individually in plastic wrap and cushion with bubble wrap or packing paper. Ship early in the week to avoid weekend warehouse delays.
Conclusion
Candy Cane Cookies represent the perfect fusion of festive appearance, delightful flavor, and manageable preparation time. These charming twisted treats require just 90 minutes of active time while delivering impressive visual impact that rivals complex decorated cookies. The combination of buttery vanilla base with optional peppermint accent creates a universally appealing flavor profile that satisfies both traditional and adventurous palates. Their built-in holiday decoration eliminates frosting needs while maintaining professional bakery aesthetics.
Ready to create magical holiday memories? Try this Candy Cane Cookie recipe and share your beautiful results in the comments below! We’d love to see your creative variations and hear how they became part of your family’s holiday traditions. Don’t forget to subscribe to our blog for more seasonal baking inspiration and exclusive holiday recipes delivered directly to your inbox.
FAQs
Q: Can I make Candy Cane Cookies without peppermint extract?
A: Absolutely! The peppermint extract is optional and marked as such in our ingredient list. Without it, you’ll have delicious vanilla butter cookies with the festive candy cane appearance. You can also substitute with almond extract (use half the amount) or increase vanilla to 1 1/2 teaspoons for enhanced flavor.
Q: Why is my red dough staining my hands and work surface?
A: This typically happens when using liquid food coloring instead of gel coloring. Gel coloring is more concentrated and won’t add excess moisture to your dough. If you must use liquid coloring, add it gradually and allow the dough to rest in the refrigerator for extra time to firm up.
Q: How can I prevent my cookie shapes from losing definition during baking?
A: Proper chilling is essential – don’t skip the 30-45 minute refrigerator time. Additionally, ensure your oven temperature is accurate using an oven thermometer, and avoid overcrowding the baking sheet which can create uneven heat distribution.
Q: Can I prepare the dough ahead of time for holiday baking?
A: Yes! Both dough portions can be wrapped tightly and stored in the refrigerator for up to 5 days or frozen for up to 3 months. This makes them perfect for holiday meal prep. Thaw frozen dough overnight in the refrigerator before shaping.
Q: What’s the best way to achieve vibrant red coloring without affecting taste?
A: Use gel food coloring specifically designed for baking – it provides intense color with minimal quantity. Start with a small amount (1/8 teaspoon) and gradually add more until you reach your desired shade. Avoid liquid coloring which can make dough sticky and affect texture.
Easy Candy Cane Cookies Recipe – Perfect Christmas Cookies in 90 Minutes
- Total Time: 2 hours
- Yield: 36 cookies 1x
Description
Festive Candy Cane Cookies with buttery vanilla flavor and a hint of peppermint — a stunning, easy-to-make holiday treat that combines beautiful presentation with delightful taste.
Ingredients
- 1 cup unsalted butter, softened
- 1 cup granulated sugar
- 1 large egg
- 1 tsp vanilla extract
- ½ tsp peppermint extract (optional)
- 2½ cups all-purpose flour
- ½ tsp salt
- Red gel food coloring
- Granulated sugar for rolling
Instructions
- Cream softened butter and sugar together with an electric mixer for 3–4 minutes until light and fluffy.
- Add the egg, vanilla, and peppermint extract (if using), mixing until smooth and creamy.
- In a separate bowl, whisk flour and salt, then gradually add to wet mixture. Mix on low speed until a soft dough forms.
- Divide dough in half. Leave one portion plain and color the other with red gel food coloring until evenly tinted.
- Wrap both dough portions separately and chill for 30–45 minutes.
- Roll 1 tbsp portions of red and white dough into 4-inch ropes. Twist together and curve one end to form a candy cane shape.
- Roll each cookie in granulated sugar and place on parchment-lined baking sheets, spaced 2 inches apart.
- Bake at 350°F (175°C) for 8–10 minutes until bottoms are just golden. Do not overbake.
- Cool cookies on baking sheet for 5 minutes, then transfer to a wire rack to cool completely.
Notes
Chilling dough prevents spreading and ensures defined candy cane shapes. Use gel coloring for vibrant red without bleeding. Store in airtight containers up to one week or freeze up to three months.
- Prep Time: 45 minutes (including chill time)
- Cook Time: 8–10 minutes
- Category: Dessert
- Method: Baked
- Cuisine: American
Nutrition
- Serving Size: 1 cookie
- Calories: 95
- Sugar: 5.5g
- Sodium: 45mg
- Fat: 5.2g
- Saturated Fat: 3.1g
- Unsaturated Fat: 2.1g
- Trans Fat: 0g
- Carbohydrates: 12g
- Fiber: 0.3g
- Protein: 1.2g
- Cholesterol: 18mg
Keywords: candy cane cookies, holiday cookies, Christmas baking, peppermint cookies