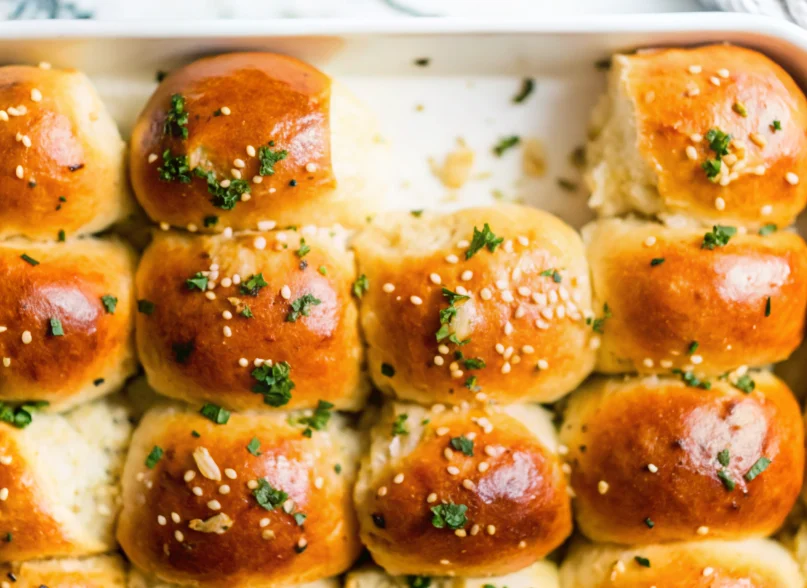
Did you know that despite social conversations about garlic decreasing by 13.92% over the past year, 54.86% of restaurants continue to offer garlic dishes? This statistic reveals something profound about our enduring love affair with garlic-flavored foods. Among these beloved creations, garlic bread rolls stand out as the perfect marriage of comfort and sophistication, transforming ordinary dinner rolls into restaurant-quality masterpieces that elevate any meal. Whether you’re planning a holiday feast or simply want to add warmth to your weeknight dinners, these homemade garlic bread rolls deliver soft and fluffy dinner rolls brushed with delicious garlic herb butter that make a perfect side to any dish.
The beauty of garlic bread rolls lies in their versatility and the incredible aroma that fills your kitchen as they bake. Unlike traditional garlic bread made from sliced loaves, these individual rolls offer portion control and an elegant presentation that’s perfect for entertaining. With the global bread and rolls market valued at nearly USD 221.87 billion in 2024 and projected to grow at a CAGR of 2.2% to reach USD 270.33 billion by 2034, it’s clear that homemade bread products continue to capture hearts and homes worldwide.
Table of Contents
Ingredients List
Creating perfect garlic bread rolls requires high-quality ingredients that work in harmony to deliver exceptional flavor and texture. Here’s everything you’ll need:
For the Rolls:
- 4 1/2 tablespoons unsalted butter (European-style butter like Kerrygold adds exceptional richness)
- 2 tablespoons minced fresh garlic (avoid pre-minced for maximum flavor impact)
- 3 1/2 cups + 1 tablespoon all-purpose flour (or substitute with bread flour for extra chewiness)
- 3 tablespoons chopped fresh parsley (substitute with fresh thyme or oregano if preferred)
- 1 tablespoon granulated sugar (honey or maple syrup work beautifully for deeper sweetness)
- 2 1/4 teaspoons instant yeast (active dry yeast requires activation—see notes)
- 1 teaspoon fine sea salt (enhances all flavors without overpowering)
- 1 cup whole or 2% milk, warmed to 110°F (full-fat milk creates the softest texture)
- 1 large egg, room temperature (binds ingredients and adds golden color)
- 1 beaten egg for brushing (creates beautiful golden tops)
For the Garlic Butter Finish:
- 2 tablespoons unsalted butter
- 1 tablespoon minced fresh garlic
- 1 tablespoon chopped fresh parsley
- Flaky sea salt for finishing (Maldon or similar for texture contrast)
Smart Substitutions: Replace all-purpose flour with whole wheat for fiber, use plant-based milk and vegan butter for dairy-free versions, or add 1/4 cup grated Parmesan for extra richness.
Timing
Understanding the timeline for these garlic bread rolls helps you plan perfectly for any meal:
Preparation Time: 25 minutes (including ingredient prep and initial mixing)
Rising Time: 1-2 hours (approximately 25% faster than traditional bread recipes)
Baking Time: 20-30 minutes
Total Time: 2 hours 45 minutes to 3 hours 15 minutes
This timing is notably efficient compared to traditional bread recipes, which often require 4+ hours from start to finish. The streamlined process makes these rolls accessible for both weeknight dinners and special occasions.
Step-by-Step Instructions
Step 1: Prepare Your Workspace and Pan
Lightly butter a 9×13-inch baking pan, ensuring even coverage on the bottom and sides. This prevents sticking and adds an extra layer of buttery flavor to the roll bottoms.
Step 2: Create the Aromatic Garlic Base
In a small saucepan, melt 4 1/2 tablespoons of butter over medium-low heat. Add 2 tablespoons of minced garlic and cook for 1-2 minutes, stirring constantly until the garlic becomes fragrant and just begins to sizzle. The key is cooking just until aromatic—overcooked garlic becomes bitter. Remove from heat and let cool while measuring other ingredients.
Step 3: Combine Dry Ingredients
In your stand mixer bowl, whisk together flour, parsley, sugar, yeast, and salt. This ensures even distribution before adding wet ingredients, preventing lumps and ensuring consistent flavor throughout.
Step 4: Form the Dough
Add warmed milk, room-temperature egg, and the cooled garlic butter to the dry ingredients. Using the dough hook attachment, knead on low speed for 10-12 minutes until the dough appears smooth and feels soft and tacky (not sticky). If the dough clings excessively to your hands, add flour one tablespoon at a time.
Step 5: Shape Individual Rolls
Transfer dough to a lightly floured surface and divide into 12 equal portions (approximately 67 grams each for consistency). Shape each portion into a smooth ball by gently rolling in your palm, then pinching the bottom seam closed. Place shaped rolls in the prepared pan, leaving slight space between each for expansion.
Step 6: First Rise
Cover the pan with plastic wrap or a clean kitchen towel. Place in a warm, draft-free location and let rise until doubled in size, typically 1-2 hours. A slightly warm oven (turned off) or the top of your refrigerator works perfectly.
Step 7: Bake to Golden Perfection
Preheat your oven to 350°F (180°C). Brush the risen rolls with beaten egg wash for beautiful color. Bake for 20-30 minutes until tops are golden brown and the internal temperature reaches 190°F.
Step 8: Apply Garlic Butter Finish
While rolls bake, prepare the finishing butter by melting 2 tablespoons butter with 1 tablespoon minced garlic for 1-2 minutes until fragrant. Stir in fresh parsley. Immediately brush the hot rolls with this mixture and sprinkle with flaky sea salt. Serve warm for maximum impact.
Nutritional Information
Understanding the nutritional profile helps you enjoy these rolls as part of a balanced diet:
Per Roll (Makes 12):
- Calories: 87kcal
- Carbohydrates: 4g
- Protein: 2g
- Total Fat: 7g
- Saturated Fat: 4g
- Fiber: 1g
- Sodium: 210mg
- Sugar: 2g
Key Nutrients:
- Vitamin A: 355IU (supports vision and immune function)
- Potassium: 73mg (heart health)
- Cholesterol: 32mg
These rolls provide moderate calories while delivering satisfying carbohydrates and essential nutrients. The fresh garlic contributes antioxidants and potential cardiovascular benefits.
Healthier Alternatives for the Recipe
Transform these indulgent rolls into nutritious options without sacrificing flavor:
Flour Swaps: Replace half the all-purpose flour with whole wheat pastry flour for increased fiber and nutrients. For gluten-free versions, use a 1:1 gluten-free flour blend, though texture will be slightly denser.
Fat Modifications: Substitute half the butter with olive oil for heart-healthy monounsaturated fats. Greek yogurt can replace some butter while adding protein and probiotics.
Sugar Alternatives: Use honey or pure maple syrup instead of granulated sugar for natural sweeteners with additional minerals. Reduce to 2 teaspoons since liquid sweeteners are more concentrated.
Dairy-Free Adaptations: Replace milk with unsweetened oat or almond milk, and use plant-based butter. The rolls will be slightly less rich but remain delicious.
Protein Boost: Add 2 tablespoons of vital wheat gluten or protein powder to increase protein content, perfect for active individuals.
Herb Enhancements: Incorporate dried Italian herbs, rosemary, or oregano into the dough for additional antioxidants and flavor complexity.
Serving Suggestions
Maximize the impact of your garlic bread rolls with these creative serving ideas:
Classic Pairings: Serve alongside hearty soups like tomato basil, minestrone, or creamy potato leek. The rolls’ buttery richness complements acidic tomato-based dishes beautifully.
Pasta Companions: These rolls shine next to spaghetti carbonara, fettuccine Alfredo, or rustic ragu. Use them to soak up every drop of sauce.
Holiday Centerpieces: Present on a wooden board with compound butter varieties—herb butter, sun-dried tomato butter, or honey cinnamon butter for versatility.
Appetizer Transformation: Slice rolls horizontally and toast lightly for garlic bread bruschetta bases. Top with fresh tomatoes, basil, and balsamic glaze.
Breakfast Innovation: Day-old rolls make exceptional French toast or bread pudding bases, absorbing custard beautifully while maintaining structure.
International Flair: Serve with Italian antipasto platters, alongside olive tapenade and aged cheeses, or with Mediterranean dips like hummus and baba ganoush.
Common Mistakes to Avoid
Learn from these typical pitfalls to ensure perfect rolls every time:
Over-Flouring the Dough: Adding excess flour creates dense, dry rolls. The dough should feel soft and slightly tacky, not completely dry. Trust the process—sticky dough often yields the softest results.
Incorrect Water Temperature: Water above 115°F kills yeast, while water below 100°F won’t activate it properly. Use a thermometer for accuracy, or test on your wrist—it should feel warm but not hot.
Insufficient Rising Time: Rushing the rising process produces dense rolls. Using too much flour, expired yeast, not kneading the dough long enough, and not letting the dough rise until doubled in size can all result in dense bread rolls. Be patient and watch for size doubling rather than relying solely on timing.
Overbaking: Golden brown tops are perfect—dark brown means overcooked. Check rolls at 20 minutes and continue baking only if needed.
Skipping the Final Butter Brush: Applying garlic butter immediately after baking is crucial for flavor penetration and soft crust development.
Using Old Yeast: Always check yeast expiration dates. Test questionable yeast by proofing in warm water with a pinch of sugar—it should foam within 5 minutes.
Storing Tips for the Recipe
Proper storage ensures your garlic bread rolls remain fresh and delicious:
Short-Term Storage: These garlic bread rolls are best served warm! Before serving, cover the rolls with foil and bake them at 350°F until warmed through. You can also pop them in the microwave for 20-30 seconds until warm. Store at room temperature in an airtight container or zip-lock bag for 2-3 days maximum.
Freezer Storage: Store them in an airtight container in the freezer for 2-3 months. Cool completely before freezing to prevent ice crystal formation. Wrap individually in plastic wrap, then place in freezer bags for best quality.
Make-Ahead Strategy: After shaping rolls and placing in the pan, cover tightly with plastic wrap and refrigerate overnight. The next morning, remove from refrigeration and allow to come to room temperature and double in size before baking—this may take 2-3 hours.
Reheating Perfection: For frozen rolls, thaw at room temperature for 1 hour, then warm in a 350°F oven for 5-8 minutes. Fresh rolls benefit from a light misting with water before reheating to restore moisture.
Professional Tip: Store garlic butter separately and brush onto reheated rolls for the freshest flavor impact.
Conclusion
These homemade garlic bread rolls represent the perfect intersection of comfort food tradition and culinary excellence. By combining aromatic fresh garlic, quality butter, and proven bread-making techniques, you create rolls that transform ordinary meals into memorable dining experiences. The 2-3 hour investment yields 12 spectacular rolls that deliver restaurant-quality results in your own kitchen.
Ready to create magic in your kitchen? Try this recipe today and share your results in our comments section below! We’d love to see photos of your beautiful golden rolls and hear about your favorite serving combinations. Don’t forget to subscribe to our newsletter for more tested recipes, baking tips, and seasonal cooking inspiration delivered directly to your inbox. Your family and friends will thank you for mastering these irresistible garlic bread rolls!
FAQs
Q: Can I make these rolls without a stand mixer?
A: Absolutely! Mix ingredients in a large bowl and knead by hand on a floured surface for 12-15 minutes until smooth and elastic. The dough is quite manageable for hand kneading.
Q: Why are my rolls dense instead of fluffy?
A: Dense rolls typically result from expired yeast, insufficient kneading, over-flouring, or inadequate rising time. Ensure your yeast is fresh and allow full doubling time regardless of the clock.
Q: Can I prepare the dough in advance?
A: Yes! After the first rise and shaping, cover tightly and refrigerate up to 24 hours. Allow 2-3 hours at room temperature to come to double size before baking.
Q: What’s the best way to reheat day-old rolls?
A: Wrap in damp paper towels and microwave for 20-30 seconds, or wrap in foil and warm in a 350°F oven for 5-8 minutes until heated through.
Q: Can I freeze the unbaked dough?
A: Freeze shaped rolls on a baking sheet until solid, then transfer to freezer bags. Thaw, rise until doubled, then bake as directed—add 3-5 extra minutes to baking time.
Q: How do I know when the rolls are perfectly baked?
A: Look for golden brown tops and an internal temperature of 190°F. The rolls should sound hollow when tapped on the bottom.

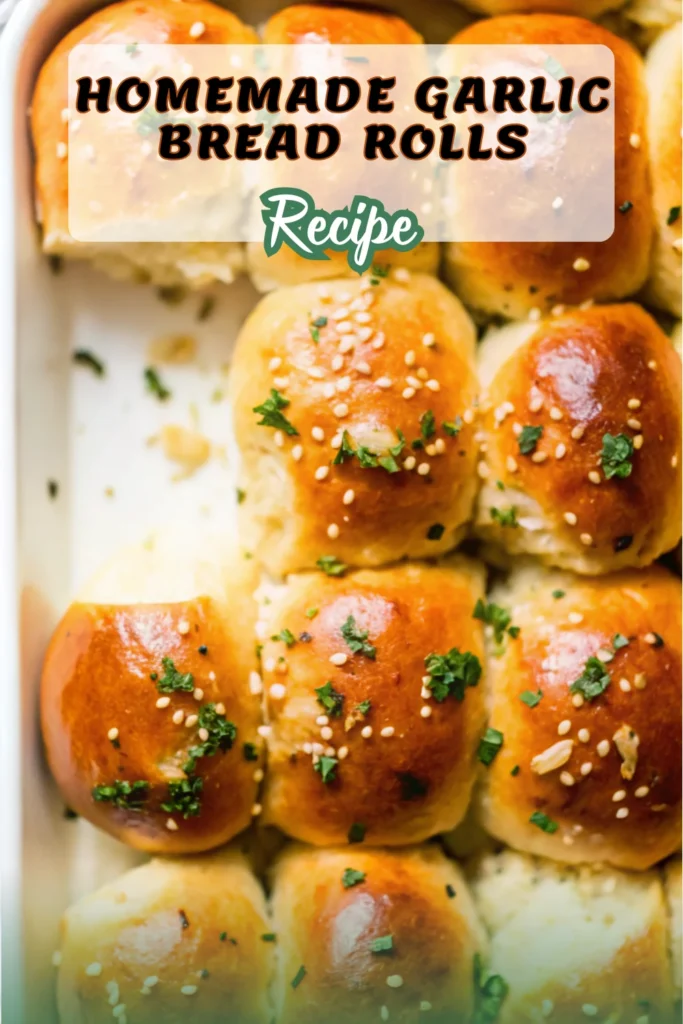
The Ultimate Guide to Homemade Garlic Bread Rolls: Soft, Fluffy, and Irresistibly Buttery
- Total Time: 3 hours
- Yield: 12 rolls 1x
Description
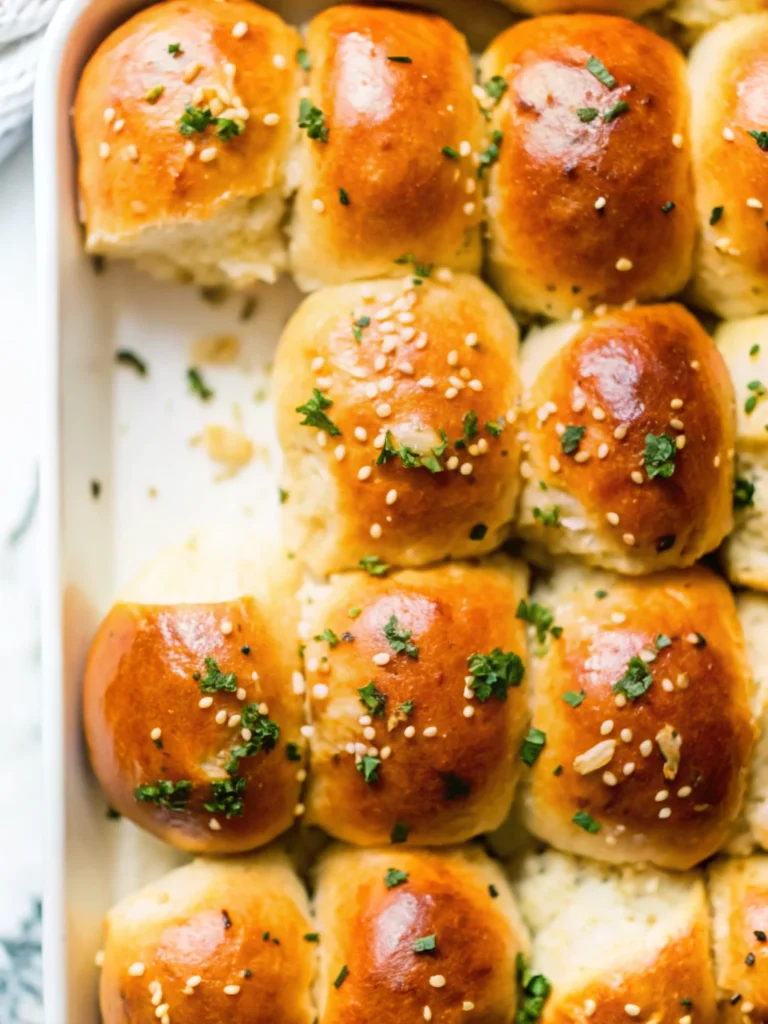
These homemade garlic bread rolls are soft, fluffy, and brushed with garlic herb butter. Perfect as a comforting side dish or elegant dinner accompaniment, they’re irresistible from the first bite.
Ingredients
- 4 1/2 tbsp unsalted butter
- 2 tbsp minced fresh garlic
- 3 1/2 cups + 1 tbsp all-purpose flour
- 3 tbsp chopped fresh parsley
- 1 tbsp granulated sugar
- 2 1/4 tsp instant yeast
- 1 tsp fine sea salt
- 1 cup warm whole or 2% milk (110°F)
- 1 large egg, room temperature
- 1 beaten egg (for brushing)
- 2 tbsp unsalted butter (for garlic butter finish)
- 1 tbsp minced garlic (for garlic butter finish)
- 1 tbsp chopped parsley (for garlic butter finish)
- Flaky sea salt (for finishing)
Instructions
- Butter a 9×13-inch baking pan.
- Melt 4 1/2 tbsp butter with 2 tbsp garlic for 1–2 minutes. Remove from heat to cool.
- In mixer bowl, whisk flour, parsley, sugar, yeast, and salt.
- Add milk, egg, and garlic butter. Knead with dough hook 10–12 minutes until smooth and tacky.
- Divide dough into 12 equal portions, shape into balls, and place in pan.
- Cover and let rise 1–2 hours until doubled in size.
- Preheat oven to 350°F (180°C). Brush rolls with beaten egg and bake 20–30 minutes until golden brown and internal temperature reaches 190°F.
- Melt 2 tbsp butter with 1 tbsp garlic. Stir in parsley. Brush over hot rolls and sprinkle with flaky sea salt. Serve warm.
Notes
Dough should feel soft and slightly tacky, not dry. Always check yeast freshness. Brush garlic butter immediately after baking for best flavor.
- Prep Time: 25 minutes
- Cook Time: 30 minutes
- Category: Bread
- Method: Baked
- Cuisine: American
Nutrition
- Serving Size: 1 roll
- Calories: 87
- Sugar: 2g
- Sodium: 210mg
- Fat: 7g
- Saturated Fat: 4g
- Unsaturated Fat: 3g
- Trans Fat: 0g
- Carbohydrates: 4g
- Fiber: 1g
- Protein: 2g
- Cholesterol: 32mg
Keywords: garlic bread rolls, homemade rolls, soft fluffy bread, garlic butter rolls