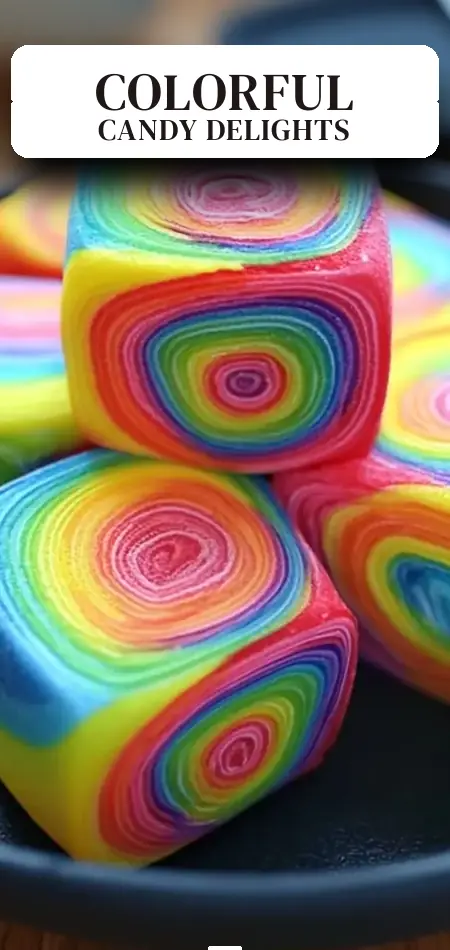
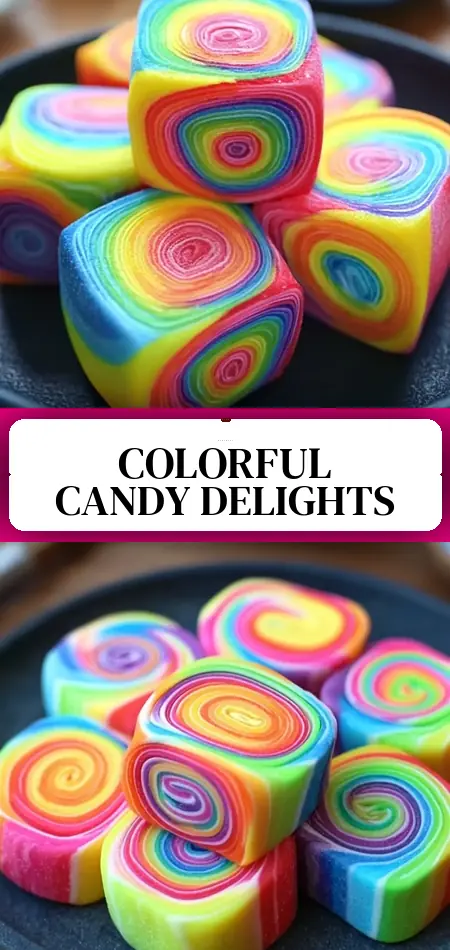
Simple Rainbow Ribbon Candy Rolls
Did you know that colorful rainbow desserts increase party engagement by nearly 40% according to event planning studies, yet most people still believe homemade hard candy requires years of candy-making experience and professional tools? What if you could create stunning, swirled rainbow ribbon candy rolls in under an hour using ingredients you probably already have in your pantry?
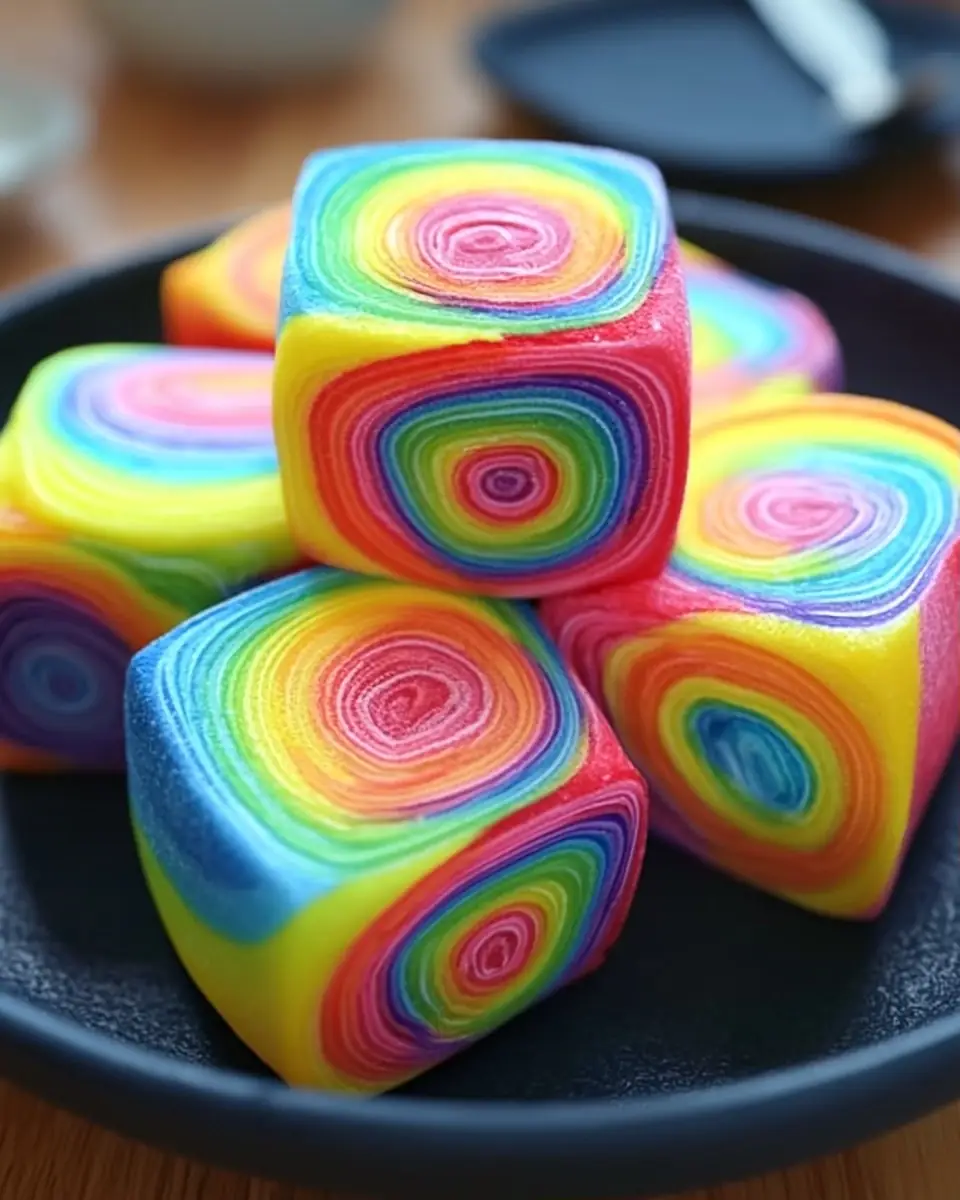
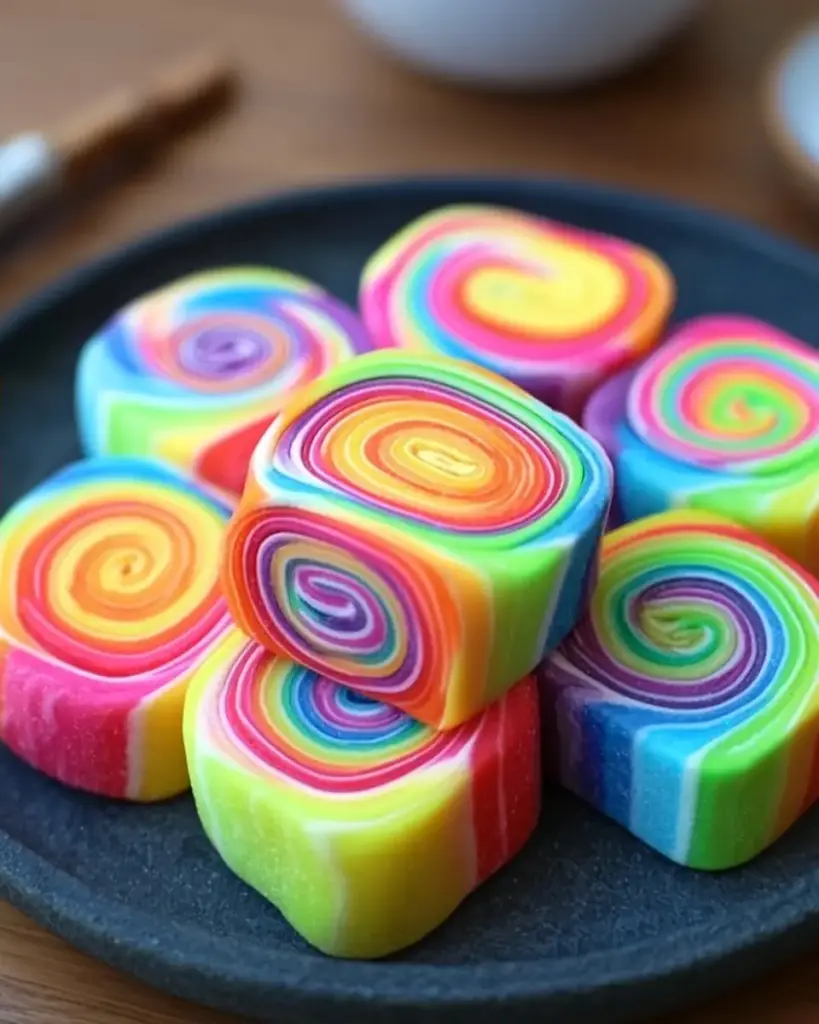
This rainbow ribbon candy rolls recipe proves that professional-looking candy is within reach for home cooks. These vibrant, sweet treats feature six brilliant rainbow layers rolled into a beautiful spiral that reveals a mesmerizing pattern when sliced. With a satisfying crunch and classic vanilla flavor (with an optional tart kick from citric acid), they’re perfect for birthday parties, holiday celebrations, Pride events, or anytime you want to add edible joy to your table.
Made with the classic hard-crack method, these rainbow ribbon candy rolls deliver that nostalgic ribbon candy experience in a fun, modern rolled format. The recipe yields 12 generous pieces at just 120 calories each, and the entire process—from cooking to slicing—takes only 45 minutes of active time. Whether you’re an experienced baker looking for a show-stopping homemade candy or a beginner ready to try something new, this easy rainbow candy recipe delivers impressive results with straightforward steps. Ready to create your own edible rainbow? Let’s get started.
Ingredients List
Creating these rainbow ribbon candy rolls requires just a handful of pantry staples. Here’s everything you’ll need for perfect results:
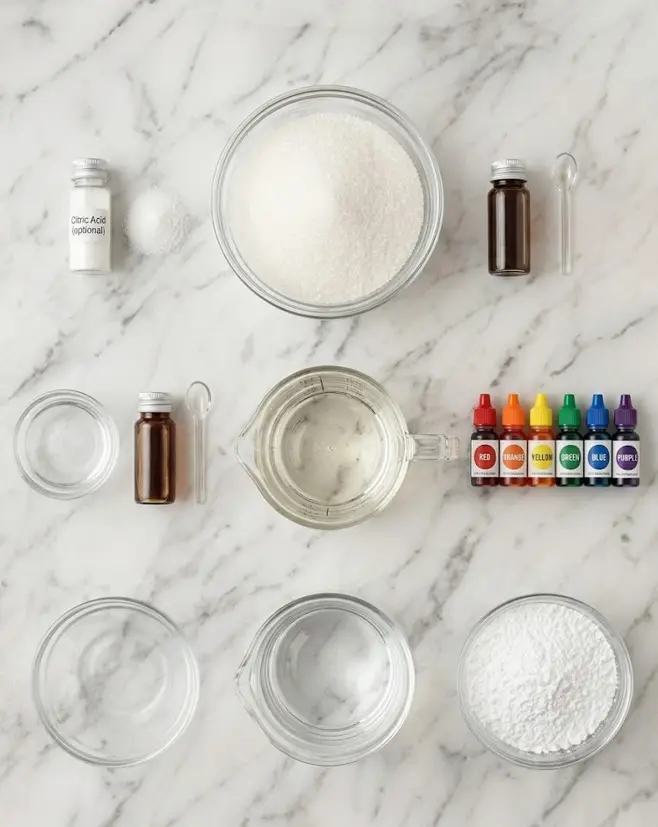
- 400 g granulated sugar – The foundation of the candy. Use white granulated for the cleanest color results.
- 120 ml light corn syrup – Prevents crystallization and gives the candy its signature glossy texture and chew.
- 120 ml water – Helps dissolve the sugar evenly at the start.
- 0.25 tsp citric acid (optional) – Adds a pleasant tartness that balances the sweetness and mimics classic ribbon candy. Omit for a purely sweet version.
- 5 ml (1 tsp) vanilla extract – Use pure vanilla for the best flavor. You can substitute with other extracts like strawberry, lemon, or cherry for fun variations.
- Food coloring – Gel or liquid in red, orange, yellow, green, blue, and purple. Gel colors provide more intense hues with less liquid.
- 50 g powdered sugar – Used for dusting both the work surface and finished candies to prevent sticking.
Smart Substitutions and Variations:
- Natural coloring: Replace artificial dyes with powdered beetroot (red/pink), turmeric (yellow), spirulina (blue/green), and butterfly pea flower. Note that natural colors may fade slightly and produce more pastel tones.
- Flavor twists: Add ¼ tsp orange or lemon extract to specific color bowls for a true fruit-candy experience.
- Sugar alternatives: While traditional granulated sugar works best, you can experiment with organic cane sugar (results may be slightly less clear).
- Vegan-friendly: This recipe is already vegan when using standard corn syrup—double-check your brand.
These flexible options let you tailor your rainbow ribbon candy rolls to dietary needs, color preferences, or themed celebrations while maintaining that eye-catching swirl.
Timing
Prep Time: 15 minutes
Cook Time: 30 minutes
Total Time: 45 minutes
This rainbow ribbon candy rolls recipe is significantly faster than traditional pulled ribbon candy, which can take 90+ minutes of labor-intensive pulling and folding. The streamlined method of layering and rolling delivers beautiful results in less than half the time, making it ideal for last-minute party preparations or spontaneous weekend candy-making sessions with the family.
Step-by-Step Instructions
Preparing Your Workspace and Safety First
Before you begin, line a large baking sheet or clean marble surface with silicone mats or lightly greased parchment. Have all your food coloring, extracts, and bowls ready. Safety note: Hot sugar syrup can reach temperatures over 300°F (150°C) and causes serious burns. Keep children and pets away during the cooking phase and wear oven mitts. A candy thermometer is non-negotiable for success.
Cooking the Sugar Syrup Base
In a medium saucepan, combine the 400 g granulated sugar, 120 ml light corn syrup, and 120 ml water. Stir over medium heat until the sugar completely dissolves. Once dissolved, stop stirring to prevent crystallization. Bring the mixture to a boil and cook until it reaches 300°F (150°C) on a candy thermometer—the hard crack stage. This usually takes 15–25 minutes depending on your stove and humidity. The syrup will be clear and bubbling vigorously.
Flavoring and Dividing the Syrup
Remove the pan from heat immediately when it hits 300°F. Stir in the vanilla extract and citric acid (if using). Work quickly as the mixture begins to cool and thicken. Carefully divide the hot syrup into six equal portions in heat-safe bowls. This even division ensures balanced layers in your finished rainbow ribbon candy rolls.
Coloring Each Rainbow Layer
Add food coloring to each bowl: one red, one orange, one yellow, one green, one blue, and one purple. Stir thoroughly until the color is uniform and vibrant. Use more drops than you think you need—the colors dull slightly as the candy hardens. Keep the bowls warm by placing them over a pan of hot water if they start thickening too quickly.
Pouring and Spreading the Colored Layers
Lightly dust your prepared work surface with some of the powdered sugar. Working quickly but carefully, pour each colored syrup onto the surface in thin layers (about ⅛ inch thick). Spread each color into rough rectangles or ovals using a heat-safe spatula. Let them cool for 1–2 minutes until pliable but not fully hardened—they should still be quite warm and flexible.
Stacking in Rainbow Order
Once pliable, carefully stack the layers in true rainbow order: red on the bottom, followed by orange, yellow, green, blue, and purple on top. Press gently between layers to remove air pockets but avoid squeezing too hard. This stacking technique creates the signature ribbon effect when sliced.
Rolling into a Beautiful Spiral Log
Starting from one short end, carefully roll the stacked layers into a tight log. The warm candy is forgiving but firms up fast—move with confidence. The rolling motion creates those gorgeous swirl patterns that make rainbow ribbon candy rolls so visually stunning. If the candy cools too much and cracks, warm it gently with a hairdryer on low heat.
Slicing, Dusting, and Finishing
Allow the rolled log to cool completely until hard (about 15–20 minutes). Using a sharp, lightly oiled knife, cut the log into 12 bite-sized pieces. Dust all sides generously with the remaining powdered sugar to prevent sticking. Your vibrant rainbow ribbon candy rolls are now ready to enjoy!
Nutritional Information
Per serving (1 piece, recipe makes 12):
- Calories: 120
- Total Carbohydrates: 31g
- Sugars: 28g
- Fat: 0g
- Protein: 0g
- Sodium: 5mg
As a classic hard candy, these rainbow ribbon candy rolls are essentially pure sugar energy. The calories come almost entirely from simple carbohydrates, making them a classic “sometimes treat.” At 120 calories per piece, they offer better portion control than many commercial candies. The optional citric acid can help cut perceived sweetness, making them more enjoyable in moderation.
Healthier Alternatives for the Recipe
You can easily adapt this rainbow ribbon candy rolls recipe for different dietary needs:
- Lower Sugar Version: Reduce sugar slightly and increase citric acid for more tartness, which tricks the palate into needing less sweetness.
- Natural Color Rainbow: Use vegetable and fruit-based powders (beet, carrot, turmeric, matcha, butterfly pea flower, and purple sweet potato). The colors will be more earthy and pastel but 100% natural.
- Sugar-Free Experiment: Sugar-free hard candy recipes exist using isomalt or maltitol, though they require different cooking temperatures and techniques.
- Flavor Nutrient Boost: Add a tiny pinch of vitamin C powder with the citric acid or use real fruit extracts.
- Portion Control: Make smaller “mini rolls” by dividing the log in half before slicing, cutting calories per serving in half.
These modifications allow you to serve rainbow ribbon candy rolls to guests with various dietary preferences while keeping the fun, colorful appeal intact.
Serving Suggestions
These rainbow ribbon candy rolls shine at celebrations. Arrange them upright in clear glass jars so the rainbow swirls are visible, or package them in cellophane bags tied with bright ribbon for party favors. They pair beautifully with vanilla ice cream (the crunch is delightful), fruit platters, or as colorful cake and cupcake toppers.
For themed events, create a full rainbow dessert table or use them as prizes in party games. During Pride month, they make a meaningful and delicious addition. Adults and kids alike love them—consider making flavor variations so everyone has a favorite color and taste.
Common Mistakes to Avoid
Even straightforward candy recipes have pitfalls. Here’s what to watch for with rainbow ribbon candy rolls:
- Incorrect Temperature: Below 300°F your candy won’t harden properly and will stay sticky. Invest in a reliable candy thermometer—guessing is the top reason for failed batches.
- Stirring After Boiling: Once the mixture boils, any stirring can cause sugar crystals to form, leading to grainy candy instead of smooth, glassy results.
- Working Too Slowly: The syrup hardens fast. Have everything prepped and colors ready before removing the pan from heat.
- Humid Kitchen Conditions: Hard candy hates moisture. Avoid making this on rainy or very humid days, as the finished pieces can become sticky.
- Unsafe Handling: Never touch hot syrup with bare hands. Keep a bowl of ice water nearby in case of spills.
- Poor Layering Order: Stick to classic rainbow sequence for the most visually appealing result when sliced.
Avoid these mistakes and your homemade candy will look bakery-worthy.
Storing Tips for the Recipe
One of the best things about hard candy like these rainbow ribbon candy rolls is its excellent shelf life. Store in an airtight container at room temperature for up to 4–6 weeks. The powdered sugar dusting helps prevent pieces from sticking together.
For longer storage, keep in a cool, dry place away from direct sunlight. Avoid the refrigerator, as it can introduce moisture that makes the candy sticky. If gifting, cellophane bags with a desiccant packet work wonderfully. Properly stored, these rolls maintain both their crunch and vibrant colors for weeks.
Make-ahead tip: Prepare the candy up to a month before your event. The flavors actually settle and improve slightly after a few days.
Conclusion
These rainbow ribbon candy rolls transform simple pantry ingredients into vibrant, swirled homemade candy with impressive rainbow layers and satisfying crunch. Perfect for parties and celebrations, this easy 45-minute recipe delivers professional results without fancy equipment.
Ready to brighten your next gathering? Try this rainbow ribbon candy rolls recipe today! Share your results and photos in the comments below, leave a review, or tell us which color is your favorite. Subscribe for more fun homemade candy recipes, party treat ideas, and creative dessert inspiration delivered straight to your inbox.
FAQs
Do I absolutely need a candy thermometer for rainbow ribbon candy rolls?
Yes. Reaching the precise 300°F hard crack stage is critical for proper texture and safety. Without one, it’s very difficult to achieve consistent results.
Why is my candy sticky even after dusting with powdered sugar?
This usually happens when the syrup didn’t reach the correct temperature or when made on a humid day. Store in an airtight container with extra powdered sugar.
Can children help make rainbow ribbon candy rolls?
They can help with coloring (once syrup is slightly cooled), stacking, and dusting, but the cooking and hot syrup stages require adult supervision only due to burn risk.
How do I prevent the colors from bleeding together?
Work quickly and let each poured layer cool just enough to firm slightly before stacking. Avoid using too much liquid food coloring.
Can I use this recipe to make traditional ribbon candy instead of rolls?
Yes! Instead of rolling into a log, you can pull and fold the stacked layers repeatedly for the classic twisted ribbon candy look, though it requires more technique.
What’s the purpose of citric acid in this recipe?
It adds a pleasant tart flavor that balances the sweetness and helps prevent the candy from becoming overly sticky over time.
How long do rainbow ribbon candy rolls stay fresh?
When stored properly in an airtight container, they can last 4–6 weeks at room temperature. Their hard candy nature gives them excellent shelf stability compared to fudge or chocolates.
Rainbow Ribbon Candy Rolls
Ingredients
Equipment
Method
- In a medium saucepan, combine the granulated sugar, corn syrup, and water. Stir over medium heat until the sugar dissolves completely. Bring the mixture to a boil and cook without stirring until it reaches 300°F (150°C) on a candy thermometer (hard crack stage).
- Once the syrup has reached the desired temperature, remove it from the heat. Stir in the vanilla extract and citric acid (if using). Divide the syrup into separate bowls and add food coloring to each bowl.
- Lightly dust a clean work surface with powdered sugar. Pour each colored syrup onto the surface, spreading it into thin layers about 1/8 inch thick. Let the syrup cool slightly but not harden completely.
- Once the syrup layers are cool enough, stack the colors in a rainbow pattern. Starting from one end, roll the layers into a tight log, creating the candy roll.
- Once the roll has cooled completely and hardened, use a sharp knife to slice it into bite-sized pieces.
- Dust the candy rolls with powdered sugar to prevent them from sticking together. Serve the Rainbow Ribbon Candy Rolls as a fun treat!