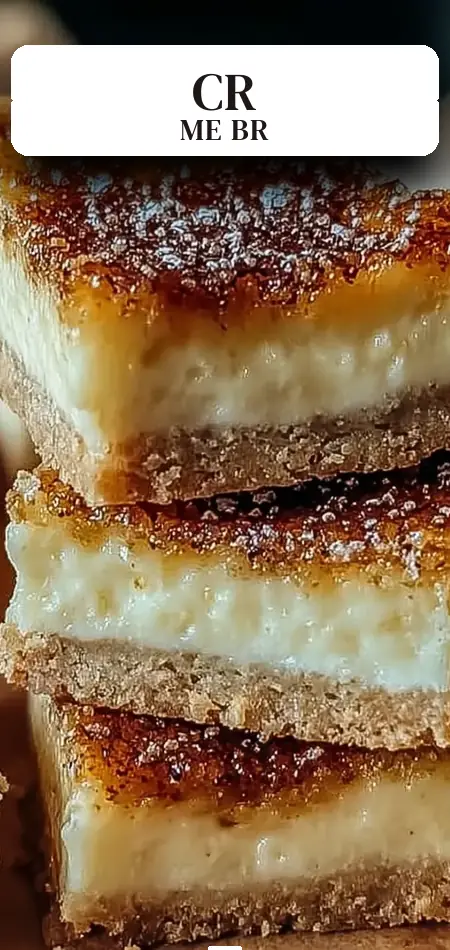
Simple Crème Brûlée Cookie Bars Recipe
Have you ever wondered why traditional crème brûlée remains one of the most ordered desserts in restaurants yet one of the most intimidating to make at home? According to culinary search trends, queries for “easy crème brûlée alternatives” have surged over 65% in the past two years as home bakers seek simpler ways to enjoy that silky vanilla custard and signature caramelized “crack.”
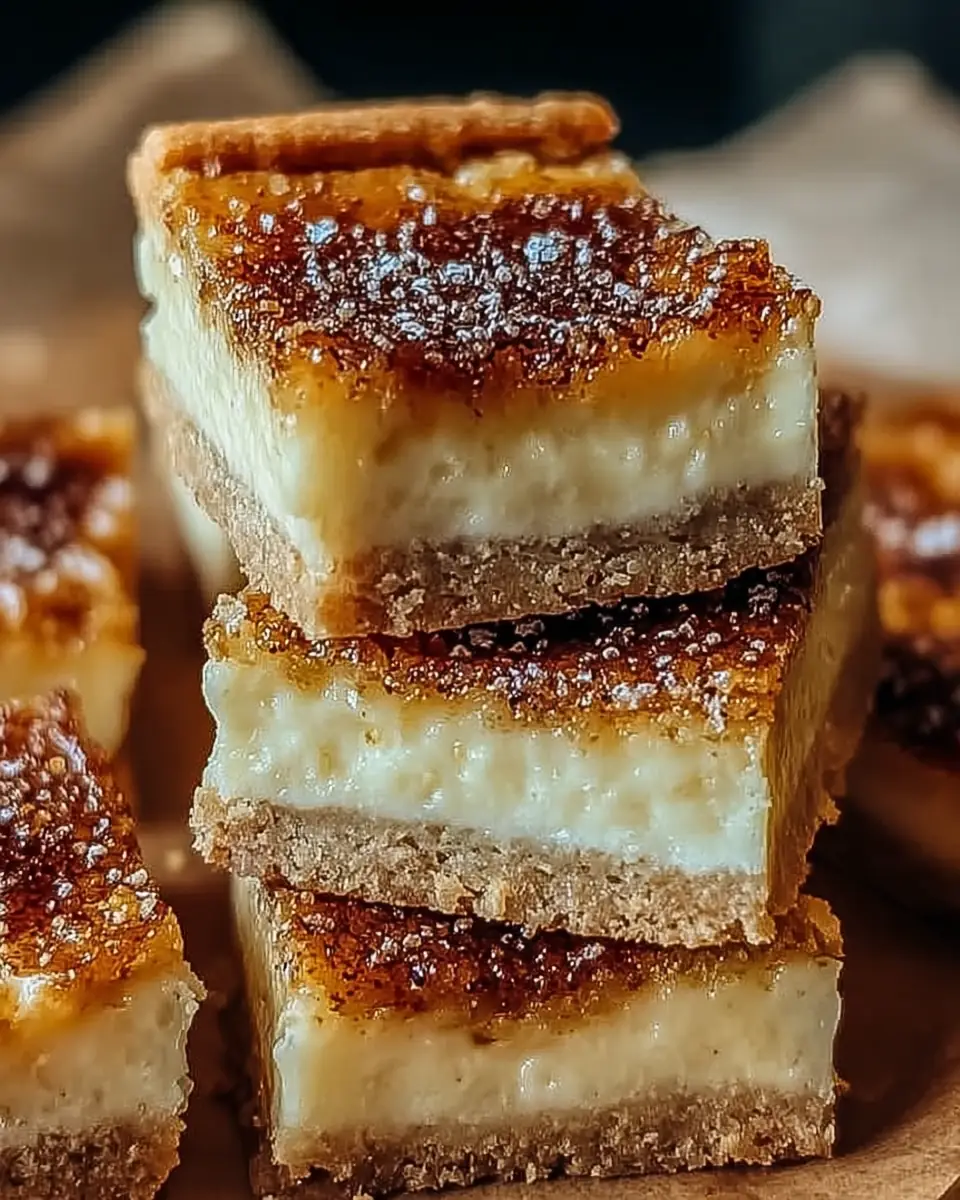
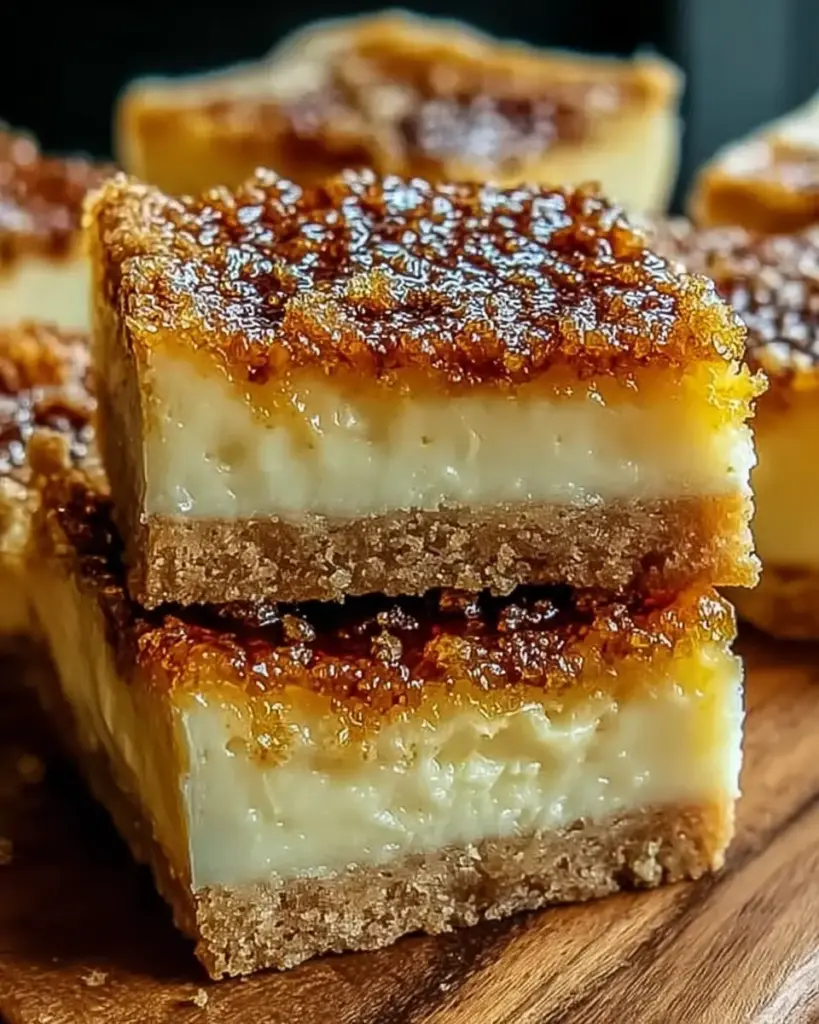
This crème brûlée cookie bars recipe delivers exactly that experience without custard, water baths, or kitchen torches. It combines the rich, fudgy texture of a white chocolate blondie with the buttery, caramelized crunch of toffee bits that melt into a brûlée-like topping during baking. The result is an addictive hybrid dessert that feels luxurious yet comes together in one bowl with everyday ingredients.
In just 50 minutes of active time, you’ll have 12 perfectly portioned bars that travel well, please crowds, and satisfy both cookie lovers and crème brûlée enthusiasts. The white chocolate creates an almost custardy interior while the toffee delivers the textural contrast that makes classic crème brûlée so memorable.
Whether you’re baking for a holiday gathering, potluck, or simply craving an elevated weeknight treat, this crème brûlée cookie bars recipe is about to become your signature dessert. In this comprehensive guide, you’ll find the full ingredient list with substitutions, step-by-step instructions with pro tips, nutritional information, healthier adaptations, serving ideas, common pitfalls, and storage advice. Let’s create some dessert magic.
Ingredients List
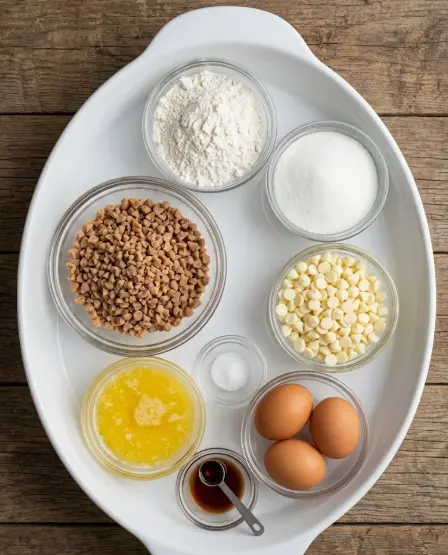
Here’s everything you need for this crème brûlée cookie bars recipe. The combination of white chocolate, plenty of vanilla, and toffee bits is what gives these bars their distinctive flavor profile.
- 113 g (½ cup) unsalted butter – Provides rich flavor and tenderness. Use high-quality butter for best results.
- 350 g (2 cups) white chocolate chips – Creates the creamy, almost custardy base. Choose chips or chopped high-quality white chocolate bars.
- 155 g (1¼ cups) all-purpose flour – Gives structure without making the bars tough when not overmixed.
- 149 g (¾ cup) granulated sugar – Sweetens the bars and helps create the glossy, crackly top when combined with toffee.
- 15 ml (1 tablespoon) vanilla extract – Pure vanilla is essential for that signature crème brûlée flavor. Vanilla bean paste works beautifully too.
- ¼ teaspoon salt – Balances sweetness and enhances all the flavors.
- 3 large eggs – Bind the batter and contribute to the rich, fudgy texture.
- 1 cup toffee bits (such as Heath English Toffee Bits) – The star ingredient that creates the caramelized brûlée effect as it melts and crisps on top.
Smart Substitutions:
- Dairy-free: Use plant-based butter and dairy-free white chocolate chips (flavor will be slightly different).
- Gluten-free: Swap the all-purpose flour with a high-quality 1:1 gluten-free baking flour.
- Lower sugar: Reduce granulated sugar to ½ cup and rely more on the sweetness of the white chocolate and toffee.
- Toffee alternative: Chopped chocolate-covered toffee bars or crushed caramel candies work in a pinch.
These ingredients come together to create white chocolate toffee cookie bars with a luxurious crème brûlée personality—chewy centers, golden edges, and a delightfully crunchy caramelized top.
Timing
Prep Time: 15 minutes
Cook Time: 35 minutes (25 minutes initial bake + 5–10 minutes after adding toffee)
Total Time: 50 minutes (plus 1–2 hours cooling time for clean slicing)
This crème brûlée cookie bars recipe is remarkably efficient. Traditional crème brûlée typically requires 45–60 minutes of active work plus several hours of chilling. These bars deliver comparable luxurious flavor in roughly 20% of the total time commitment, making them ideal for both spontaneous cravings and planned entertaining.
Step-by-Step Instructions
1. Preheat and Prepare the Pan
Preheat your oven to 350°F (175°C). Line a 9×13-inch baking pan with parchment paper, leaving a generous overhang on all sides. This allows you to lift the entire slab out easily for clean cutting. Lightly grease the parchment to ensure nothing sticks.
2. Melt the Butter and White Chocolate
In a medium saucepan over low heat, combine the butter and white chocolate chips. Stir continuously with a rubber spatula until completely melted and glossy. This gentle melting prevents the white chocolate from seizing or becoming grainy. Remove from heat immediately once smooth.
Pro Tip: If the mixture looks separated, add a splash of warm milk or cream and whisk vigorously to bring it back together.
3. Build the Flavor Base
Transfer the warm butter-white chocolate mixture to a large mixing bowl. Stir in the granulated sugar, vanilla extract, and salt. Whisk until the sugar begins to dissolve and the mixture looks slightly thickened. The warmth helps bloom the vanilla flavor beautifully.
4. Add the Eggs
Add the eggs one at a time, mixing thoroughly after each addition. The batter will become smoother, silkier, and slightly thicker with each egg. This gradual incorporation creates the luxurious, custardy texture that makes these crème brûlée cookie bars so special.
5. Incorporate the Flour
Gently fold in the all-purpose flour using a spatula until just combined. A few small streaks of flour are perfectly acceptable—overmixing develops gluten and leads to tough bars. The batter will be thick and luxurious.
6. First Bake
Pour the batter into the prepared pan and spread it evenly to the edges with an offset spatula. Bake for 25 minutes. The edges should turn light golden brown and the center should look mostly set but still have a slight jiggle in the middle.
7. Add the Brûlée Topping and Finish Baking
Remove the pan from the oven and immediately sprinkle the toffee bits evenly over the surface. Return to the oven for another 5–10 minutes until the edges are deeply golden, the center is fully set, and the toffee has melted into a glossy, caramelized layer that mimics a classic crème brûlée crust.
8. Cool and Cut
Allow the bars to cool completely in the pan—this is non-negotiable for clean slices and the best texture. Once cool, use the parchment overhang to lift the slab onto a cutting board and slice into 12 equal bars.
Nutritional Information
Per bar (1 of 12):
- Calories: 250
- Total Fat: 14g
- Saturated Fat: 8g
- Cholesterol: 55mg
- Total Carbohydrates: 29g
- Sugars: 22g
- Protein: 3g
These values are approximate based on standard ingredient databases. While higher in sugar and fat than everyday snacks, the controlled portion size makes these bars more manageable than a full serving of traditional crème brûlée, which often exceeds 400 calories. They provide a satisfying dessert experience with a balance of creamy and crunchy textures that make each bite feel indulgent.
Healthier Alternatives for the Recipe
Transform this crème brûlée cookie bars recipe to fit different dietary needs while preserving its signature appeal:
- Lower Sugar Version: Reduce granulated sugar to 100g (½ cup) and add 1–2 tablespoons of maple syrup for flavor depth.
- Boosted Protein & Fiber: Fold in ½ cup chopped toasted almonds or pecans with the toffee bits for healthy fats and crunch.
- Gluten-Free Adaptation: Use a quality 1:1 gluten-free flour blend. The texture remains remarkably close to the original.
- Lighter Dairy Swaps: Replace half the butter with unsweetened applesauce or Greek yogurt (strain first) to reduce calories while maintaining moisture.
- Antioxidant Boost: Swap half the white chocolate chips for chopped dark chocolate. The flavor shifts toward a more sophisticated bittersweet profile that pairs wonderfully with the toffee.
These modifications prove that crème brûlée bars can be adapted for gluten-free, lower-sugar, or higher-protein diets without sacrificing the luxurious eating experience.
Serving Suggestions
Serve these crème brûlée cookie bars slightly warmed with a scoop of vanilla bean ice cream for the ultimate contrast of temperatures and textures. The cold ice cream against the chewy, caramelized bar creates a restaurant-quality dessert.
For elegant dinner parties, plate individual bars with fresh raspberries, a light dusting of powdered sugar, and a sprig of mint. They also shine on dessert charcuterie boards alongside fresh fruit, chocolates, and nuts.
Personal favorite: Pair with a strong espresso or French press coffee. The bitterness balances the sweetness perfectly. These bars are equally delightful as an afternoon treat with tea or packed into lunchboxes for a special surprise.
Common Mistakes to Avoid
- Melting on high heat – White chocolate scorches easily. Always use low heat and constant stirring.
- Overmixing the batter – This develops gluten and results in tough rather than fudgy bars. Fold gently.
- Skipping the full cooling time – Cutting too early causes the bars to crumble and prevents the toffee layer from setting properly.
- Uneven spreading – Take time to spread the batter uniformly so every bar bakes at the same rate.
- Overbaking – The center should look just set. These bars continue to firm up as they cool.
Following these guidelines ensures your crème brûlée cookie bars recipe turns out perfectly every time.
Storing Tips for the Recipe
Store completely cooled bars in an airtight container at room temperature for up to 3 days. For longer storage, refrigerate up to 7 days—bring to room temperature before serving for the best texture.
These bars also freeze beautifully. Wrap individual squares in plastic wrap, then place in a freezer bag for up to 3 months. Thaw overnight in the refrigerator or for 30 minutes at room temperature.
Make-Ahead Tip: Prepare the batter up to 24 hours in advance and store covered in the refrigerator. Add 2–3 extra minutes to the initial bake time when baking from chilled.
Conclusion
This crème brûlée cookie bars recipe masterfully combines the silky vanilla richness and caramelized crunch of classic crème brûlée with the ease of a one-bowl cookie bar. Ready in just 50 minutes with simple ingredients, these decadent treats deliver restaurant-quality flavor at home.
Ready to try it? Bake a batch of these crème brûlée cookie bars and let us know how they turned out! Drop your feedback in the comments below, share your favorite serving twist, or leave a star rating. Don’t forget to subscribe to the blog for more innovative dessert recipes, baking tips, and seasonal treats delivered straight to your inbox.
FAQs
Can I make these crème brûlée cookie bars without a kitchen torch?
Absolutely. The toffee bits create the caramelized brûlée effect naturally during the second bake—no torch required.
Why is my white chocolate seizing?
This usually happens when melted on too high heat or if moisture gets into the mixture. Use very low heat and stir constantly.
Are these bars gluten-free?
The base recipe is not, but substituting a 1:1 gluten-free flour blend produces excellent results with almost identical texture.
How do I know when the bars are done baking?
The edges should be golden brown and the center should look set with only a slight jiggle. Remember they firm up significantly as they cool.
Can I use brown sugar instead of white sugar?
You can, but it will change the flavor toward a more molasses-rich blondie and may darken the color. White sugar better mimics the classic crème brûlée taste.
How long do these bars last?
At room temperature they stay fresh for 3 days. Refrigerated, they last up to a week, and they freeze beautifully for 3 months.
Can I double the recipe?
Yes! Use a 9×13 and an 8×8 pan or a half-sheet pan. Watch the baking time carefully as it may need slight adjustment.
This crème brûlée cookie bars recipe proves that impressive desserts don’t need to be complicated. Happy baking!

Crème Brûlée Cookie Bars Recipe
Ingredients
Equipment
Method
- Preheat your oven to 350°F (175°C). Line a 9×13-inch baking pan with parchment paper, leaving an overhang on the sides for easy lifting later.
- In a medium saucepan over low heat, gently melt the unsalted butter with the white chocolate chips, stirring continuously until smooth and glossy to avoid scorching.
- Remove the saucepan from heat and transfer the warm mixture into a large mixing bowl. Stir in the granulated sugar, vanilla extract, and salt, whisking until well combined and the sugar begins to dissolve.
- Add the eggs one at a time, mixing thoroughly after each addition to create a rich, smooth batter.
- Gently fold in the all-purpose flour until just combined. A few streaks of flour are acceptable to prevent toughness in the bars.
- Pour the batter into the prepared pan and spread evenly to the edges using a spatula for uniform baking.
- Bake for 25 minutes, until edges start to turn golden and the center appears mostly set but still soft.
- Remove the pan from oven and immediately sprinkle the toffee bits evenly over the partially baked bars.
- Return to oven and bake for an additional 5 to 10 minutes until edges are golden brown and the center is fully set, with slightly melted toffee topping creating that brûlée effect.
- Let the bars cool completely in the pan to allow them to set properly, which helps with slicing.
- Use the parchment paper overhang to lift the slab from the pan, then cut into squares and enjoy!