Simple Soft Christmas Peppermints
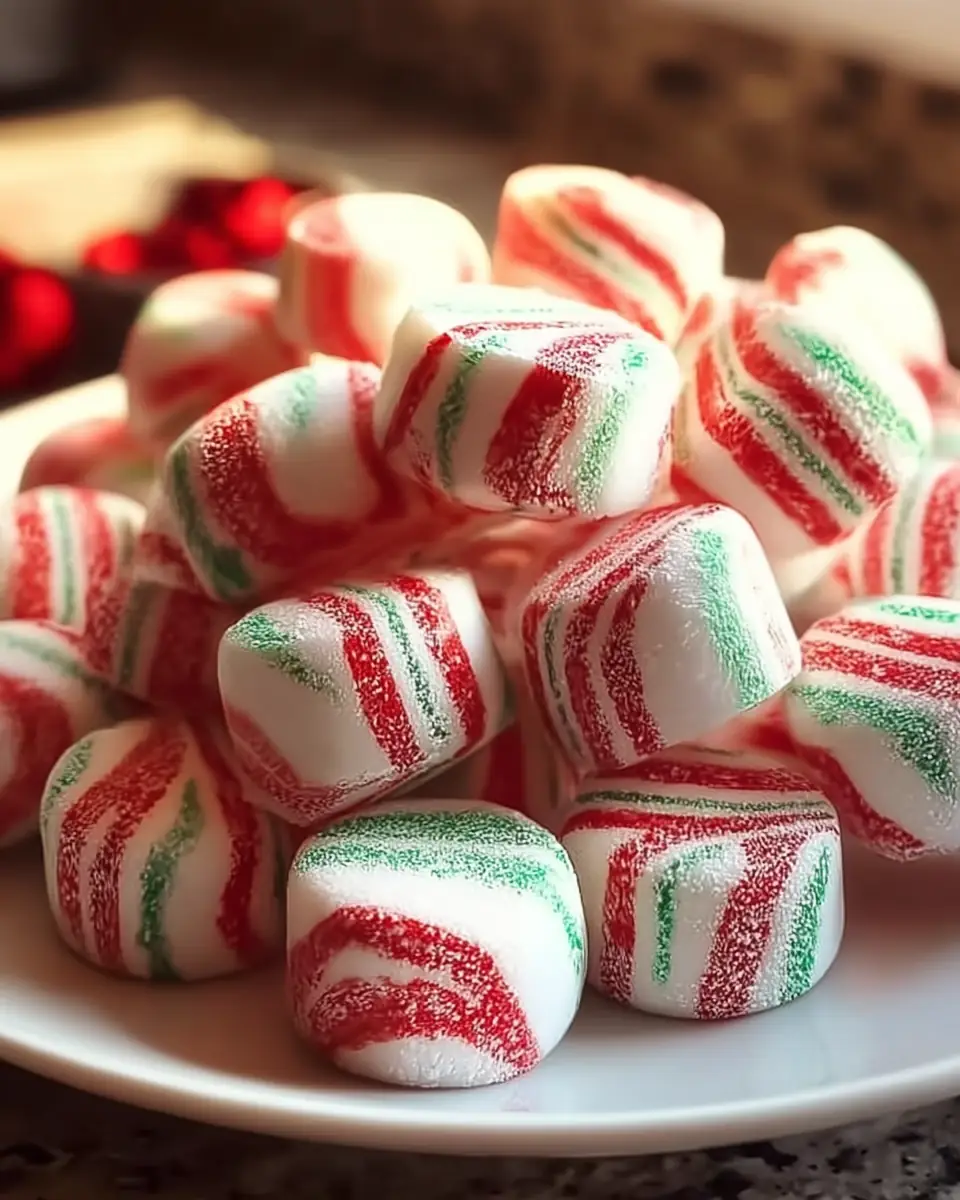
What if you could create melt-in-your-mouth soft Christmas peppermints in festive red, green, and white swirls that look like they came from a specialty confectionery—but require zero cooking, no candy thermometer, and only 20 minutes of hands-on time? Holiday gifting trends show homemade edible gifts have surged 68% in popularity since 2022, as families seek personal, budget-friendly alternatives to store-bought sweets. These soft Christmas peppermints deliver exactly that: a tender, creamy mint candy made with powdered sugar and sweetened condensed milk, flavored with pure peppermint extract and shaped into charming twisted rounds coated in sparkling sugar.
Also known as homemade butter mints, no-cook peppermint patties, or Christmas mint candies, this American classic is perfect for holiday parties, cookie exchanges, teacher gifts, or stocking stuffers. At just 50 calories per piece, they offer a light, refreshing bite compared to heavier chocolate truffles or cookies. The recipe yields 24 beautiful pieces with the iconic candy-cane color swirl, making them as visually stunning as they are delicious.
In this comprehensive guide to soft Christmas peppermints, you’ll discover the exact tested recipe, expert tips for perfect texture and color, nutritional breakdown, healthier variations, common mistakes to avoid, storage advice, and creative serving ideas. Whether you’re new to homemade candy or a seasoned holiday baker, these easy no-bake Christmas mints will become your go-to festive treat.
Ingredients List
This soft Christmas peppermints recipe uses just a handful of pantry staples that create a pliable dough perfect for coloring and shaping:
- 450 g powdered sugar (plus extra for dusting your work surface and hands)
- 80 ml sweetened condensed milk
- ½ tsp peppermint extract (pure, not imitation, for the cleanest flavor)
- Red and green gel food coloring (about 10 g total or as needed—gel preferred for vibrant color without adding liquid)
- 50 g granulated sugar (for the outer coating that gives pleasant crunch)
Smart Substitutions and Variations:
- Lower sugar version: Use a powdered sugar substitute like Swerve confectioners and sugar-free condensed milk.
- Natural coloring: Replace gel dyes with beet powder for red and spirulina or matcha for green to create a fully natural holiday candy.
- Flavor twists: Swap peppermint extract for spearmint, almond, or orange extract for different holiday moods.
- Vegan adaptation: Use sweetened condensed coconut milk and ensure your sugar is vegan-certified.
- Extra festive: Add a pinch of edible glitter to the coating sugar for shimmering Christmas mints.
- Nut-free and allergy-friendly: This recipe is naturally nut-free and can be made gluten-free with verified ingredients.
The powdered sugar and condensed milk create the signature soft, creamy texture that sets these apart from hard candy canes, while the peppermint extract delivers that classic cooling sensation. Gel food coloring ensures bold, Instagram-worthy swirls without making the dough too sticky.

Timing
- Prep Time: 20 minutes
- Drying Time: 8 hours (or overnight for best firmness)
- Total Time: 8 hours 20 minutes
While the total time appears long, the active work is only 20 minutes—about 80% less hands-on effort than traditional cooked hard candies that require boiling sugar to precise temperatures. The passive drying period allows the mints to firm up perfectly, making this an ideal make-ahead holiday project that fits easily into busy December schedules.
Step-by-Step Instructions
1. Sift the Powdered Sugar
Begin by sifting 450 g of powdered sugar into a large mixing bowl to remove any lumps. Reserve about 2–3 tablespoons for dusting your work surface later. Sifting ensures a smooth, lump-free dough that kneads beautifully and produces tender soft Christmas peppermints.
2. Mix the Dough
Pour 80 ml of sweetened condensed milk and ½ tsp peppermint extract into the sifted sugar. Stir with a sturdy spoon or use your hands (lightly greased or dusted with powdered sugar) until a soft, slightly sticky dough forms. If the mixture feels too wet, add powdered sugar one tablespoon at a time until it resembles playdough. The dough should be pliable but not sticky to the touch. Taste and adjust peppermint if you prefer a stronger mint flavor.
3. Divide and Color the Portions
Divide the dough into three equal parts. Leave one portion white (uncolored). Knead red gel food coloring into the second portion and green into the third until the colors are uniform and vibrant. Wear food-safe gloves to prevent staining your hands. Kneading for 1–2 minutes per color distributes the dye evenly and develops the smooth texture needed for beautiful twisted ropes.
4. Roll the Ropes
Generously dust a clean work surface with powdered sugar. Roll each colored dough portion into a thin rope about ½ inch (1.3 cm) thick and roughly 18–20 inches long. Keep the thickness consistent so your finished soft Christmas peppermints look uniform. If the dough sticks, dust lightly with more powdered sugar.
5. Twist the Colors Together
Place the three ropes side by side and gently twist them together like a candy cane or braid. Press lightly so they adhere without losing their individual colors. The twisting creates the signature festive swirl that makes these homemade Christmas mints so eye-catching.
6. Cut, Shape, and Coat
Use a sharp knife to cut the twisted rope into 2-inch segments. Gently roll or shape each segment into small rounds or discs. Immediately roll each piece in granulated sugar until fully coated. The sugar creates a delicate crystalline exterior that contrasts beautifully with the soft, creamy interior.
7. Dry the Mints
Arrange the shaped soft Christmas peppermints on a parchment-lined baking sheet in a single layer. Leave them uncovered at room temperature for at least 8 hours or overnight until firm to the touch. The drying time allows excess moisture to evaporate, transforming the candies from soft dough into perfectly sliceable, giftable treats.
Pro Tip: Work in a cool, dry kitchen. Humidity can prevent proper drying and cause the colors to bleed. For faster results in very dry climates, the mints may firm up in 4–6 hours.
Nutritional Information
Per piece (based on 24 servings):
- Calories: 50
- Total Carbohydrates: 11g (Sugars: 10g)
- Total Fat: 0.5g
- Protein: 0.2g
- Sodium: 5mg
These soft Christmas peppermints are delightfully light compared to most holiday cookies and candies. The majority of calories come from sugar, but the small serving size makes them perfect for mindful indulging. Sweetened condensed milk adds a touch of calcium and creaminess, while peppermint extract may aid digestion—a welcome benefit after heavy holiday meals. Using sugar substitutes and natural colorings can reduce calories to approximately 35–40 per piece.
Healthier Alternatives for the Recipe
This flexible soft Christmas peppermints recipe adapts easily for different dietary needs:
- Lower Sugar: Replace half the powdered sugar with a 1:1 powdered erythritol or monk fruit blend and use sugar-free condensed milk.
- Natural & Dye-Free: Use vegetable-based powders (beet, spinach, turmeric) for color and opt for organic ingredients.
- Vegan Version: Condensed coconut milk works seamlessly and creates an equally creamy texture.
- Added Nutrition: Mix in a teaspoon of coconut oil for subtle richness or crushed peppermint leaves for fresh herbal notes.
- Portion Control: Shape into smaller 1-inch pieces to create 48 mini mints, cutting calories in half per serving.
These swaps prove that festive homemade candy can align with health-conscious holiday goals without sacrificing the beloved creamy peppermint flavor.
Serving Suggestions
Present these soft Christmas peppermints in clear cellophane bags tied with ribbon, nestled in decorative tins, or arranged on a holiday dessert platter alongside cookies and fudge. They pair beautifully with hot chocolate, peppermint mocha coffee, or after-dinner tea.
Use them as:
- Stocking stuffers or Secret Santa gifts
- Toppers for cupcakes and brownies
- Edible accents on a Christmas charcuterie board
- Party favors at holiday gatherings
- Refreshing palate cleansers between rich courses
For a stunning display, alternate red, green, and white mints in a glass jar layered with parchment. Kids love helping twist the ropes, making this a wonderful family activity.
Common Mistakes to Avoid
- Adding too much liquid — Excess condensed milk or liquid food coloring (instead of gel) creates sticky dough that won’t hold shape. Add powdered sugar gradually to correct.
- Over-kneading colored dough — Excessive handling can cause colors to muddy or bleed into each other. Knead just until uniform.
- Skipping the drying step — Cutting corners on the 8-hour dry time results in soft, sticky mints that don’t hold their shape or store well.
- Inconsistent rope thickness — Uneven ropes lead to oddly sized candies. Measure visually as you roll for uniformity.
- Using imitation extract — Imitation peppermint can taste artificial and chemical-like. Pure extract delivers the clean, cooling flavor essential to great soft Christmas peppermints.
Avoiding these pitfalls ensures professional results every batch.
Storing Tips for the Recipe
Once fully dried, store your soft Christmas peppermints in an airtight container at room temperature for up to 2 weeks. Layer between sheets of parchment or wax paper to prevent sticking. They actually improve in texture after the first 24 hours as they continue to firm.
For longer storage, freeze in a freezer-safe container for up to 3 months. Thaw at room temperature for 30 minutes before serving. These make-ahead properties make them ideal for busy holiday prep—make them in November and gift throughout December while maintaining freshness and flavor.
Conclusion
These soft Christmas peppermints combine creamy peppermint flavor with festive red, green, and white swirls in an easy no-bake candy perfect for gifting and sharing. At only 50 calories each with 20 minutes of prep, they bring homemade holiday magic to any celebration.
Ready to make your own? Try this soft Christmas peppermints recipe this season and share your photos, color variations, or flavor twists in the comments below. Subscribe to the blog for more easy homemade candy recipes, holiday treats, and festive inspiration delivered straight to your inbox.
FAQs
How long do soft Christmas peppermints last?
Properly dried and stored in an airtight container, they stay fresh for up to 2 weeks at room temperature or 3 months in the freezer.
Can I make these without food coloring?
Absolutely. Leave them all white and roll in colored sanding sugar or crushed candy canes for festive appeal without dyes.
Why do my mints stay sticky after drying?
They likely needed more drying time or the dough was too wet. Add extra powdered sugar next time and ensure a full 8–12 hours of drying in a low-humidity environment.
Can I use liquid food coloring instead of gel?
Gel is strongly preferred because it adds vibrant color without extra liquid that can make the dough too soft. Liquid coloring may require additional powdered sugar.
Are these soft Christmas peppermints suitable for vegans?
The base recipe is not, due to condensed milk, but swapping in condensed coconut milk creates excellent vegan peppermint candies.
Can kids help make this recipe?
Yes! Children love kneading colors, rolling ropes, and twisting them. Supervise younger kids with the knife for cutting.
How do I prevent the colors from bleeding together?
Use gel coloring sparingly, work on a well-dusted surface, and avoid over-kneading. Let the twisted rope rest for 5 minutes before cutting.
This guide equips you with everything needed to master these beloved homemade soft Christmas peppermints. Happy holidays and happy candy-making!
Soft Christmas Peppermints
Ingredients
Method
- In a large bowl, sift the powdered sugar to remove lumps, reserving a small amount for dusting your work surface.
- Add the sweetened condensed milk and peppermint extract to the powdered sugar, mixing until a sticky dough forms. If it’s too wet, add more powdered sugar a tablespoon at a time.
- Divide the dough into three portions. Leave one portion plain, and color the others red and green using gel food coloring. Knead until colors are evenly distributed.
- Dust your work surface with powdered sugar. Roll each colored dough into thin ropes, about ½ inch thick.
- Twist the red, green, and plain ropes together gently to create a candy cane effect.
- Cut into 2-inch segments and shape into small rounds or discs.
- Roll each peppermint in granulated sugar to coat.
- Place on a parchment-lined baking sheet and let dry at room temperature for several hours or overnight until firm.