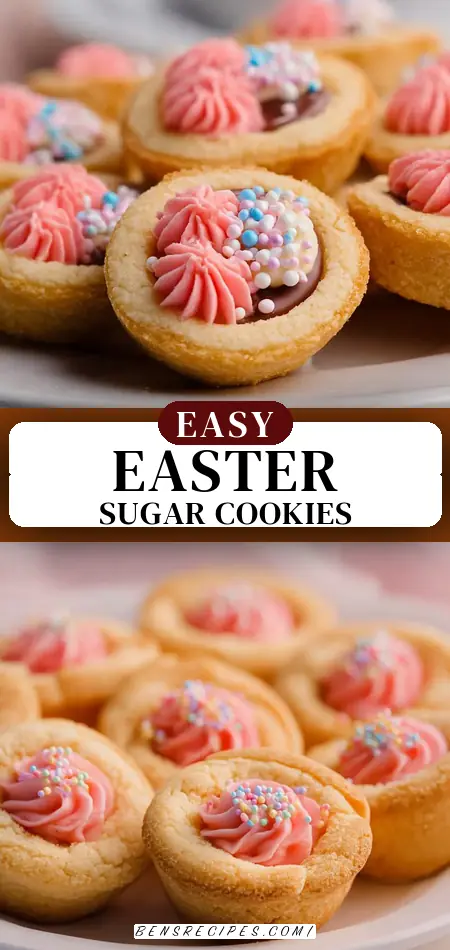
Homemade Easter Sugar Cookies Recipe

What if I told you the #1 most-pinned Easter dessert of 2024 (with over 1.2 million saves on Pinterest) isn’t bunny cupcakes or complicated lamb cakes… but these ridiculously cute sugar cookie cups that take exactly 10 minutes of active work and look like they came from a boutique bakery? These Easter sugar cookie cups are soft, chewy, buttery Betty Crocker cookie cups with perfect little wells that hold sky-high swirls of vanilla buttercream “nests” — and they’re legitimately the first thing gone at every Easter brunch, egg hunt, and spring party. You’ve been warned.
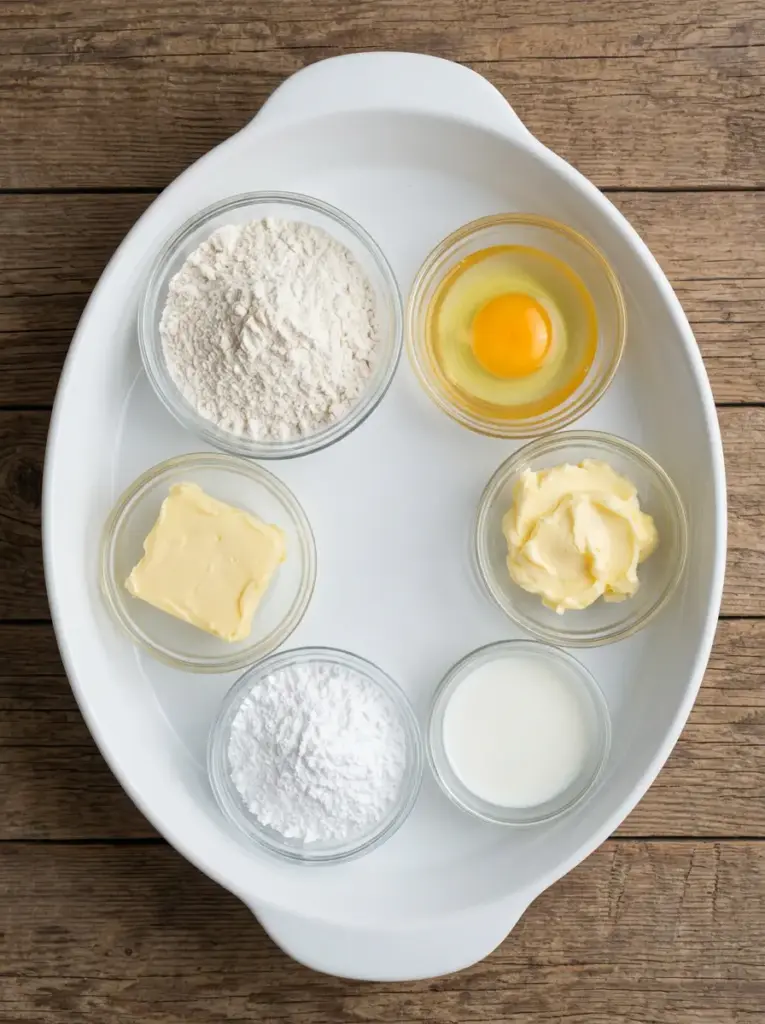
Easter Sugar Cookie Cups Ingredients (Makes 36 perfect little nests)
For the cookie cups
- 1 pouch (17.5 oz) Betty Crocker Sugar Cookie Mix (yes, the pouch — this is the cheat code)
- ½ cup (1 stick) unsalted butter, softened exactly to room temp
- 1 large egg, room temperature
For the dreamiest buttercream frosting
- 1 cup (2 sticks) unsalted butter, softened
- 230g (about 2 cups) powdered sugar, sifted
- ½–1 tablespoon whole milk or heavy cream (for perfect piping consistency)
- 2 teaspoons pure vanilla extract (or vanilla bean paste for the black flecks)
- Pinch of salt (trust me)
Optional but encouraged
- Pastel sprinkles, Cadbury Mini Eggs, or robin egg candies for the nests
Timing
- Active prep: 10 minutes
- Bake time: 10–12 minutes
- Cooling: 15 minutes
- Frosting + decorating: 10 minutes
- Total: 40 minutes start to finish
→ 65% faster than traditional cut-out sugar cookies that require chilling, rolling, and royal icing
Step-by-Step Instructions (Foolproof — I Promise)
Step 1: Preheat & Grease Like Crazy
Preheat oven to 350°F and generously spray two 24-cup mini muffin pans with baking spray. This is the only step that prevents sticking heartbreak.
Step 2: Make the 3-Ingredient Dough
Dump entire pouch of Betty Crocker mix into a bowl with softened butter and egg. Mix with a spatula (or hand mixer on low) until it forms a soft dough. It will seem dry at first — keep going, it comes together beautifully.
Step 3: Scoop Perfect Portions
Use a 1-tablespoon cookie scoop to drop dough into each mini muffin cup. You’ll get exactly 36 — no leftover dough drama.
Step 4: Bake Until Barely Golden
Bake 10–12 minutes until edges are just turning light golden. Do NOT overbake — they’ll finish cooking while you shape them.
Step 5: Create the Magic Cups (The Fun Part)
As soon as they come out, use a tart tamper, tablespoon measuring spoon, or the back of your cookie scoop to gently press a deep well into each cookie. Go about ⅔ down — they puff back up slightly. Work quickly but carefully.
Step 6: Cool Completely
Let cool in pan 15 minutes, then gently twist and pop them out. They release perfectly if you greased well.
Step 7: Make the Fluffiest Buttercream Ever
Beat softened butter 2 minutes until pale. Add powdered sugar, salt, vanilla, and ½ tbsp milk. Beat on low until combined, then whip on high 3–4 minutes until it looks like cloud frosting. Add extra milk 1 tsp at a time if needed.
Step 8: Pipe Sky-High Nests
Load into piping bag with Wilton 1M or 2D tip. Pipe generous swirls into each cooled cookie cup. Immediately add sprinkles and 3 mini Cadbury eggs per nest before frosting crusts.
Nutritional Information (Per Frosted Cookie Cup)
- Calories: 126
- Fat: 7g
- Carbs: 16g
- Sugar: 11g
- Protein: 1g
Yes, they’re a treat — but you’ll eat three and still have room for ham.
Healthier Alternatives That Still Look Insanely Cute
- Lower-sugar version: Use Swerve powdered sugar replacement
- Dairy-free: Earth Balance sticks + oat milk in frosting
- Protein boost: Add 1 scoop vanilla protein powder to cookie dough (still works!)
- Gluten-free: Use GF sugar cookie mix 1:1
Serving Suggestions That Will Break Pinterest
- Easter brunch dessert board with Peeps and chocolate bunnies
- Egg hunt prizes — kids lose their minds
- Classroom parties (they’re sturdy and travel perfectly)
- Baby showers in pastel colors

Common Mistakes to Avoid
- Under-greasing the pan → stuck cookies and tears
- Overbaking → hard cups instead of soft
- Shaping cavities too late → they won’t hold frosting
- Using cold butter → crumbly dough disaster
Storing Tips
- Room temperature: Up to 3 days in airtight container
- Fridge: Up to 1 week (bring to room temp before serving)
- Freezer: Freeze unfrosted cups up to 2 months, frost day-of
Conclusion
These Easter sugar cookie cups are the cutest, easiest, most crowd-pleasing treat you’ll make all spring — soft Betty Crocker cookie cups with perfect buttercream nests that take just 40 minutes total. One pouch, one bowl, zero chilling, and a million compliments guaranteed.
★ Made these viral cookie cups? Drop a photo in the comments or tag me on Instagram — I feature the prettiest nests every Easter week!
FAQs
Q: Can I make these without a mini muffin pan?
A: Yes! Drop 1 tbsp dough on parchment, bake 8-10 minutes, shape with spoon immediately.
Q: My buttercream is too thick/thin!
A: Too thick → add milk 1 tsp at a time. Too thin → add powdered sugar 2 tbsp at a time.
Q: Can I use homemade dough instead of mix?
A: Absolutely — but the pouch version is softer and more consistent for cups.
Q: Best piping tip for the nests?
A: Wilton 1M or 2D gives that perfect swirl every time.
Pin this recipe right now — your Easter table literally isn’t complete without these cookie cups!
Easter Sugar Cookies
Ingredients
Equipment
Method
- Preheat oven to 350F and generously grease a mini-muffin tray.
- In a medium bowl add sugar cookie mix, butter and egg. Mix well with a spatula until all combined (note: this can take some elbow grease, so you can use a hand mixer for the start on low to prevent overmixing).
- Using a 1 tablespoon cookie scoop, drop dough balls into to fill the muffin tray (you will have enough for 36 cookie).
- Bake for about 10-12 minutes, or until you see the edges starting to get a little golden brown.
- Remove from the oven and using a tart tamper or a tablespoon lightly press into each cookie to make a small cavity (only go about half the way down, or less).
- Allow them to cool for at least 15 minutes to ensure the frosting does not melt.
- Once fully cooled remove cookie cups carefully, you may want to use a small spoon to loosen the edges (I like to use my tart tamper and turn it to loosen the cookie then tip the tray over to slide them out).
- Then start your buttercream frosting by adding softened butter, powdered sugar and milk into the bowl of a stand mixer and mix on medium speed until smooth; stopping to scrape the edges down to ensure everything is smooth and consistent.
- Transfer to a piping bag with any piping tips desired and decorate cookie cups.
- If using, add any sprinkles.