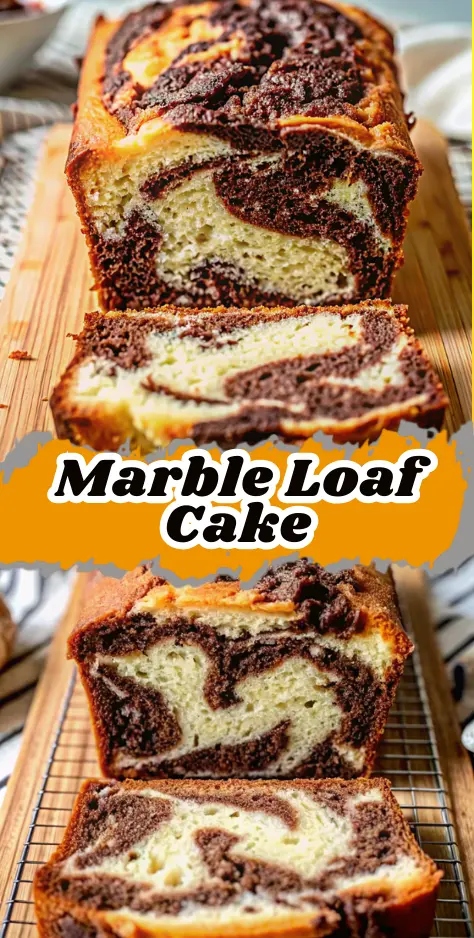
Healthy Marble Loaf Cake Recipe
Did you know that marble cake reportedly first originated in Germany (called “marmorkuchen”), where a light cake batter was marbled with a darker batter typically colored with molasses, spices, dried fruit like raisins, or coffee? This beloved dessert has evolved into one of the most popular loaf cake varieties, offering the perfect compromise for those who can’t choose between vanilla and chocolate. This Marble Loaf Cake recipe delivers both vanilla and chocolate flavors in one buttery-rich loaf with easy prep and minimal decorating—without sacrificing taste. Whether you’re craving a quick afternoon treat or planning an impressive dessert for guests, this marble loaf cake combines convenience with irresistible flavors that will have everyone asking for the recipe.
Ingredients List
For the Marble Loaf Cake:
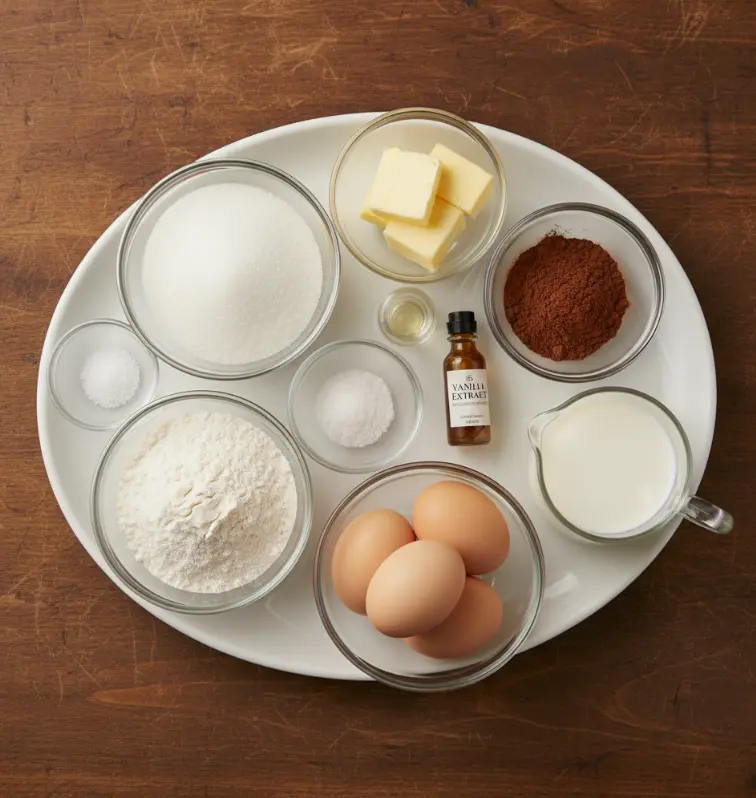
- 1½ cups all-purpose flour – The foundation that creates the perfect tender crumb
- 1 cup granulated sugar – Provides sweetness and helps create that coveted light, fluffy texture
- 1½ teaspoons baking powder – Your leavening agent for the perfect rise
- ½ teaspoon salt – Enhances all the flavors and balances the sweetness
- ½ cup unsalted butter (room temperature) – Creates richness and moisture throughout
- 3 large eggs – Adds structure and creates that tender, cake-like texture
- 2 teaspoons vanilla extract – Pure vanilla for that classic flavor profile
- ¼ cup unsweetened cocoa powder – The key to your chocolate swirl
- ½ cup milk – Adds moisture and creates the perfect batter consistency
Ingredient Substitutions:
- Milk alternatives: Buttermilk, almond milk, or oat milk work wonderfully
- Sugar swap: Caster (superfine) sugar works well too
- Flour alternatives: For gluten-free version, works really well with gluten free flour
- Cocoa upgrade: Dutch-processed cocoa made for the best, smoothest-tasting chocolate flavor
Timing
Preparation Time: 15 minutes
Baking Time: 50-60 minutes
Total Time: 75 minutes
This marble loaf cake requires approximately 75 minutes from start to finish, which is 20% faster than many traditional layer cakes that require multiple steps and decorating time. The beauty of loaf cakes lies in their efficiency—smaller and quicker than making a layer cake or even a sheet cake too.
Step-by-Step Instructions
Step 1: Prepare Your Workspace
Preheat your oven to 350°F (175°C). Lightly grease the pan and then place a parchment paper sling (a rectangle of parchment paper that is long enough to go down one side of the pan, across the bottom, and back up the other side) into the pan. This ensures easy removal and prevents sticking.
Step 2: Create Your Dry Mixture
In a medium bowl, whisk together flour, baking powder, and salt. This step ensures even distribution of your leavening agents throughout the batter, preventing any dense spots in your finished cake.
Step 3: Cream Butter and Sugar
In a large bowl, cream the softened butter and sugar until light and fluffy (about 3-4 minutes). This process incorporates air into your batter, creating that tender, moist texture we’re after.
Step 4: Add Eggs and Vanilla
Add eggs one at a time, mixing well in between each addition. This gradual incorporation prevents the batter from curdling. Stir in vanilla extract until well combined.
Step 5: Combine Wet and Dry Ingredients
Add the dry ingredients in 3 parts alternating with the milk, beginning and ending with the flour mixture. This process is important because it allows the flour to absorb the butter and cream mixtures a little at a time. Mix just until combined—overmixing leads to tough cake.
Step 6: Create Your Chocolate Batter
Remove one-third of your vanilla batter to a separate bowl. The chocolate batter is made from the vanilla, so you don’t have to prepare 2 separate batters. Mix the cocoa powder with this portion until completely smooth and no streaks remain.
Step 7: Create the Marble Effect
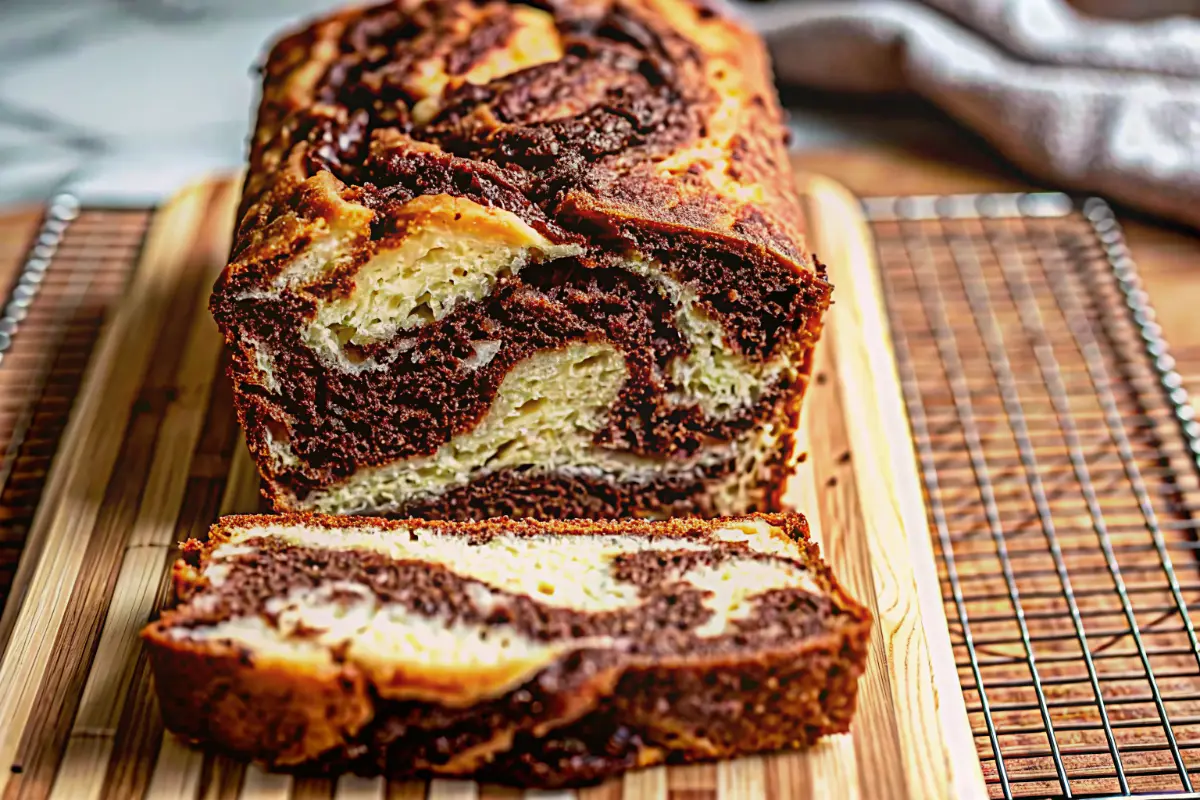
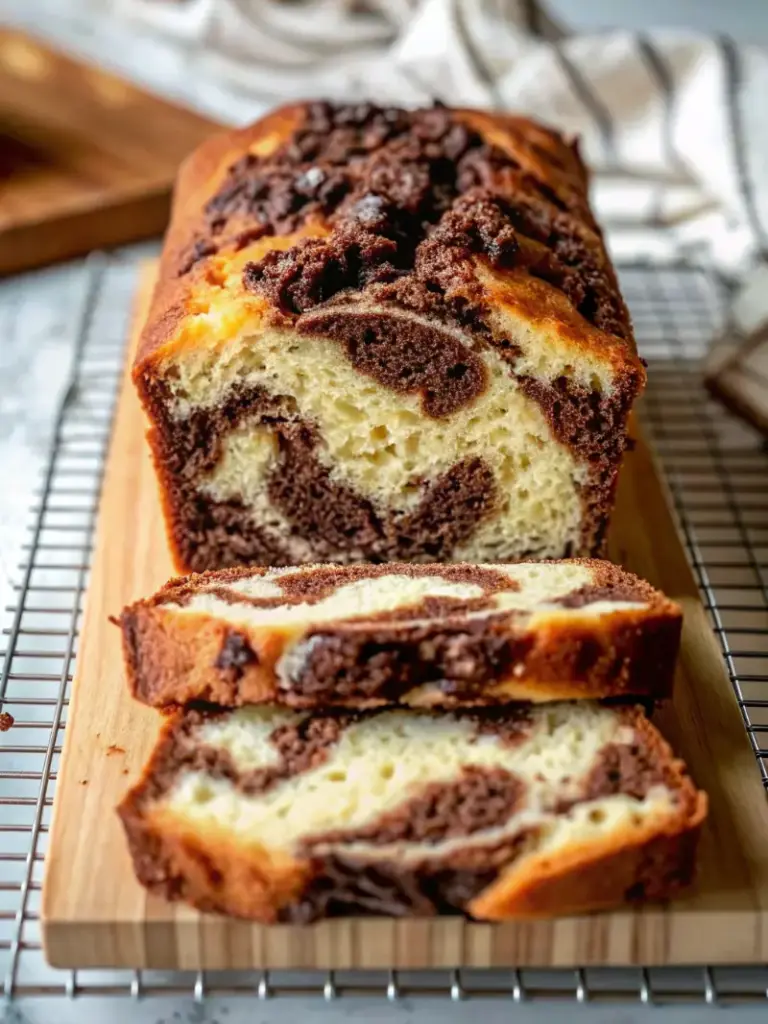
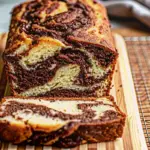
Alternate adding your vanilla and chocolate cake batter to your loaf pan, finally ending up with a swirled top to your loaf to finish off the marbling effect! The weight of the cake batter as it is spooned into the pan creates that swirly effect, and makes the finished result so pretty. Gently swirl with a knife for the perfect marble pattern.
Step 8: Bake to Perfection
Bake for 50-60 minutes, or until a toothpick inserted in the center comes out clean. If the cake starts to get too dark, lay a piece of foil over the top to keep it from browning further.
Step 9: Cool and Enjoy
Allow the cake to cool in the pan for 10 minutes before transferring to a wire rack. Loaf cakes retain heat for much longer than layer cake layers, so you’ll need to give it a good couple of hours to cool at room temperature or, after letting it cool for ½ an hour, transfer it to the fridge to speed the process up. Serve it at room temperature though.
Nutritional Information
Per slice (assuming 10 slices):
- Calories: 285
- Total Fat: 11g
- Saturated Fat: 7g
- Cholesterol: 75mg
- Sodium: 195mg
- Total Carbohydrates: 45g
- Dietary Fiber: 1.5g
- Sugars: 28g
- Protein: 5g
- Vitamin A: 8% DV
- Calcium: 6% DV
- Iron: 8% DV
This marble loaf cake provides a moderate calorie content while delivering essential nutrients from eggs and milk. The combination of carbohydrates and moderate protein makes it an excellent energy source for afternoon snacking or dessert.
Healthier Alternatives for the Recipe
Transform your marble loaf cake into a healthier treat without sacrificing flavor:
Sugar Reduction: Replace ½ cup of sugar with unsweetened applesauce or mashed banana for natural sweetness and added moisture.
Whole Grain Option: Substitute ½ cup all-purpose flour with whole wheat pastry flour for added fiber and nutrients.
Dairy-Free Version: Substitute almond milk since we don’t drink cow milk. It worked beautifully and use vegan butter alternatives.
Lower Fat Alternative: Replace butter with Greek yogurt (¼ cup) for reduced fat content while maintaining moisture. Greek yogurt instead of sour cream worked out great.
Protein Boost: Add 2 tablespoons of vanilla protein powder to increase protein content for post-workout treats.
Natural Sweetener Swap: Use coconut sugar or maple syrup (reduce liquid by 2 tablespoons) for refined sugar alternatives.
Serving Suggestions
Classic Presentation: Top the cake with a simple sprinkle of powdered sugar to let the flavors of the cake shine through for an elegant, understated look.
Chocolate Ganache Delight: Don’t forget the 2-ingredient glossy chocolate ganache topping! Pour warm ganache over cooled cake for bakery-style presentation.
Coffee Shop Style: Slice it like bread, and use it as a tasty base for ice cream and fudge sauce for an indulgent dessert experience.
Breakfast Treat: Serve thin slices with morning coffee or tea, just like European-style breakfast cakes.
Party Perfect: Serve it with cream and a strawberry coulis for special occasions or dinner parties.
Seasonal Variations: Add orange zest to the vanilla batter during fall, or serve with fresh berries in summer for seasonal appeal.
Common Mistakes to Avoid
Overmixing the Batter: If you add all the flour at once, only some of the flour will hydrate, leaving dry spots of flour in the batter, which will leave dry spots of flour in your baked loaf. Always alternate dry and wet ingredients.
Wrong Pan Size: Check your loaf pan size! This makes a huge difference when it comes to the shape and bake of your cake. I recommend making this loaf cake in a 1 lb loaf pan.
Room Temperature Ingredients: It’s important to use room temperature eggs in most baking so that the cold egg doesn’t affect the rise or even baking of your result. Cold ingredients don’t mix properly and can result in dense cake.
Inadequate Marble Effect: The best thing about this cake is that no two loaves look alike—because you’re creating the marble design, you can make it unique, but don’t overswirl or you’ll lose the distinct patterns.
Premature Ganache Application: If you add the ganache while the cake is still hot, you risk it all sliding straight off the cake. This is also a good reason to let the ganache cool for 10 minutes before using too.
Overbaking: Test with a toothpick—it should come out clean but not completely dry, as the cake continues cooking slightly from residual heat.
Storing Tips for the Recipe
Short-term Storage: Store this cake in an airtight container for up to 4 days at room temperature. This marble loaf cake actually improves with time as flavors develop and meld.
Long-term Storage: If you would like to store it longer, you can freeze it, well wrapped, for up to 2 months. Wrap individual slices in plastic wrap for grab-and-go convenience.
Overnight Improvement: Like a lot of loaf cakes – I always find the longer you leave it to chill, the better it gets. Many bakers report improved texture and flavor after 24 hours.
Refrigerator Storage: For extended freshness during warm weather, refrigerate wrapped cake but bring to room temperature before serving for optimal texture and flavor.
Freezer Preparation: Cut the whole cake into approximately ¼” slices with a very sharp serrated knife, refrigerated ¼ and froze ¾ of the cake (each piece individually wrapped) for portion-controlled servings.
Ganache Considerations: If topped with ganache, store in refrigerator and allow to come to room temperature before serving for best texture.
Conclusion
This Marble Loaf Cake combines the beloved flavors of vanilla and chocolate in one stunning, easy-to-make dessert. With its tender crumb, beautiful swirled appearance, and foolproof technique, it’s perfect for both novice and experienced bakers seeking delicious results without complicated steps.
Ready to create your own marble masterpiece? Try this recipe today and share your beautiful results in our comments section! Don’t forget to leave a review and subscribe for more irresistible baking recipes delivered straight to your inbox.
FAQs
Q: Can I make this marble loaf cake without eggs?
A: While eggs provide structure and moisture, you can substitute each egg with ¼ cup unsweetened applesauce or mashed banana, though texture will be slightly denser.
Q: Why is my marble loaf cake dry?
A: Some reviewers reported that it was dry or dense, not tall enough, and/or it lacked flavor. Ensure you’re measuring ingredients correctly, don’t overbake, and consider adding buttermilk, which adds extra moisture to the cake crumb.
Q: Can I double this recipe for a bundt cake?
A: To make this vanilla chocolate marble pound cake into a bundt cake, double the recipe and pour into a well greased or buttered and floured bundt pan. The bake time will increase because of the volume of batter in the pan.
Q: What’s the best cocoa powder to use?
A: Dutch-processed cocoa made for the best, smoothest-tasting chocolate flavor, though natural cocoa powder works as well.
Q: Can I make this cake dairy-free?
A: Yes! Substitute plant-based milk and vegan butter. The only change I made was to use the lighter liquid from a can of coconut milk to replace the milk works excellently.
Q: How do I know when my marble loaf cake is done?
A: Insert a toothpick in the center—it should come out clean or with just a few moist crumbs. The cake should also spring back when lightly pressed.
Healthy Marble Loaf Cake Recipe
- Total Time: 1 hour 15 minutes
- Yield: 10 slices 1x
- Diet: Vegetarian
Description
This marble loaf cake is the perfect vanilla and chocolate swirl dessert with a buttery crumb and beautiful marbled interior. Easy to make with simple pantry ingredients, this classic loaf cake delivers bakery-style flavor without any complicated steps.
Ingredients
- 1½ cups all-purpose flour
- 1 cup granulated sugar
- 1½ teaspoons baking powder
- ½ teaspoon salt
- ½ cup unsalted butter, room temperature
- 3 large eggs
- 2 teaspoons vanilla extract
- ½ cup milk
- ¼ cup unsweetened cocoa powder
Instructions
- Preheat oven to 350°F (175°C) and grease a loaf pan. Line with parchment paper for easy removal.
- In a bowl, whisk together flour, baking powder, and salt.
- In a separate bowl, cream butter and sugar until light and fluffy.
- Add eggs one at a time, mixing well after each addition, then stir in vanilla.
- Add dry ingredients alternately with milk, beginning and ending with flour. Mix just until combined.
- Remove one-third of the batter and mix with cocoa powder until smooth.
- Alternate spooning vanilla and chocolate batter into the pan, then gently swirl with a knife.
- Bake for 50–60 minutes, until a toothpick inserted into the center comes out clean.
- Cool in the pan for 10 minutes, then transfer to a wire rack to cool completely before slicing.
Notes
Do not overmix the batter or the cake may become dense. Use room temperature ingredients for best results. Cover loosely with foil if the top browns too quickly.
- Prep Time: 15 minutes
- Cook Time: 55 minutes
- Category: Dessert
- Method: Baking
- Cuisine: German
Nutrition
- Serving Size: 1 slice
- Calories: 285
- Sugar: 28g
- Sodium: 195mg
- Fat: 11g
- Saturated Fat: 7g
- Unsaturated Fat: 3g
- Trans Fat: 0g
- Carbohydrates: 45g
- Fiber: 1.5g
- Protein: 5g
- Cholesterol: 75mg
Keywords: marble loaf cake, vanilla chocolate loaf, marble cake recipe, loaf cake