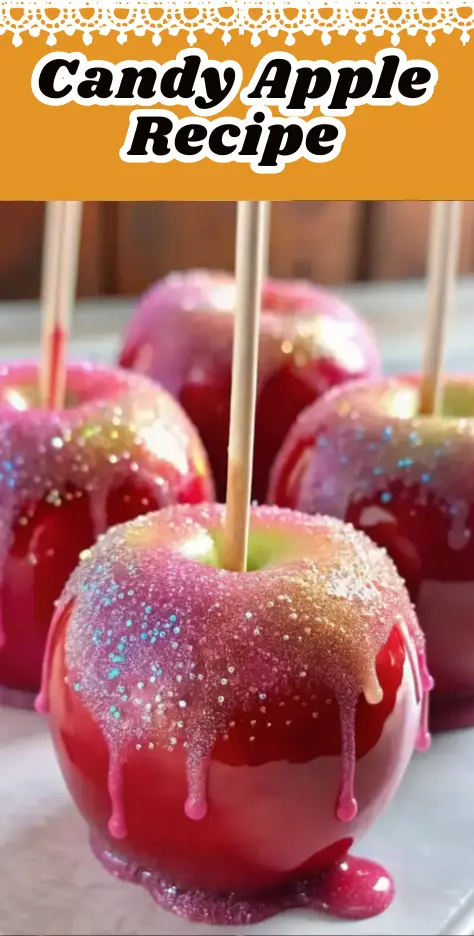
Easy Ultimate Candy Apple Recipe
Have you ever wondered why candy apple recipes consistently rank among the most-searched fall and holiday treats? The answer might surprise you—it’s not just nostalgia. The perfect homemade candy apple combines simplicity with showstopping results, making it an irresistible dessert that appeals to both beginners and seasoned home cooks. Whether you’re hosting a gathering, planning a dessert bar, or simply craving that classic carnival treat, mastering a candy apple recipe elevates your kitchen credibility instantly.
But here’s the challenge: most candy apple recipes fail because people don’t understand the critical temperature control and coating techniques required. In this comprehensive guide, we’ll break down everything you need to know to create restaurant-quality candy apples that impress guests and satisfy every craving. Let’s dive into the art and science of crafting the perfect confection.
Ingredients List
To create stunning homemade candy apples, you’ll need quality ingredients that work harmoniously together. Here’s what you’ll gather:
Core Ingredients:
- 4 medium-sized apples (Gala, Fuji, Honeycrisp, or Granny Smith varieties)
- 2 cups granulated sugar (refined and finely processed)
- 1 cup filtered water
- ¼ cup light corn syrup (or Karo syrup as a substitute)
- Food coloring (gel or liquid, in your choice of vibrant hues)
- 1 bag cotton candy (optional, for decorative flair)
- 4-6 lollipop sticks or wooden skewers
Optional Enhancement Ingredients:
- ½ teaspoon cinnamon extract (adds warmth and sophistication)
- ¼ cup demerara sugar (for sparkly, crystallized bottoms)
- 1 teaspoon pumpkin spice (seasonal variation)
- Baking spray (for preparing your work surface)
Pro Tip: Quality matters significantly in candy apple making. Choose fresh apples with a firm texture and minimal wax coating. If your apples are heavily waxed, a quick dunk in boiling water removes the coating, ensuring optimal candy adhesion.
Timing
Understanding time requirements helps you plan your candy-making schedule efficiently:
- Preparation Time: 15 minutes
- Cooking Time: 20-25 minutes
- Cooling Time: 30-60 minutes
- Total Time: 65-100 minutes
This candy apple recipe takes approximately 65-100 minutes from start to finish—remarkably efficient compared to many homemade candy recipes that demand 3-4 hours. The straightforward process means you can prepare multiple batches throughout an afternoon, making it ideal for parties or holiday preparations.
Step-by-Step Instructions
Step 1: Prepare Your Apples for Success
Begin by selecting firm, crisp apples like Gala, Fuji, or Honeycrisp varieties. These maintain structural integrity throughout the coating process, unlike softer varieties. Thoroughly wash each apple under cool running water, rubbing away any residue or dirt. Pat them completely dry with a clean cloth—moisture is the enemy of proper candy coating adhesion.
Insert your lollipop sticks or wooden skewers firmly into the stem end of each apple, pushing approximately halfway through the fruit. This anchors your apple securely during dipping and prevents frustrating slips. Arrange prepared apples on parchment paper or a silicone mat, spacing them so they don’t touch. This setup becomes your station for later cooling.
Step 2: Create the Perfect Candy Syrup Base
In a heavy-bottomed saucepan (this is non-negotiable—thin pans don’t retain heat adequately and cause premature cooling), combine your sugar, water, and light corn syrup. Using a heavy-bottomed vessel is crucial for maintaining consistent temperature and preventing crystallization. Stir this mixture over medium heat until the sugar completely dissolves, approximately 3-4 minutes.
Once the mixture begins boiling, stop stirring immediately. Continued agitation introduces air bubbles and causes crystallization, resulting in a grainy, undesirable texture. This is where patience becomes your greatest asset. Attach your candy thermometer to the side of the saucepan, ensuring the tip doesn’t touch the bottom (which would give false readings).
Step 3: Heat to Hard Crack Stage
Continue boiling undisturbed until your candy thermometer registers the hard crack stage: 300°F to 310°F. This typically requires 15-20 minutes. Resist the urge to stir or fuss with the mixture. The higher the temperature climbs toward the end, the faster it rises—watch carefully during the final minutes. At hard crack stage, the candy becomes glass-like when cooled, creating that satisfying crunch.
Step 4: Add Your Vibrant Food Coloring
Remove the saucepan from heat and allow the bubbling to subside for approximately 2 minutes. This crucial pause prevents splattering when you introduce food coloring. If using multiple colors, prepare small bowls with your chosen gel or liquid food colorings beforehand. Carefully stir in your coloring, working quickly but cautiously since the syrup remains extremely hot—around 310°F.
For the most vibrant results, use gel-based food coloring rather than liquid varieties, as gels provide richer, more saturated hues. If creating custom shades, blend colorings in small bowls before incorporating them into the main batch.
Step 5: Dip Each Apple to Perfection
This step demands focus and confidence. Holding each apple firmly by its stick, dip it into the hot candy syrup using a smooth, swirling motion to coat evenly. Rotate the apple gently to ensure complete coverage, avoiding the area near the stick where moisture might prevent proper adhesion. Lift the apple carefully and allow excess syrup to drip back into the pan for 3-5 seconds.
Gently rest each coated apple on your prepared parchment paper or silicone mat. For a thicker, more substantial coating with enhanced crunch, perform a second dip after the first coating partially sets (approximately 2-3 minutes).
Step 6: Optional Cotton Candy Embellishment
While the candy coating remains slightly warm and tacky, you can add decorative cotton candy wisps. Gently pull apart small sections of cotton candy and press them lightly onto the warm coating. The residual heat helps them adhere beautifully, creating an eye-catching, festive appearance. Mix and match colors for dynamic visual appeal.
Step 7: Cool Completely
Allow candy apples to cool and harden completely on parchment paper or a silicone mat. This cooling period typically takes 30-60 minutes, depending on room temperature and humidity levels. Resist the temptation to refrigerate, as condensation creates stickiness and compromises that crispy texture you worked to achieve. The apples are ready to serve once the candy coating becomes completely rigid and brittle.

Nutritional Information
Each homemade candy apple (approximate values per serving):
| Nutrient | Amount |
|---|---|
| Calories | 350-400 |
| Total Fat | 0.3g |
| Saturated Fat | 0g |
| Cholesterol | 0mg |
| Sodium | 2mg |
| Total Carbohydrates | 88-92g |
| Dietary Fiber | 3.5g |
| Sugars | 75-80g |
| Protein | 0.3g |
| Vitamin C | 8% DV |
| Potassium | 195mg |
Note: Nutritional values vary based on apple size and candy coating thickness. The apple provides valuable fiber and minimal calories, while sugar content comes primarily from the candy coating.
Healthier Alternatives for Your Candy Apple Recipe
Traditional candy apple recipes are indulgent treats, but several modifications create more nutritionally balanced versions without sacrificing enjoyment:
Reduce Sugar Content: Substitute a portion of granulated sugar with monk fruit sweetener or erythritol. These reduce caloric content by 30-40% while maintaining similar texture when properly calibrated.
Use Dark Chocolate Coating: Replace hard candy coating with melted dark chocolate (70% cacao or higher), providing antioxidants and reducing sugar content by approximately 15-20% compared to traditional versions.
Incorporate Nuts: Press finely chopped almonds, walnuts, or pecans onto the warm coating for added protein, healthy fats, and nutty complexity.
Apple Selection: Prioritize tart varieties like Granny Smith apples, which contain lower natural sugars than sweeter varieties, creating better flavor balance with the candy coating.
Add Superfood Toppings: Before the candy hardens, add toppings like chia seeds, crushed freeze-dried berries, or coconut flakes for nutritional enhancement and textural variety.
Serving Suggestions
Transform your candy apples into memorable dessert moments with creative presentation ideas:
Individual Dessert Plate Presentation: Slice candy apples into wedges, arrange on white ceramic plates with edible flowers, and drizzle with complementary sauce (caramel or dark chocolate works beautifully).
Candy Apple Bar Setup: Create an interactive station featuring multiple flavored candy apples alongside an array of toppings—sprinkles, nuts, dried fruit—allowing guests to customize their experience.
Gourmet Flavor Pairings: Serve alongside artisanal cheese boards, creating sophisticated flavor contrasts that elevate the entire dining experience.
Kids’ Party Essential: Offer smaller-sized candy apples on sticks as grab-and-go treats, perfect for seasonal celebrations or Halloween gatherings.
Dessert Platter Integration: Feature candy apples alongside brownies, cookies, and other fall-inspired treats, creating visually appealing dessert arrangements.
Beverage Pairing: Complement homemade candy apples with sparkling cider, warm spiced tea, or hot chocolate for perfect seasonal pairings.

Common Mistakes to Avoid
Understanding frequent pitfalls prevents frustration and ensures consistent success with your candy apple recipe:
Mistake #1: Overcrowding the Pan
Beginners often use saucepans that are too small, causing insufficient syrup depth for proper dipping. Use a medium or large heavy-bottomed saucepan to maintain adequate coating liquid.
Mistake #2: Inadequate Apple Preparation
Failing to dry apples thoroughly or not removing waxy coating prevents candy adhesion. Moisture creates separation between apple and coating, resulting in sliding candies.
Mistake #3: Stirring After Boiling Begins
Continued stirring after the mixture boils introduces crystallization and grainy texture. Trust the thermometer and resist intervention once boiling commences.
Mistake #4: Reaching Temperatures Below 300°F
Undercooked syrup creates sticky, chewy candy rather than that coveted crispy texture. Always reach hard crack stage (300-310°F) for optimal results.
Mistake #5: Refrigerating Too Early
Placing candy apples in the refrigerator before complete cooling creates condensation and compromises crunchiness. Allow complete room-temperature hardening.
Mistake #6: Using Soft Apple Varieties
Golden Delicious, Gala, or similar soft varieties lack structural integrity for holding candy coating weight. Stick with firm varieties like Granny Smith or Honeycrisp.
Mistake #7: Ignoring Thermometer Accuracy
Unreliable or poorly positioned thermometers lead to temperature guessing, affecting final texture. Invest in quality candy thermometers and verify accuracy before use.
Storing Tips for Your Candy Apples
Maximize freshness and maintain that irresistible crunch through proper storage practices:
Short-Term Storage (1-3 Days):
Store finished candy apples at room temperature, wrapped individually in plastic wrap or placed in airtight containers. Avoid stacking to prevent coating damage. Maintain room temperature between 65-72°F for optimal preservation.
Why Avoid Refrigeration:
Cold temperatures create condensation on candy surfaces, introducing moisture that dissolves the hard candy coating. This results in stickiness and compromised texture—the opposite of what you’ve worked to achieve.
Ingredient Preparation Ahead:
Prepare apples (washed, dried, sticks inserted) up to 24 hours in advance. Store prepared apples in the refrigerator in breathable bags, allowing you to execute the candy coating process quickly when ready.
Make-Ahead Syrup:
Create your sugar syrup mixture ahead of time—store it in a sealed container at room temperature. Reheat gently before dipping when you’re ready to create your apples.
Prevent Crystallization:
If your syrup crystallizes during storage, add a tablespoon of water and heat gently, stirring constantly, until the syrup becomes clear and liquid again.
Environmental Considerations:
High humidity environments present challenges for candy storage. In humid climates, prepare and consume candy apples the same day, or store in airtight containers with silica gel packets to absorb excess moisture.
Conclusion
Mastering the candy apple recipe opens doors to impressive dessert creation, transforming simple ingredients into show-stopping treats that captivate family and friends. By understanding proper temperature control, avoiding common mistakes, and implementing creative variations, you’ve equipped yourself with knowledge to produce professional-quality homemade candy apples consistently. The 65-100 minute timeline proves accessible for busy schedules, while the endless flavor and topping possibilities keep the experience fresh and exciting. Whether you’re hosting elegant gatherings or creating festive seasonal treats, this candy apple recipe delivers reliable, delicious results every time. Start with the classic version, then experiment boldly with flavors, toppings, and presentations that reflect your culinary personality.

FAQs About Candy Apple Recipes
Q: What apple varieties work best for candy apples?
A: Firm, tart varieties like Granny Smith, Honeycrisp, and Fuji apples provide ideal texture and flavor balance. Avoid soft, sweet varieties like Golden Delicious, which lack structural integrity for holding candy coating weight.
Q: Why is a heavy-bottomed saucepan essential for candy apple recipes?
A: Heavy-bottomed saucepans retain heat more effectively than thin-bottomed pans, maintaining consistent temperature throughout the cooking process and preventing premature cooling or crystallization.
Q: Can I use liquid food coloring instead of gel coloring?
A: Yes, but gel coloring provides richer, more saturated hues with less dilution effect. If using liquid coloring, you may need additional quantity to achieve desired color intensity.
Q: How do I know when the candy reaches hard crack stage?
A: Use a reliable candy thermometer—hard crack stage occurs between 300°F and 310°F. At this temperature, syrup dropped into cold water becomes brittle and snaps cleanly.
Q: Can I store candy apples in the refrigerator?
A: No—refrigeration creates condensation that dissolves the candy coating, resulting in stickiness rather than crunch. Store at room temperature, wrapped individually in plastic wrap.
Q: What causes candy coating to slide off the apple?
A: Inadequate apple drying or wax buildup prevents proper adhesion. Always thoroughly dry apples and remove wax coating before dipping into hot syrup.
Q: How long do homemade candy apples last?
A: Store at room temperature for 1-3 days wrapped in plastic wrap. Consume the same day for optimal texture and flavor.
Q: Can I make candy apples without a candy thermometer?
A: While possible using the cold-water test method (drop syrup into cold water—it should snap cleanly when at hard crack stage), a reliable thermometer ensures accuracy and consistent results.
Q: What’s the difference between candy apples and caramel apples?
A: Candy apples feature a hard, glass-like coating of boiled sugar reaching 300-310°F, while caramel apples use melted caramel (a softer, chewier coating). Candy apples provide more satisfying crunch.
Q: Can I double this candy apple recipe?
A: Yes, double all ingredient quantities and use a larger saucepan. Cooking time may increase slightly, but the process remains identical. Always use a reliable thermometer to confirm proper temperature.
Easy Ultimate Candy Apple Recipe
- Total Time: 1 hour 30 minutes
- Yield: 4 candy apples 1x
- Diet: Vegetarian
Description
This ultimate candy apple recipe delivers perfectly crisp, glossy candy-coated apples with a satisfying crunch every time. Ideal for holidays, parties, or festive treats, these homemade candy apples are simple to make yet visually stunning and irresistibly delicious.
Ingredients
- 4 medium apples (Granny Smith, Honeycrisp, Fuji, or Gala)
- 2 cups granulated sugar
- 1 cup water
- 1/4 cup light corn syrup
- Food coloring (gel or liquid)
- 4–6 lollipop sticks or wooden skewers
- Optional: cotton candy for decoration
- Optional: 1/2 teaspoon cinnamon extract
Instructions
- Wash and thoroughly dry the apples, removing any wax coating.
- Insert lollipop sticks firmly into the stem end of each apple.
- In a heavy-bottomed saucepan, combine sugar, water, and corn syrup.
- Heat over medium heat, stirring until sugar dissolves, then stop stirring.
- Boil until the syrup reaches 300–310°F (hard crack stage).
- Remove from heat and let bubbles subside for 2 minutes.
- Carefully stir in food coloring until desired color is achieved.
- Dip each apple into the syrup, rotating to coat evenly.
- Allow excess syrup to drip off, then place apples on parchment paper.
- Decorate with cotton candy if desired while coating is warm.
- Let apples cool completely at room temperature until hardened.
Notes
Use a candy thermometer for accuracy and avoid stirring once boiling begins. Store candy apples at room temperature and avoid refrigeration to prevent stickiness.
- Prep Time: 15 minutes
- Cook Time: 25 minutes
- Category: Dessert
- Method: Candy Making
- Cuisine: American
Nutrition
- Serving Size: 1 candy apple
- Calories: 380
- Sugar: 78g
- Sodium: 2mg
- Fat: 0g
- Saturated Fat: 0g
- Unsaturated Fat: 0g
- Trans Fat: 0g
- Carbohydrates: 90g
- Fiber: 3.5g
- Protein: 0.3g
- Cholesterol: 0mg
Keywords: candy apple recipe, homemade candy apples, carnival candy apples